Centos7 MyPerf4J安装配置及可视化页面
一个针对高并发、低延迟应用设计的高性能 Java 性能监控和统计工具。 MyPerf4J 采用 JavaAgent 配置方式,透明化接入应用,对应用代码完全没有侵入。
参考:MyPerf4J
一、特性
- 高性能: 单线程支持每秒 1000 万次 响应时间的记录,每次记录只花费 73 纳秒
- 无侵入: 采用 JavaAgent 方式,对应用程序完全无侵入,无需修改应用代码
- 低内存: 采用内存复用的方式,整个生命周期只产生极少的临时对象,不影响应用程序的 GC
- 高精度: 采用纳秒来计算响应时间
- 高实时: 支持秒级监控,最低 1 秒
二、使用场景
- 在开发环境中快速定位 Java 应用程序的性能瓶颈
- 在生产环境中长期监控 Java 应用程序的性能指标
三、安装
1. 打包
如果你使用的是JDK7或者更高版本,可以尝试直接下载MyPerf4J-ASM.jar 可以忽略打包步骤
git clone git@github.com:LinShunKang/MyPerf4J.git
mvn clean package
把 /MyPerf4J-develop/MyPerf4J-ASM/target/MyPerf4J-ASM-${MyPerf4J-version}.jar 重命名为 MyPerf4J-ASM.jar
2. 配置
FlowProcessAgent配置文件:
#应用名称
AppName=FlowProcessAgent

#MetricsProcessor类型,0:以标准格式化结构输出到stdout.log 1:以标准格式化结构输出到磁盘  2:以InfluxDB LineProtocol格式输出到磁盘
MetricsProcessorType=2

#配置各个Metrics日志的文件路径,可不配置
MethodMetricsFile=/home/lwenhao/MyPerf4J/FlowProcessAgent/logs/method_metrics.log
ClassMetricsFile=/home/lwenhao/MyPerf4J/FlowProcessAgent/logs/class_metrics.log
GCMetricsFile=/home/lwenhao/MyPerf4J/FlowProcessAgent/logs/gc_metrics.log
MemMetricsFile=/home/lwenhao/MyPerf4J/FlowProcessAgent/logs/memory_metrics.log
BufPoolMetricsFile=/home/lwenhao/MyPerf4J/FlowProcessAgent/logs/buf_pool_metrics
ThreadMetricsFile=/home/lwenhao/MyPerf4J/FlowProcessAgent/logs/thread_metrics.log

#配置Record模式,可配置为accurate/rough
RecorderMode=accurate

#配置时间片,单位为ms,最小1s,最大600s
MilliTimeSlice=1000

#需要监控的package,可配置多个,用英文';'分隔
IncludePackages=quaqu.*

#是否展示方法参数类型
ShowMethodParams=true
#配置通用的方法响应时间阈值,单位为 ms
ProfilingTimeThreshold = 1
注意:使用Windows系统的,请修改路径格式。
在 JVM 启动参数里加上以下两个参数:
-javaagent:/your/path/to/MyPerf4J-ASM.jar-DMyPerf4JPropFile=/your/path/to/myPerf4J.properties
例如:
java -javaagent:/home/lwenhao/MyPerf4J/FlowProcessAgent/MyPerf4J-ASM.jar -DMyPerf4JPropFile=/home/lwenhao/MyPerf4J/FlowProcessAgent/FlowProcessAgent -jar FlowProcessAgent.jar
四、安装配置InfluxDB
MyPerf4J 默认支持使用 InfluxDB 进行数据存储
- MyPerf4J 向用户指定的日志文件中写入 LineProtocol 格式的性能统计数据
- 通过日志收集器 Telegraf 从日志文件中读取数据并导入 InfluxDB 中。 具体步骤如下:
- 配置 MetricsProcessorType=2
- InfluxDB
- 安装 InfluxDB
- 启动 InfluxDB
1.安装 InfluxDB
注意:安装InfluxDB软件包,需要root或具有管理员权限才能成功完成
新建/etc/yum.repos.d/influxdb.repo
[influxdb]
name = InfluxDB Repository - RHEL \$releasever
baseurl = https://repos.influxdata.com/rhel/\$releasever/\$basearch/stable
enabled = 1
gpgcheck = 1
gpgkey = https://repos.influxdata.com/influxdb.key
安装
yum install influxdb
配置环境变量
vim /etc/profile

添加:export INFLUXDB_CONFIG_PATH=/etc/influxdb/influxdb.conf

source .bash_profile

[root[@lwh](https://my.oschina.net/bnulwh) ~]# echo $INFLUXDB_CONFIG_PATH
/etc/influxdb/influxdb.conf
编辑/etc/influxdb/influxdb.conf
主要修改一下:
[http]
  # Determines whether HTTP endpoint is enabled.
  enabled = true

  # Determines whether the Flux query endpoint is enabled.
  # flux-enabled = false

  # Determines whether the Flux query logging is enabled.
  # flux-log-enabled = false

  # The bind address used by the HTTP service.
  bind-address = ":8086"

  # Determines whether user authentication is enabled over HTTP/HTTPS.
  auth-enabled = false

  # The default realm sent back when issuing a basic auth challenge.
  realm = "InfluxDB"

  # Determines whether HTTP request logging is enabled.
  log-enabled = true
确保存储数据和预写日志(WAL)的目录对于运行该influxd服务的用户是可写的。 注意:当前是没有密码验证的
启动
systemctl start influxdb
检查是否启动
[root[@lwh](https://my.oschina.net/bnulwh) /]# influx
Connected to http://localhost:8086 version 1.7.4
InfluxDB shell version: 1.7.4
Enter an InfluxQL query
> show databases
name: databases
name
----
_internal
>
五、安装配置Telegraf
MyPerf4J 本身不访问 InfluxDB,而是通过把统计数据写入日志文件中,通过 Telegraf 把统计数据导入 InfluxDB 中。
安装
如果上面/etc/yum.repos.d/influxdb.repo文件已创建,则直接执行:
yum install telegraf
编辑/etc/telegraf/telegraf.conf
# Global tags can be specified here in key="value" format.
[global_tags]
  dc = ""

# Configuration for telegraf agent
[agent]
  ## Default data collection interval for all inputs
  interval = "1s"
  ## Rounds collection interval to 'interval'
  ## ie, if interval="10s" then always collect on :00, :10, :20, etc.
  round_interval = true
  metric_batch_size = 1000
  metric_buffer_limit = 10000
  collection_jitter = "0s"
  ## Default flushing interval for all outputs. You shouldn't set this below
  ## interval. Maximum flush_interval will be flush_interval + flush_jitter
  flush_interval = "1s"
  flush_jitter = "0s"
  precision = "ms"
  debug = false
  quiet = false
  logfile = "/var/log/telegraf/telegraf.log"
  ## Override default hostname, if empty use os.Hostname()
  hostname = ""
  ## If set to true, do no set the "host" tag in the telegraf agent.
  omit_hostname = false

[[outputs.influxdb]]
  urls = ["http://127.0.0.1:8086"]
  database = "FlowProcessAgent"
  retention_policy = ""
  write_consistency = "any"
  timeout = "5s"

[[inputs.tail]]
  files = ["/home/lwenhao/MyPerf4J/FlowProcessAgent/logs/gc_metrics.log","/home/lwenhao/MyPerf4J/FlowProcessAgent/logs/class_metrics.log","/home/lwenhao/MyPerf4J/FlowProcessAgent/logs/memory_metrics.log","/home/lwenhao/MyPerf4J/FlowProcessAgent/logs/method_metrics.log","/home/lwenhao/MyPerf4J/FlowProcessAgent/logs/thread_metrics.log","/home/lwenhao/MyPerf4J/FlowProcessAgent/logs/buf_pool_metrics"]
  from_beginning = false
  pipe = false
  ## Method used to watch for file updates.  Can be either "inotify" or "poll".
  watch_method = "inotify"
  data_format = "influx"
注意:database、files的配置
启动
systemctl start telegraf
/var/log/telegraf/telegraf.log
2019-03-01T08:36:14Z I! Loaded inputs: inputs.tail
2019-03-01T08:36:14Z I! Loaded aggregators:
2019-03-01T08:36:14Z I! Loaded processors:
2019-03-01T08:36:14Z I! Loaded outputs: influxdb
2019-03-01T08:36:14Z I! Tags enabled: dc= host=sinorail
2019-03-01T08:36:14Z I! [agent] Config: Interval:1s, Quiet:false, Hostname:"sinorail", Flush Interval:1s
启动成功
六、安装Grafana(可视化界面)
新建/etc/yum.repos.d/grafana.repo
[grafana]
name=grafana
baseurl=https://packages.grafana.com/oss/rpm
repo_gpgcheck=1
enabled=1
gpgcheck=1
gpgkey=https://packages.grafana.com/gpg.key
sslverify=1
sslcacert=/etc/pki/tls/certs/ca-bundle.crt
安装
yum install grafana
启动
systemctl daemon-reload
service grafana-server start
访问
http://192.168.1.222:3000/
- 用户名:admin
- 密码:admin
添加DB
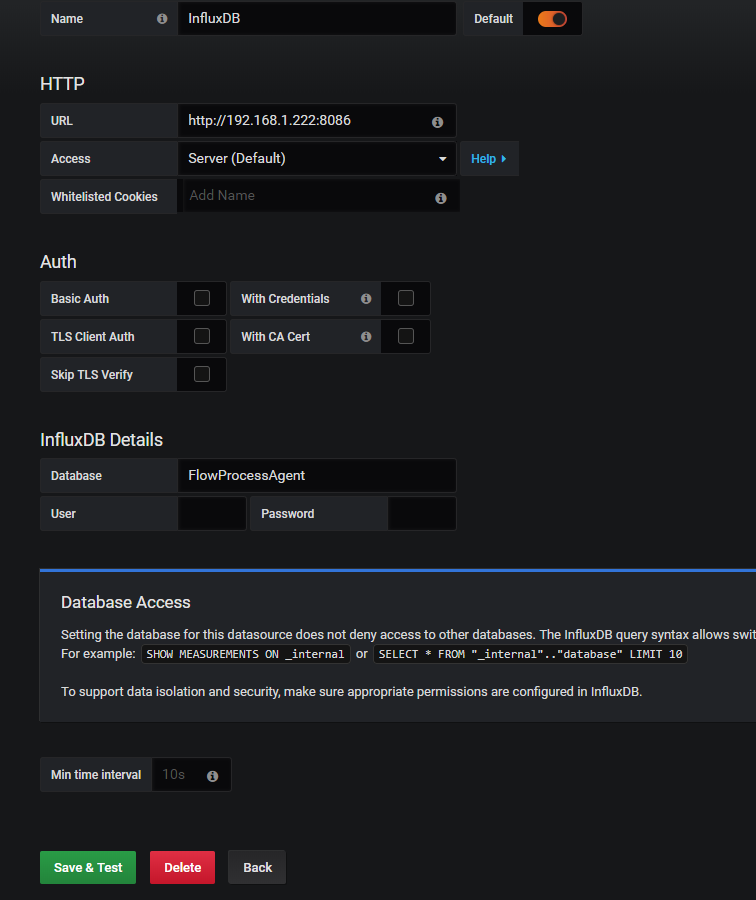
添加JVM Dashboard
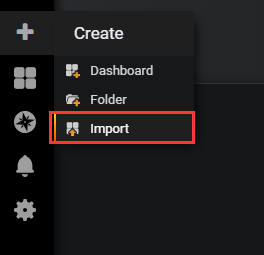
输入ID:8787
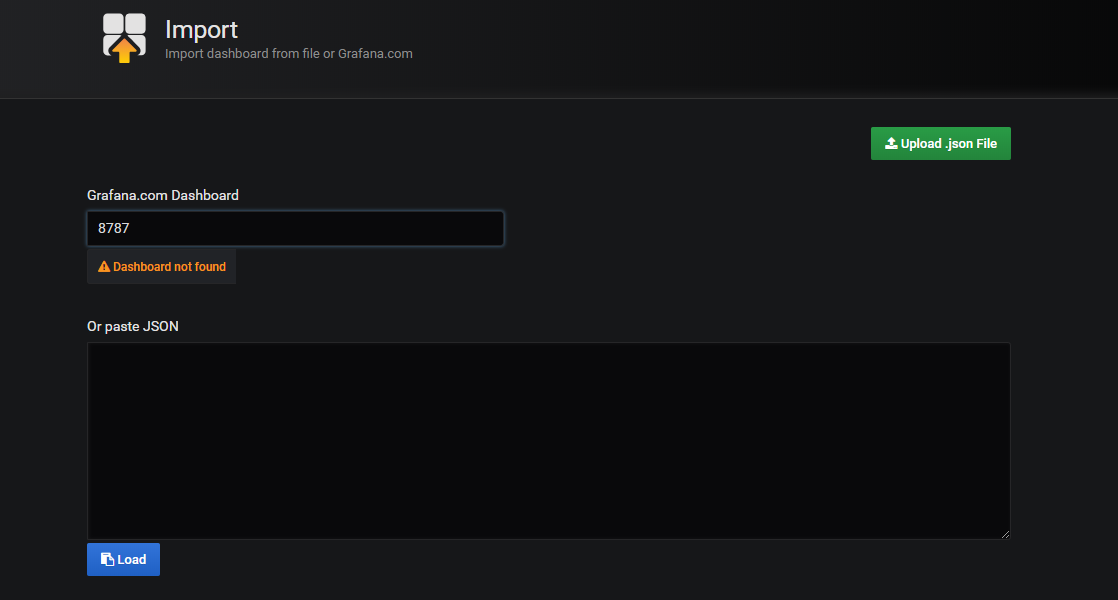
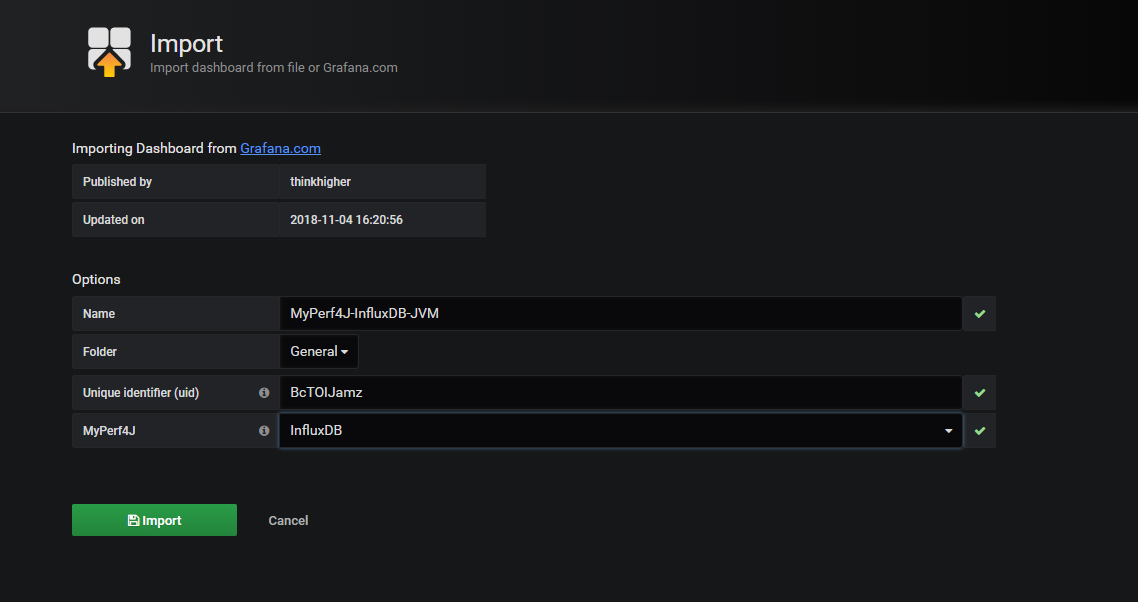
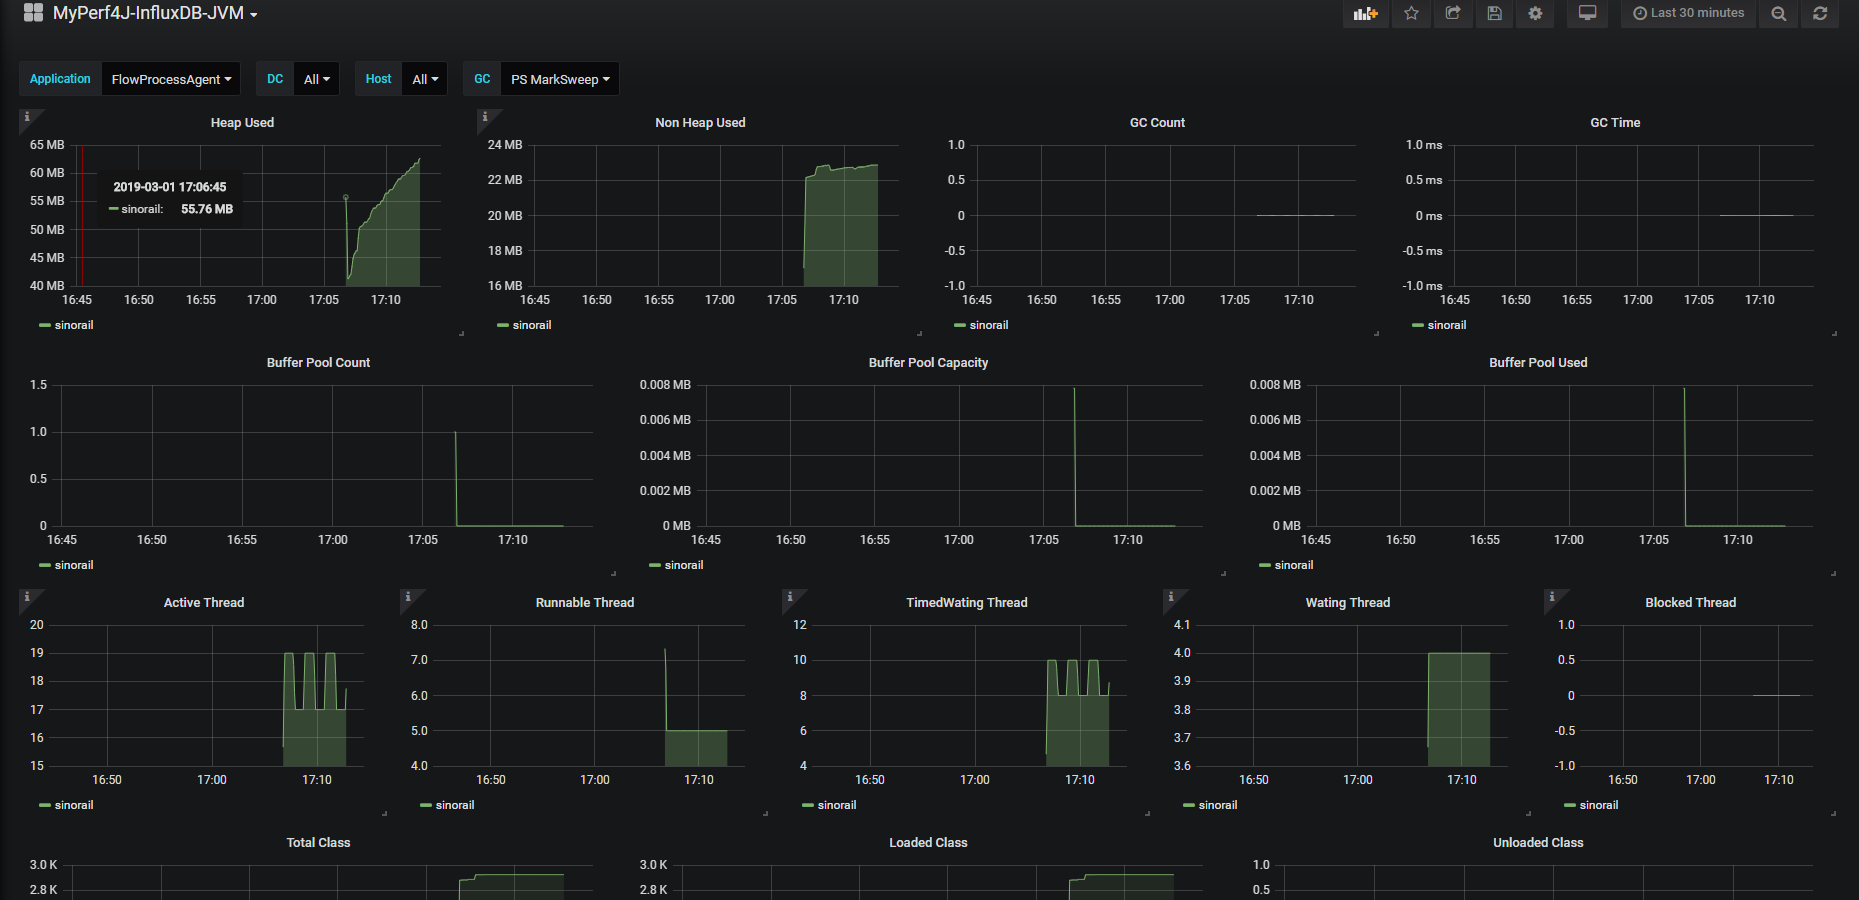
添加Method Dashboard
输入ID:7766
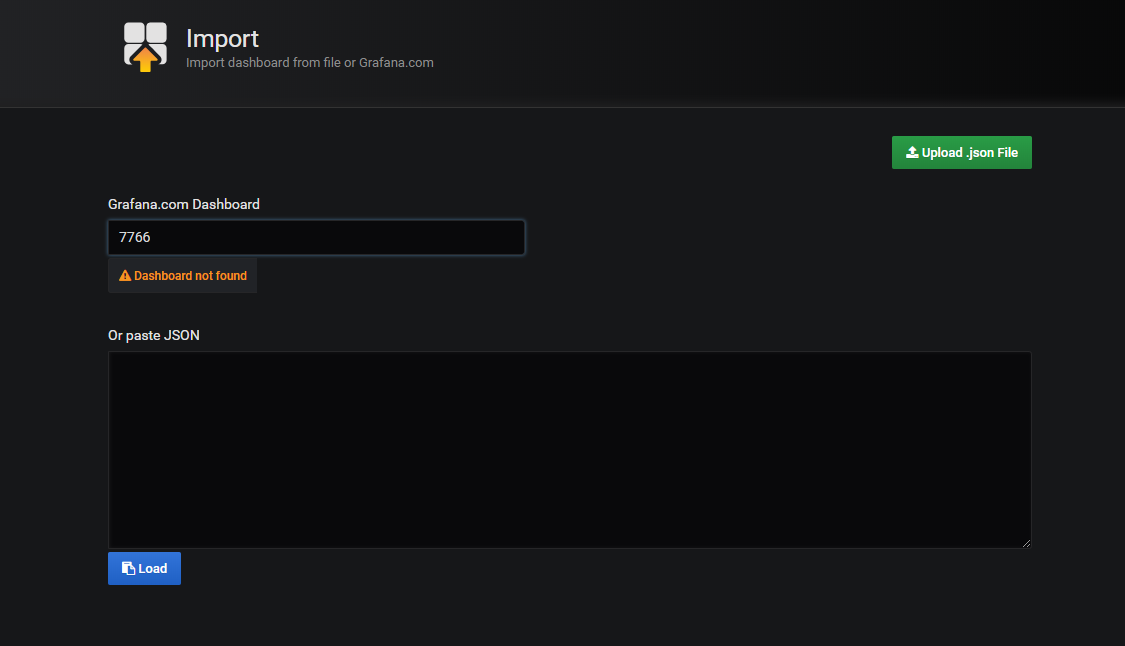
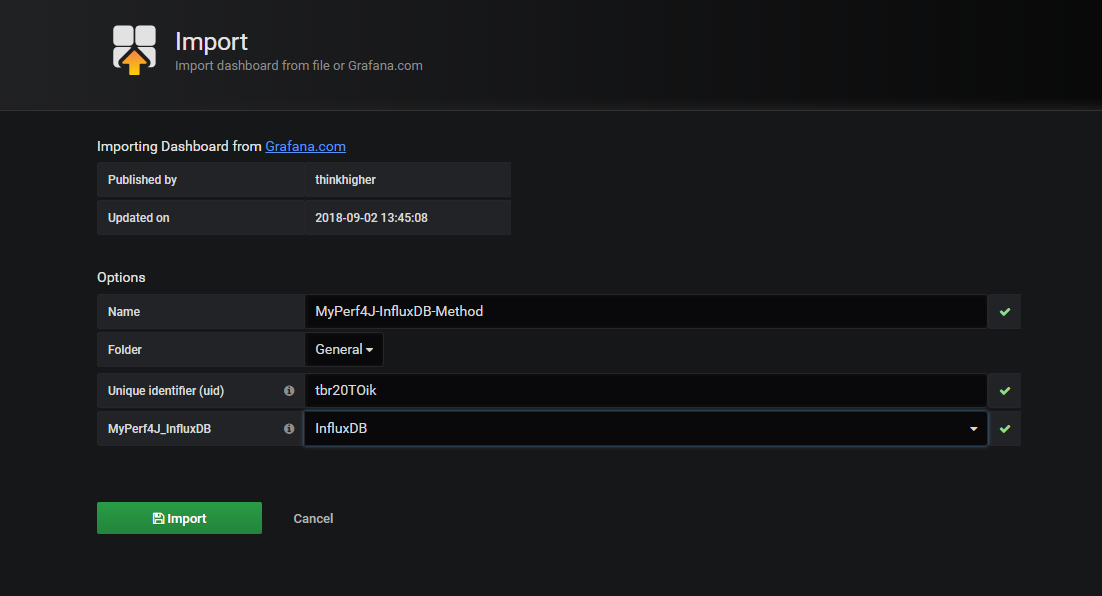
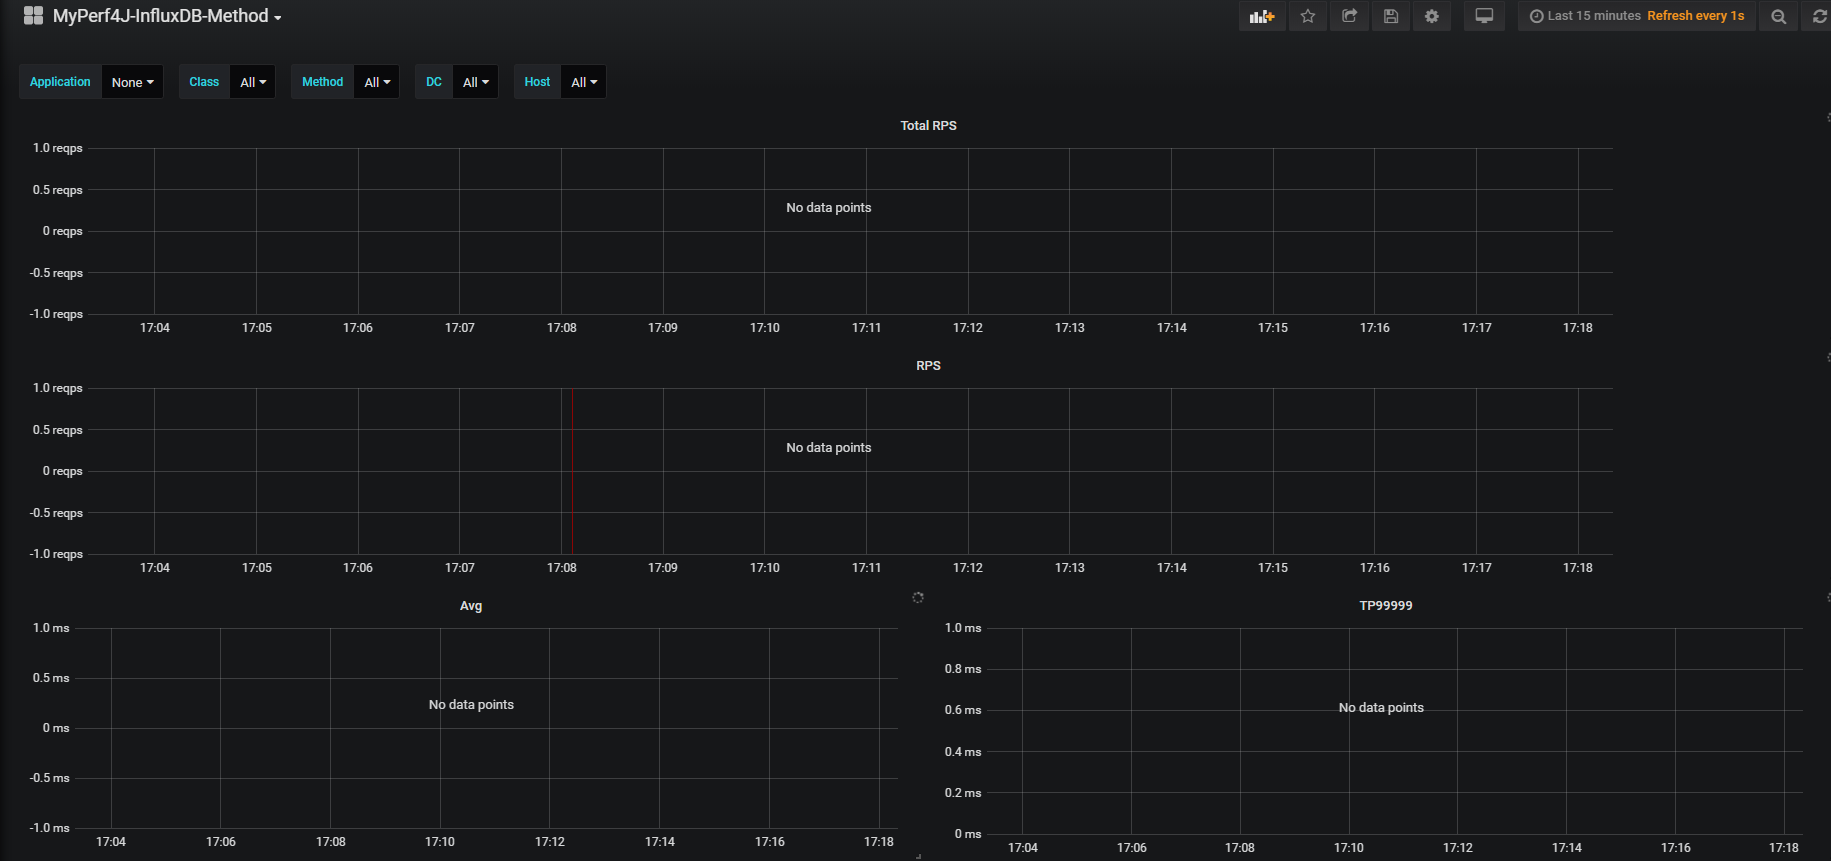
注意:/home/lwenhao/MyPerf4J/FlowProcessAgent/logs/method_metrics.log没有内容,所以这里没有数据
来源:oschina
链接:https://my.oschina.net/u/3590288/blog/3016726