目录
示例一 视图内动画
1. 准备
- 使用Xcode创建一个"Single View Application"项目
- 从控件库中选择一个标签(Label)以及一个按钮(Button)放在默认的视图上
- 设置标签(水平居中、垂直居中)以及按钮(宽度、距离屏幕下边框的位置、水平居中)的约束
- 将标签的两个约束使用Ctrl拖拽到对应的
ViewController当中,并分别命名为centerXAlign与centerYAlign - 使用Ctrl拖动按钮到代码中,并命名其为
button - 添加并重载方法
viewWillAppear与viewDidAppear
准备完成后,代码部分如下所示:
import UIKit

class ViewController: UIViewController {

    @IBOutlet weak var centerXAlign: NSLayoutConstraint!
    @IBOutlet weak var centerYAlign: NSLayoutConstraint!

    @IBOutlet weak var button: UIButton!

    // ...

    override func viewWillAppear(animated: Bool) {
        super.viewWillAppear(animated)

    }

    override func viewDidAppear(animated: Bool) {
        super.viewDidAppear(animated)

    }
}
2. 添加水平移入动画
根据之前的准备,我们可以开始进行动画效果的编写。为了让标签实现水平移入的动画效果,我们需要改变标签的初始位置到屏幕的外面。如下所示:
override func viewWillAppear(animated: Bool) {
    super.viewWillAppear(animated)

    centerXAlign.constant -= view.bounds.width
}
viewWillAppear方法用于执行在视图还没有显现,但是将要显现时候,需要进行的操作。.constant为约束的值。view.bounds表示当前视图的边界。
注意:上面代码中
centerXAlign.constant减去的内容并不是其精确的需要减去的数值,只是出于方便的考虑才直接使用视图的宽度进行设置。
在视图将要载入时,将要显示的内容移除屏幕后,我们需要在视图完成显示时,再将屏幕外的标签移动进来。由于想要达到水平移动的效果,我们只需要改变标签水平约束的值就可以了。如下所示:
override func viewDidAppear(animated: Bool) {
    super.viewDidAppear(animated)

    UIView.animateWithDuration(1.0, delay: 0.0, options: UIViewAnimationOptions.CurveEaseOut, animations: {
        self.centerXAlign.constant += self.view.bounds.width

        self.view.layoutIfNeeded()
    }, completion: nil)
}
我们设置标签移入动画的持续时间为1秒,延迟0秒执行,使用.CurveEaseOut效果执行动画。动画的内容为对标签的约束执行“加”操作,并调用self.view.layoutIfNeeded()方法,使动画效果生效。
此时,我们执行程序将会发现,标签从屏幕的右方水平移入。
注意:所有的动画效果,都是通过改变UIView实例的如下属性来进行的。
- center —— 中心
- alpha —— 透明度
- frame —— 边框
- bounds —— 约束
- transform —— 切换
- backgroundColor —— 背景色
- contentStretch —— 内容缩放
3. 添加弹性动画
之前我们已经完成对标签水平移入的操作,这里我们为之前添加的按钮添加弹性动画的效果。按钮将在标签水平移入后,执行弹性动画。具体实现如下所示:
override func viewDidAppear(animated: Bool) {
    super.viewDidAppear(animated)

    // ...

    let bounds = self.button.bounds
    UIView.animateWithDuration(2.0, delay: 1.2, usingSpringWithDamping: 0.1, initialSpringVelocity: 100.0, options: nil, animations: {

        self.button.bounds = CGRect(x: bounds.origin.x - 80, y: bounds.origin.y, width: bounds.size.width + 160, height: bounds.height)

        }, completion: nil)
}
在上面的代码中,我们通过使用一个新的矩形描述改变按钮的边界值,从而实现对按钮大小改变的弹性动画。
示例二 视图间切换
1. 准备
- 新建一个Xcode iOS项目,类型选择“Single View Application”
- 打开StoryBoard,拖入一个
View Controller - 向项目添加文件,分别为“ActionViewController.swift”、“CustomPresentAnimationController.swift”、“CustomDismissAnimationController.swift”、“CustomNavigationAnimationController.swift”。其中“ActionViewController.swift”为
UIViewController的子类,“CustomPresentAnimationController.swift”、“CustomDismissAnimationController.swift”“CustomNavigationAnimationController.swift”、“CustomNavigationAnimationController.swift”为NSObject的子类。 - 设置新拖入的
View Controller的类为ActionViewController - 设置
Action View Controller的背景色,并拖入一个按钮,修改按钮标题为“Dismiss” - 为主视图添加一个导航条按钮,并添加到
Action View Controller的Segue,设置Segue的类型为Present Modal,用于弹出Action View Controller - 为主视图添加一个按钮,并修改文字为“Toggle Navigation Transition”
- 拖拽一个ViewController到画板,然后关联“Toggle Navigation Transition”按钮到新添加的ViewController
注意:
- 在向项目添加文件的时候,要注意不要选择了OSX应用类型。
2. 视图出现切换效果
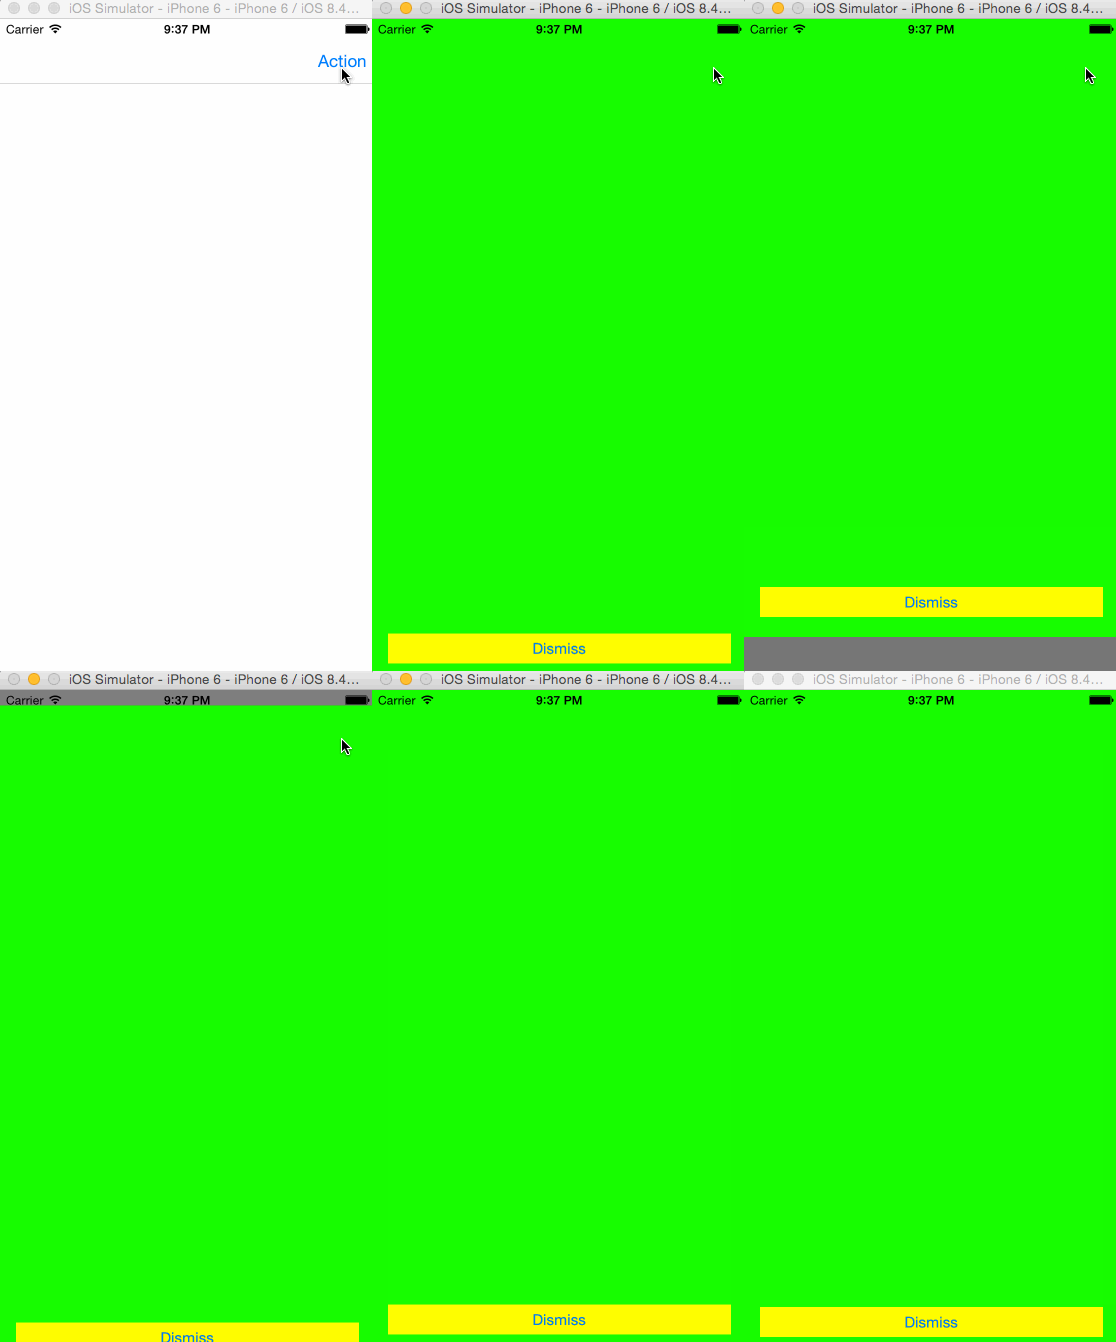
向CustomPresentAnimationController.swift文件添加如下代码。
import UIKit

class CustomPresentAnimationController: NSObject, UIViewControllerAnimatedTransitioning {

    func transitionDuration(transitionContext: UIViewControllerContextTransitioning) -> NSTimeInterval {
        return 5.0
    }

    func animateTransition(transitionContext: UIViewControllerContextTransitioning) {

        let fromViewController = transitionContext.viewControllerForKey(UITransitionContextFromViewControllerKey)!
        let toViewController = transitionContext.viewControllerForKey(UITransitionContextToViewControllerKey)!
        let finalFrameForVC = transitionContext.finalFrameForViewController(toViewController)
        let containerView = transitionContext.containerView()

        let bounds = UIScreen.mainScreen().bounds
        toViewController.view.frame = CGRectOffset(finalFrameForVC, 0, bounds.size.height)
        containerView.addSubview(toViewController.view)

        UIView.animateWithDuration(transitionDuration(transitionContext), delay: 0.0, usingSpringWithDamping: 0.5, initialSpringVelocity: 0.0, options: .CurveLinear, animations: {
            fromViewController.view.alpha = 0.5
            toViewController.view.frame = finalFrameForVC
            }, completion: {
                finished in
                transitionContext.completeTransition(true)
                fromViewController.view.alpha = 1.0
        })
    }
}
向ViewController.swift文件添加如下代码。
import UIKit

class ViewController: UIViewController, UIViewControllerTransitioningDelegate {

    // ...

    let customPresentAnimationController = CustomPresentAnimationController()

    override func prepareForSegue(segue: UIStoryboardSegue, sender: AnyObject?) {

        if segue.identifier == "showAction" {
            let toViewController = segue.destinationViewController as! UIViewController
            toViewController.transitioningDelegate = self
        }
    }

    func animationControllerForPresentedController(presented: UIViewController, presentingController presenting: UIViewController, sourceController source: UIViewController) -> UIViewControllerAnimatedTransitioning? {
        return customPresentAnimationController
    }
}

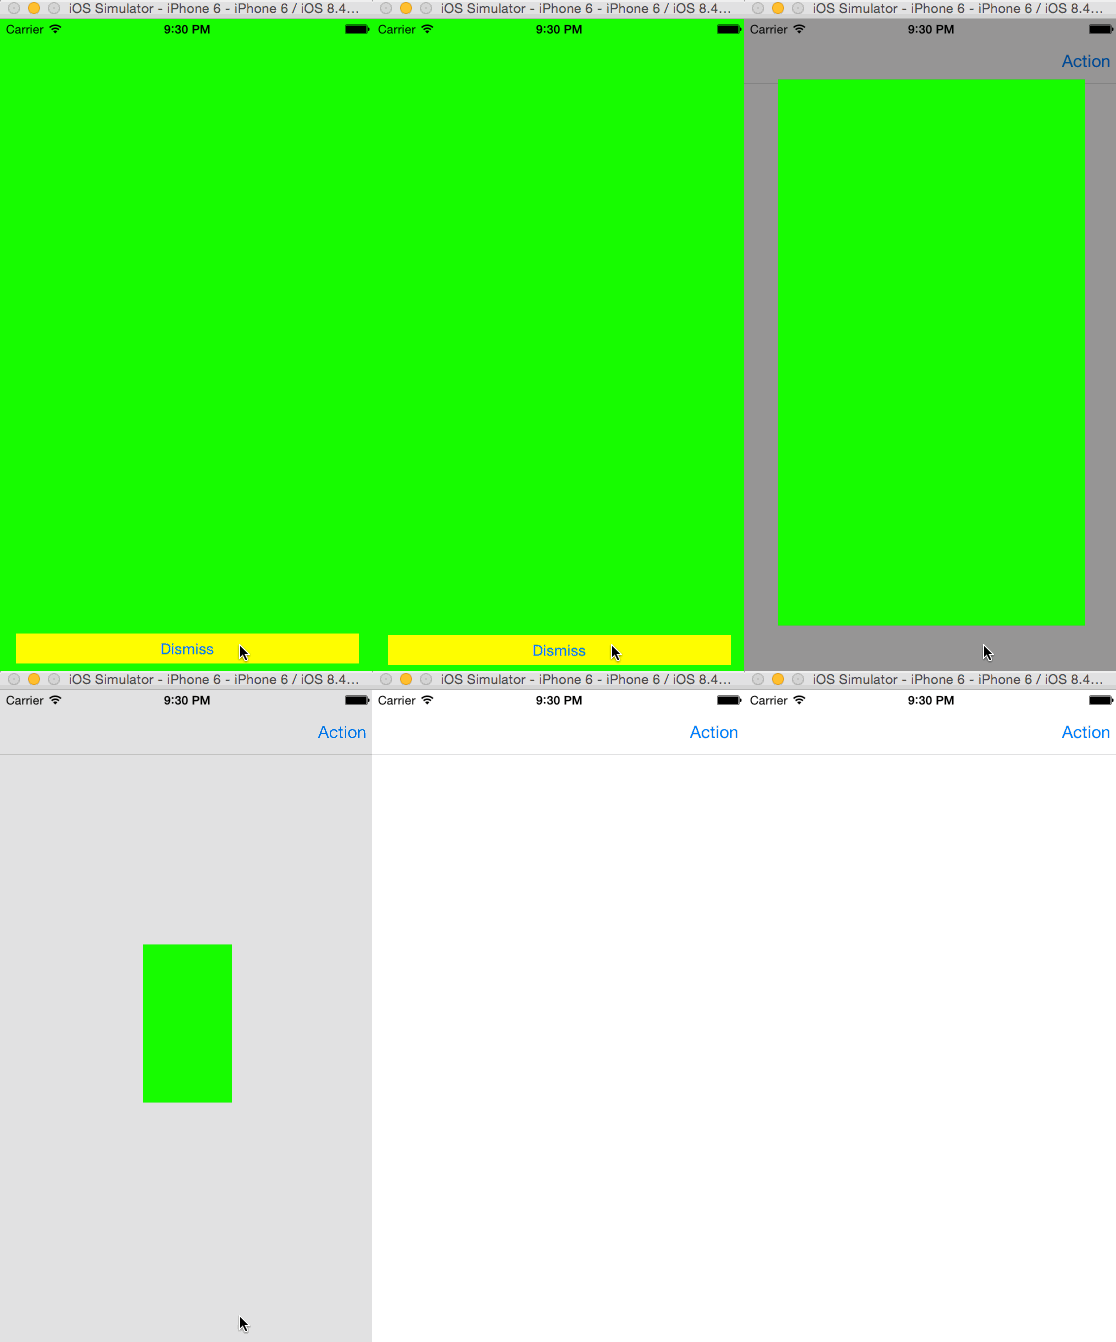
3. 视图消失切换效果
向CustomDismissAnimationController.swift添加如下代码。
import UIKit

class CustomDismissAnimationController: NSObject, UIViewControllerAnimatedTransitioning {

    func transitionDuration(transitionContext: UIViewControllerContextTransitioning) -> NSTimeInterval {
        return 1.0
    }

    func animateTransition(transitionContext: UIViewControllerContextTransitioning) {

        let fromViewController = transitionContext.viewControllerForKey(UITransitionContextFromViewControllerKey)!
        let toViewController = transitionContext.viewControllerForKey(UITransitionContextToViewControllerKey)!
        let finalFrameForVC = transitionContext.finalFrameForViewController(toViewController)
        let containerView = transitionContext.containerView()

        toViewController.view.frame = finalFrameForVC
        toViewController.view.alpha = 0.5
        containerView.addSubview(toViewController.view)
        containerView.sendSubviewToBack(toViewController.view)

        UIView.animateWithDuration(transitionDuration(transitionContext), animations: {
            fromViewController.view.frame = CGRectInset(fromViewController.view.frame, fromViewController.view.frame.size.width / 2, fromViewController.view.frame.size.height / 2)
            toViewController.view.alpha = 1.0
            }, completion: {
                finished in
                transitionContext.completeTransition(true)
        })
    }
}
向ViewController.swift添加如下代码。
import UIKit

class ViewController: UIViewController, UIViewControllerTransitioningDelegate {

    // ..

    // MARK: - for Segue's present modally action

    // ...

    let customDismissAnimationController = CustomDismissAnimationController()

    @IBAction func dimssViewController(segue: UIStoryboardSegue) {

    }

    // MARK: - UIViewControllerTransitioningDelegate's method

    // ...

    func animationControllerForDismissedController(dismissed: UIViewController) -> UIViewControllerAnimatedTransitioning? {
        return customDismissAnimationController
    }
}

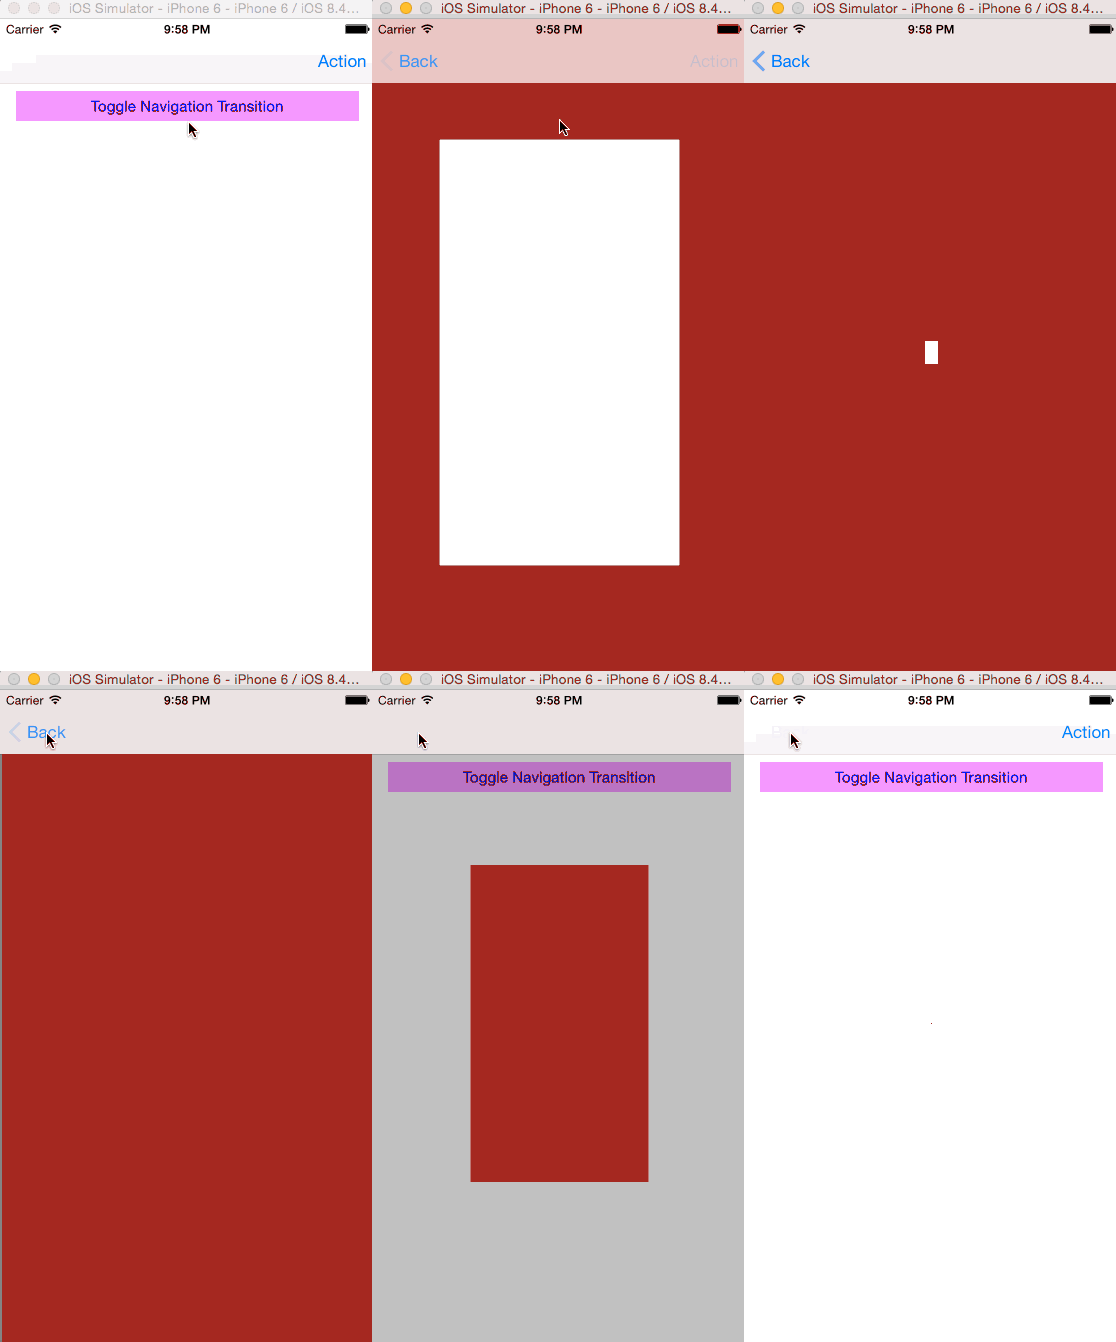
4. 视图导航切换效果
向CustomNavigationAnimationController.swift添加如下代码。(实际上是使用第三步的切换效果)
import UIKit

class CustomNavigationAnimationController: NSObject, UIViewControllerAnimatedTransitioning {

    func transitionDuration(transitionContext: UIViewControllerContextTransitioning) -> NSTimeInterval {
        return 2.0
    }

    func animateTransition(transitionContext: UIViewControllerContextTransitioning) {
        let fromViewController = transitionContext.viewControllerForKey(UITransitionContextFromViewControllerKey)!
        let toViewController = transitionContext.viewControllerForKey(UITransitionContextToViewControllerKey)!
        let finalFrameForVC = transitionContext.finalFrameForViewController(toViewController)
        let containerView = transitionContext.containerView()

        toViewController.view.frame = finalFrameForVC
        toViewController.view.alpha = 0.5
        containerView.addSubview(toViewController.view)
        containerView.sendSubviewToBack(toViewController.view)

        UIView.animateWithDuration(transitionDuration(transitionContext), animations: {
            fromViewController.view.frame = CGRectInset(fromViewController.view.frame, fromViewController.view.frame.size.width / 2, fromViewController.view.frame.size.height / 2)
            toViewController.view.alpha = 1.0
            }, completion: {
                finished in
                transitionContext.completeTransition(true)
        })
    }
}
向ViewController.swift添加如下代码。
import UIKit

class ViewController: UIViewController, UIViewControllerTransitioningDelegate, UINavigationControllerDelegate {

    // ...

    // MARK: - for Segue's present modally action

    // ...

    let customNavigationAnimationController = CustomNavigationAnimationController()

    // MARK: - UIViewControllerTransitioningDelegate's method

    // ...

    // MARK: - UINavigationControllerDelegate's method

    func navigationController(navigationController: UINavigationController, animationControllerForOperation operation: UINavigationControllerOperation, fromViewController fromVC: UIViewController, toViewController toVC: UIViewController) -> UIViewControllerAnimatedTransitioning? {
        return customNavigationAnimationController
    }
}

添加交互
注:此效果是后来添加的,由于在设计Demo的时候没有考虑到,所以就在Demo项目中就没有实现。代码来自参考的文章。
新建一个“CustomInteractionController”类。并编辑这个类文件为如下所示。
import UIKit

class CustomInteractionController: UIPercentDrivenInteractiveTransition {

    var navigationController: UINavigationController!
    var shouldCompleteTransition = false
    var transitionInProgress = false

    var completionSeed: CGFloat {
        return 1 - percentComplete
    }

    func attachToViewController(viewController: UIViewController) {
        navigationController = viewController.navigationController
        setupGestureRecognizer(viewController.view)
    }

    private func setupGestureRecognizer(view: UIView) {
        view.addGestureRecognizer(UIPanGestureRecognizer(target: self, action: "handlePanGesture:"))
    }

    func handlePanGesture(gestureRecognizer: UIPanGestureRecognizer) {
        let viewTranslation = gestureRecognizer.translationInView(gestureRecognizer.view!.superview!)
        switch gestureRecognizer.state {
        case .Began:
            transitionInProgress = true
            navigationController.popViewControllerAnimated(true)
        case .Changed:
            var const = CGFloat(fminf(fmaxf(Float(viewTranslation.x / 200.0), 0.0), 1.0))
            shouldCompleteTransition = const > 0.5
            updateInteractiveTransition(const)
        case .Cancelled, .Ended:
            transitionInProgress = false
            if !shouldCompleteTransition || gestureRecognizer.state == .Cancelled {
                cancelInteractiveTransition()
            } else {
                finishInteractiveTransition()
            }
        default:
            println("Swift switch must be exhaustive, thus the default")
        }
    }
}
向ViewController.swift文件添加如下代码。
//
//  ViewController.swift
//  ViewTransition
//
//  Created by CongJunfeng on 15/8/2.
//  Copyright (c) 2015年 46day. All rights reserved.
//

import UIKit

class ViewController: UIViewController, UIViewControllerTransitioningDelegate, UINavigationControllerDelegate {

    // ...

    // MARK: - for Segue's present modally action

    // ...

    let customInteractionController = CustomInteractionController() // for Interaction

    // MARK: - UIViewControllerTransitioningDelegate's method

    // ...

    // MARK: - UINavigationControllerDelegate's method

    func navigationController(navigationController: UINavigationController, animationControllerForOperation operation: UINavigationControllerOperation, fromViewController fromVC: UIViewController, toViewController toVC: UIViewController) -> UIViewControllerAnimatedTransitioning? {

        /**
        *  for Interaction
        */
        if operation == .Push {
            customInteractionController.attachToViewController(toVC)
        }

        return customNavigationAnimationController
    }

    // for Interaction
    func navigationController(navigationController: UINavigationController, interactionControllerForAnimationController animationController: UIViewControllerAnimatedTransitioning) -> UIViewControllerInteractiveTransitioning? {
        return customInteractionController.transitionInProgress ? customInteractionController : nil
    }
}
参考
- Creating Simple View Animations in Swift
- Introduction to Custom View Controller Transitions and Animations
来源:oschina
链接:https://my.oschina.net/u/96756/blog/486424