在本节学习中,我们使用Seaborn作为数据可视化的入门工具
Seaborn的官方网址如下:http://seaborn.pydata.org
一:definition
Seaborn is a Python data visualization library based on matplotlib. It provides a high-level interface for drawing attractive and informative statistical graphics.
Seaborn是基于matplotlib的数据可视化库,它的主要功能是做数据可视化
二:Setup the notebook
对数据进行初始化,引入相应的包
import pandas as pd
import matplotlib.pyplot as plt
%matplotlib inline
import seaborn as sns
pirnt("Setup Complete")
三: Load the data
加载数据
file_path = "../input/fifa.csv"
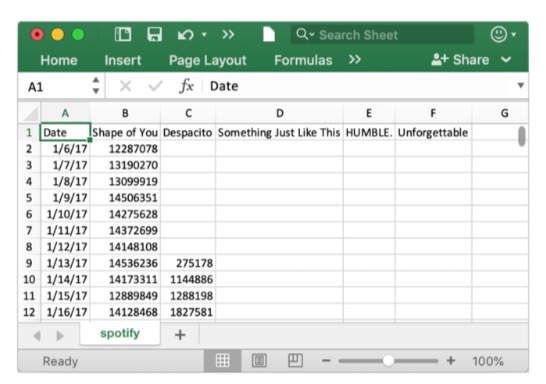
fifa_data = pd.read_csv(file_path, index_col="Date", parse_Dates=True)

注:
file_path:
表示dataset的路径
idnex_col="Date" :
When we load the dataset, we want each entry in the first column to denote a different row. To do this, we set the value of index_col to the name of the first column ("Date", found in cell A1 of the file when it's opened in Excel).
parse_dates=True:
This tells the notebook to understand the each row label as a date (as opposed to a number or other text with a different meaning).
四: Examine the data
列出数据的前5行检验:
fifa_data.head()

五: Plot the data
- Line Chart
plt.figure(figsize=(16,6))
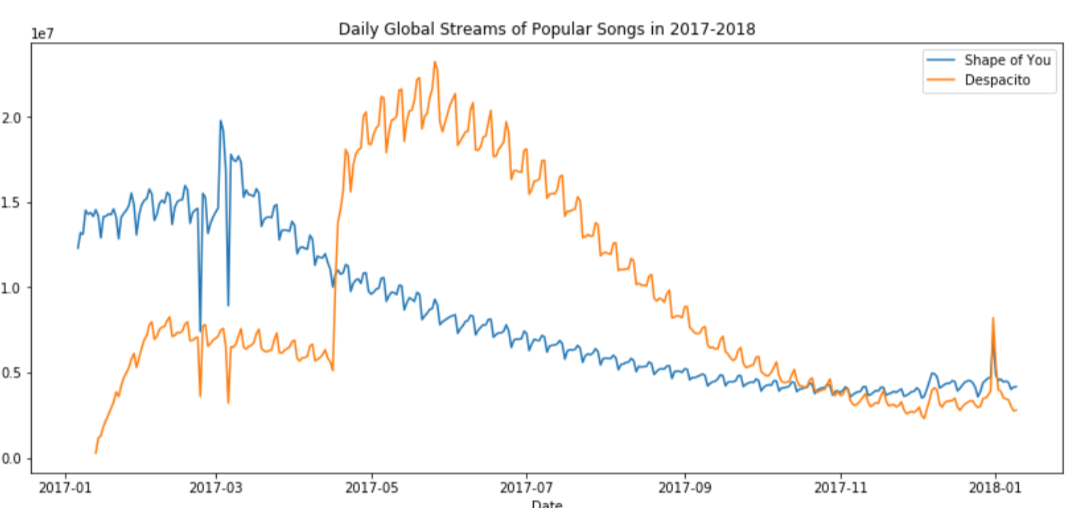
sns.lineplot(data=fifa_data)

注:
plt.figure(figsize=(16,6))
设定的是图形的宽度和高度
plt.title("name") 增加title,并命名为name
sns.lineplot(data=fifa_data)画出数据的线状图
若想plot a subset of the data (仅仅画出一部分图线):
sns.lineplot(data=spotify["shape of you"],label=shape of you")
sns.lineplot(data=spotify["despacito"], label="despatito")
plt.xlabel("name X")
plt.blabel("name Y")
注:
plt.xlabel
plt.ylabel
是分别对label x, y 进行命名

- Bar Charts
plt.title("Average Arrival Delay for Spirit Airlines Flights, by Month")
sns.barplot(x=flight_data.index, y=flight_data['NK'])
plt.ylabel("Arrival delay (in minutes)"

注:
x=flight_data.index :
This determines what to use on the horizontal axis. In this case, we have selected the column that indexes the rows (in this case, the column containing the months).
- Heat Maps
plt.figure(figsize=(16,6))
plt.title("Average Arrival Delay for Each Airline, by Month")
sns.heatmap(data=flight_data,annot=True)
plt.xlabel("Airline")
注:
sns.heatmap:
This tells the notebook that we want to create a heatmap.
data=flight_data:
This tells the notebook to use all of the entries in flight_data to create the heatmap
annot=Ture:
This ensures that the vlaues for each cell appear on the chart.

- Scatter plots
(1) sns.scatterplot (x=insurance_data['bmi'], y=insurance_data['charges'])

注:
the horizontal x-axis (x=insurance_data['bmi'])
the vertical y-axis (y=insurance_data['charges'])
(2) 为了看出点的关系强度,可以使用regression line(回归线)
sns.regplot(x=insurance_data['bmi'], y=insurance_data['charges'])

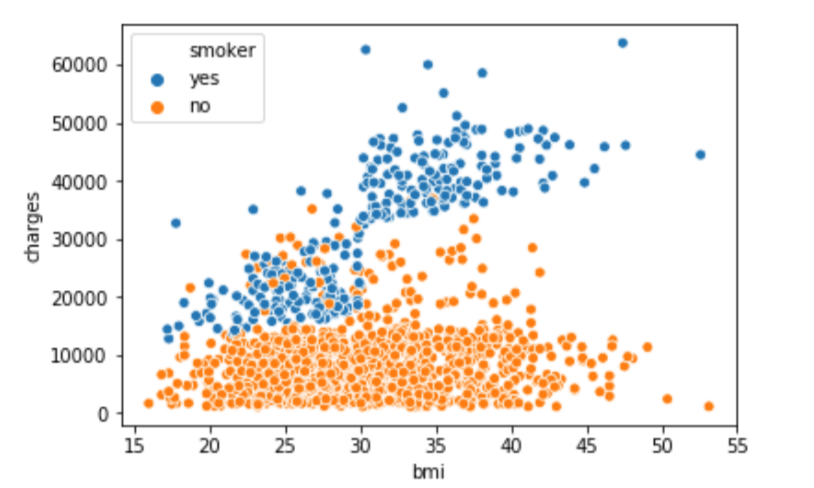
(3) sns.scatterplot(x=insurance_data['bmi'], y=insurance_data['charges'], hue=insurance_data['smoker'])
hue=insurance_data['smoker']:按照hue来对数据进行标色

- Histograms
sns.distplot(a=iris_data['Petal Length (cm)'], kde=False)

- Density plots
更平滑的图:
sns.kdeplot(data=iris_data['Petal Length(cm)'], shade=True)

六:Conclusion
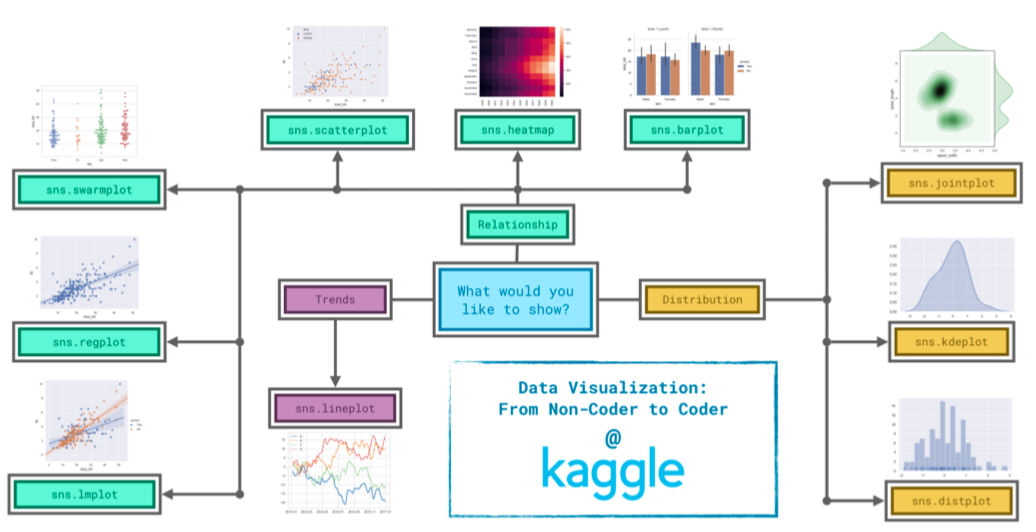
下图显示,在seaborn中,选择图形需要根据需求来决定

来源:oschina
链接:https://my.oschina.net/u/4351598/blog/3404562