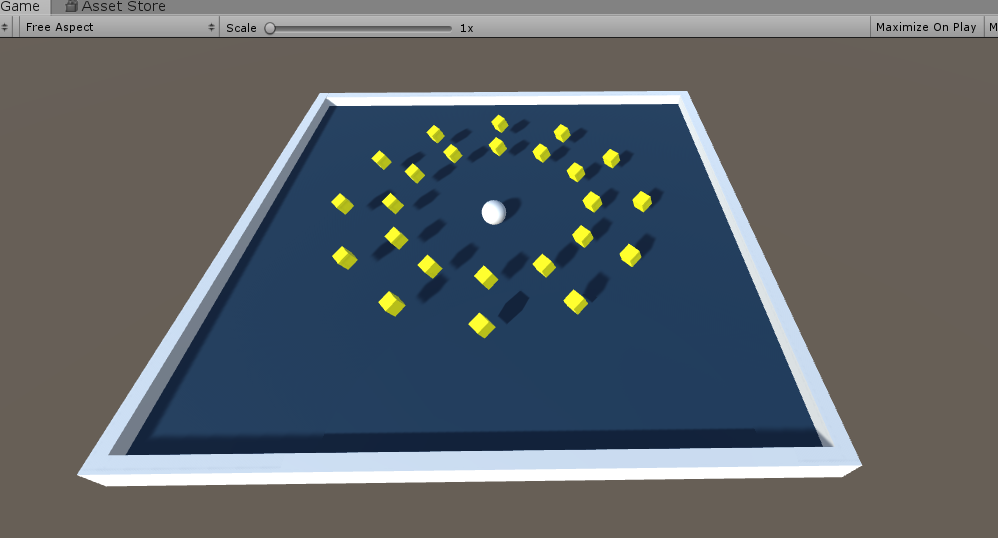
成品展示

操作步骤
- 新建一个plane当作地面,重命名为Ground,位置坐标修改为(0,0,0)。再新建一个空对象,在里面新建一个Cube,再进行三次复制。重命名为Wall,当作墙,修改坐标为(0,0,0).通过修改四个Cube的position和scale属性,使其围在Ground四周。
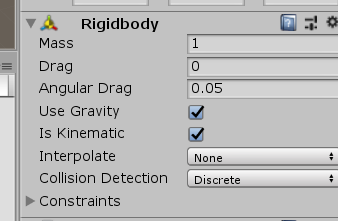
- 新建一个Cube,重命名为PickUp,附上材质,并修改位置坐标为(0,1,0),修改rotation属性使其倾斜。为PickUp添加一个Rigidbodt组件,并勾选Use Gravity和Is Kinematic选项,使其固定在原位置。
 新建一个脚本文件,命名为RotatePickUp,作为小方块旋转脚本
 。脚本内容为:
 using System.Collections; using System.Collections.Generic; using UnityEngine; public class RotatePickUp : MonoBehaviour { // Start is called before the first frame update void Start() { } // Update is called once per frame void Update() { this.transform.Rotate(new Vector3(15, 30, 45) * Time.deltaTime); } }保存编译,然后将PickUp复制11个,并打包到一个空对象中。
-
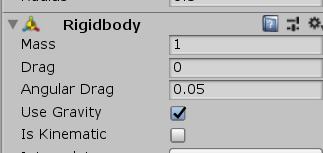
新建一个Sphere,重命名为Player,修改位置坐标为(0,0,0),并添加一个Rigidbody组件,勾选Use Gravity
 。新建一个脚本文件,命名为PlayerContraller,用于对小球的控制。同时新建两个text,分别重命名为CountText和WinText,用于计数和提示。当玩家控制小球碰到小方块时,小方块会消失,左上角计数会+1,当达到一定数量时,会显示“You Win!”脚本内容如下:
using System.Collections; using System.Collections.Generic; using UnityEngine; public class CameraContraller : MonoBehaviour { public GameObject player; private Vector3 offset; public GameObject PickUpPfb; private GameObject[] obj1; private int objCount = 0; // Start is called before the first frame update void Start() { offset=this.transform.position - player.transform.position; obj1 = new GameObject[12]; for (objCount = 0; objCount < 12; objCount++) { obj1[objCount] = GameObject.Instantiate(PickUpPfb); obj1[objCount].name = "PickUp"+objCount.ToString(); obj1[objCount].transform.position = new Vector3(4*Mathf.Sin(Mathf.PI/6*objCount),1,4*Mathf.Cos(Mathf.PI/6*objCount)); } } void LateUpdate() { this.transform.position = player.transform.position + offset; } // Update is called once per frame void Update() { } } -
将脚本附给对应的组件,编译调试。
来源:oschina
链接:https://my.oschina.net/u/4462201/blog/3207833

 新建一个脚本文件,命名为RotatePickUp,作为小方块旋转脚本
 。脚本内容为:
  。新建一个脚本文件,命名为PlayerContraller,用于对小球的控制。同时新建两个text,分别重命名为CountText和WinText,用于计数和提示。当玩家控制小球碰到小方块时,小方块会消失,左上角计数会+1,当达到一定数量时,会显示“You Win!”脚本内容如下: