一、Thymeleaf简介
Thymeleaf是一个流行的模板引擎,该模板引擎采用Java语言开发,除了thymeleaf之外还有Velocity、FreeMarker等模板引擎,功能类似。Thymeleaf是用来开发Web和独立环境项目的服务器端的Java模版引擎;Spring官方支持的服务的渲染模板中,并不包含jsp。而是Thymeleaf和Freemarker等,而Thymeleaf与SpringMVC的视图技术,及SpringBoot的自动化配置集成非常完美,几乎没有任何成本,你只用关注Thymeleaf的语法即可。
Thymeleaf的特点
-
动静结合:Thymeleaf 在有网络和无网络的环境下皆可运行,即它可以让美工在浏览器查看页面的静态效果,也可以让程序员在服务器查看带数据的动态页面效果。这是由于它支持 html 原型,然后在 html 标签里增加额外的属性来达到模板+数据的展示方式。浏览器解释 html 时会忽略未定义的标签属性,所以 thymeleaf 的模板可以静态地运行;当有数据返回到页面时,Thymeleaf 标签会动态地替换掉静态内容,使页面动态显示。
-
开箱即用:它提供标准和spring标准两种方言,可以直接套用模板实现JSTL、 OGNL表达式效果,避免每天套模板、该jstl、改标签的困扰。同时开发人员也可以扩展和创建自定义的方言。
-
多方言支持:Thymeleaf 提供spring标准方言和一个与 SpringMVC 完美集成的可选模块,可以快速的实现表单绑定、属性编辑器、国际化等功能。
-
与SpringBoot完美整合,SpringBoot提供了Thymeleaf的默认配置,并且为Thymeleaf设置了视图解析器,我们可以像以前操作jsp一样来操作Thymeleaf。代码几乎没有任何区别,就是在模板语法上有区别。
二、在SpringBoot中集成Thymeleaf
1、添加依赖
       <dependency>
            <groupId>org.springframework.boot</groupId>
            <artifactId>spring-boot-starter-web</artifactId>
        </dependency>
        <dependency>
            <groupId>org.springframework.boot</groupId>
            <artifactId>spring-boot-starter-test</artifactId>
            <scope>test</scope>
        </dependency>
        <dependency>
            <groupId>org.springframework.boot</groupId>
            <artifactId>spring-boot-starter-thymeleaf</artifactId>
        </dependency>
       <!-- thymeleaf会对html中的标签进行严格校验,如果html标签缺少结束标签的话,thymeleaf会报错,我们可以通过下面方式去除thymeleaf的校验 -->
        <dependency>
            <groupId>net.sourceforge.nekohtml</groupId>
            <artifactId>nekohtml</artifactId>
            <version>1.9.22</version>
        </dependency>
2、properties配置
application.properties文件内容如下:
server.port=8080
spring.application.name=springboot-thymeleaf
#开发时建议关闭Thymeleaf缓存
spring.thymeleaf.cache=false
3、编写测试Controller
import org.springframework.stereotype.Controller;
import org.springframework.ui.Model;
import org.springframework.web.bind.annotation.RequestMapping;

@Controller
@RequestMapping
public class ThymeleafController {

    @RequestMapping("index")
    public String index(Model model){
        model.addAttribute("msg", "Hello Thymeleaf");
        return "index";
    }
}
4、编写测试Thymeleaf模板文件
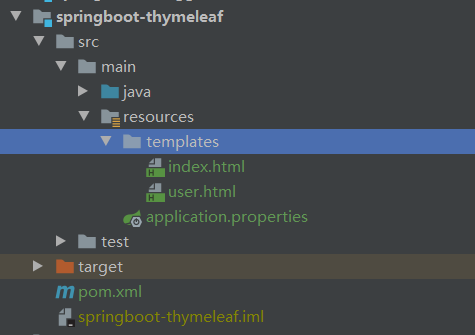
在resources下新建 templates文件夹,在templates文件夹下新建html5文件index.html

index.html文件内容如下:
<!DOCTYPE html>
<html lang="en">
<head>
    <meta charset="UTF-8">
    <title>springboot2.x整合Thymeleaf</title>
</head>
<body>
<h1 th:text="${msg}">来看下效果</h1>
<!-- 非H5页面可以使用如下指令 -->
<h1 data-th-text="${msg}">来看下效果</h1>
</body>
</html>
SpringBoot使用Thymeleaf作为视图,模板文件放置在resources/templates目录下,静态资源放置在resources/static目录下,这是默认配置,会自动生效。
从自动装配的代码中可以看出:

5、编写SpringBoot启动类
@SpringBootApplication
public class ThymeleafApplication {

    public static void main(String[] args) {
        SpringApplication.run(ThymeleafApplication.class, args);
    }
}
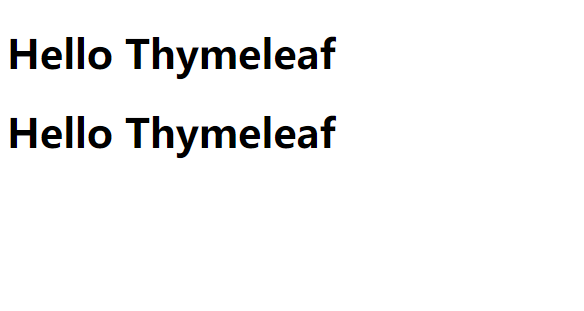
运行该程序,浏览器访问:http://127.0.0.1:8080/index

来源:CSDN
作者:奕奕星空
链接:https://blog.csdn.net/angellee1988/article/details/104443568