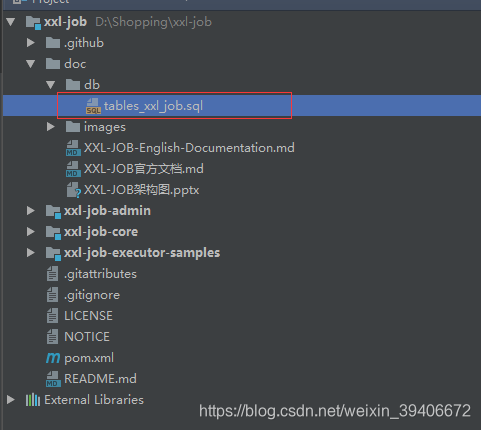
github下载
https://github.com/xuxueli/xxl-job
中文文档:http://www.xuxueli.com/xxl-job/#/
初始化脚本在上面源码目录的 /doc/db/tables_xxl_job.sql ,将此脚本在MySQL数据库中执行一遍。
执行完毕,会在MySQL数据库中生成如下 16 张表:
5、配置调度中心
调度中心就是源码中的 xxl-job-admin 工程,我们需要将其配置成自己需要的调度中心,通过该工程我们能够以图形化的方式统一管理任务调度平台上调度任务,负责触发调度执行。
### web
server.port=8080
server.servlet.context-path=/xxl-job-admin

### actuator
management.server.servlet.context-path=/actuator
management.health.mail.enabled=false

### resources
spring.mvc.servlet.load-on-startup=0
spring.mvc.static-path-pattern=/static/**
spring.resources.static-locations=classpath:/static/

### freemarker
spring.freemarker.templateLoaderPath=classpath:/templates/
spring.freemarker.suffix=.ftl
spring.freemarker.charset=UTF-8
spring.freemarker.request-context-attribute=request
spring.freemarker.settings.number_format=0.##########

### mybatis
mybatis.mapper-locations=classpath:/mybatis-mapper/*Mapper.xml
#mybatis.type-aliases-package=com.xxl.job.admin.core.model

### xxl-job, datasource
spring.datasource.url=jdbc:mysql://127.0.0.1:3306/xxl_job?serverTimezone=UTC&Unicode=true&characterEncoding=UTF-8
spring.datasource.username=root
spring.datasource.password=root
spring.datasource.driver-class-name=com.mysql.jdbc.Driver

### datasource-pool
spring.datasource.type=com.zaxxer.hikari.HikariDataSource
spring.datasource.hikari.minimum-idle=10
spring.datasource.hikari.maximum-pool-size=30
spring.datasource.hikari.auto-commit=true
spring.datasource.hikari.idle-timeout=30000
spring.datasource.hikari.pool-name=HikariCP
spring.datasource.hikari.max-lifetime=900000
spring.datasource.hikari.connection-timeout=10000
spring.datasource.hikari.connection-test-query=SELECT 1

### xxl-job, email
spring.mail.host=smtp.qq.com
spring.mail.port=25
spring.mail.username=xxx@qq.com
spring.mail.password=xxx
spring.mail.properties.mail.smtp.auth=true
spring.mail.properties.mail.smtp.starttls.enable=true
spring.mail.properties.mail.smtp.starttls.required=true
spring.mail.properties.mail.smtp.socketFactory.class=javax.net.ssl.SSLSocketFactory

### xxl-job, access token
xxl.job.accessToken=

### xxl-job, i18n (default empty as chinese, "en" as english)
xxl.job.i18n=

## xxl-job, triggerpool max size
xxl.job.triggerpool.fast.max=200
xxl.job.triggerpool.slow.max=100

### xxl-job, log retention days
xxl.job.logretentiondays=30
该工程是一个springboot项目,我们只需要在IDEA中执行 XxlJobAdminApplication 类即可运行该工程:
在浏览器输入 http://localhost:8080/xxl-job-admin 然后输入用户名和密码(前面配置文件中配置的),即可看到如下管理界面。
部署任务示例


来源:CSDN
作者:开心的小尾叭
链接:https://blog.csdn.net/weixin_39406672/article/details/104170634