springboot整合了第三方常用的框架
log4j日志配置https://www.jianshu.com/p/ccafda45bcea
声明该类是一个springboot引导类SpringBootApplication
所有springboot工程必须继承
<parent>
        <groupId>org.springframework.boot</groupId>
        <artifactId>spring-boot-starter-parent</artifactId>
        <version>2.1.9.RELEASE</version>
        <relativePath/> <!-- lookup parent from repository -->
    </parent>
web功能起步依赖
<dependency>
        <!--web功能起步的依賴-->
        <groupId>org.springframework.boot</groupId>
        <artifactId>spring-boot-starter-web</artifactId>
    </dependency>
热部署配置
开发中反复修改类 页面等资源,需要重启才能生效。热部署解决这个麻烦。
热部署有两点需要配置(百度搜)
<!--熱部署配置-->
    <dependency>
        <groupId>org.springframework.boot</groupId>
        <artifactId>spring-boot-devtools</artifactId>
    </dependency>
(1)File-Settings-Compiler-Build Project automatically
(2)ctrl + shift + alt + / ,选择Registry,勾上 Compiler autoMake allow when app running
SpringBootApplication
相当于配置
springbootconfiguration+enableautoconfiguration+componentscan三个注解
enableautoconfiguration是否开启自动配置
@runwith注解
让测试在Spring容器环境下执行。如测试类中无此注解,将导致service,dao等自动注入失败。
@Mapper注解
添加了@Mapper注解之后这个接口在编译时会生成相应的实现类
需要注意的是:这个接口中不可以定义同名的方法,因为会生成相同的id,也就是说这个接口是不支持重载的
对于多个参数来说,每个参数之前都要加上@Param注解,要不然会找不到对应的参数进而报错
@ConfigurationProperties(prefix=“person”)
告诉springboot将本类中的所有属性和的配置文件中相关的配置进行绑定;prefix = “person”配置文件中的所有属性进行一一对应。
@value获取值和@configurationproperties获取值
** 前者支持批量注入配置文件中的属性,后者一个一个指定**
** 前者支持松散绑定==》lastName = last_name**
后者支持spel表达式,前者支持jsr303数据校验(邮箱…)
@propertysource&@importresource
前者加载指定的配置文件,如@propertysource(“classpath:person.properties”)+
@configurationproperties(prefix=“person”)
后者导入spring配置文件,让配置文件里面的内容生效,如xml文件里的《bean id=“getall” class=“com…”》,@importresource(location={“class path:beans.xml”})
@configuration
指明当前类是一个配置类,用来替代spring配置文件
只要文件在springboot Application(入口文件)同一级或上一级目录,注解自动扫描
**@id**的意思标准来说是声明一个属性将映射到数据库主键的字段。
**@entity**它会帮你创建一个数据表
写插入语句时,有多个参数时,在dao层必须做一个映射
    @Insert("insert into stock values(#{code},#{date})")
    void insertInfo(@Param("code") int code,@Param("date") String date);

不然报错如下
org.apache.ibatis.binding.BindingException: Parameter 'code' not found. Available parameters are [0, 1, param1, param2]
使用@Mapper注解
为了让DemoMapper能够让别的类进行引用,我们可以在DemMapper类上添加@Mapper注解,而直接在Mapper类上面添加注解@Mapper,这种方式要求每一个mapper类都需要添加此注解,麻烦。
@Mapper
public interface DemoMapper {
    @Insert("insert into Demo(name) values(#{name})")
    @Options(keyProperty="id",keyColumn="id",useGeneratedKeys=true)
    public void save(Demo demo);
}
使用@MapperScan注解
通过使用@MapperScan可以指定要扫描的Mapper类的包的路径。
@SpringBootApplication
@MapperScan("com.kfit.*.mapper")
public class App {
    public static void main(String[] args) {
       SpringApplication.run(App.class, args);
    }
}
直接在springboot入口函数上指定扫描的包,可以指定多个包。
@SpringBootApplication
@MapperScan({"com.kfit.*.mapper","org.kfit.*.mapper"})
public class App {
    public static void main(String[] args) {
       SpringApplication.run(App.class, args);
    }
}
@EnableAutoConfiguration注解扫描范围只有当前的类。
@SpringBootApplication=@SpringBootConfiguration+@EnableAutoConfiguration+@ComponentScan
@SpringBootApplication里的@ComponentScan注解默认扫描路径为
配置 @SpringBootApplication类的同级包。
若要springboot整合jsp,需要当前项目为war类型项目
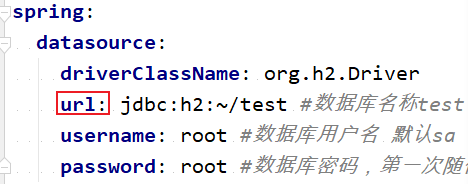
springboot多数据源时,不能单纯写URL…,因为springboot2存在一bug,扫描时是按jdbc-url名称进行扫描。
**@Configuration注解在类上:**相当于把该类配置为类名.xml
@Configuration可理解为用spring的时候xml里面的标签
@Bean可理解为用spring的时候xml里面的标签
ModelAndView和Map在网页面传值
这两种方法都行,但ModelAndView 需要手动跳转及需要自己实例化
 @GetMapping("/query")
    public String queryList(@ModelAttribute("con") UserCondition con, Map<String, Object> map) {
        map.put("user", userService.queryList(con));
        map.put("dept",userService.deptmentList());
        return "list";
    }
    @GetMapping("/query")
    public ModelAndView queryList(@ModelAttribute("con") UserCondition con) {
        ModelAndView mav = new ModelAndView();//实例化
        mav.addObject("user", userService.queryList(con));
        mav.addObject("dept",userService.deptmentList());
        mav.setViewName("list");//设置跳转页面
        return mav;
简写成这样可以:
		return new ModelAndView("list","user",userService.queryList(con));
把数据传到重定向的页面
map集合传到前端只在当前页面有效(resquest域共享),重定向之后是另一地址,不能共享数据。
 public String addCustomer(RedirectAttributes redirectAttributes){
	redirectAttributes.addFlashAttribute("message", "Successfully added..");}
配置监听器
- 实现HttpSessionListener两个方法,并在方法上添加@WebListener注解
- 在启动类上添加@ServletComponentScan扫描这个监听器
@WebListener
public class SessionListener implements HttpSessionListener {
    @Override
    public void sessionCreated(HttpSessionEvent se) {

    }

    @Override//销毁事件
    public void sessionDestroyed(HttpSessionEvent se) {
        HttpSession session = se.getSession();
        String token = (String) session.getAttribute("token");
        MockDB.T_TOKEN.remove(token);//删除MockDB里的token
        List<ClientInfoVo> list = MockDB.T_CLIENT_INFO.remove(token);
        for (ClientInfoVo vo : list) {//list集合里存放的都是用户使用一个token登录的子系统
            try {//通过遍历删除不同子系统上的session
                HttpUtils.sendHttpRequest(vo.getClientUrl(),vo.getJsessionId());
            } catch (Exception e) {
                e.printStackTrace();
            }
        }
@ServletComponentScan
@SpringBootApplication
public class SsoServerApplication {

	public static void main(String[] args) {
		SpringApplication.run(SsoServerApplication.class, args);
	}

}
来源:CSDN
作者:da杰
链接:https://blog.csdn.net/tushy/article/details/102682355