安装好vs和wtl开发环境后,就可以进行wtl开发了。
wtl提供了windows图形界面开发框架,可以利用wtl开发出想要的windows图形视窗界面程序。
首先我们简单的建立一个wtl的程序,看看wtl的代码逻辑和图形界面是如何来搭建代码积木的。
打开vs工具,
1、新建项目——>在已安装——>Visual C++ ——>WTL
——> ATL/WT Application Wizard
名称写wtl_work,
Application Type选Dialog Based。
建好工程后,配置一下工程属性,
给C/C++附加包含目录:D:\WTL91_5270_Beta\Include
给资源附加包含目录:D:\WTL91_5270_Beta\Include
建好工程后,wtl已经有了一个简单的对话框窗口。
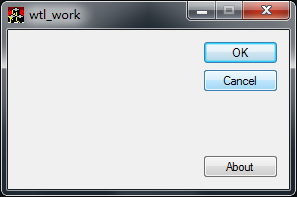
你可以编译运行一下,
程序样子如下图:
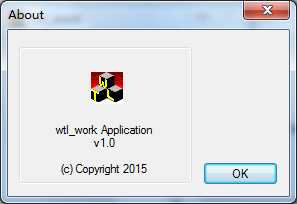
点击about,弹出对话框:
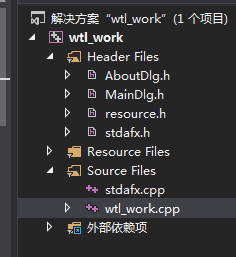
在vs工具解决方案资源管理器里查看新建工程的包含文件如下图:
看看wtl_work.cpp代码,
里面包含两个函数_tWinMain和Run。
int WINAPI _tWinMain(HINSTANCE hInstance, HINSTANCE /*hPrevInstance*/, LPTSTR lpstrCmdLine, int nCmdShow)
{
    HRESULT hRes = ::CoInitialize(NULL);
// If you are running on NT 4.0 or higher you can use the following call instead to
// make the EXE free threaded. This means that calls come in on a random RPC thread.
//  HRESULT hRes = ::CoInitializeEx(NULL, COINIT_MULTITHREADED);
    ATLASSERT(SUCCEEDED(hRes));

    // this resolves ATL window thunking problem when Microsoft Layer for Unicode (MSLU) is used
    ::DefWindowProc(NULL, 0, 0, 0L);

    AtlInitCommonControls(ICC_BAR_CLASSES); // add flags to support other controls

    hRes = _Module.Init(NULL, hInstance);
    ATLASSERT(SUCCEEDED(hRes));

    int nRet = Run(lpstrCmdLine, nCmdShow);

    _Module.Term();
    ::CoUninitialize();

    return nRet;
}
int Run(LPTSTR /*lpstrCmdLine*/ = NULL, int nCmdShow = SW_SHOWDEFAULT)
{
    CMessageLoop theLoop;
    _Module.AddMessageLoop(&theLoop);

    CMainDlg dlgMain;

    if(dlgMain.Create(NULL) == NULL)
    {
        ATLTRACE(_T("Main dialog creation failed!\n"));
        return 0;
    }

    dlgMain.ShowWindow(nCmdShow);

    int nRet = theLoop.Run();

    _Module.RemoveMessageLoop();
    return nRet;
}
来源:CSDN
作者:mofabang
链接:https://blog.csdn.net/mofabang/article/details/49863975


