[toc]
前言:上一篇博文已经介绍了Unity ml-agents的环境配置(https://www.cnblogs.com/KillerAery/p/10629963.html)了。
个人建议先敲demo再摸清概念比较容易上手,因此本文先提供一个demo示例简单阐述下。
由于过了差不多2年,Unity ml-agents项目API已经更新了很多,以前的demo教程已经不适合了,因此决定翻新Unity ml-agents机器学习系列博客。
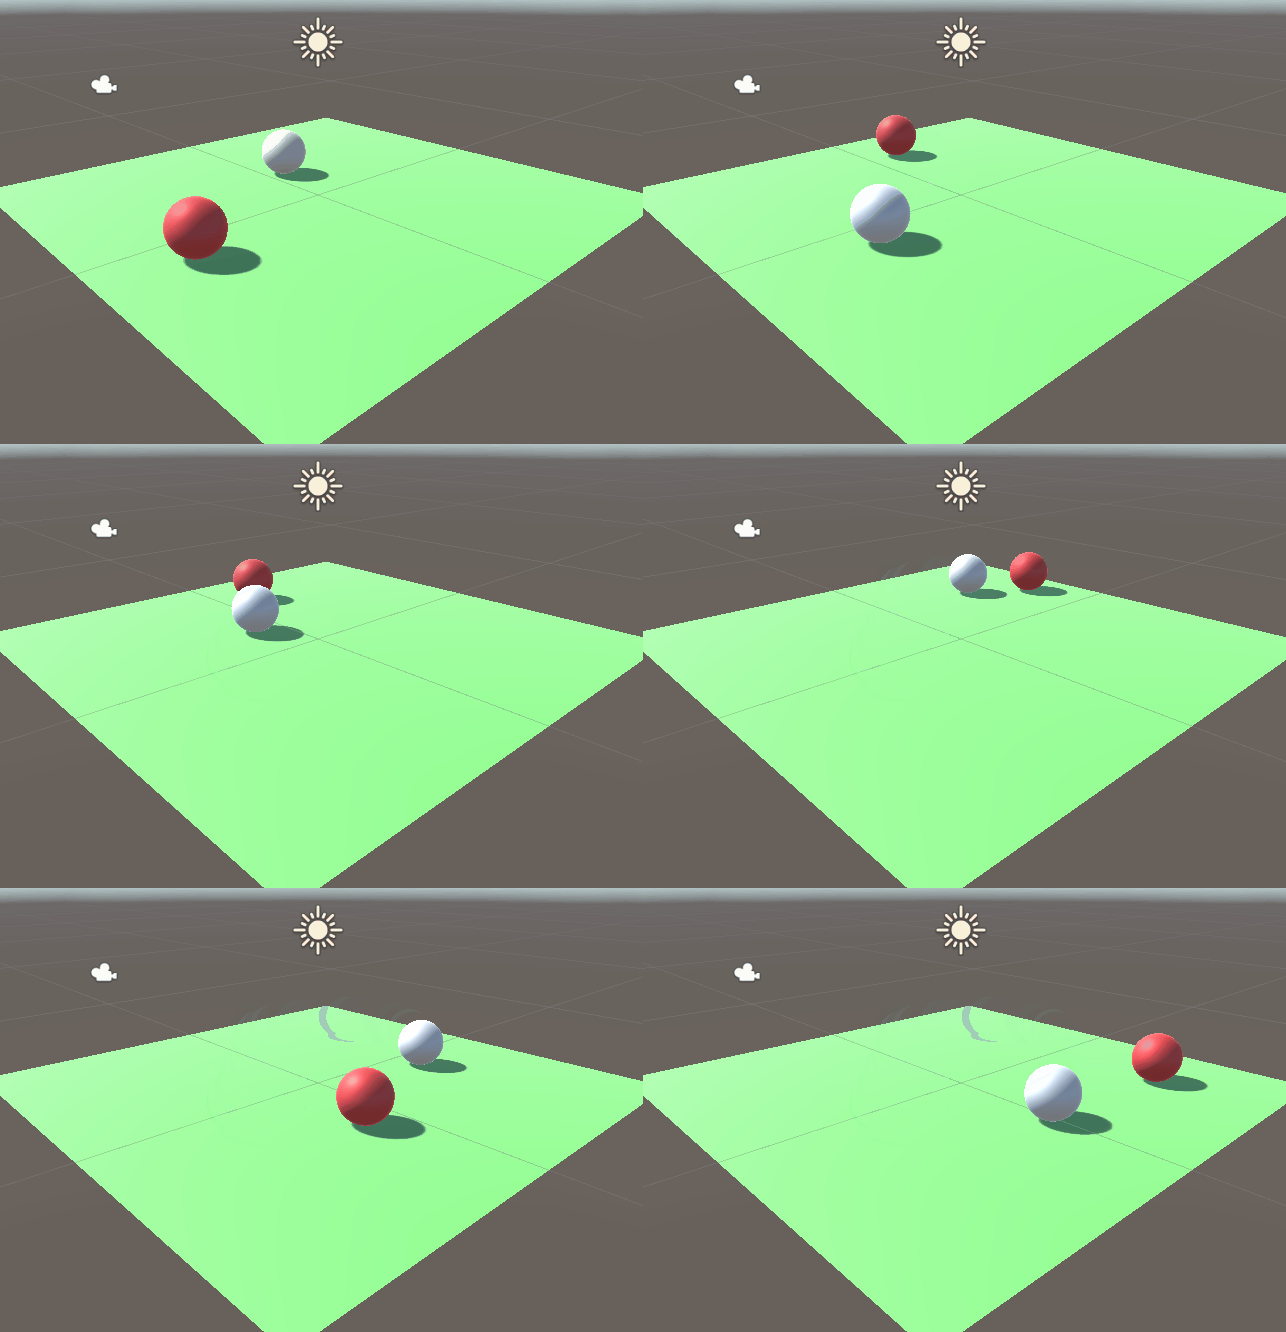
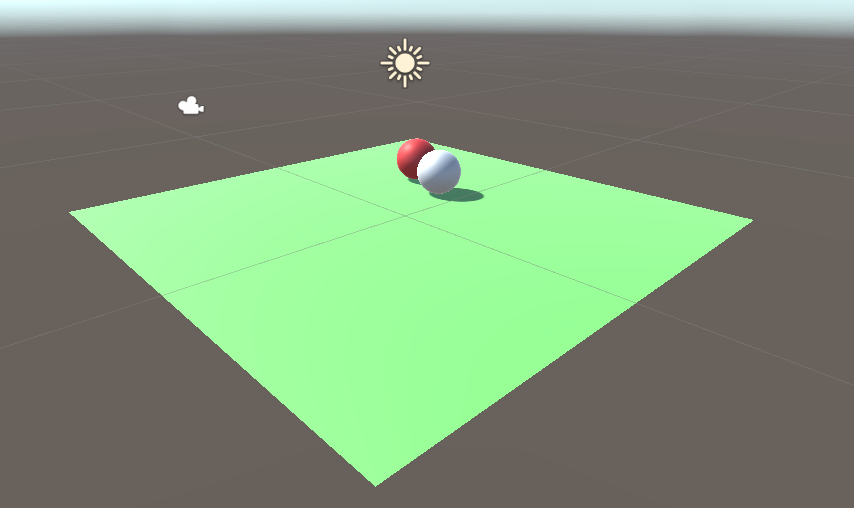
本次示例:训练一个追踪红球的白球AI
1. 新建Unity项目,导入package
进入Unity项目,在上方 Window => Package Manager,,然后安装Barracuda这个package(如果没看见,一般就是没有显示All packages或没显示preview package):
<img src="https://img2020.cnblogs.com/blog/1409576/202003/1409576-20200309202859875-769795640.png" width="70%" height="70%">
并将之前下载的ml-agents项目com.unity.ml-agents目录下Editor、Plugin、Runtime复制进新建Unity项目里(建议放在Assets文件夹内)

旧版本ml-agents项目UnitySDK文件夹已被分割为com.unity.ml-agents文件夹(Unity ml-agents包)和Project文件夹(示例项目,含若干个机器学习示例demo)。
2. 编写Agent脚本
RollerAgent 是将用于智能体对象的组件脚本:
//RollerAgent.cs

using UnityEngine;
using MLAgents;
using MLAgents.Sensors;
public class RollerAgent : Agent
{
    public Transform Target;
    public float speed = 10;
    private Rigidbody rBody;

    void Start()
    {
        rBody = GetComponent<Rigidbody>();
    }

    //收集观察结果
    public override void CollectObservations(VectorSensor sensor)
    {
        //观察目标球和智能体的位置
        sensor.AddObservation(Target.position);
        sensor.AddObservation(this.transform.position);
        //观察智能体的速度
        sensor.AddObservation(rBody.velocity.x);
        sensor.AddObservation(rBody.velocity.z);
        //在这里因为目标球是不会动的,智能体也不会在y轴上又运动,所以没有必要观察这些值的变化。
        //sensor.AddObservation(rBody.velocity.y);
    }

    //处理动作,并根据当前动作评估奖励值
    public override void AgentAction(float[] vectorAction)
    {
        //------ 动作处理
        // 接受两个动作数值
        Vector3 controlSignal = Vector3.zero;
        controlSignal.x = vectorAction[0];
        controlSignal.z = vectorAction[1];
        rBody.AddForce(controlSignal * speed);

        //------ 奖励信号
        float distanceToTarget = Vector3.Distance(this.transform.position, Target.position);
        // 到达目标球
        if (distanceToTarget < 1.42f)
        {
            //奖励值+1.0f
            SetReward(1.0f);
            Done();
        }

        // 掉落场景外
        if (this.transform.position.y < 0)
        {
            Done();
        }
    }

    //启发函数,玩家可手动操控智能体,用于手动调试智能体或启发模仿学习。
    public override float[] Heuristic()
    {
        var action = new float[2];
        action[0] = -Input.GetAxis("Horizontal");
        action[1] = Input.GetAxis("Vertical");
        return action;
    }

    //Reset时调用
    public override void AgentReset()
    {
        if (this.transform.position.y < 0)
        {
            //如果智能体掉下去,则重置位置+重置速度
            this.rBody.angularVelocity = Vector3.zero;
            this.rBody.velocity = Vector3.zero;
            this.transform.position = new Vector3(0, 0.5f, 0);
        }
        //将目标球重生至一个新的随机位置
        Target.position = new Vector3(UnityEngine.Random.value * 8 - 4, 0.5f, UnityEngine.Random.value * 8 - 4);
    }
}
Agent,即智能体,含有感知和行为——它通过观察环境然后做出相应的行为。在最常使用的强化学习里,智能体的训练模型类似一个黑盒。 每一次模拟步长中,智能体的感知会作为黑盒的输入,然后黑盒会输出行为选择,然后根据行为选择来让智能体做出行为。
当我们需要创建一个智能体类型时,让其继承Agent类,以用于重写智能体CollectObservations,AgentAction,AgentReset等方法。
CollectObservations()
- 每一个模拟步长都会被调用。
- 负责收集智能体的对环境的观察信息。
这部分类似于黑箱子的输入。值得注意的是,所需观察的信息越少越好。因此,我们需要尽可能减少不必要的观察信息,这会让训练变得更加快速、准确。
AgentAction()
- 每一个模拟步长都会被调用。
- 负责接受决策的行为选择从而让智能体做出行为。示例里,通过行为选择的2个float输入值来驱使球体移动,一旦掉出场景外,便调用Done()。
- 负责评估此步长的reward(奖励值)。示例里,只要触碰到目标球即可获得一定的reward。
如何根据实际问题设计reward往往是一个难点,设计的不好(例如部分奖励值过大)容易造成网络不收敛。
Heuristic()
- 通过玩家亲自操控智能体来输出行为选择。
亲自操控智能体可用于模仿学习或调试智能体的行为。
AgentReset()
- Done()被调用时,它才被调用。
- 负责重新设置场景,来准备下一次session。
当Done()被调用时,这意味着一次session的结束。然后深度强化学习模型评估整个session的reward并且重新设置场景,以准备下一次session。在示例里,为了让训练更加有效更加广泛化,因此给目标球设置的是随机位置(实际上智能体球也应该设置随机位置)。
3. 搭建好游戏场景
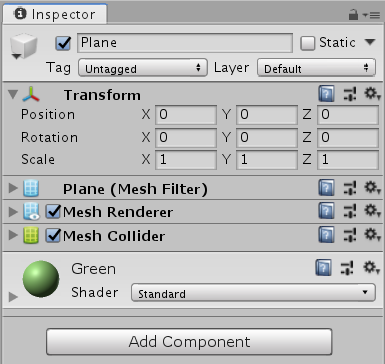
创建一个地板:
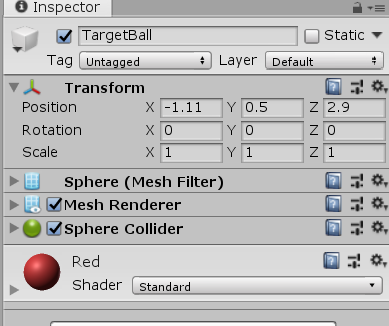
创建一个小球:
创建一个智能体(RollerAgent):
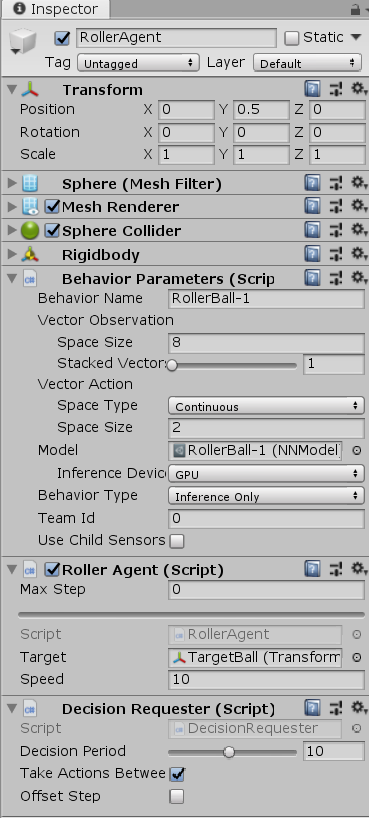
先创建一个带刚体的球体对象,然后我们需要给它挂载RollerAgent脚本(挂载后自动额外挂载BehaviorParameters脚本用于配置)和DecisionRequester脚本。
4. 调整脚本参数
Behavior Parameters
每个Agent还必须得附带一个行为参数脚本,行为参数脚本用于定义智能体如何做出决策。
Vector Observation Space Size:观察信息的大小。在本示例中应调整为8,因为示例智能体脚本总共需要观察的特征元素为2个3D位置+2个1D速度,因此总共需要空间为8个float大小。
Vector Action Space Size:动作矢量的大小。在本示例中应调整为2,因为智能体脚本里接受2个浮点型动作输入。动作矢量的元素可以选择两种类型:一种是离散型的整型数值,适用于离散动作,例如下棋的位置选择;另一种则是连续性的浮点数值,适用于连续动作,例如3个float值可以代表一个施加到智能体刚体的力或力矩。
Inference Device:调整为GPU,从而使用GPU来训练。
Behavior Type:行为类型,主要有Default、Heuristic、Inference三种模式。
- Default:默认训练模式,用于一般的强化学习。
- Heuristic Only:启发模式,玩家亲自操控智能体,可用于模仿学习或调试游戏场景。
- Inference Only:推理模式,运行训练好的模型。
Roller Agent
Max Step:决定智能体最多可以有多少步决策,超过限制后则强制Done。特殊地,设置为0意思是不限制步数。在本示例中应调整为0。
Decision Requester
Decision Period:决策间隔。在本示例中应调整为10。
目前场景预览:
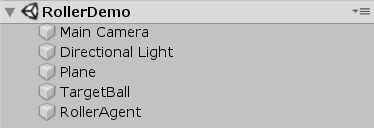
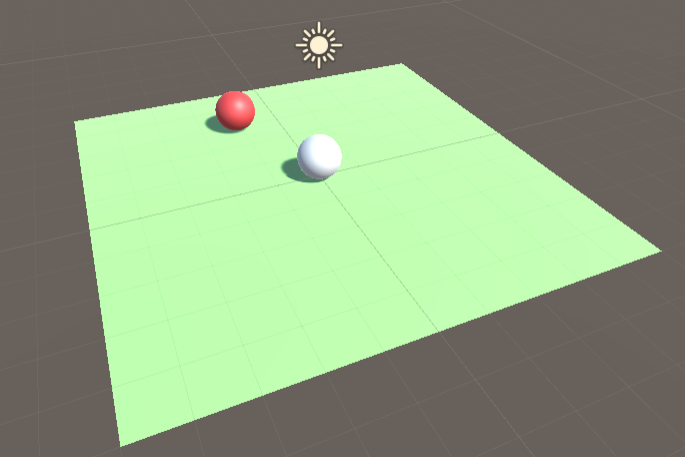
在这里,最好先Behavior Type切换成Heuristic Only模式用于调试游戏场景,运行Unity场景后可尝试自己用WASD键盘操控小球,测试游戏场景是否OK。然后确认无问题后再切换回Default。
5. 开始训练
然后现在可以打开开始菜单,直接使用cmd命令窗口, cd到之前下载ml-agents项目的目录里
cd C:\Downloads\ml-agents
再输入激活ml-agents环境:
activate ml-agents
开启训练:
mlagents-learn config/config.yaml --run-id=RollerBall-1 --train
- config/config.yaml是训练配置文件,RollerBall-1是你给训练出来的模型取的名字
- 此外注意config/config.yaml是不存在的,可以自己仿照官方的示例yaml文件修改配置而新建的。
下面是config.yaml示例:
default:
    trainer: ppo
    batch_size: 10
    beta: 5.0e-3
    buffer_size: 100
    epsilon: 0.2
    gamma: 0.99
    hidden_units: 128
    lambd: 0.95
    learning_rate: 3.0e-4
    max_steps: 3.0e5
    memory_size: 256
    normalize: false
    num_epoch: 3
    num_layers: 2
    time_horizon: 64
    sequence_length: 64
    summary_freq: 1000
    use_recurrent: false
    use_curiosity: false
    curiosity_strength: 0.01
    curiosity_enc_size: 128
    reward_signals:
        extrinsic:
            strength: 1.0
            gamma: 0.99
有关config参数具体配置将放在文末附录。

当出现如下画面:
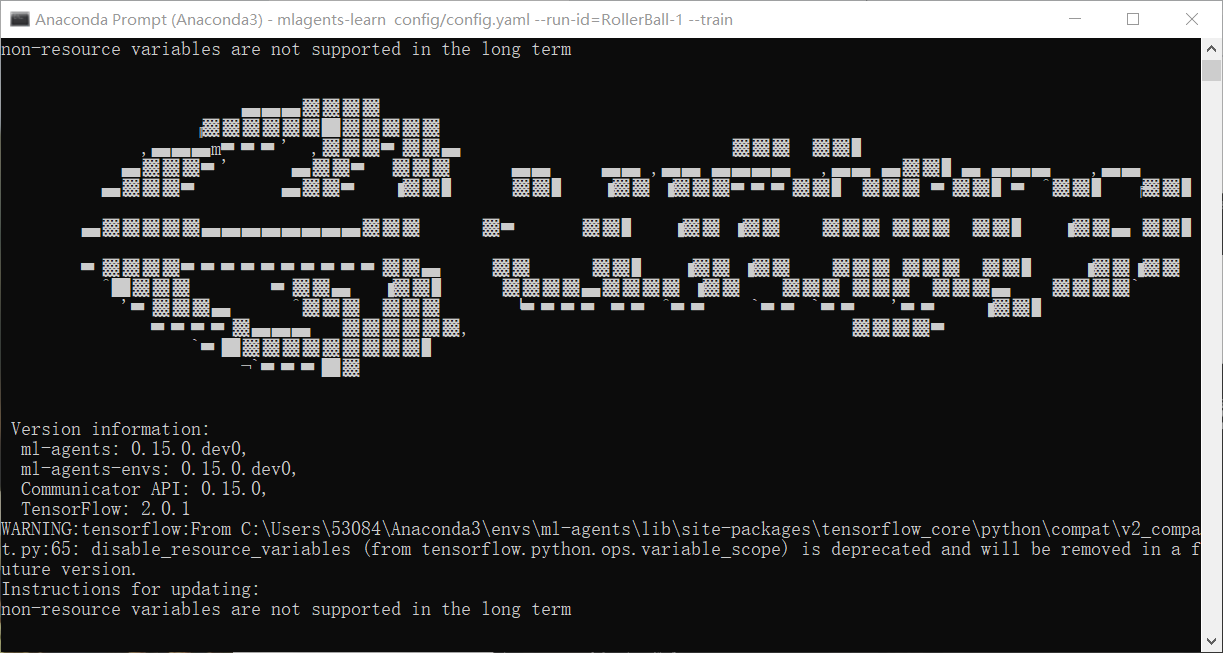
返还到Unity,点下运行键,那么你就会看到Unity执行训练。


你的命令窗口也会时刻告诉你训练阶段的信息:
- Step:模拟的步长次数
- Time Elapsed:所用时间
- Mean Reward:奖励平均值
- Std of Reward:奖励标准方差值
一般来说,随着训练的进行,奖励平均值越来越高,奖励标准方差值越来越低。这意味着智能体的行为越来越稳定趋向于获奖收益最高的行为。
现在可以去挂机等待结果了,亦或者在某个时间停止Unity场景运行。那么ml-agents会将目前为止训练出来的数据模型(.nn文件)保存到ml-agents\models目录下。
6. 将训练过的模型整合到Unity中

将训练出来的nn文件导入到Unity项目文件夹中,并在智能体Behavior Parameters脚本上的Model选择刚刚导入的nn文件;然后将Behavior Type调整为Inference Only。
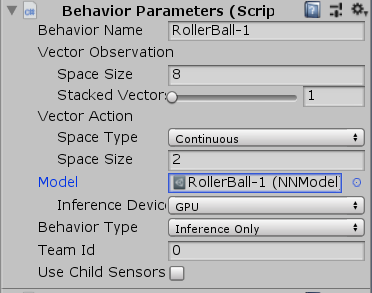
运行Unity场景,看看你跑出来的模型的蠢样了(笑)。
附录
config文件配置
参数配置(翻修中):
| 参数名 | 描述 | 适用算法 |
|---|---|---|
| trainer | The type of training to perform: "ppo", "sac", "offline_bc" or "online_bc". | PPO, SAC |
| batch_size | The number of experiences in each iteration of gradient descent. | PPO, SAC |
| batches_per_epoch | In imitation learning, the number of batches of training examples to collect before training the model. | |
| beta | The strength of entropy regularization. | PPO |
| buffer_size | The number of experiences to collect before updating the policy model. In SAC, the max size of the experience buffer. | PPO, SAC |
| buffer_init_steps | The number of experiences to collect into the buffer before updating the policy model. | SAC |
| epsilon | Influences how rapidly the policy can evolve during training. | PPO |
| hidden_units | The number of units in the hidden layers of the neural network. | PPO, SAC |
| init_entcoef | How much the agent should explore in the beginning of training. | SAC |
| lambd | The regularization parameter. | PPO |
| learning_rate | The initial learning rate for gradient descent. | PPO, SAC |
| learning_rate_schedule | Determines how learning rate changes over time. | PPO, SAC |
| max_steps | The maximum number of simulation steps to run during a training session. | PPO, SAC |
| memory_size | The size of the memory an agent must keep. Used for training with a recurrent neural network. See Using Recurrent Neural Networks. | PPO, SAC |
| normalize | Whether to automatically normalize observations. | PPO, SAC |
| num_epoch | The number of passes to make through the experience buffer when performing gradient descent optimization. | PPO |
| num_layers | The number of hidden layers in the neural network. | PPO, SAC |
| behavioral_cloning | Use demonstrations to bootstrap the policy neural network. See Pretraining Using Demonstrations. | PPO, SAC |
| reward_signals | The reward signals used to train the policy. Enable Curiosity and GAIL here. See Reward Signals for configuration options. | PPO, SAC |
| save_replay_buffer | Saves the replay buffer when exiting training, and loads it on resume. | SAC |
| sequence_length | Defines how long the sequences of experiences must be while training. Only used for training with a recurrent neural network. See Using Recurrent Neural Networks. | PPO, SAC |
| summary_freq | How often, in steps, to save training statistics. This determines the number of data points shown by TensorBoard. | PPO, SAC |
| tau | How aggressively to update the target network used for bootstrapping value estimation in SAC. | SAC |
| time_horizon | How many steps of experience to collect per-agent before adding it to the experience buffer. | PPO, SAC |
| train_interval | How often to update the agent. | SAC |
| num_update | Number of mini-batches to update the agent with during each update. | SAC |
| use_recurrent | Train using a recurrent neural network. See Using Recurrent Neural Networks. | PPO, SAC |
- PPO = Proximal Policy Optimization
- SAC = Soft Actor-Critic
- BC = Behavioral Cloning (Imitation)
- GAIL = Generative Adversarial Imitaiton Learning
参考
另外一提,最新的介绍文档资料示例等都在Unity官方机器学习的github项目,感兴趣可以持续保持关注它的更新:
[1] Unity官方机器学习的github项目 https://github.com/Unity-Technologies/ml-agents
[2] Unity官方博客机器学习概念详解(1) https://blogs.unity3d.com/2017/12/11/using-machine-learning-agents-in-a-real-game-a-beginners-guide/
[3] Unity官方博客机器学习概念详解(2) https://blogs.unity3d.com/2017/06/26/unity-ai-themed-blog-entries/
[4] Unity ml-agents概念详解国内翻译博客 https://blog.csdn.net/u010019717/article/details/80382933
来源:oschina
链接:https://my.oschina.net/u/4317491/blog/3591603