一、安装Python
安装过程很简单,打开安装文件一直点击next。
注意修改环境变量:在环境变量Path条目下添加Python环境路径。
二、安装vscode
略略略(很简单)。
三、安装Python插件
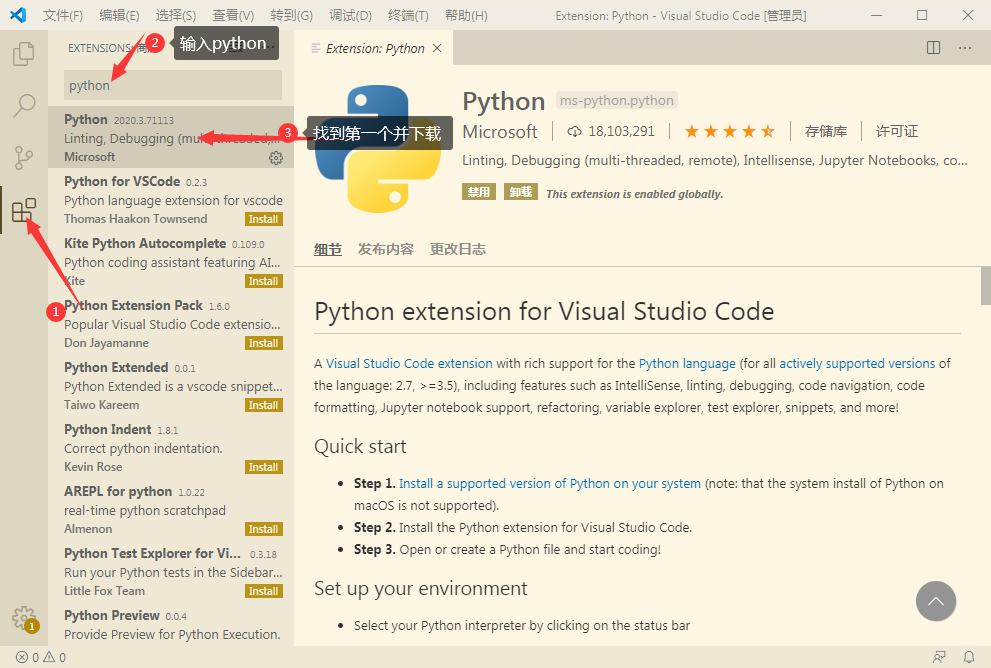
1.如下图,安装后打开软件,点击左边最下面的图标,搜索Python,选择列表的第一个插件并点击安装。
2.打开工作目录
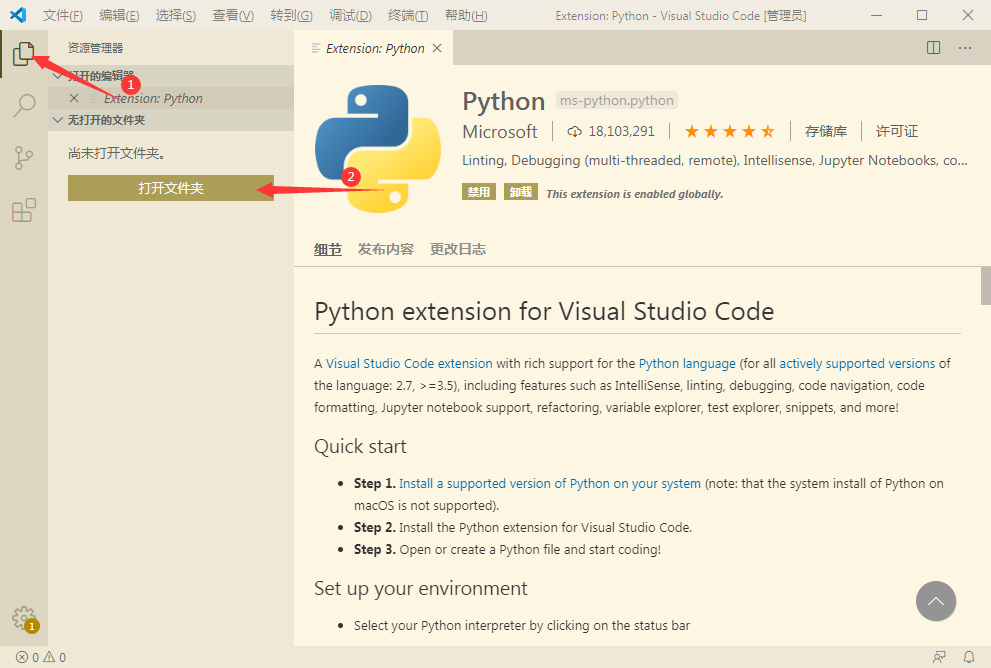
如下图,点击左边的 文件图标,再点击“打开文件夹”按钮,选择一个文件夹作为工作目录,之后新建的文件都会存放在这个目录下。
3.配置python的配置文件launch.json
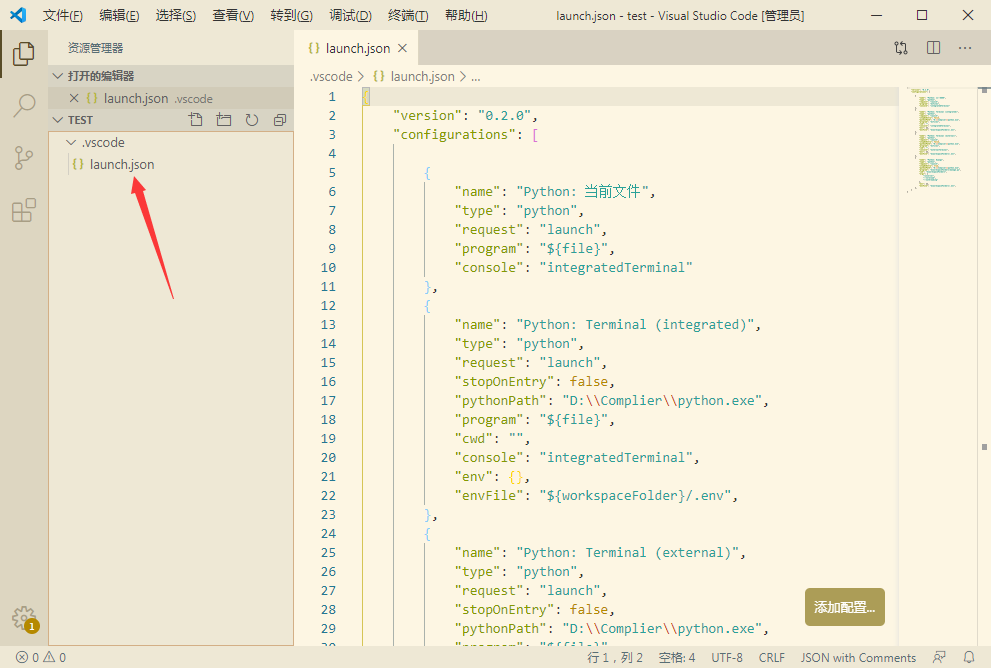
{
    // 使用 IntelliSense 了解相关属性。
    // 悬停以查看现有属性的描述。
    // 欲了解更多信息,请访问: https://go.microsoft.com/fwlink/?linkid=830387
    "version": "0.2.0",
    "configurations": [

        {
            "name": "Python: 当前文件",
            "type": "python",
            "request": "launch",
            "program": "${file}",
            "console": "integratedTerminal"
        },
        {
            "name": "Python: Terminal (integrated)",
            "type": "python",
            "request": "launch",
            "stopOnEntry": false,
            "pythonPath": "D:\\Complier\\python.exe",
            "program": "${file}",
            "cwd": "",
            "console": "integratedTerminal",
            "env": {},
            "envFile": "${workspaceFolder}/.env",
        },
        {
            "name": "Python: Terminal (external)",
            "type": "python",
            "request": "launch",
            "stopOnEntry": false,
            "pythonPath": "D:\\Complier\\python.exe",
            "program": "${file}",
            "cwd": "",
            "console": "externalTerminal",
            "env": {},
            "envFile": "${workspaceFolder}/.env",
        },
        {
            "name": "Python: Django",
            "type": "python",
            "request": "launch",
            "stopOnEntry": true,
            "pythonPath": "D:\\Complier\\python.exe",
            "program": "${workspaceFolder}/manage.py",
            "cwd": "${workspaceFolder}",
            "args": [
                "runserver",
                "--noreload",
                "--nothreading"
            ],
            "env": {},
            "envFile": "${workspaceFolder}/.env",
        },
    ]
}
4.settings.json文件配置
点击新建文件,命名为'settings.json'
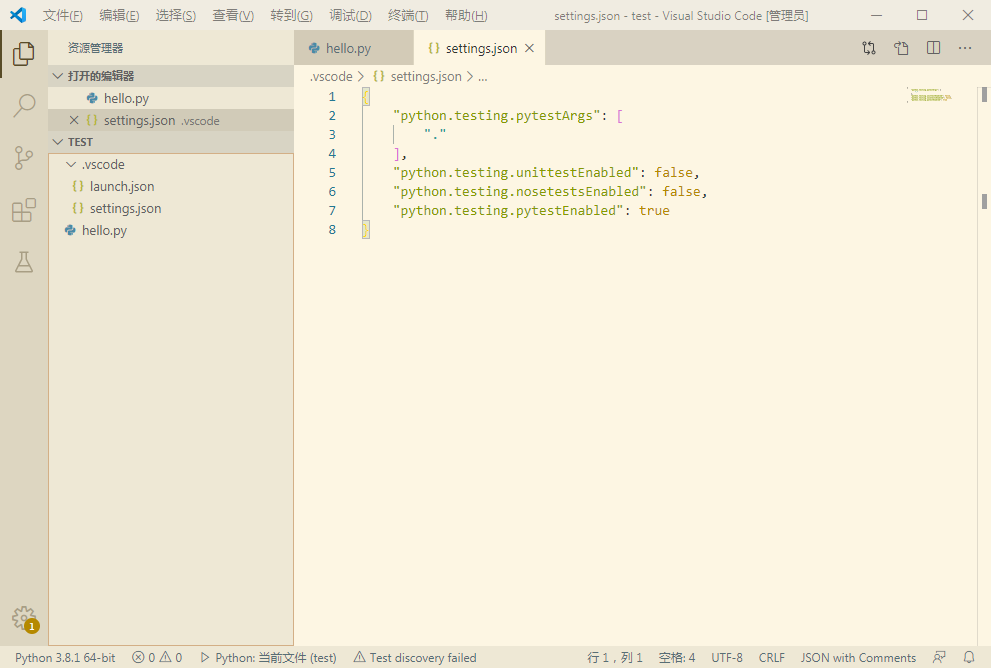
{
    "python.testing.pytestArgs": [
        "."
    ],
    "python.testing.unittestEnabled": false,
    "python.testing.nosetestsEnabled": false,
    "python.testing.pytestEnabled": true
}
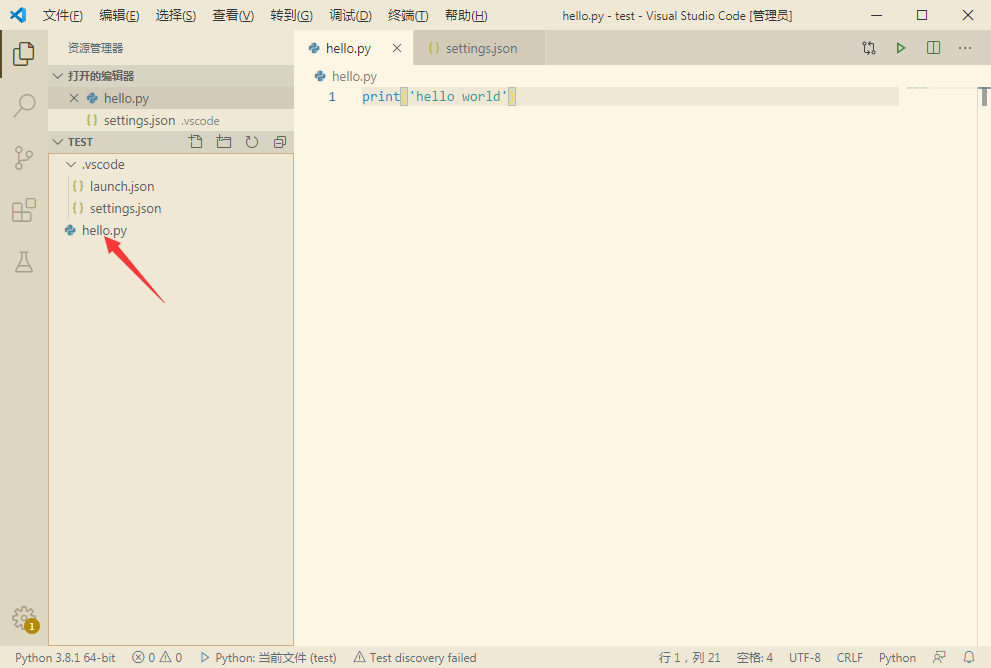
5.新建helloworld.py并运行
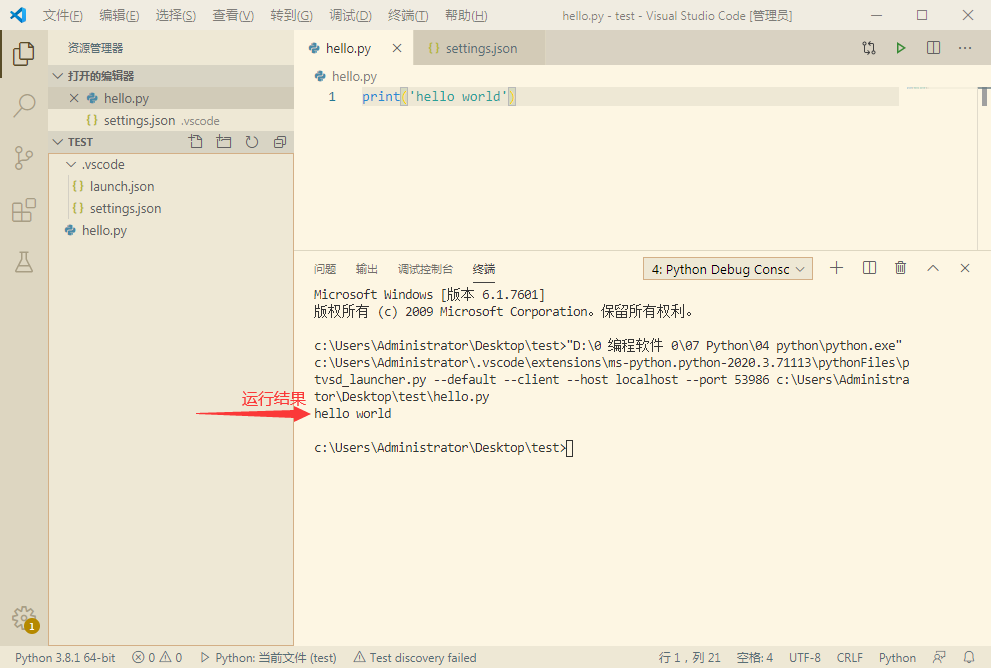
6.运行结果
点击调试
来源:https://www.cnblogs.com/sylg12138/p/12610413.html