一、Helm
1.1、什么是Helm
在没使用 helm 之前,向 kubernetes 部署应用,我们要依次部署 deployment、svc 等,步骤较繁琐。况且随着很多项目微服务化,复杂的应用在容器中部署以及管理显得较为复杂,helm 通过打包的方式,支持发布的版本管理和控制,很大程度上简化了 Kubernetes 应用的部署和管理
Helm 本质就是让 K8s 的应用管理(Deployment,Service 等 ) 可配置,能动态生成。通过动态生成 K8s 资源清单文件(deployment.yaml,service.yaml)。然后调用 Kubectl 自动执行 K8s 资源部署
Helm 是官方提供的类似于 YUM 的包管理器,是部署环境的流程封装。Helm 有两个重要的概念:chart 和release
- chart :是创建一个应用的信息集合,包括各种 Kubernetes 对象的配置模板、参数定义、依赖关系、文档说明等。chart 是应用部署的自包含逻辑单元。可以将 chart 想象成 apt、yum 中的软件安装包
- release :是 chart 的运行实例,代表了一个正在运行的应用。当 chart 被安装到 Kubernetes 集群,就生成一个 release。chart 能够多次安装到同一个集群,每次安装都是一个 release
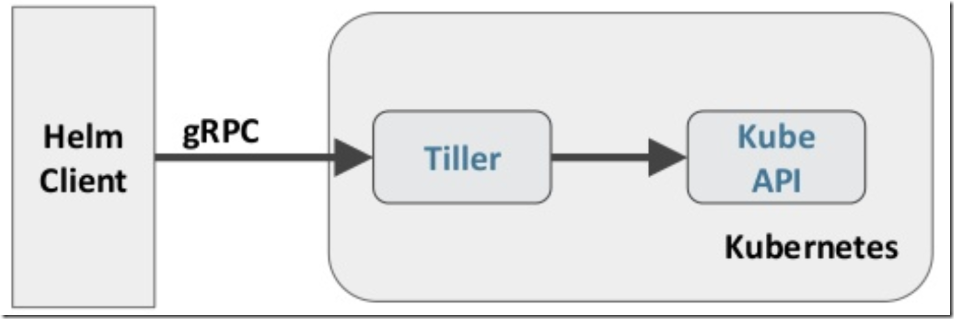
Helm 包含两个组件:Helm 客户端和 Tiller 服务器,如下图所示
Helm 客户端负责 chart 和 release 的创建和管理以及和 Tiller 的交互。Tiller 服务器运行在 Kubernetes 集群中,它会处理 Helm 客户端的请求,与 Kubernetes API Server 交互
1.2、Helm 部署
1)下载helm软件包
[root@k8s-master01 helm]# wget https://storage.googleapis.com/kubernetes-helm/helm-v2.13.1-linux-amd64.tar.gz
[root@k8s-master01 helm]# ls
helm-v2.13.1-linux-amd64.tar.gz
[root@k8s-master01 helm]# tar xf helm-v2.13.1-linux-amd64.tar.gz
[root@k8s-master01 helm]# ls
helm-v2.13.1-linux-amd64.tar.gz  linux-amd64
[root@k8s-master01 helm]# cp linux-amd64/helm /usr/local/bin/
[root@k8s-master01 helm]# chmod +x /usr/local/bin/helm
2)Kubernetes APIServer 开启了 RBAC 访问控制,所以需要创建 tiller 使用的 service account: tiller 并分配合适的角色给它,创建rbac-config.yaml 文件
[root@k8s-master01 helm]# cat rbac-config.yaml
apiVersion: v1
kind: ServiceAccount
metadata:
  name: tiller
  namespace: kube-system

---
apiVersion: rbac.authorization.k8s.io/v1beta1
kind: ClusterRoleBinding
metadata:
  name: tiller
roleRef:
  apiGroup: rbac.authorization.k8s.io
  kind: ClusterRole
  name: cluster-admin
subjects:
  - kind: ServiceAccount
    name: tiller
    namespace: kube-system
[root@k8s-master01 helm]# kubectl create -f rbac-config.yaml
serviceaccount/tiller created
clusterrolebinding.rbac.authorization.k8s.io/tiller created

#helm初始化
[root@k8s-master01 helm]# helm init --service-account tiller --skip-refresh
Creating /root/.helm
Creating /root/.helm/repository
Creating /root/.helm/repository/cache
Creating /root/.helm/repository/local
Creating /root/.helm/plugins
Creating /root/.helm/starters
Creating /root/.helm/cache/archive
Creating /root/.helm/repository/repositories.yaml
Adding stable repo with URL: https://kubernetes-charts.storage.googleapis.com
Adding local repo with URL: http://127.0.0.1:8879/charts
$HELM_HOME has been configured at /root/.helm.

Tiller (the Helm server-side component) has been installed into your Kubernetes Cluster.

Please note: by default, Tiller is deployed with an insecure 'allow unauthenticated users' policy.
To prevent this, run `helm init` with the --tiller-tls-verify flag.
For more information on securing your installation see: https://docs.helm.sh/using_helm/#securing-your-helm-installation
Happy Helming!

[root@k8s-master01 helm]# kubectl get pod -n kube-system
NAME                                   READY   STATUS    RESTARTS   AGE
coredns-5c98db65d4-6vgp6               1/1     Running   4          4d
coredns-5c98db65d4-8zbqt               1/1     Running   4          4d
etcd-k8s-master01                      1/1     Running   4          4d
kube-apiserver-k8s-master01            1/1     Running   4          4d
kube-controller-manager-k8s-master01   1/1     Running   4          4d
kube-flannel-ds-amd64-dqgj6            1/1     Running   0          17h
kube-flannel-ds-amd64-mjzxt            1/1     Running   0          17h
kube-flannel-ds-amd64-z76v7            1/1     Running   3          4d
kube-proxy-4g57j                       1/1     Running   3          3d23h
kube-proxy-qd4xm                       1/1     Running   4          4d
kube-proxy-x66cd                       1/1     Running   3          3d23h
kube-scheduler-k8s-master01            1/1     Running   4          4d
tiller-deploy-58565b5464-lrsmr         0/1     Running   0          5s

#查看helm版本信息
[root@k8s-master01 helm]# helm version
Client: &version.Version{SemVer:"v2.13.1", GitCommit:"618447cbf203d147601b4b9bd7f8c37a5d39fbb4", GitTreeState:"clean"}
Server: &version.Version{SemVer:"v2.13.1", GitCommit:"618447cbf203d147601b4b9bd7f8c37a5d39fbb4", GitTreeState:"clean"}
1.3、helm仓库
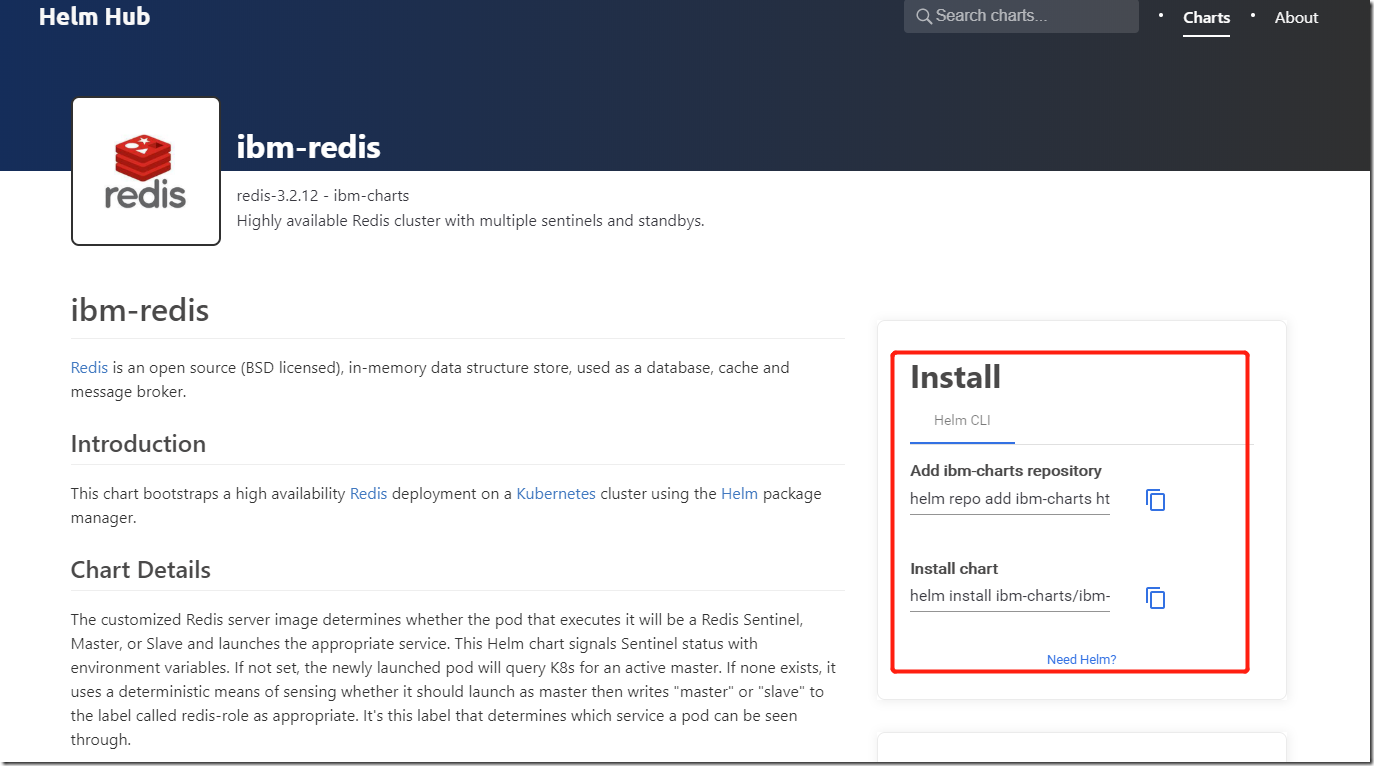
仓库地址:https://hub.helm.sh/
来源:https://www.cnblogs.com/hujinzhong/p/12268581.html

