互动编程习作——表现随机行为及牛顿运动学
主题:创作一组编程习作,体现随机行为及牛顿力学;
要求:编程语言与工具:编程工具不限;
作品:参考《代码本色》的第0~4章内容及其实例程序(自行在processing内下载),针对这5章分别编写1个习作(一共5个),每个习作都有不少于2个案例参考,且必须有一定的拓展。
第0章 引言
这一章我根据柏林噪声制作了移动的云层,如下图: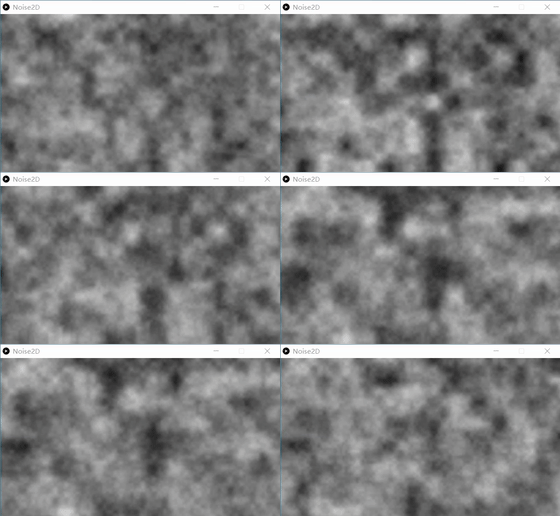
代码如下:(在代码本色原本2D柏林噪声的基础上再加上了一个参数,变成3D柏林噪声)
float increment = 0.02;
float t=0;
void setup()
{
  size(640, 360);
}
void draw()
{
  background(0);
  t++;  loadPixels();
  for (int x = 0; x < width; x++)
  {
      for (int y = 0; y < height; y++)
      {
           float bright = noise(x*0.02, y*0.02,t*0.02)*255;
           pixels[x+y*width] = color(bright);
      }
  }
  updatePixels();
}
第1章 向量
这一章主要学习了向量的运用,添加了Mover类,其中Mover中主要有三个重要参数:位置,速度和加速度:
Mover类工作就是不断更新物体的加速度—>速度—>位置,并显示在屏幕上。我利用这个类制作了一个小车,按WSAD键来控制它的移动,效果如下图: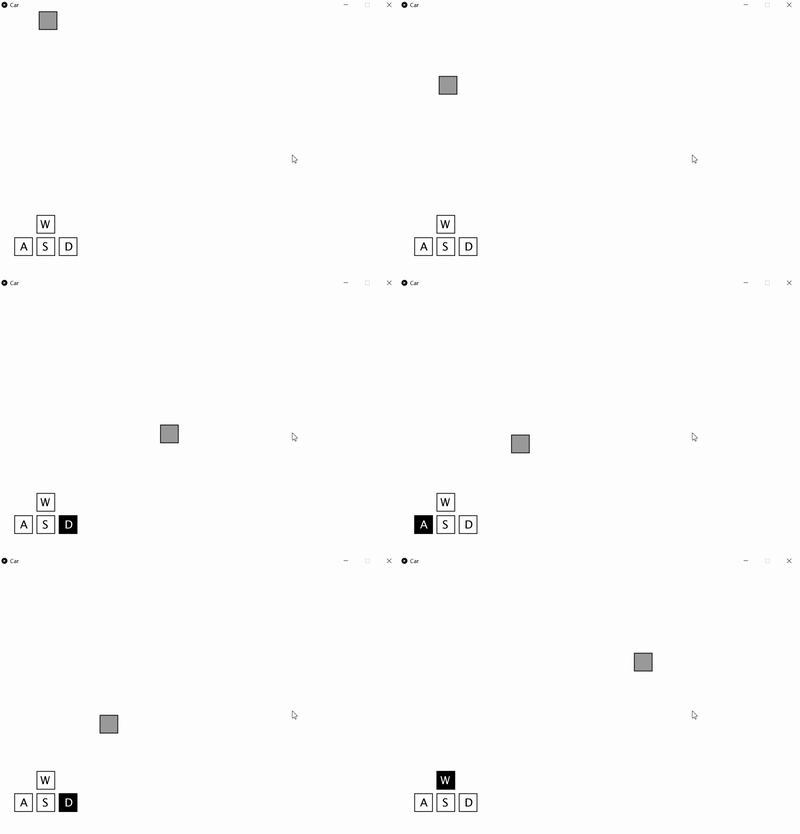
代码如下:
Mover类:
class Mover
{
  PVector position;
  PVector velocity;
  PVector acceleration;
  float topspeed;
  Mover()
  {
    position = new PVector(random(width),random(height));
    velocity = new PVector(0,0);
    topspeed = 5;
  }
  void update()
  {
    if(keyPressed)
    {
     if(key=='w')
     {
       acceleration = new PVector(0,-0.001);
       acceleration.normalize();
       acceleration.mult(0.2);
       velocity.add(acceleration);
       position.add(velocity);
     }
     if(key=='s')
     {
       acceleration = new PVector(0,0.001);
       acceleration.normalize();
       acceleration.mult(0.2);
       velocity.add(acceleration);
       position.add(velocity);
     }
     if(key=='a')
     {
        acceleration = new PVector(-0.001,0);
        acceleration.normalize();
        acceleration.mult(0.2);
        velocity.add(acceleration);
        position.add(velocity);
      }
      if(key=='d')
      {
        acceleration = new PVector(0.001,0);
        acceleration.normalize();
        acceleration.mult(0.2);
        velocity.add(acceleration);
        position.add(velocity);
      }
      velocity.limit(topspeed);
    }
}
void display()
{
  stroke(0);
  strokeWeight(2);
  fill(127,200);
  rect(position.x,position.y,48,48);
}
void drawkey()
{
    stroke(0);
    strokeWeight(2);
    fill(255);
    rect(100,550,48,48); //w
    rect(100,610,48,48); //s
    rect(40,610,48,48); //a
    rect(160,610,48,48); //d
    fill(0);
    textSize(30);
    text("W",110,585);
    text("S",115,645);
    text("A",55,645);
    text("D",175,645);
    if(keyPressed)
    {
      if(key=='w')
      {
        fill(0);
        rect(100,550,48,48);
        fill(255);
        text("W",110,585);
      }
      if(key=='s')
      {
        fill(0);
        rect(100,610,48,48);
        fill(255);
        text("S",115,645);
      }
      if(key=='a')
      {
        fill(0);
        rect(40,610,48,48);
        fill(255);
        text("A",55,645);
       }
       if(key=='d')
       {
         fill(0);
         rect(160,610,48,48);
         fill(255);
         text("D",175,645);
       }
     }
   }
}
Car类:
Mover Car;
void setup()
{
  size(1080,720);
  Car = new Mover();
}
void draw()
{
   background(255);
   Car.update();
   Car.display();
   Car.drawkey();
}
第2章 力
这一章也用到Mover这个类,因为力也是向量。
我主要改进了流体阻力这一小节的参考程序,原来的参考程序在小球入水时,给小球增加了水的阻力,但小球还是能够下沉,如下图: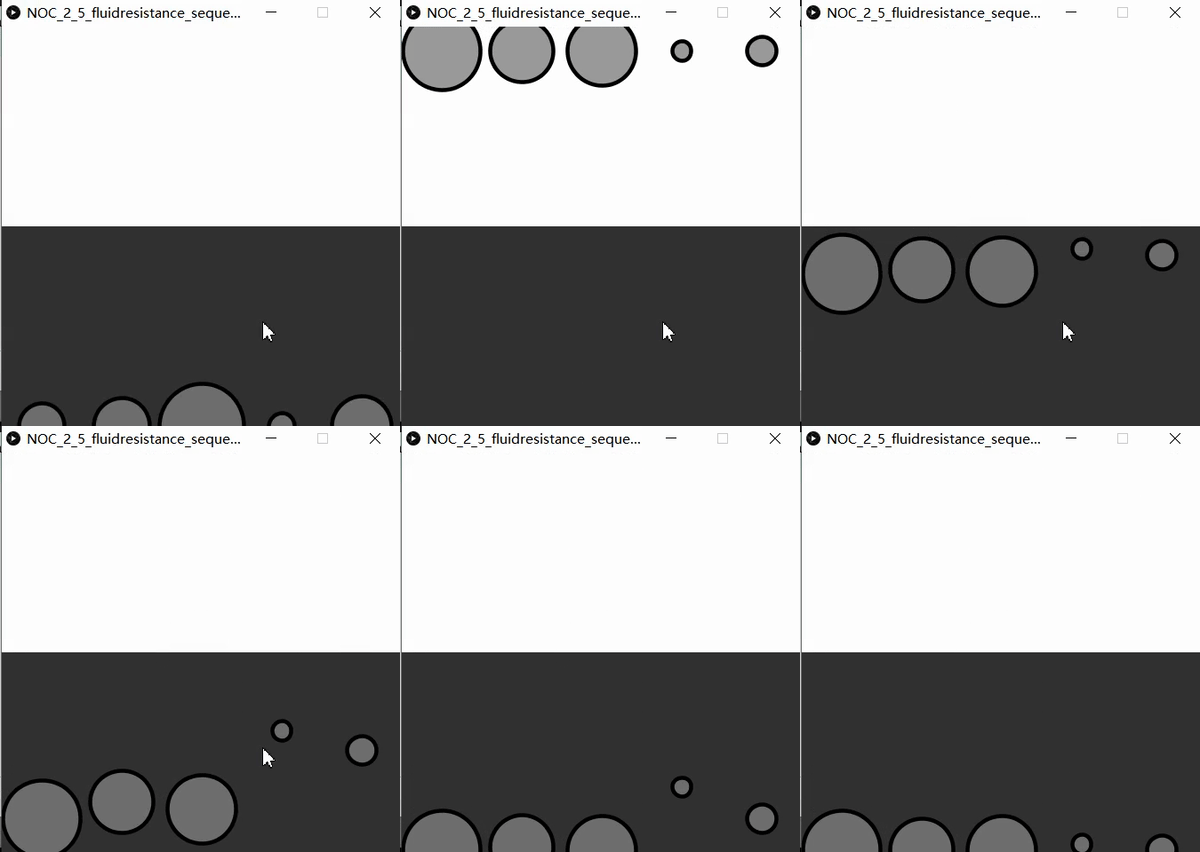
我在此基础上给小球添加了水的浮力,这样如果小球密度大于水的密度就会下沉,小于水的密度就会上浮,等于水的密度就会悬浮在水中,下面是小球和水的密度都为1时的效果: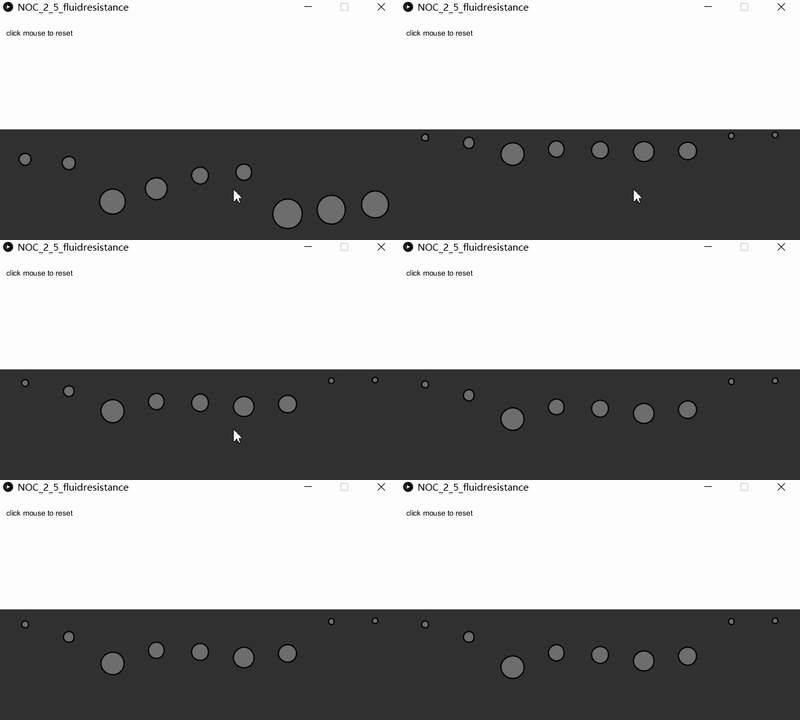
当液体密度为0.5,小球密度为1时: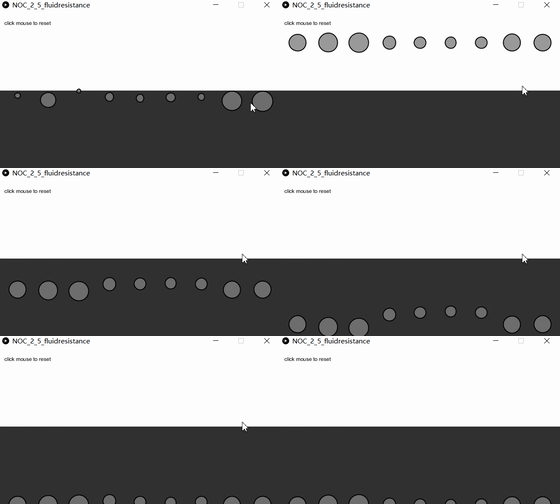
当液体密度为1.3,小球密度为1时: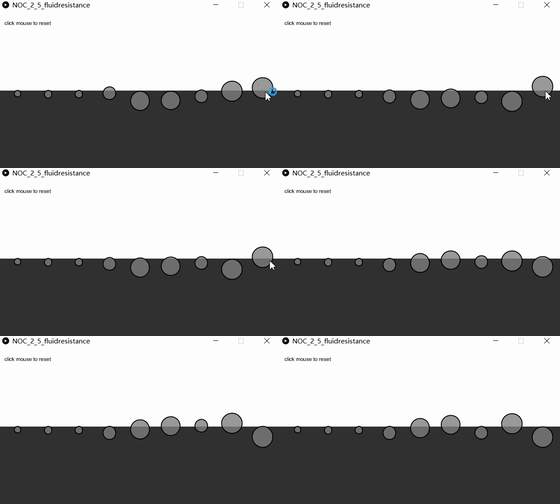
主要运用到物理上浮力的公式:F浮=ρ液gV排以及阻力公式f=k*v²
PVector drag(Mover m)
{
   float speed = m.velocity.mag();
   float dragMagnitude = c * speed*speed;
   float dis = m.position.y-height/2;
   if(dis>-m.mass*8&&dis<0)
   {
      float f=d*(-dis/(m.mass*16))*m.mass*0.1;
      dragMagnitude +=f;
   }
   if(dis>0&&dis<m.mass*8)
   {
      dragMagnitude = c * speed * speed;
      float f=d*((dis+m.mass*8)/(m.mass*16))*m.mass*0.1;
      dragMagnitude +=f;
   }
   if(dis>m.mass*8)
   {
     dragMagnitude = c * speed * speed;
     float f=d*m.mass*0.1;
     dragMagnitude +=f;
   }
   PVector dragForce = new PVector(0, -1);
   dragForce.normalize();
   dragForce.mult(dragMagnitude);
   return dragForce;
}
第3章 振荡
这一章我利用周期和三角函数的内容,制作了一个简单的鱼在水里游的动画,下图: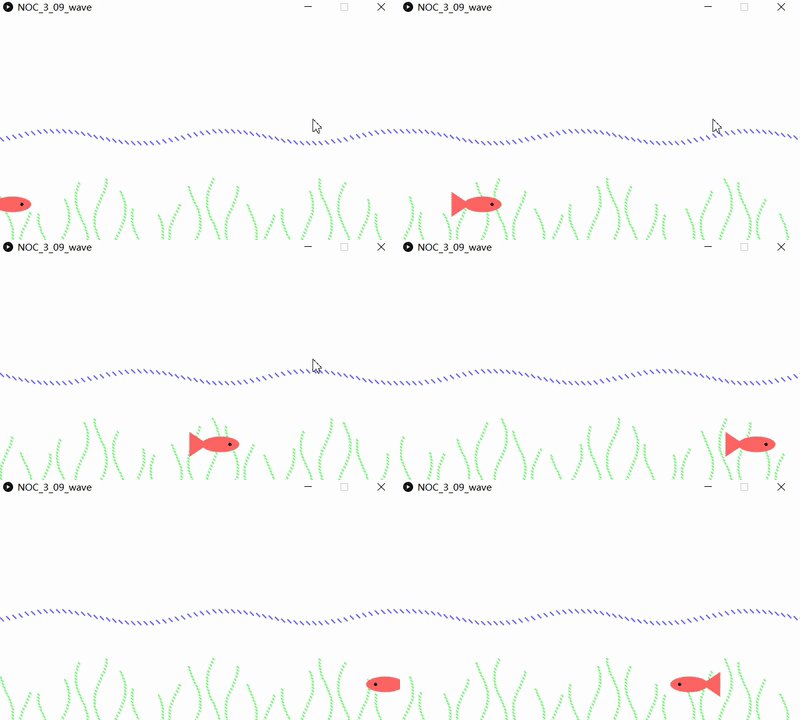
利用三角函数sin绘制水草和水面,再让小雨按sin函数周期性来回游动,代码如下:
float startAngle = 0;
float angleVel = 0.23;
boolean t=false;
void setup()
{
  size(640,360);
}
void draw()
{
  background(255);
  startAngle += 0.015;
  float angle = startAngle;
  //water
  for (int x = 0; x <= width; x += 10)
  {
    float y = map(sin(angle),-1,1,height/2,height/2+20);
    stroke(100,100,255);
    strokeWeight(2);
    line(x,y,x+5,y+5);
    angle += angleVel;
  }
  //watergrass
  for(int k=0;k<21;k++)
  {
    for (float y = height*4/5+sin(k)*30; y <= height; y += 5)
    {
       float x = map(sin(angle),-1,1,k*30,20+k*30);
       stroke(100,255,100);
       fill(100,255,100);
       strokeWeight(2);
       line(x,y,x+2,y+2);
       angle += angleVel;
    }
  }
   //fish
   float period = 800;
   float amplitude = 300;
   float x = amplitude * sin(TWO_PI * frameCount / period);
   noStroke();
   translate(width/2,height/2);
   if(x==-300)
   {
     t=false;
   }
   if(x==300)
   {
     t=true;
   }
   if(!t)
   {
     fill(255,100,100);
     triangle(x-20,height/3,x-50,height/3+20,x-50,height/3-20);
     ellipse(x,height/3,60,25);
     fill(0);
     ellipse(x+15,height/3,5,5);
   }
   if(t)
   {
   fill(255,100,100);
   triangle(x+20,height/3,x+50,height/3+20,x+50,height/3-20);
   ellipse(x,height/3,60,25);
   fill(0);
   ellipse(x-15,height/3,5,5);
 }
}
第4章 粒子系统
前面的章节我们或多或少在物理或者数学中有接触过,但是这一章对于我来说是新的知识。粒子系统有两个重要的类,一个是Particle类,另一个是ParticleSysterm类。
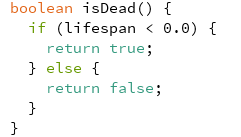
Particle类与之前的Mover类相似,但多出了一个重要的参数 生命周期,我们不能在队列中无限添加粒子,这样会引起程序奔溃,所要粒子有生命周期,当其生命周期耗尽时,应从队列中去除粒子,所以我们要在Upadate函数中逐渐递减粒子的生命周期并且添加一个判断粒子是否到达生命周期的函数:
ParticleSysterm类的主要功能是添加粒子,给粒子添加力,在屏幕上显示粒子,代码如下:
class ParticleSystem
{
  ArrayList<Particle> particles;
  PVector origin;
  ParticleSystem(PVector position)
  {
    origin = position.get();
    particles = new ArrayList<Particle>();
  }
  void addParticle(float v0)
  {
    particles.add(new Particle(origin,v0));
  }
  // A function to apply a force to all Particles
  void applyForce(PVector f)
  {
    for (Particle p: particles)
    {
       p.applyForce(f);
    }
  }
  void run()
  {
    for (int i = particles.size()-1; i >= 0; i--)
    {
      Particle p = particles.get(i);
      p.run();
      if (p.isDead())
      {
        particles.remove(i);
      }
    }
  }
}
在这一章的改写中我主要添加了一个互动功能,按下DOWN键蓄力,给所有粒子添加一个不定的初速度,蓄力越久,初速度越大。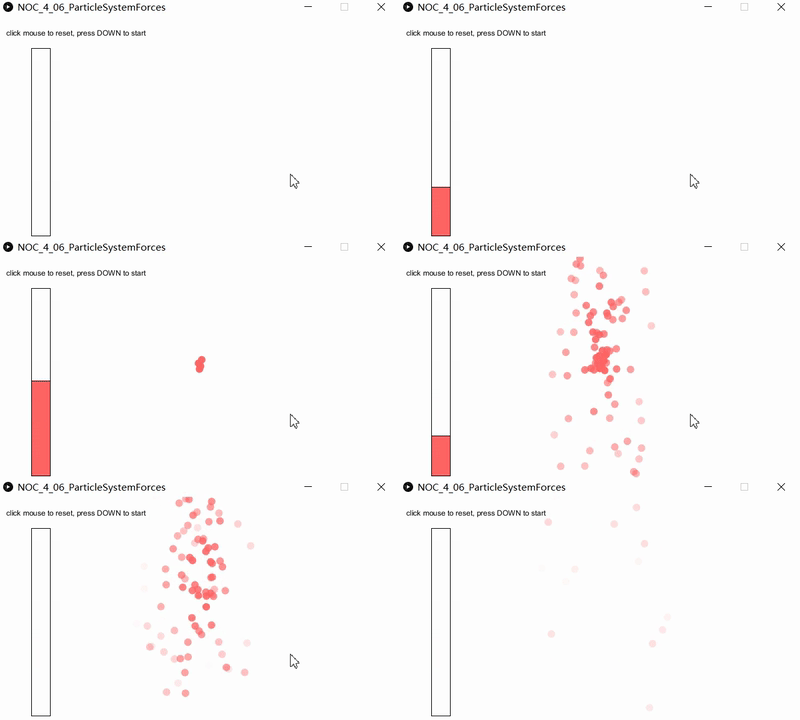
代码如下:
ParticleSystem ps;
int i=0;
boolean keyup=false;
float f=0,r=0;
void setup()
{
  size(640,360);
  ps = new ParticleSystem(new PVector(width/2,height/2));
}
void draw()
{
  background(255);
  stroke(0);
  fill(255);
  rect(50,50,30,300);
  // Apply gravity force to all Particles
  if(keyPressed)
  {
    if(keyCode==DOWN)
    {
      f+=0.001;
      fill(255,100,100);
      rect(50,50,30,300);
      fill(255);
      rect(50,50,30,300-1000*f);
    }
  }
  if(keyup)
  {
    PVector gravity = new PVector(0,0.1);
    ps.applyForce(gravity);
    if(i<f*1000)
    {
      r+=0.001;
      fill(255,100,100);
      rect(50,50,30,300);
      fill(255);
      rect(50,50,30,300-1000*f+1000*r);
      ps.addParticle(f*30);
      i++;
    }
    ps.run();
  }
  fill(0);
  text("click mouse to reset, press DOWN to start", 10, 30);
}
void keyReleased()
{
  keyup=true;
}
void mousePressed()
{
  reset();
}
// Restart all the Mover objects randomly
void reset()
{
  f=0;
  i=0;
  r=0;
  keyup=false;
}
通过代码本色这五章内容的学习,我学习到了如何用Processing3来模拟现实中的场景,例如鱼的游动,车的移动,物体在水中的状态等等。
来源:CSDN
作者:林困困
链接:https://blog.csdn.net/Slient116/article/details/103581774