- argo是云原生计算基金会的孵化项目 https://www.cncf.io/projects/。 Argo专为容器而设计,没有传统VM和基于服务器的环境的开销和限制,是一个基于kubernetes的CI/CD工具
- 目前CI(持续集成)方面还不完善,未提供event triggers( https://github.com/argoproj/argo/blob/master/examples/README.md#continuous-integration-example ),可以看下另一个云原生的CI/CD工具 tekton
- 更多介绍参考官网 https://github.com/argoproj/argo
- 安装argo controller,以官方最新为准https://github.com/argoproj/argo/releases
kubectl create namespace argo
kubectl apply -n argo -f https://raw.githubusercontent.com/argoproj/argo/v2.10.0-rc4/manifests/install.yaml
- 安装argo linux/mac客服端(可不安装,使用UI操作)
# Download the binary
curl -sLO https://github.com/argoproj/argo/releases/download/v2.10.0-rc4/argo-linux-amd64.gz

# Unzip
gunzip argo-linux-amd64.gz

# Make binary executable
chmod +x argo-linux-amd64

# Move binary to path
mv ./argo-linux-amd64 /usr/local/bin/argo

# Test installation
argo version
- 外网访问argo controller的Service(traefik https://my.oschina.net/u/160697/blog/4437939 ),官方也有登录方案,只是文档较少,选择自定义的一种方案
#通过以下命令生成(在线生成https://tool.oschina.net/htpasswd)帐号密码
#并替换Secret中的users
sudo apt install apache2-utils
echo $(htpasswd -nb admin gJv4EAfuXp5vFJ8)
替换第8行的users内容为上面echo的输出。增加basicAuth认证,增加认证后会增加Header(authorization),argo会判断此header。所以需要增加一个中间件删除authorization
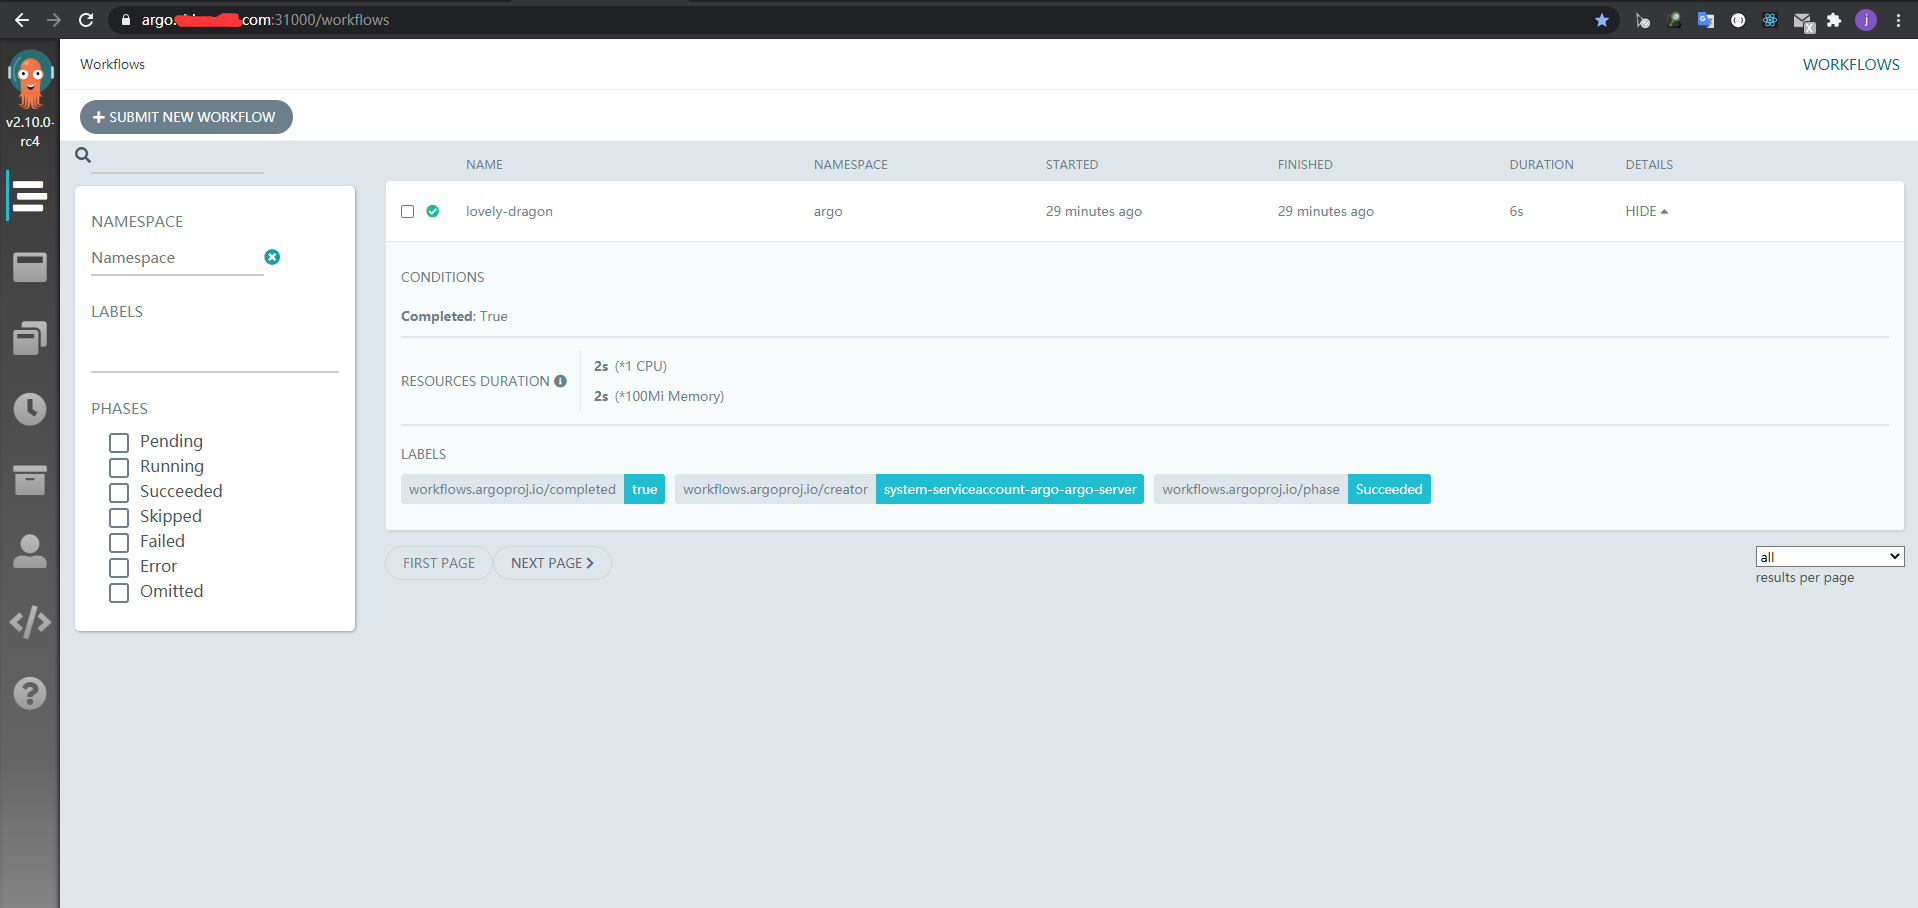
apiVersion: v1 kind: Secret metadata: name: argo-dashboard-auth-secret namespace: argo type: Opaque stringData: users: admin:$apr1$tQ1iFwRf$8SvGrGQcBT.RdZS73ULXH1 --- apiVersion: traefik.containo.us/v1alpha1 kind: Middleware metadata: name: argo-dashboard-auth namespace: argo spec: basicAuth: secret: argo-dashboard-auth-secret --- apiVersion: traefik.containo.us/v1alpha1 kind: Middleware metadata: name: remove-argo-auth-header namespace: argo spec: headers: customRequestHeaders: authorization: "" # Removes --- apiVersion: traefik.containo.us/v1alpha1 kind: IngressRoute metadata: name: argo-dashboard namespace: argo spec: entryPoints: - websecure routes: - kind: Rule match: Host(`argo.your_domain.com`) services: - name: argo-server port: 2746 middlewares: - name: argo-dashboard-auth - name: remove-argo-auth-header tls: certResolver: aliyun domains: - main: "argo.your_domain.com" - 效果

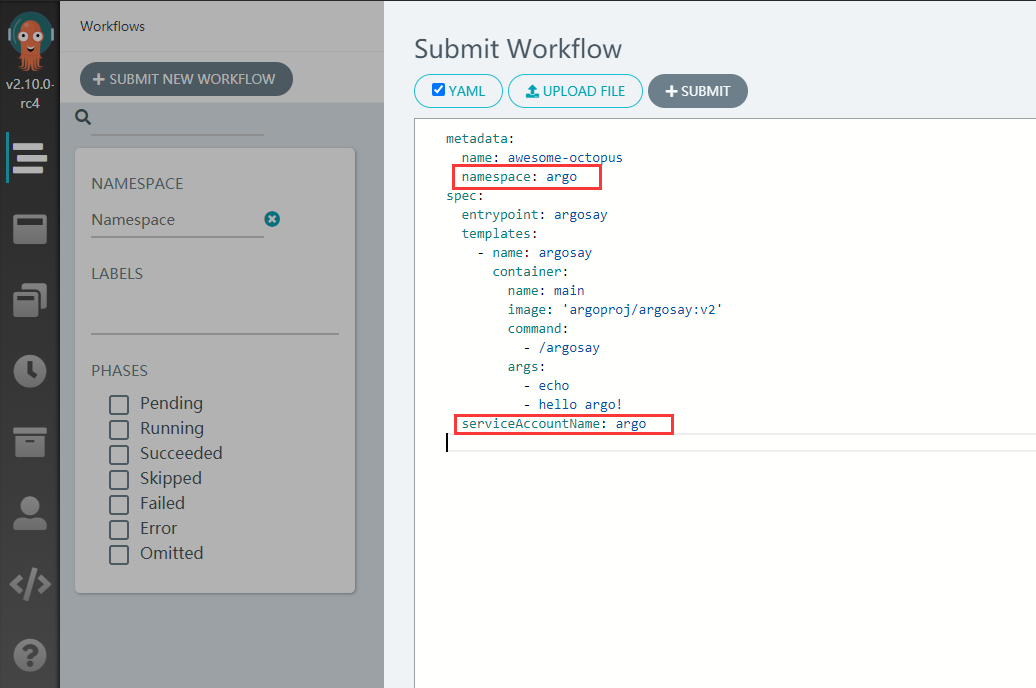
- 创建一个官方默认的workflow。
- 需要注意的是namespace选择argo,spec下增加serviceAccountName: argo
- 使用kubectl apply -n argo -f https://raw.githubusercontent.com/argoproj/argo/v2.10.0-rc4/manifests/install.yaml创建时,只在命名空间argo里创建了ServiceAccount
- 如不修改会报以下错误:Failed to establish pod watch: unknown (get pods)
- 如需在其它命名空间使用,参考后面

- 如果需要在其它命名空间下创建workflow。需要创建ServiceAccount。以下为argo-rbac.yaml
#argo-rbac.yaml
apiVersion: v1
kind: ServiceAccount
metadata:
  name: workflow
---
apiVersion: rbac.authorization.k8s.io/v1
kind: Role
metadata:
  name: workflow-role
rules:
# pod get/watch is used to identify the container IDs of the current pod
# pod patch is used to annotate the step's outputs back to controller (e.g. artifact location)
- apiGroups:
  - ""
  resources:
  - pods
  verbs:
  - get
  - watch
  - patch
# logs get/watch are used to get the pods logs for script outputs, and for log archival
- apiGroups:
  - ""
  resources:
  - pods/log
  verbs:
  - get
  - watch
---
apiVersion: rbac.authorization.k8s.io/v1
kind: RoleBinding
metadata:
  name: workflow-binding
roleRef:
  apiGroup: rbac.authorization.k8s.io
  kind: Role
  name: workflow-role
subjects:
- kind: ServiceAccount
  name: workflow
- 创建ServiceAccount。可把default改为其它命名空间,创建后使用也必须加serviceAccountName: workflow
kubectl apply -n default -f argo-rbac.yaml
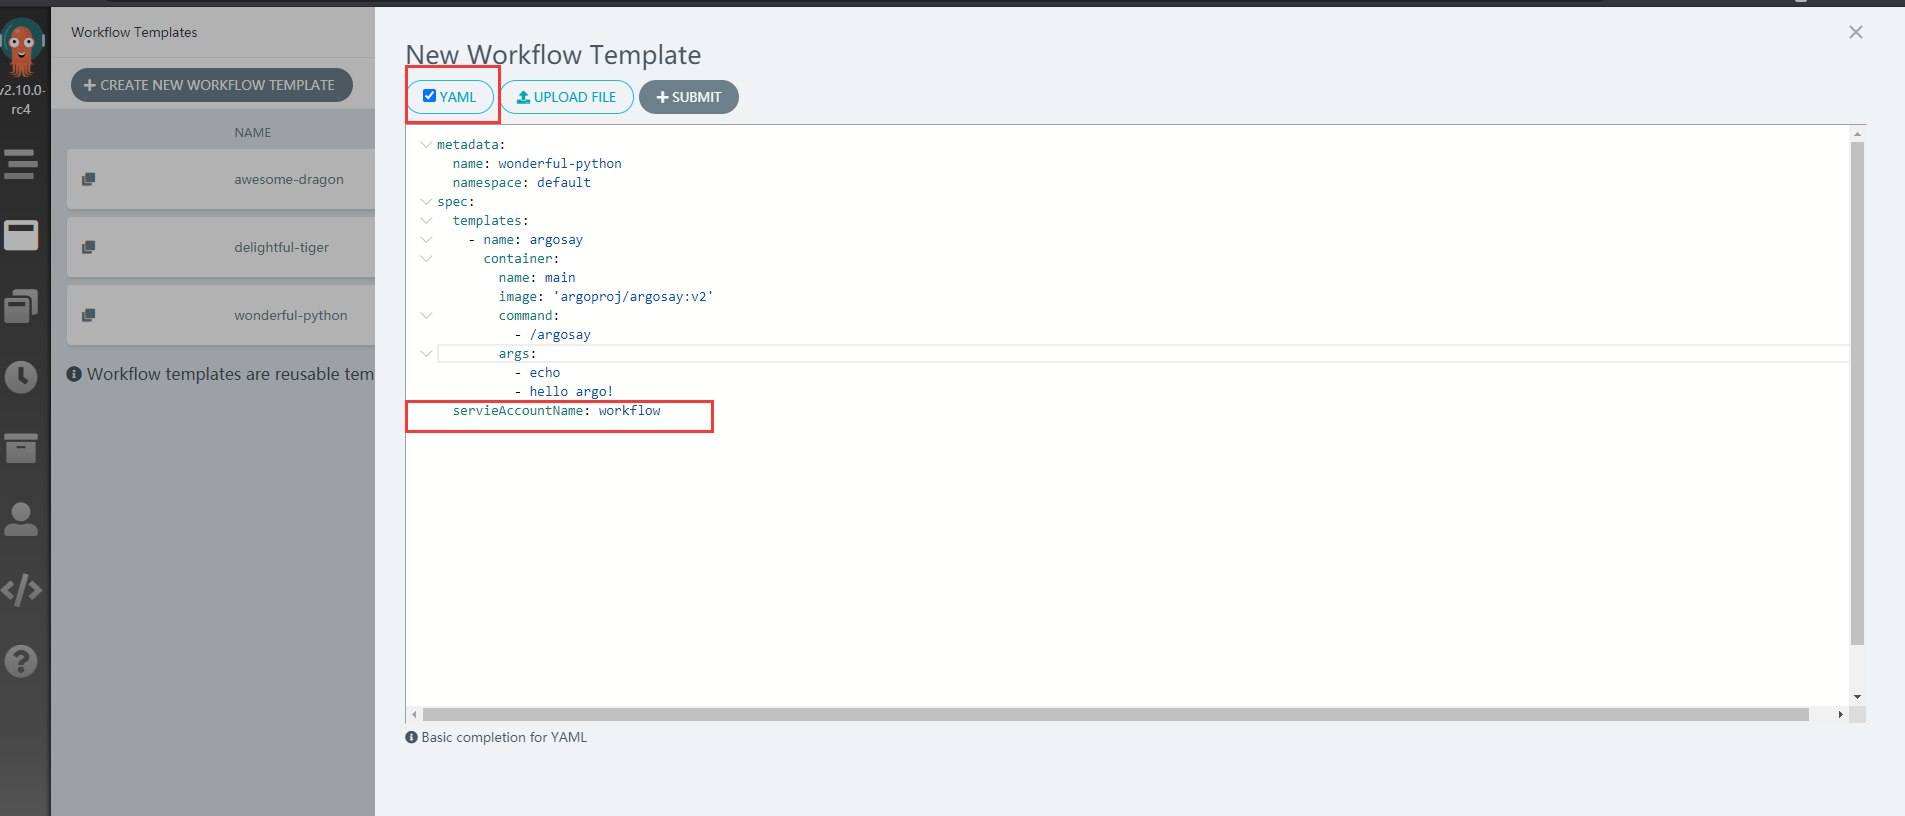
- 使用Workflow Template

增加一行serviceAccountName: workflow
创建后就可以通过此模板部署k8s程序

来源:oschina
链接:https://my.oschina.net/u/160697/blog/4454853