OCR与Tesseract介绍
将图片翻译成文字一般被称为光学文字识别(Optical Character Recognition,OCR)。可以实现OCR 的底层库并不多,目前很多库都是使用共同的几个底层OCR 库,或者是在上面进行定制。
Tesseract 是一个OCR 库,目前由Google 赞助(Google 也是一家以OCR 和机器学习技术闻名于世的公司)。Tesseract 是目前公认最优秀、最精确的开源OCR 系统。
除了极高的精确度,Tesseract 也具有很高的灵活性。它可以通过训练识别出任何字体(只要这些字体的风格保持不变就可以),也可以识别出任何Unicode 字符。
Tesseract的安装与使用
Tesseract的Windows安装包下载地址为: http://digi.bib.uni-mannheim.de/tesseract/tesseract-ocr-setup-4.00.00dev.exe ,下载后双击直接安装即可。安装完后,需要将Tesseract添加到系统变量中。在CMD中输入tesseract -v, 如显示以下界面,则表示Tesseract安装完成且添加到系统变量中。
识别简体中文,需要事先安装简体中文语言包,下载地址为:https://github.com/tesseract-ocr/tessdata/find/master/chi_sim.traineddata ,再讲chi_sim.traineddata放在C:\Program Files (x86)\Tesseract-OCR\tessdata目录下。
Python图像处理之图片验证码识别
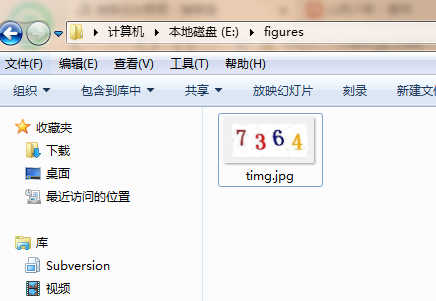
利用Tesseract软件来识别图片中的英文与中文,本文将具体介绍如何在Python中利用Tesseract软件来识别验证码(数字加字母)。
本文将具体介绍如何利用Python的图像处理模块pillow和OCR模块pytesseract来识别上述验证码(数字加字母)。
我们识别上述验证码的算法过程如下:
-
- 将原图像进行灰度处理,转化为灰度图像;
- 获取图片中像素点数量最多的像素(此为图片背景),将该像素作为阈值进行二值化处理,将灰度图像转化为黑白图像(用来提高识别的准确率);
- 去掉黑白图像中的噪声,噪声定义为:以该点为中心的九宫格的黑点的数量小于等于4;
- 利用pytesseract模块识别,去掉识别结果中的特殊字符,获得识别结果。
完整的Python代码如下:
import os
import pytesseract
from PIL import Image
from collections import defaultdict

# tesseract.exe所在的文件路径
pytesseract.pytesseract.tesseract_cmd = 'C://Program Files (x86)/Tesseract-OCR/tesseract.exe'


# 获取图片中像素点数量最多的像素
def get_threshold(image):
    pixel_dict = defaultdict(int)

    # 像素及该像素出现次数的字典
    rows, cols = image.size
    for i in range(rows):
        for j in range(cols):
            pixel = image.getpixel((i, j))
            pixel_dict[pixel] += 1

    count_max = max(pixel_dict.values())  # 获取像素出现出多的次数
    pixel_dict_reverse = {v: k for k, v in pixel_dict.items()}
    threshold = pixel_dict_reverse[count_max]  # 获取出现次数最多的像素点

    return threshold


# 按照阈值进行二值化处理
# threshold: 像素阈值
def get_bin_table(threshold):
    # 获取灰度转二值的映射table
    table = []
    for i in range(256):
        rate = 0.1  # 在threshold的适当范围内进行处理
        if threshold * (1 - rate) <= i <= threshold * (1 + rate):
            table.append(1)
        else:
            table.append(0)
    return table


# 去掉二值化处理后的图片中的噪声点
def cut_noise(image):
    rows, cols = image.size  # 图片的宽度和高度
    change_pos = []  # 记录噪声点位置

    # 遍历图片中的每个点,除掉边缘
    for i in range(1, rows - 1):
        for j in range(1, cols - 1):
            # pixel_set用来记录该店附近的黑色像素的数量
            pixel_set = []
            # 取该点的邻域为以该点为中心的九宫格
            for m in range(i - 1, i + 2):
                for n in range(j - 1, j + 2):
                    if image.getpixel((m, n)) != 1:  # 1为白色,0位黑色
                        pixel_set.append(image.getpixel((m, n)))

            # 如果该位置的九宫内的黑色数量小于等于4,则判断为噪声
            if len(pixel_set) <= 4:
                change_pos.append((i, j))

    # 对相应位置进行像素修改,将噪声处的像素置为1(白色)
    for pos in change_pos:
        image.putpixel(pos, 1)

    return image  # 返回修改后的图片


# 识别图片中的数字加字母
# 传入参数为图片路径,返回结果为:识别结果
def OCR_lmj(img_path):
    image = Image.open(img_path)  # 打开图片文件
    imgry = image.convert('L')  # 转化为灰度图

    # 获取图片中的出现次数最多的像素,即为该图片的背景
    max_pixel = get_threshold(imgry)

    # 将图片进行二值化处理
    table = get_bin_table(threshold=max_pixel)
    out = imgry.point(table, '1')

    # 去掉图片中的噪声(孤立点)
    out = cut_noise(out)

    # 保存图片
    # out.save('E://figures/img_gray.jpg')

    # 仅识别图片中的数字
    # text = pytesseract.image_to_string(out, config='digits')
    # 识别图片中的数字和字母
    text = pytesseract.image_to_string(out)

    # 去掉识别结果中的特殊字符
    exclude_char_list = ' .:\\|\'\"?![],()~@#$%^&*_+-={};<>/¥'
    text = ''.join([x for x in text if x not in exclude_char_list])
    # print(text)

    return text


def main():
    # 识别指定文件目录下的图片
    # 图片存放目录figures
    dir = 'E://figures'

    correct_count = 0  # 图片总数
    total_count = 0  # 识别正确的图片数量

    # 遍历figures下的png,jpg文件
    for file in os.listdir(dir):
        if file.endswith('.png') or file.endswith('.jpg'):
            # print(file)
            image_path = '%s/%s' % (dir, file)  # 图片路径

            answer = file.split('.')[0]  # 图片名称,即图片中的正确文字
            recognizition = OCR_lmj(image_path)  # 图片识别的文字结果

            print((answer, recognizition))
            if recognizition == answer:  # 如果识别结果正确,则total_count加1
                correct_count += 1

            total_count += 1

    print('Total count: %d, correct: %d.' % (total_count, correct_count))
    '''
    # 单张图片识别
    image_path = 'E://figures/code .jpg'
    OCR_lmj(image_path)
    '''

if __name__:
    main()
运行结果如下:

来源:oschina
链接:https://my.oschina.net/u/4336077/blog/3408428
