一、PHPUnit是什么?
1、它是一款轻量级的PHP测试框架,地址:http://www.phpunit.cn
2、手册:http://www.phpunit.cn/
二、为什么要用PHPUnit?
1、可以通过命令操控测试脚本
2、可以测试性能
3、可以测试代码覆盖率
4、可以自动化的更新测试用例的参数数据
5、各种格式的日志
三、phpunit安装
1、下载phpunit:wget https://phar.phpunit.de/phpunit.phar
2、修改下载文件的权限:chmod +x phpunit.phar
3、将phpunit设置为全局变量:mv phpunit.phar /usr/local/bin/phpunit
4、查看phpunit版本:phpunit -V
5、还可以按照第三方工具包 cd path/项目 composer require phpunit/phpunit
四、编写第一个单元测试用例
下面我们开始编写第一个单元测试用例。在编写测试用例时,要遵守如下的phpunit的规则:
1 一般地,在测试用例中,可以扩展PHPUnit\Framework\TestCase类,这样就可以使用象setUp(),tearDown()等方法了。
2 测试用例的名字最好是使用约定俗成的格式,即在被测试类的后面加上”Test”,比如要测试的类为Connect,则测试用例的命名为ConnectTest。
3 在一个测试用例中的所有的测试方法,在命名时都应该以test+测试方法名去命名,如testDoesLikeWaffles(),要注意的是该方法必须是声明为public类型的。当然可以在你的测试用例中包含private的方法,但它们不能被phpunit所调用。
4 测试方法中是不能接收参数的。
下面首先举个简单的例子,代码如下:
namespace Server;
class Connect
{
public function connectToServer($serverName = null)
{
if ($serverName == null) {
throw new Exception("That's not a server name!");
}
$fp = fsockopen($serverName, 80);
$client = new Client();
$client->serverNmae = $serverName;
return ($fp) ? true : false;
}
public function returnSampleObject() { return $this; }
}
1
2
3
4
5
6
7
8
9
10
11
12
13
14
15
16
17
18
上面的代码其实是实现连接到一个指定的服务器的功能,那么我们可以编写测试代码如下:
namespace tests;
use PHPUnit\Framework\TestCase;
use Server\Connect;
class ConnectTest extends TestCase
{
public function setUp() { }
public function tearDown() { }
public function testConnectionIsValid()
{
// test to ensure that the object from an fsockopen is valid
$connObj = new Connect();
$serverName = 'www.baidu.com';
$this->assertTrue($connObj->connectToServer($serverName) !== false);
}
}
1
2
3
4
5
6
7
8
9
10
11
12
13
14
15
16
17
18
19
20
21
在上面的代码中,由于继承了PHPUnit\Framework\TestCase类,因此在setUp和tearDown方法中,不需要编写任何代码。SetUp方法是在每个测试用例运行前进行一些初始化的工作,而tearDown则在每个测试用例运行后进行一些比如资源的释放等工作。在测试方法中,通过使用phpunit的断言assertTrue去判断所返回的布尔值是否为真,这里是通过调用Connect.php中的connectToServe方法去判断能否连接上服务器。
接下来我们运行这个单元测试,在命令行下输入代码:
phpunit /path/to/tests/ConnectTest.php
即可,可以看到测试顺利通过的话,会输出以下结果:
PHPUnit 6.5.3 by Sebastian Bergmann and contributors.
. 1 / 1 (100%)
Time: 260 ms, Memory: 10.00MB
OK (1 test, 1 assertion)
1
2
3
4
5
6
7
8
记录测试日志:
日志多种格式:http://www.phpunit.cn/manual/5.7/zh_cn/textui.html#textui.clioptions
phpunit ArrayTest.php --log-tap log.txt
TAP version 13
ok 1 - ArrayTest::testArrayIsEmpty
ok 2 - ArrayTest::testarrayHasKey
1..2
1
2
3
4
5
6
可以看到,上面是通过了测试。默认情况下,phpunit是会运行测试用例中的所有测试方法的。下面再介绍下phpunit中相关的几个断言:
AssertTrue/AssertFalse 断言是否为真值还是假
AssertEquals 判断输出是否和预期的相等
AssertGreaterThan 断言结果是否大于某个值,同样的也有LessThan(小于),GreaterThanOrEqual(大于等于),
LessThanOrEqual (小于等于).
AssertContains 判断输入是否包含指定的值
AssertType 判断是否属于指定类型
AssertNull 判断是否为空值
AssertFileExists 判断文件是否存在
AssertRegExp 根据正则表达式判断
1
2
3
4
5
6
7
8
9
五、PHPUnit测试代码覆盖率
可以通过配置phpunit.xml设置需要测试的代码路径或文件
例如:phpunit.xml的配置(放在项目根目录)
<<?xml version="1.0" encoding="UTF-8"?>
<phpunit bootstrap="vendor/autoload.php"
backupGlobals="false"
backupStaticAttributes="false"
colors="true"
convertErrorsToExceptions="true"
convertNoticesToExceptions="true"
convertWarningsToExceptions="true"
processIsolation="false"
stopOnFailure="false"
syntaxCheck="false">
<testsuites>
<testsuite name="Application Test Suite">
<directory suffix=".php">./tests/</directory>
</testsuite>
</testsuites>
<filter>
<whitelist>
<directory suffix=".php">src/</directory>
</whitelist>
</filter>
<logging>
<log type="coverage-html" target="./runtime/tests/report" lowUpperBound="35"
highLowerBound="70"/>
<log type="coverage-clover" target="./runtime/tests/coverage.xml"/>
<log type="coverage-php" target="./runtime/tests/coverage.serialized"/>
<log type="coverage-text" target="php://stdout" showUncoveredFiles="false"/>
<log type="junit" target="./runtime/tests/logfile.xml" logIncompleteSkipped="false"/>
<log type="testdox-html" target="./runtime/tests/testdox.html"/>
<log type="testdox-text" target="./runtime/tests/testdox.txt"/>
</logging>
</phpunit>
1
2
3
4
5
6
7
8
9
10
11
12
13
14
15
16
17
18
19
20
21
22
23
24
25
26
27
28
29
30
31
32
33
<filter><whitelist> 必须要写不然会报错Error: Incorrect whitelist config, no code coverage will be generated.(没有代码可测试)
1、通过生成html页面查看代码覆盖率
通过执行命令:phpunit --coverage-html ./coverage ./src/test
命令解释:
--coverage-html:生成覆盖率结果的html
coverage:html生成目录,可以重新定义
./src/test:测试用例目录(也可以是单个测试用例文件)
1
2
3
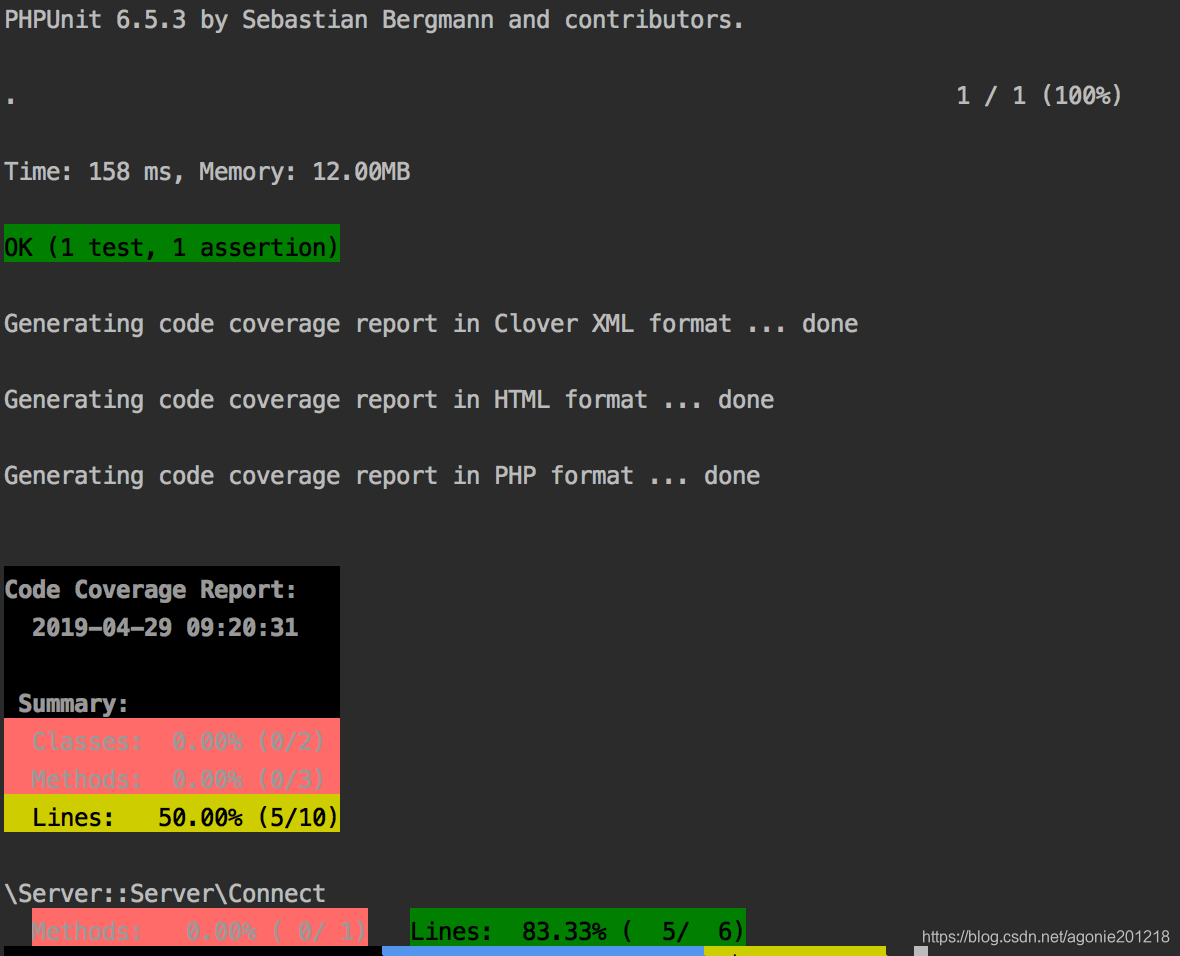
覆盖率结果
2、通过生成的text文件查看代码覆盖率
通过执行命令:phpunit --coverage-text ./src/test > test.log
命令解释:
`--coverage-html`:生成覆盖率结果的text
`./src/test`:测试用例目录(也可以是单个测试用例文件)
`> test.log`:存放覆盖率结果的文件(文件名称自己定义)
1
2
3
可以清晰的看到总覆盖率和每个文件的覆盖率。
覆盖率计算问题:
1、类:只有类中所有代码都执行了,覆盖率才为100%;
2、方法:类中的方法每一行都执行了,覆盖率才算100%。例如:类中有5个方法,有两个方法每一行执行了,覆盖率为:40%;
3、行:每一行代码都执行了就是100%;
六、PHPUnit.xml 配置文件
具体xml看上方。添加PHPUnit.xml之后就可以通过命令phpunit可批量执行单元测试;下面来讲讲他的配置选项。
bootstrap="./booten.php"
在测试之前加载的的PHP 文件,一般可以做一个初始化工作
<testsuite name="actionsuitetest">
<directory suffix=".php">action</directory>
<file>HuiyuanZhanghuOrder.php</file>
</testsuite>
1
2
3
4
测试套件,如果想测试页面,action,model 可以多加几个测试套件
name: 套件名称
directory :套件测试的目录,目录下一般放测试文件的用例
suffix :测试文件后缀,如果不填写,则默认后缀为Test.php,即phpunit 默认会执行Test.php 的文件
action:测试目录名
file:可以单独设置测试文件
exclude:排除不需要测试的文件
<php>
<includePath>.</includePath>
<ini name="foo" value="bar"/>
<const name="foo" value="bar"/>
<var name="foo" value="bar"/>
<env name="foo" value="bar"/>
<post name="foo" value="bar"/>
<get name="foo" value="bar"/>
<cookie name="foo" value="bar"/>
<server name="foo" value="bar"/>
<files name="foo" value="bar"/>
<request name="foo" value="bar"/>
</php>
1
2
3
4
5
6
7
8
9
10
11
12
13
这段xml 可以对应以下PHP 代码
includePath
ini_set('foo', 'bar');
define('foo', 'bar');
$GLOBALS['foo'] = 'bar';
$_ENV['foo'] = 'bar';
$_POST['foo'] = 'bar';
$_GET['foo'] = 'bar';
$_COOKIE['foo'] = 'bar';
$_SERVER['foo'] = 'bar';
$_FILES['foo'] = 'bar';
$_REQUEST['foo'] = 'bar';
1
2
3
4
5
6
7
8
9
10
11
12
具体参考:https://phpunit.readthedocs.io/zh_CN/latest/configuration.html#
源码地址,欢迎start
Introduction
单元测试是几个现代敏捷开发方法的基础,使得PHPUnit成为许多大型PHP项目的关键工具。这个工具也可以被Xdebug扩展用来生成代码覆盖率报告 ,并且可以与phing集成来自动测试,最后它还可以和Selenium整合来完成大型的自动化集成测试。
这是对PHPUnit的一个Demo。一步步带你走入PHPUnit。基础文档
Getting started
# clone the project
git clone https://github.com/AndyYoungCN/PHPUnitDemo
# install dependency
composer install
# install phpunit if uninstall
wget https://phar.phpunit.de/phpunit.phar
chmod +x phpunit.phar
mv phpunit.phar /usr/local/bin/phpunit
phpunit -V
cd PHPUnitDemo
phpunit
1
2
3
4
5
6
7
8
9
10
11
12
13
14
15
结果

文档引导
来源:oschina
链接:https://my.oschina.net/u/3371661/blog/3169153