新闻列表
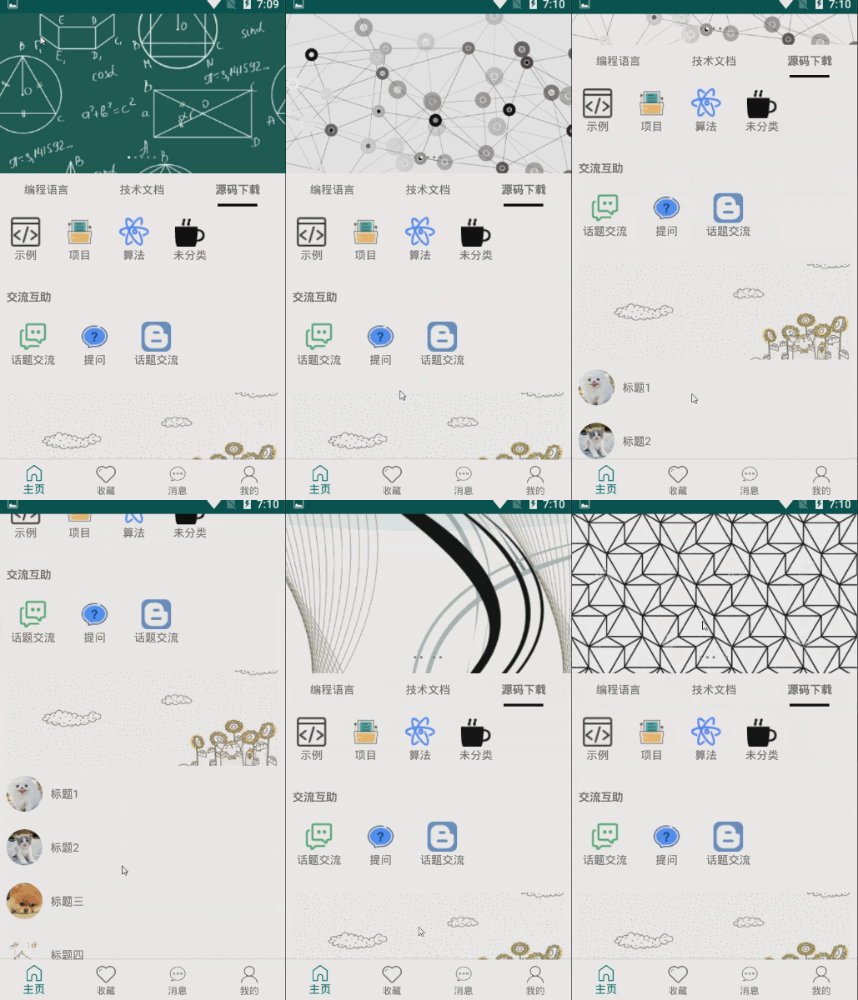
添加新闻列表可以使用RecyclerView。但是有个问题,RecyclerView只会在内部滚动,不会带动整个屏幕滚动。所以在原根布局外层添加androidx.core.widget.NestedScrollView,并且在原先根局部,添加android:descendantFocusability,解决进入页面跳入页面底部的问题。
·添加RecyclerView
<androidx.recyclerview.widget.RecyclerView
        android:id="@+id/homepage_news_container"
        android:layout_width="match_parent"
        android:layout_height="wrap_content"
        android:layout_below="@+id/homepage_line5"
        android:layout_marginTop="10dp"/>
·新建RecyclerView三种item样式,分别表示推荐文章图片,一般文章标题和下划线
fragment_home_news_item_recommand.xml
<?xml version="1.0" encoding="utf-8"?>
<LinearLayout xmlns:android="http://schemas.android.com/apk/res/android"
    android:orientation="vertical" android:layout_width="match_parent"
    android:layout_height="wrap_content">
    <ImageView
        android:id="@+id/homepage_news_item_recommand"
        android:layout_width="match_parent"
        android:layout_height="120dp"
        android:layout_marginLeft="10dp"
        android:layout_marginRight="10dp"
        android:scaleType="centerCrop"/>

</LinearLayout>
fragment_home_news_item_normal.xml
<?xml version="1.0" encoding="utf-8"?>
<LinearLayout xmlns:android="http://schemas.android.com/apk/res/android"
    android:orientation="horizontal" android:layout_width="match_parent"
    android:layout_height="wrap_content"
    android:layout_margin="10dp">
<ImageView
    android:id="@+id/homepage_news_item_image"
    android:layout_width="45dp"
    android:layout_height="45dp"
    android:layout_marginRight="10dp" /><!--android:background="@drawable/borders1"-->
    <TextView
        android:id="@+id/homepage_news_item_text"
        android:layout_width="0dp"
        android:layout_height="45dp"
        android:layout_weight="1"
        android:text="test"
        android:gravity="center_vertical" />

</LinearLayout>
fragment_home_news_item_line.xml
<?xml version="1.0" encoding="utf-8"?>
<LinearLayout xmlns:android="http://schemas.android.com/apk/res/android"
    android:orientation="vertical" android:layout_width="match_parent"
    android:layout_height="wrap_content"
    android:paddingRight="10dp"
    android:paddingLeft="10dp">
<ImageView
    android:layout_width="match_parent"
    android:layout_height="2dp"
    android:background="#f8f8f8"/>
</LinearLayout>
·新建HomePageNewsAdapter
class HomePageNewsAdapter:RecyclerView.Adapter<RecyclerView.ViewHolder>() {
    //定义两种类型item
    private val TYPE_RECOMMAND=0
    private val TYPE_NORMAL=1
    private val TYPE_LINE=2
    override fun onCreateViewHolder(parent: ViewGroup, viewType: Int): RecyclerView.ViewHolder {
        var holder:RecyclerView.ViewHolder?=null
        when(viewType){

            TYPE_RECOMMAND->holder= HomePageViewHolder(LayoutInflater.from(parent.context).inflate(R.layout.fragment_home_news_item_recommand,parent,false))
            TYPE_NORMAL->holder=return HomePageViewHolder(LayoutInflater.from(parent.context).inflate(R.layout.fragment_home_news_item_normal,parent,false))
            TYPE_LINE->holder=return HomePageViewHolder(LayoutInflater.from(parent.context).inflate(R.layout.fragment_home_news_item_line,parent,false))
        }
        return holder!!
        //return HomePageViewHolder(LayoutInflater.from(parent.context).inflate(R.layout.fragment_home_news_item_normal,parent,false))
    }

    override fun getItemCount(): Int {
        return 11
    }

    var titles= listOf("标题1","标题2","标题三","标题四","标题五")
    var imageIds=listOf(R.drawable.news_title1,R.drawable.news_title2,R.drawable.news_title3,R.drawable.news_title4,R.drawable.news_title5)

    override fun onBindViewHolder(holder: RecyclerView.ViewHolder, position: Int) {
        var type:Int=holder.itemViewType
        when(type){
            TYPE_RECOMMAND->{
                var imageView:ImageView=holder.itemView.findViewById(R.id.homepage_news_item_recommand)
                imageView.setImageResource(R.drawable.news_recommand)
            }
            TYPE_NORMAL->{
                var textView: TextView =holder.itemView.findViewById(R.id.homepage_news_item_text)
                textView.text=titles[position/2-1]
                var imageView:ImageView=holder.itemView.findViewById(R.id.homepage_news_item_image)
                imageView.setImageResource(imageIds[position/2-1])
            }
            TYPE_LINE->{

            }
        }

    }

    //item类型
    override fun getItemViewType(position: Int): Int {
        var type:Int=-1
        if(position==0){
            type=TYPE_RECOMMAND
        }else if(position%2==1){
            type=TYPE_LINE
        }else if (position%2==0) {
            type = TYPE_NORMAL
        }
        return type
    }

    class HomePageViewHolder(itemView: View) :RecyclerView.ViewHolder(itemView){

    }
}
·在HomePageFragment中定义变量,赋值
homepage_news_container.layoutManager=LinearLayoutManager(context)
homepage_news_container.adapter=HomePageNewsAdapter()
这样基本的效果就有了。有个问题是我想把标题文字旁边的图片做成圆形的
简单的方法是PS一下,截取圆的部分,背景透明;用编程实现好像有点复杂,我试过为ImageView定义一个圆形的背景,但是添加图片,大概会把原来定义好的背景覆盖掉。
那一种android中实现“圆角矩形”的方法提供了有效的方法
关于canvas的文章
测试一下,先来个简单的
class NiceImageView: ImageView {
    private var radiusArray:FloatArray=FloatArray(8,{0f})//绘制区域,加圆角的横轴半径,纵轴半径组成的数组
    //private var radiusArray= floatArrayOf(0f,0f,0f,0f,0f,0f,0f,0f)
    //private var radiusArray=FloatArray(8)
    constructor(context: Context) : super(context) {

    }

    constructor(context: Context, attrs: AttributeSet) : super(context, attrs) {

    }
    constructor(context: Context,attrs:AttributeSet,defAttrStyle:Int):super(context,attrs,defAttrStyle){

    }

    constructor(context: Context,attrs:AttributeSet,defAttrStyle:Int,defStyleSet:Int):super(context,attrs,defAttrStyle,defStyleSet) {
    }

//    fun setRound(letTop:Float,rightTop:Float,rigthBottom:Float,leftBottom: Float){
//        radiusArray.set(0,letTop)
//        radiusArray.set(1,letTop)
//        radiusArray.set(2,rightTop)
//        radiusArray.set(3,rightTop)
//        radiusArray.set(4,rigthBottom)
//        radiusArray.set(5,rigthBottom)
//        radiusArray.set(6,leftBottom)
//        radiusArray.set(7,leftBottom)
//    }

    override fun onDraw(canvas: Canvas?) {
        var path:Path= Path()
        //toFloat和as Float是不一样
//        path.addRoundRect(RectF(0f,0f,width.toFloat(),height.toFloat()),radiusArray,Path.Direction.CW)//Path.Direction.CW按顺时针,Path.Direction.CCW按逆时针;
//        canvas!!.clipPath(path)
        path.addCircle(width/2.toFloat(),height/2.toFloat(),width/2.toFloat(),Path.Direction.CW)
        canvas!!.clipPath(path)
        super.onDraw(canvas)
    }


}
布局文件
<com.vocus.canvas.NiceImageView
    android:id="@+id/image1"
    android:layout_width="80dp"
    android:layout_height="80dp" />
使用
image1.setImageResource(R.drawable.berry)
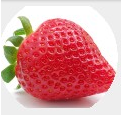
效果

(这个图背景是白色,锯齿不太明显,但是换成其他颜色背景图,就会有明显锯齿)
这里图片来源必须是src不能说设置成背景图片
这种方法有个缺点是不能抗锯齿
抗锯齿的代码是这样
var srcRectf=RectF(0f,0f,width.toFloat(),height.toFloat()) //原始图片Rect
        canvas!!.saveLayer(srcRectf,null)//创建一个新图层
        super.onDraw(canvas)//调用父类方法把canvas绘制在创建的图层上
        //绘制圆
        var path:Path= Path()
        path.addCircle(width/2.toFloat(),height/2.toFloat(),height/2.toFloat(),Path.Direction.CW)
        var paint=Paint(Paint.ANTI_ALIAS_FLAG)//画笔抗锯齿
        paint.style=Paint.Style.FILL
        paint.xfermode=PorterDuffXfermode(PorterDuff.Mode.DST_IN) //PorterDuff颜色渲染器,来源人名。MODE_SRC_IN取两层绘制交集,显示上层,Mode_DST_IN取交集,显示下层
        canvas.drawPath(path,paint)

        paint.xfermode=null

        canvas.restore()//恢复
效果

其实跟PS差不多。。。有些图片不规则,所以最好设置一下imageView的属性android:scaleType="centerCrop"
还有可以设置一下边框,遮罩层什么的。这里就不弄了
主页界面这样就算做完了吧

源码
链接:https://pan.baidu.com/s/11pmbo_O4L9qDI7bqdPvzKw
提取码:te93
来源:https://www.cnblogs.com/vocus/p/12355469.html