form组件
官方描述
https://developers.weixin.qq.com/miniprogram/dev/component/form.html
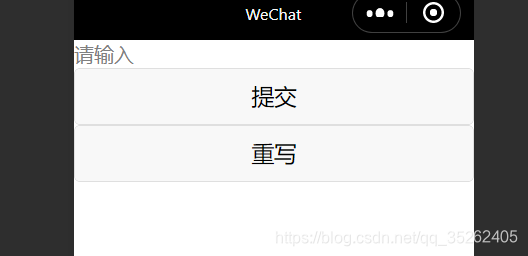
下面是一个简单的表单
<form bindsubmit="formsubmit" bindreset="formreset">
  <input name="inputValue" placeholder="请输入"></input>
  <button form-type="submit">提交</button>
  <button form-type="reset">重写</button>
</form>
formsubmit:function(event){
  console.log(event)
  console.log(event.detail.value.inputValue)
},

提交事件触发,可以发现这个是根据input的name属性取的值

表单控件
表单中存在许多控件帮助我们实现多种形式的表单填写。
官方描述
https://developers.weixin.qq.com/miniprogram/dev/component/button.html
下面是简单的示例,演示了多种常用的表单控件的使用
<form>
  <button type="primary">button</button>
  <checkbox-group>
    <checkbox value="1">tianjing</checkbox>
    <checkbox value="2">wuhan</checkbox>
  </checkbox-group>
  <checkbox-group>
    <label class="chkbox" wx:for="{{cities}}">
      <checkbox value="{{item.name}}">{{item.name}}</checkbox>
    </label>
  </checkbox-group>

  <input value="input" placeholder="input" type="digit" password bindinput confirm-type="done"></input>

  <label></label>

  <picker mode="selector" value="{{country}}" bindchange="pickChange" range="{{array}}">
    国家选择:{{country}}
  </picker>

  <picker mode="multiSelector" value="" range="{{multiArray}}">多维选择</picker>

  <radio-group bindchange>
    <radio value="11">11</radio>
    <radio value="22">22</radio>
  </radio-group>

  <!-- 滑动选择器 -->
  <slider min="0" max="100" step="1" value="10" bindchange></slider>

  <switch bindchange=""></switch>

  <textarea></textarea>
</form>
data: {
  country:"",
  cities:[
    {name:'chn'},
    {name:"usa"},
    {name:"eng"}
  ],
  array:[
    "中国","美国","日本"
  ],
  multiArray:[
    ["a","aa"],
    ["b","bb"]
  ]
},

pickChange:function(event){
  console.log(event);
  console.log(this.data.array[event.detail.value])
  this.setData({
    country:this.data.array[event.detail.value]
  })
},

navigator组件
navigator组件属于跳转组件,它可以帮助我们实现一些页面之间跳转的需求
官网描述
https://developers.weixin.qq.com/miniprogram/dev/component/navigator.html
下面是一个跳转的示例
<navigator url="/pages/audio/audio">
  <view>audio</view>
</navigator>

注意在tabBar中已经出现的页面,不能使用默认open-type,需要设置open-type为switchTab(跳转到 tabBar 页面),这是因为tabbar和navigator跳转不可同时作用在一个对象(页面)上。
camera组件
官方描述
https://developers.weixin.qq.com/miniprogram/dev/component/camera.html
https://developers.weixin.qq.com/miniprogram/dev/api/media/camera/CameraContext.html
相机组件,属于原生控件,通过createCameraContext创建相机对象实现拍照。
<camera mode="normal" device-position="front"></camera>
<button type="primary" bindtap="takephoto">拍照</button>
takephoto:function(){
  const ctx = wx.createCameraContext();
  ctx.takephoto({
    quality:"high",
    success:(res)=>{
      console.log(res)
      this.setData({

      })
    }
  })
},

来源:CSDN
作者:ww0peo
链接:https://blog.csdn.net/qq_35262405/article/details/104033272