1.推荐github上的Mininet源安装
2.为了节约课程时间,实验室机房PC已经安装了Mininet,请大家在课后在自己的Ubuntu系统或虚拟机中尝试安装,并记录安装步骤。
使用git clone语句出现了一点小问题,直接拷贝了老师的Ubuntu解决问题。
1.清除已建立的网络拓扑:
Sudo mn c
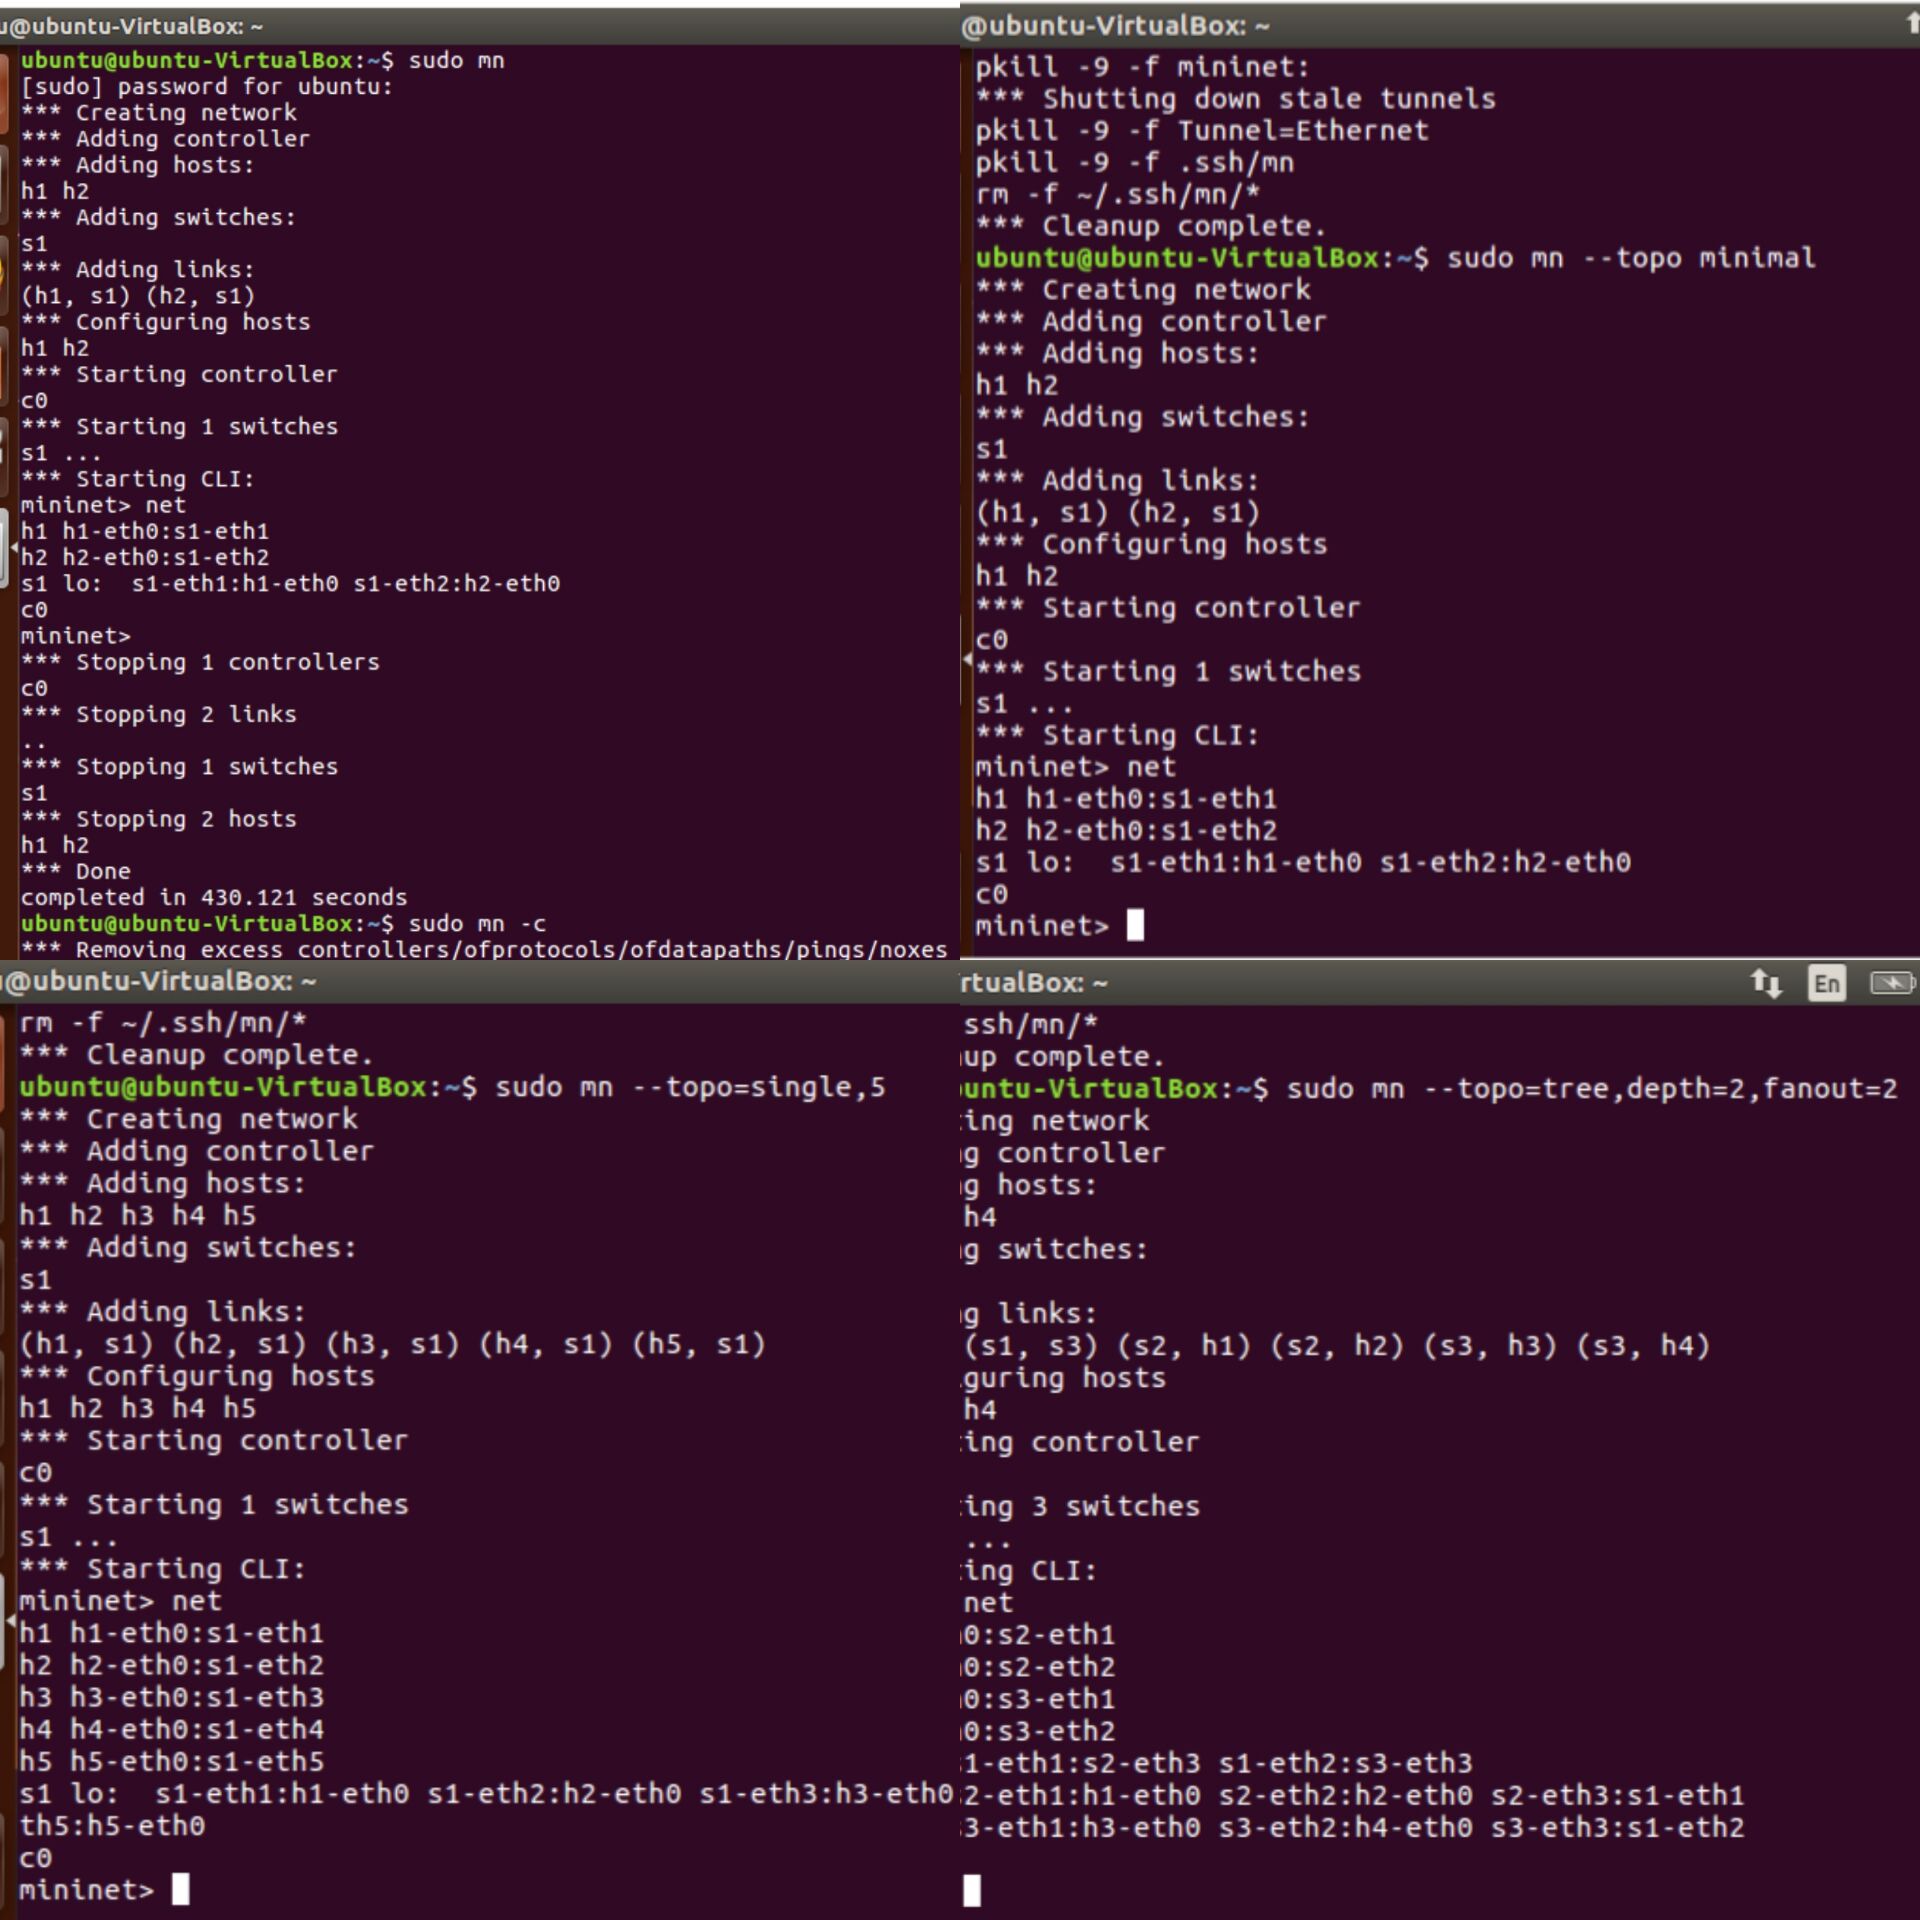
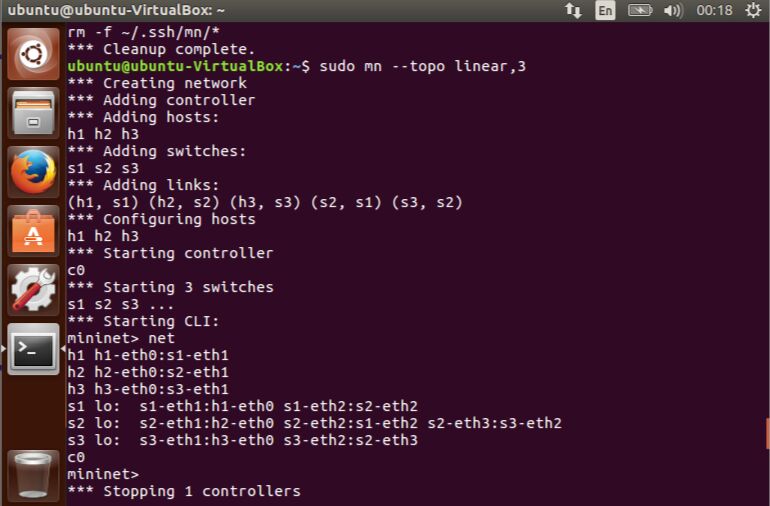
2.线性拓扑
Sudo mn topo linear,3
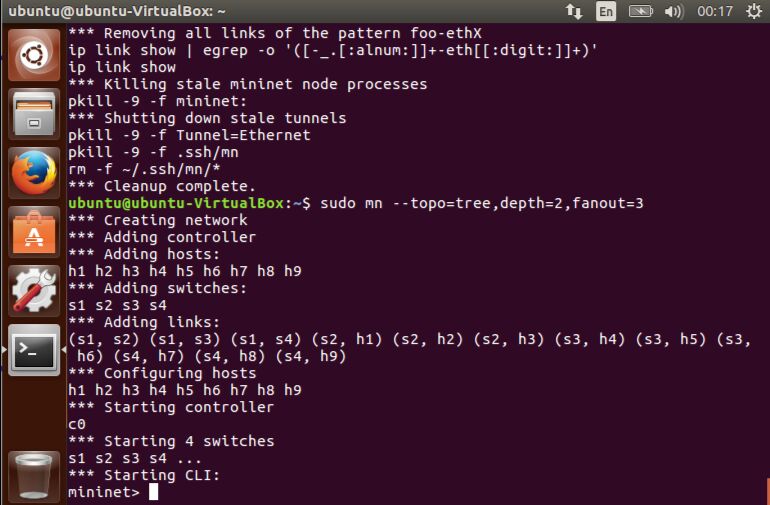
3.树形拓扑:定义深度和扇出形成基于树的拓扑,深度2,扇出3
Sudo mn topo=tree, depth=2, fanout=3
1.打开对应脚本(不加sudo会出问题)
sudo ./miniedit.py
2.开启OpenFlow以及CLI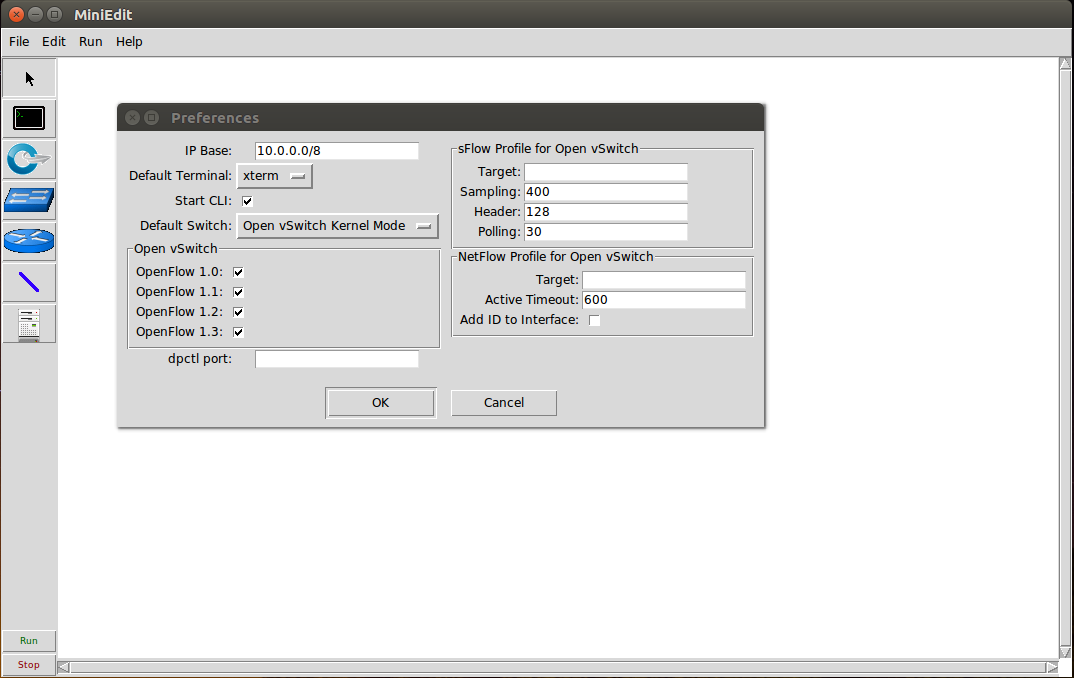
3.建立拓扑并设置,设置h1(10.0.0.10)、h2(10.0.0.11)、h3(10.0.0.12)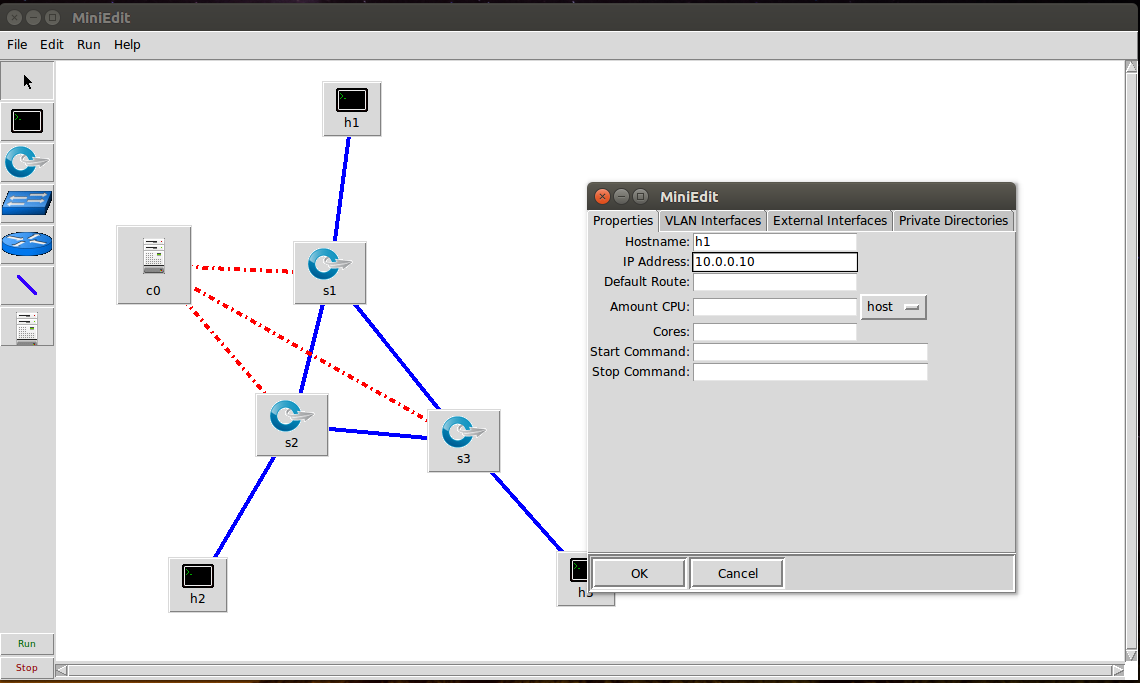
4.命令行执行信息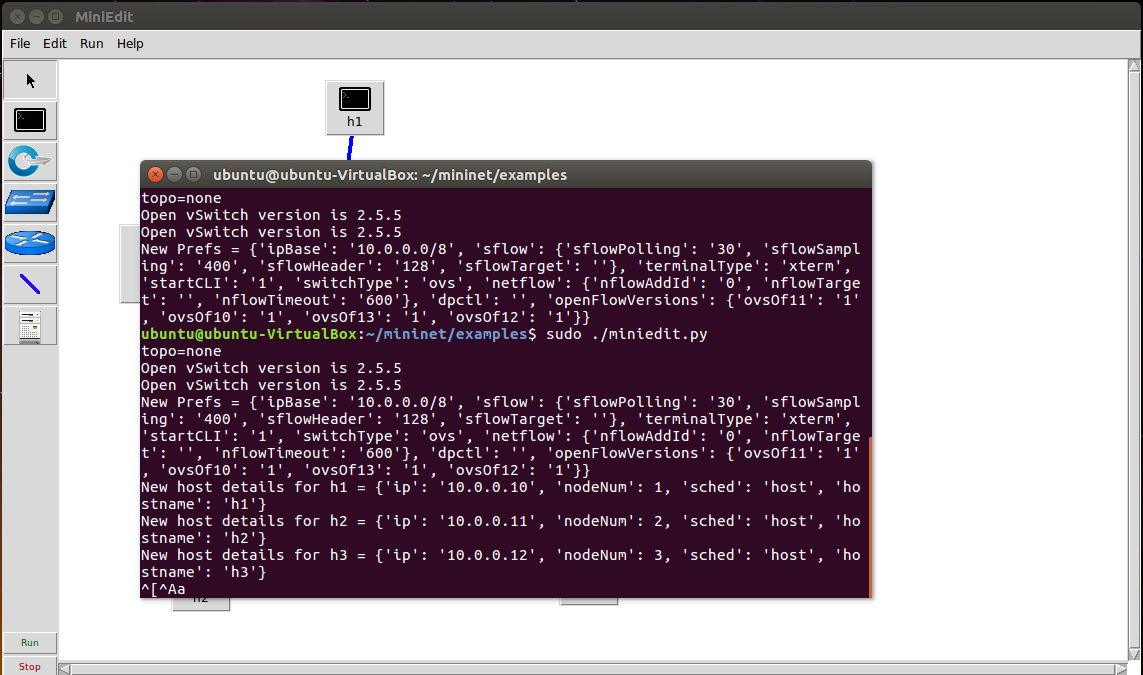
5.run以后,网络创建成功通过net命令显示
6.保存生成的py文件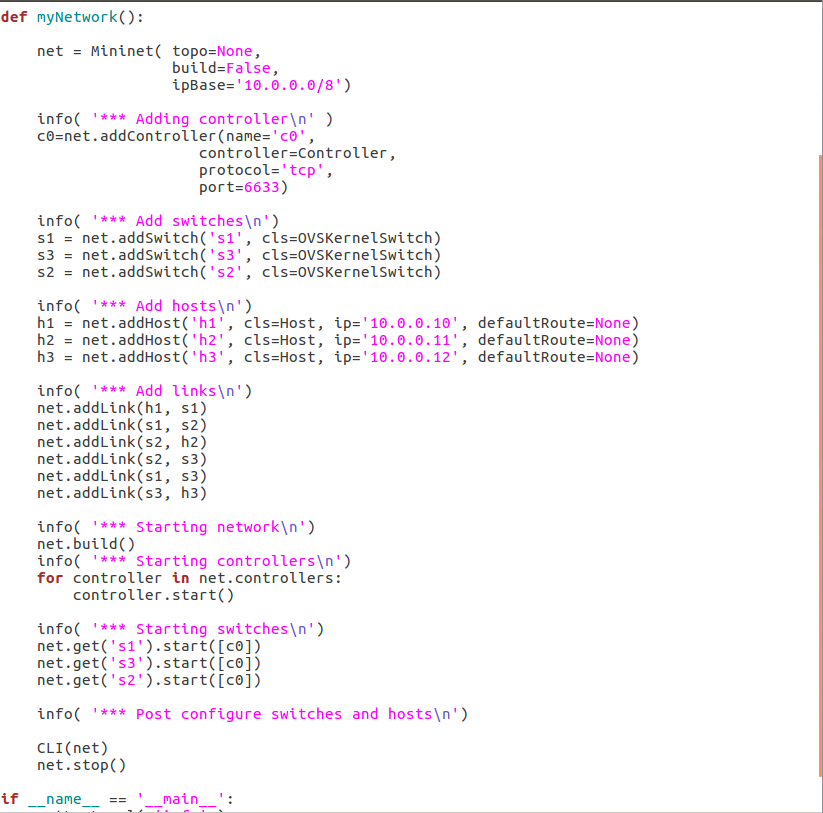
7.xterm验证主机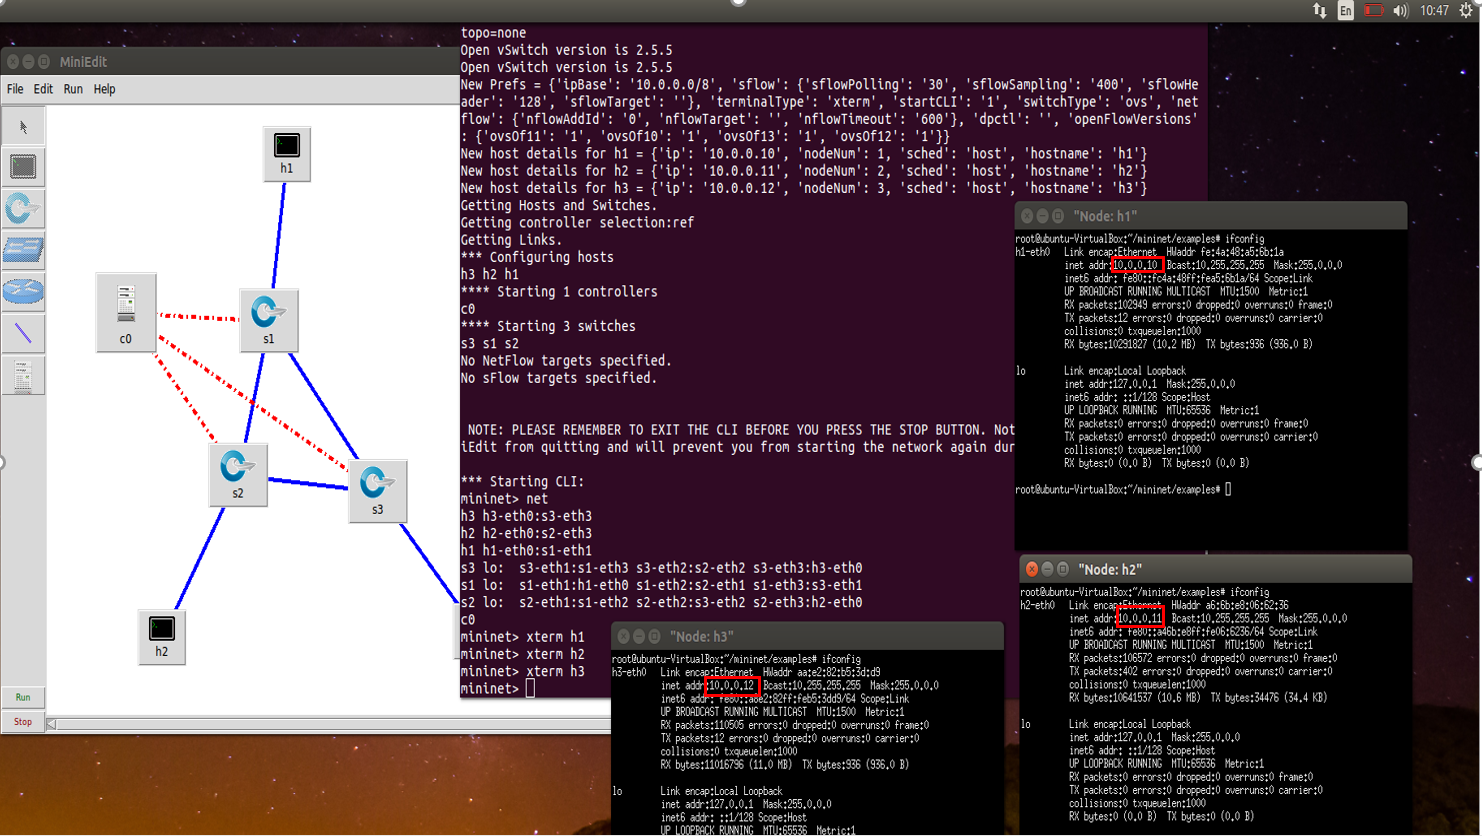
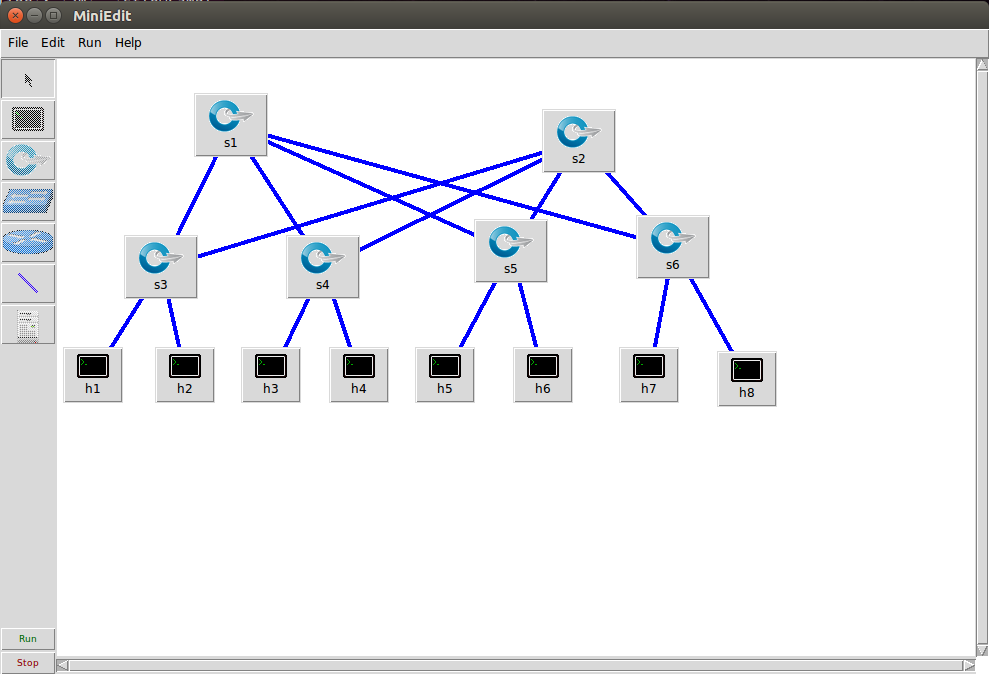
1.python代码
#!/usr/bin/python #创建网络拓扑 """Custom topology example Adding the 'topos' dict with a key/value pair to generate our newly defined topology enables one to pass in '--topo=mytopo' from the command line. """ from mininet.topo import Topo from mininet.net import Mininet from mininet.node import RemoteController,CPULimitedHost from mininet.link import TCLink from mininet.util import dumpNodeConnections class MyTopo( Topo ): "Simple topology example." def __init__( self ): "Create custom topo." # Initialize topology Topo.__init__( self ) L1 = 2 L2 = L1 * 2 s = [] # add core ovs for i in range( L1 ): sw = self.addSwitch( 's{}'.format( i + 1 ) ) s.append( sw ) # add aggregation ovs for i in range( L2 ): sw = self.addSwitch( 's{}'.format( L1 + i + 1 ) ) s.append( sw ) # add links between core and aggregation ovs for i in range( L1 ): sw1 = s[i] for j in range(L1,L1+L2): sw2=s[j] # self.addLink(sw2, sw1, bw=10, delay='5ms', loss=10, max_queue_size=1000, use_htb=True) self.addLink( sw2, sw1 ) #add hosts and its links with edge ovs count = 1 for j in range(L1,L1+L2): sw1=s[j] for i in range(2): host = self.addHost( 'h{}'.format( count ) ) self.addLink( sw1, host ) count += 1 topos = { 'mytopo': ( lambda: MyTopo() ) }
2.输入命令
sudo mn --custom fattree.py --topo mytopo --switch ovsk,protocols=OpenFlow10
3.实验结果如下: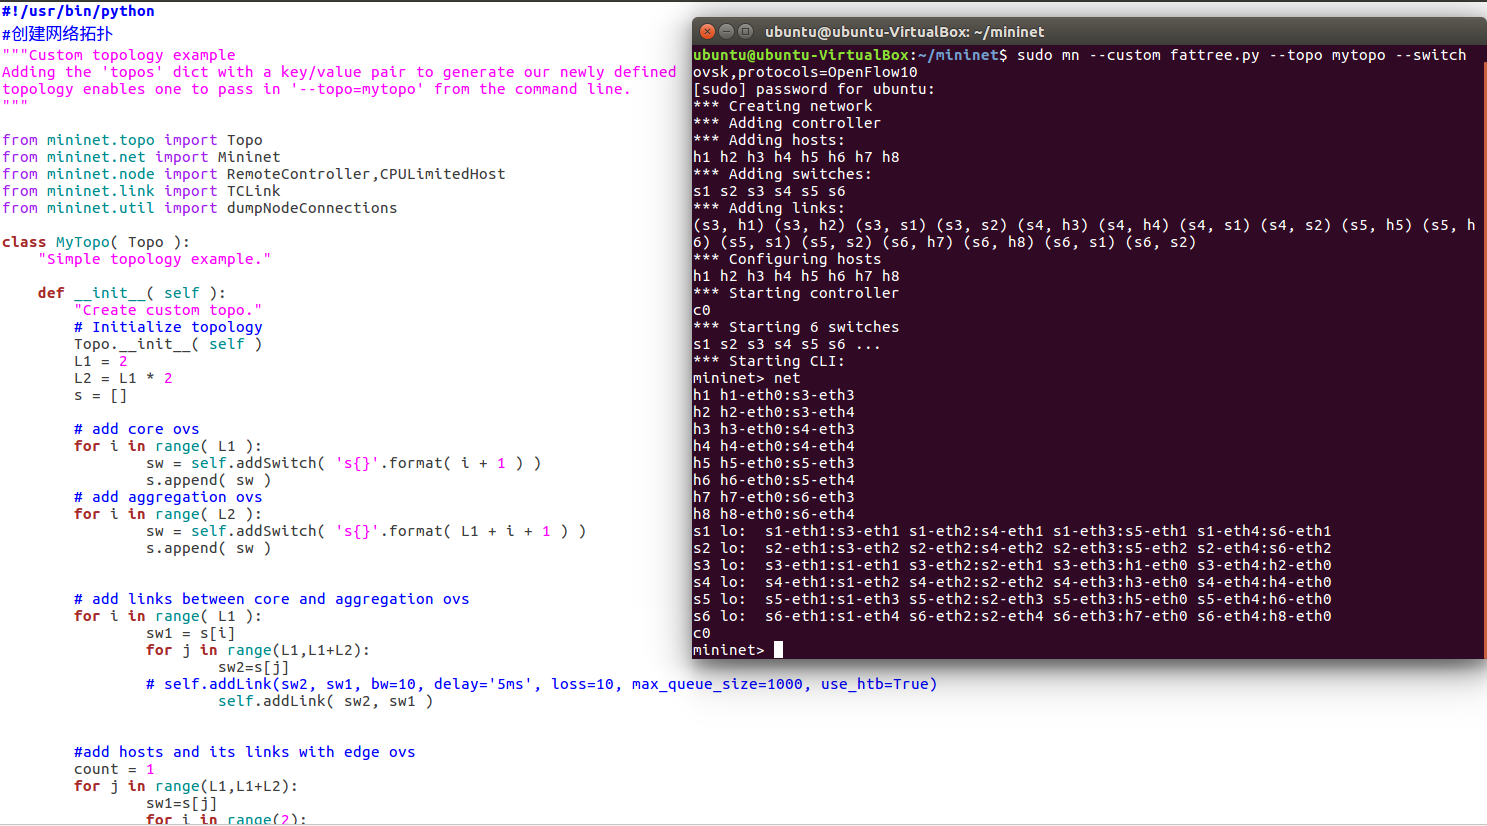
来源:博客园
作者:Unétrange
链接:https://www.cnblogs.com/0717fei/p/11780345.html