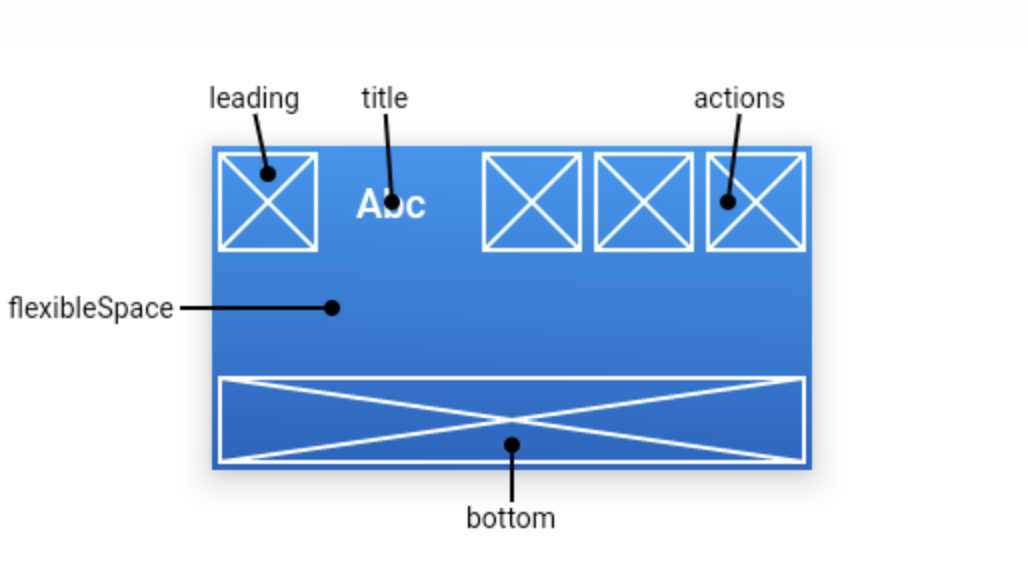
AppBar属于基础组件,结构如下

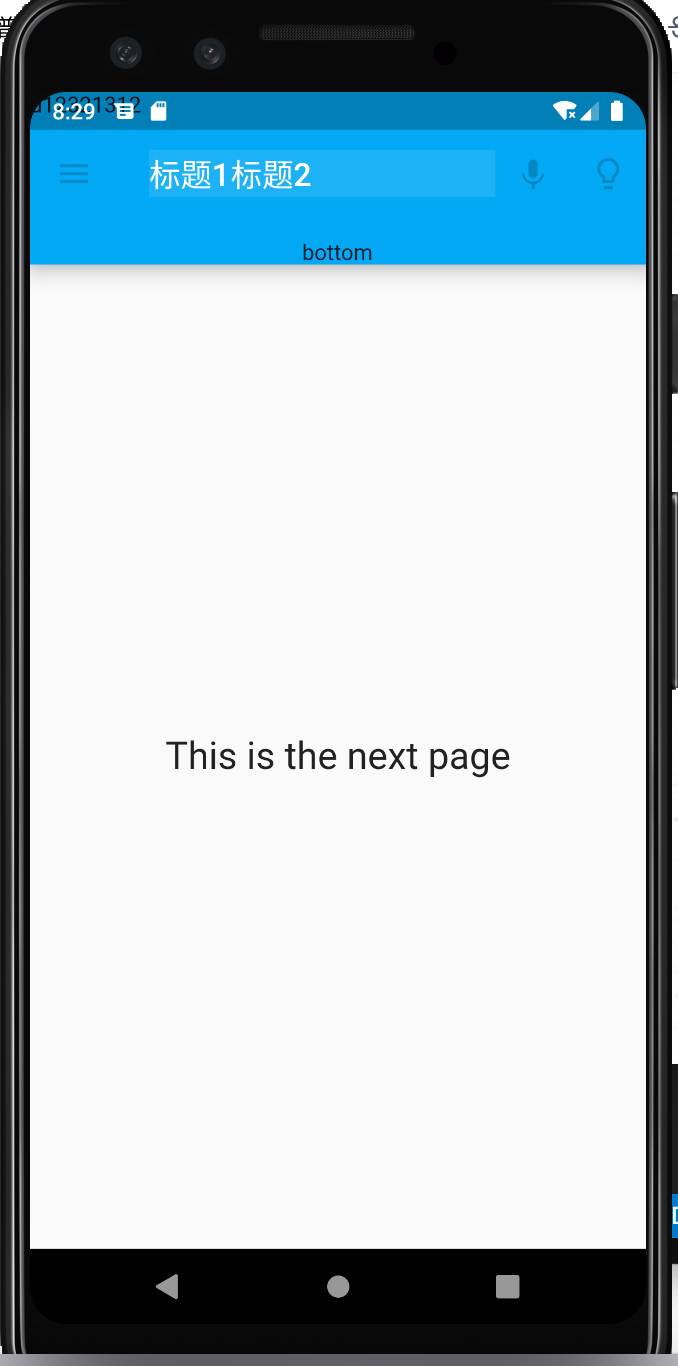
以下示例显示一个带有两个简单操作的AppBar。第一个动作打开SnackBar,第二个动作导航到新页面。
import 'package:flutter/material.dart';

class LoginPage extends StatefulWidget {
  @override
  _LoginPageState createState() => _LoginPageState();
}

class _LoginPageState extends State<LoginPage> {
  @override
  Widget build(BuildContext context) {
    final GlobalKey<ScaffoldState> scaffoldKey = GlobalKey<ScaffoldState>();
    final SnackBar snackBar = const SnackBar(content: Text('Showing Snackbar'));
    return Scaffold(
      key: scaffoldKey,
      appBar: AppBar(
        title: const Text('AppBar Demo'),
        actions: <Widget>[
          IconButton(
            icon: const Icon(Icons.add_alert),
            tooltip: 'Show Snackbar',
            onPressed: () {
              scaffoldKey.currentState.showSnackBar(snackBar);
            },
          ),
          IconButton(
            icon: const Icon(Icons.navigate_next),
            tooltip: 'Next page',
            onPressed: () {
              openPage(context);
            },
          ),
        ],
      ),
      body: const Center(
        child: Text(
          'This is the home page',
          style: TextStyle(fontSize: 24),
        ),
      ),
    );
  }

  void openPage(BuildContext context) {
    Navigator.push(context, MaterialPageRoute(
      builder: (BuildContext context) {
        return Scaffold(
          appBar: AppBar(
            title: Container(
              color: Colors.white10,
              child: Row(
                children: <Widget>[Text('标题1'), Text('标题2')],
              ),
            ),
            actions: <Widget>[
              IconButton(
                icon: Icon(Icons.keyboard_voice),
                tooltip: 'keyboard_voice',
                onPressed: null,
              ),
              IconButton(
                icon: Icon(Icons.lightbulb_outline),
                tooltip: 'lightbulb_outline',
                onPressed: null,
              ),
            ],
            // 左侧返回按钮
            leading: Builder(
              builder: (BuildContext context) {
                return IconButton(
                  icon: const Icon(Icons.menu),
                  onPressed: null,
                  tooltip: 'menu',
                );
              },
            ),
            //导航栏和状态栏的的颜色
            backgroundColor: Colors.lightBlue,
            // 在appbar底部
            bottom: PreferredSize(
                child: Text('bottom'),
                preferredSize: Size(30, 30)),
            //控制状态栏的颜色
            brightness: Brightness.dark,
             //icon的主题样式
            iconTheme: IconThemeData(
                color: Colors.pink,
                opacity: 0.5,
                size: 30),
            //字体主题
            textTheme: TextTheme(),
            //标题是否居中,默认为false
            centerTitle: true,
             //整个导航栏的不透明度
            toolbarOpacity: 1.0,
            //bottom的不透明度
            bottomOpacity: 0.8,
            //标题两边的空白区域,
            titleSpacing: 10,
             //阴影的高度
            elevation: 10,
            flexibleSpace: Text('d12321312'),
          ),
          body: const Center(
            child: Text(
              'This is the next page',
              style: TextStyle(fontSize: 24),
            ),
          ),
        );
      },
    ));
  }
}
官方文档:
https://flutterchina.club/widgets/basics/
https://api.flutter.dev/flutter/material/AppBar-class.html

来源:oschina
链接:https://my.oschina.net/u/2427561/blog/3135603