摘要:本次实践基于 mobilenetV2 实现猫狗图像分类,贯穿了数据集获取及处理、预训练模型微调及迁移、端侧部署及推理等环节和知识点,体会到了 MindSpore 简单的开发体验和全场景快速部署的魅力。
- startTime: 2021年1月23日00:43:22
- endTime: 2021年1月23日11:34:44
(包含学习、睡觉、吃饭、爬坑、水文……的时间)
了解MindSpore开源生态
发现一个小秘密。 github 上多三个仓库,是什么呢?
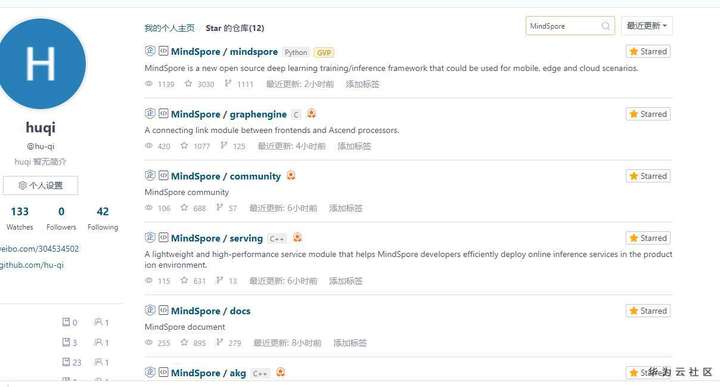
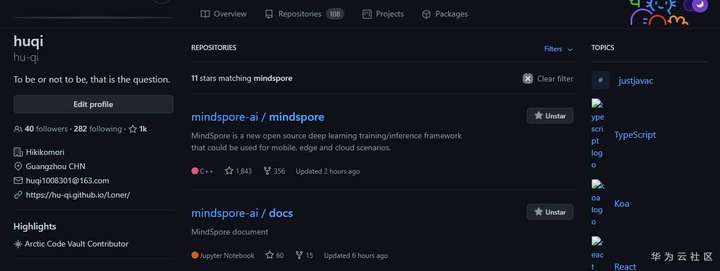
此处应是 github 过滤的 bug ,实际上mindspore-ai 有 15 个仓库, 比 gitee 多出来的三个是:mindspore-21-days-tutorials、 mail_templates、 infrastructure
别看这 3 个不起眼的仓库,在社区建设方面却大有作为。比如,mindspore-21-days-tutorials 是我们之前参加 21 天实战营的参考代码和指导文档,多么宝贵的学习资料;另外两个是 MindSpore 的开源基础建设,其中 infrastructure 包含了用于配置 Mindspore 社区的所有必需 Dockerfile 和 YAML 文件,并借助 Github 的 Action 定时自动同步 Gitee 的代码到 Github 。
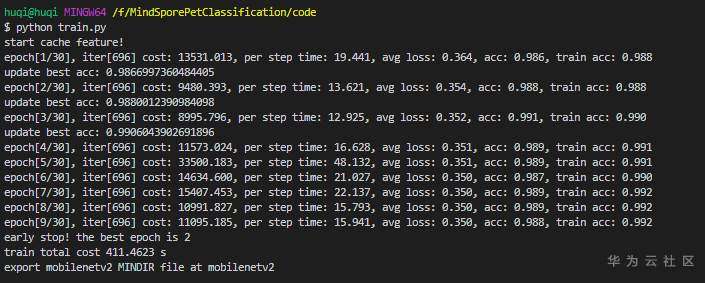
训练时长截图
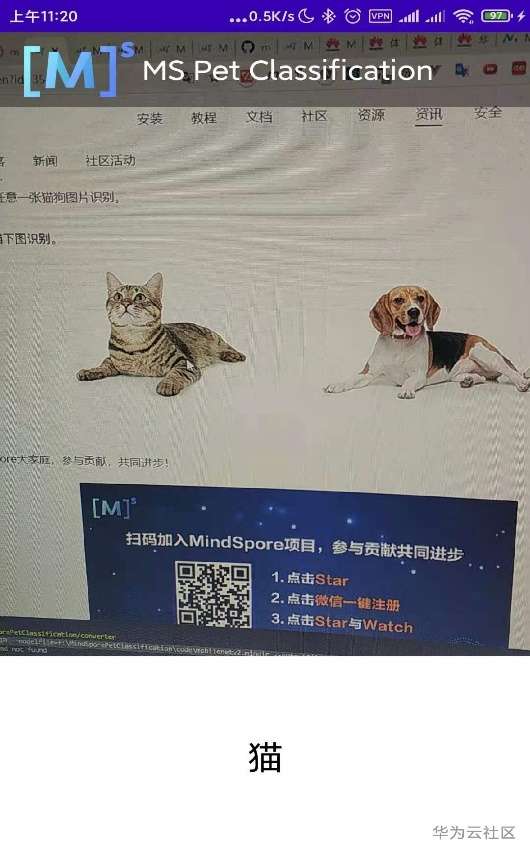
手机识别截图
学习总结
在学习之前我以为我会了,但真正实践起来还是磕磕碰碰,所有的代码似曾相识,都是 26 个字母加一些符号组成,但真正去理解还是发现基本功不够:一是不知道怎么写,二是不知道为什么要这么写。尽管如此,我大概理顺了整个实践流程:训练猫狗图像分类模型(云端) --> 手机端推理及应用 --> 从 “1” 开始 Fine Tune 模型(本地) --> 手机端验证 ,当然作为学渣,整个操作过程肯定不止一个小时, 深刻体会到“眼睛:学会了,脑子:学废了!”,因此必须借此帖记录一下“学废了”的过程:
目的
本次实践基于 mobilenetV2 实现猫狗图像分类,贯穿了数据集获取及处理、预训练模型微调及迁移、端侧部署及推理等环节和知识点,体会到了 MindSpore 简单的开发体验和全场景快速部署的魅力。
项目目录
MindSporePetClassification
├─ ADB                          // 支持手机与电脑传递文件工具
│  ├─ adb.exe
│  ├─ AdbWinApi.dll
│  ├─ AdbWinUsbApi.dll
│  └─ fastboot.exe
├─ code                         // Fine tune训练代码及数据集
│  ├─ dataset
│  │  ├─ PetImages
│  │  │  ├─ eval
│  │  │  │  ├─ Cat
│  │  │  │  └─ Dog
│  │  │  ├─ train
│  │  │  │  ├─ Cat
│  │  │  │  └─ Dog
│  │  ├─ MSR-LA - 3467.docx
│  │  └─ readme[1].txt
│  ├─ src
│  │  ├─ __pycache__
│  │  │  ├─ args.cpython-37.pyc
│  │  │  ├─ config.cpython-37.pyc
│  │  │  ├─ dataset.cpython-37.pyc
│  │  │  ├─ lr_generator.cpython-37.pyc
│  │  │  ├─ mobilenetV2.cpython-37.pyc
│  │  │  ├─ models.cpython-37.pyc
│  │  │  └─ utils.cpython-37.pyc
│  │  ├─ args.py
│  │  ├─ config.py
│  │  ├─ dataset.py
│  │  ├─ lr_generator.py
│  │  ├─ mobilenetV2.py
│  │  ├─ models.py
│  │  └─ utils.py
│  ├─ mobilenetV2.ckpt                    // 预训练模型文件
│  ├─ preprocessing_dataset.py            // 预先处理数据集脚本
│  └─ train.py                            // 主训练脚本
├─ converter                              // 转换工具MindSpore Lite Converter
│  ├─ converter_lite.exe
│  ├─ libgcc_s_seh-1.dll
│  ├─ libglog.dll
│  ├─ libmindspore_gvar.dll
│  ├─ libssp-0.dll
│  ├─ libstdc++-6.dll
│  └─ libwinpthread-1.dll
└─ kagglecatsanddogs_3367a.zip
依赖安装
本次实践依赖opencv-python 和 matplotlib,一个用来处理图形比如打印图片和嵌入文字,一个用来将数据集以可视化图片的形式展现出来。
pip install opencv-python -i https://pypi.tuna.tsinghua.edu.cn/simple
pip install matplotlib -i https://pypi.tuna.tsinghua.edu.cn/simple
数据预处理
主要删除一些不符合要求(如非JPEG格式)的图片并分割 train 和 eval 数据集,默认9:1:
python preprocessing_dataset.py 您的路径\kagglecatsaData to Dragnddogs_3367a.zip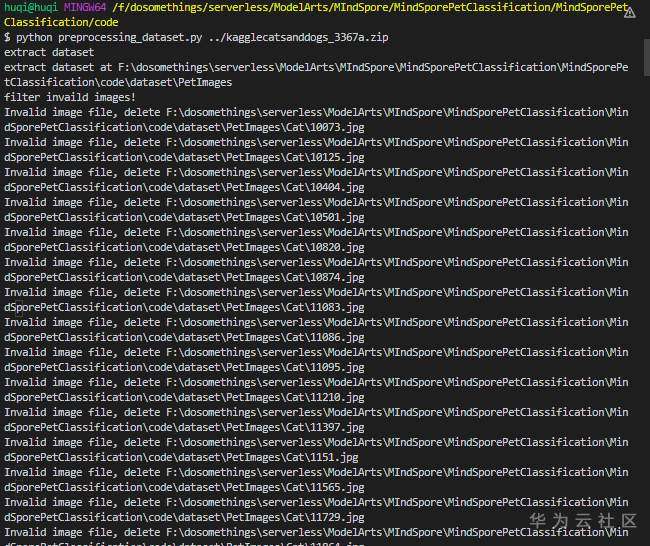
Fine tune
执行Fine tune脚本train.py,并生成模型文件:
python train.py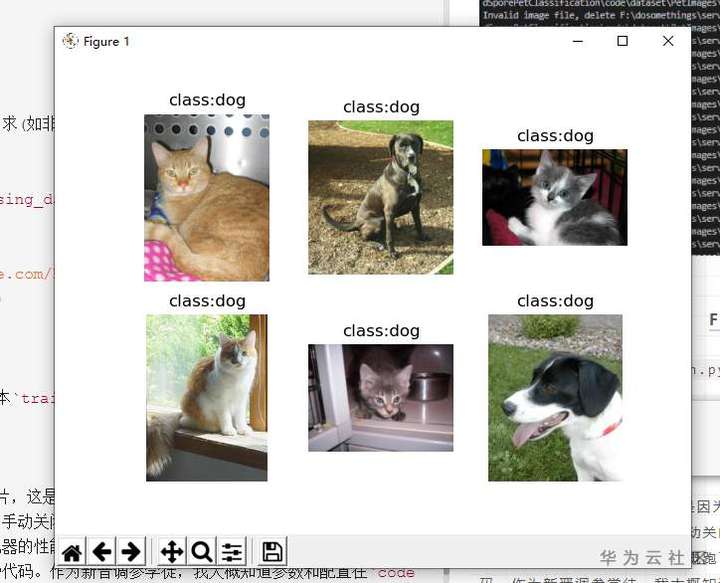
此时会弹窗提示6张图片,这是因为脚本会在正式训练前从数据集中抽取6张图片载入当前模型文件,需要手动关闭才能继续,这是 AI 很傻,全都识别成了 Dog 。
当然,我这边由于机器的原因,没少踩坑,这不“出师未捷身先死”,突然的报错把我整蒙了,将所有num_parallel_workers参数设置为4之后,继续训练!
$ python train.py
start cache feature!
Traceback (most recent call last):
  File "train.py", line 52, in <module>
    data, step_size = extract_features(backbone_net, args_opt.dataset_path, config)
  File "F:\dosomethings\serverless\ModelArts\MIndSpore\MindSporePetClassification\MindSporePetClassification\code\src\dataset.py",
line 84, in extract_features
    train_dataset = create_dataset(dataset_path=os.path.join(dataset_path, "train"), do_train=True, config=config)
  File "F:\dosomethings\serverless\ModelArts\MIndSpore\MindSporePetClassification\MindSporePetClassification\code\src\dataset.py",
line 41, in create_dataset
    ds = de.ImageFolderDataset(dataset_path, num_parallel_workers=8, shuffle=True)
  File "C:\Users\huqi\AppData\Local\Programs\Python\Python37\lib\site-packages\mindspore\dataset\engine\validators.py", line 51, in new_method
    validate_dataset_param_value(nreq_param_int, param_dict, int)
  File "C:\Users\huqi\AppData\Local\Programs\Python\Python37\lib\site-packages\mindspore\dataset\core\validator_helpers.py", line 352, in validate_dataset_param_value
    check_num_parallel_workers(param_dict.get(param_name))
  File "C:\Users\huqi\AppData\Local\Programs\Python\Python37\lib\site-packages\mindspore\dataset\core\validator_helpers.py", line 340, in check_num_parallel_workers
    raise ValueError("num_parallel_workers exceeds the boundary between 1 and {}!".format(cpu_count()))
ValueError: num_parallel_workers exceeds the boundary between 1 and 4!
这一步耗时就和本地机器的性能有关了,我的粗粮渣渣机大概跑废了。趁着训练的空档,学习了一些代码。作为新晋调参学徒,我大概知道参数和配置在code\src\args.py和code\src\config.py这两个文件,而数据的加载在code\src\dataset.py这个文件处理,code\src\mobilenetV2.py定义了模型,code\src\models.py这个文件读取和保存模型并打印输出训练日志。
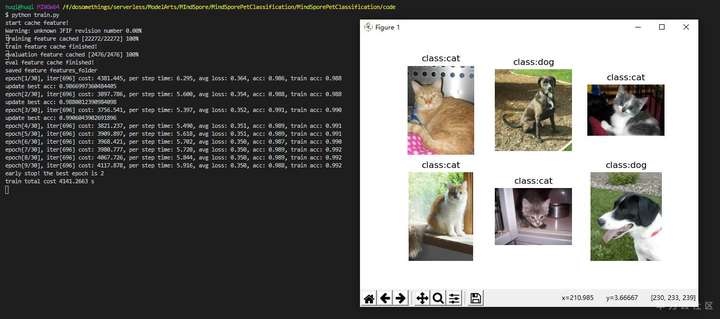
训练完成会,又会调用predict_from_net方法来显示预测的图片和标签,这回我们发现 AI 挺棒的,全部识别正确! 当我满怀信心点击关闭的时候,以为程序立马会给我一个mobilenetv2.mindir,结果我又蒙了,返回了一串错误日志!!!
early stop! the best epoch is 2
train total cost 4141.2663 s
Traceback (most recent call last):
  File "train.py", line 81, in <module>
    export_mindir(net, "mobilenetv2")
  File "F:\dosomethings\serverless\ModelArts\MIndSpore\MindSporePetClassification\MindSporePetClassification\code\src\utils.py", line 93, in export_mindir
    export(net, Tensor(input_np), file_name=path, file_format='MINDIR')
  File "C:\Users\huqi\AppData\Local\Programs\Python\Python37\lib\site-packages\mindspore\train\serialization.py", line 535, in export
    Validator.check_file_name_by_regular(file_name)
  File "C:\Users\huqi\AppData\Local\Programs\Python\Python37\lib\site-packages\mindspore\_checkparam.py", line 438, in check_file_name_by_regular
    target, prim_name, reg, flag))
ValueError: 'F:\dosomethings\serverless\ModelArts\MIndSpore\MindSporePetClassification\MindSporePetClassification\code\mobilenetv2.mindir'  is illegal, it should be match regular'^[0-9a-zA-Z\_\-\.\/\\]+$' by flags'256'
一开始我以为是文件层级太深了,将文件目录迁移到盘的根目录,重来重来!好在不需要再次加载数据集了,不然又得漫长的等待。 满怀信心结果又被“啪啪啪”打脸,之后群里请教一遍之后,王辉老师建议我把路径改成文件名再试试,果然立马奏效~
- path = os.path.abspath(f"{name}.mindir")
+ path = name
终于如愿以偿,code\mobilenetv2.mindir她来了!

手机端推理及应用
- 训练模型转换
将.mindir模型文件转换成.ms文件,.ms文件可以导入端侧设备并基于MindSpore端侧框架训练。
F:\MindSporePetClassification\converter>call converter_lite --fmk=MINDIR --modelFile=f:\MindSporePetClassification\code\mobilenetv2.mindir --outputFile=pet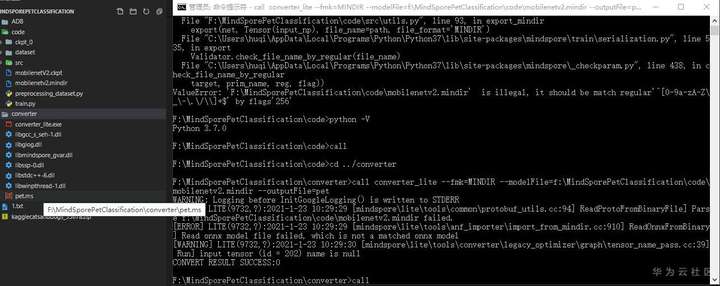
我们可以下载 MindSpore 官方提供的 Android APP 源码: https://gitee.com/mindspore/mindspore/tree/master/model_zoo/official/lite/pet_classification
或者直接下载打包好的 APP 安装到手机: https://download.mindspore.cn/model_zoo/official/lite/apk/pet/petclassification.apk
先体验下预训练模型的识别效果:
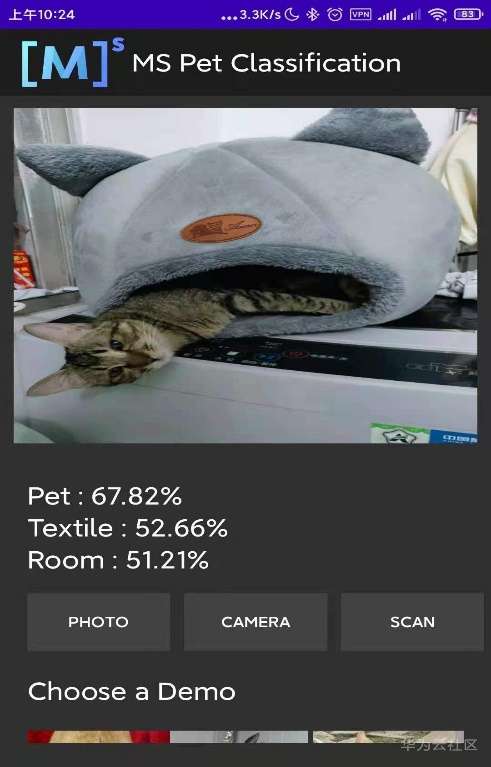
接着我们把转换好的模型移动到手机端的/sdcard/PetClassification,这里用到的是 ADB 工具:需要确保手机已开启开发者模式并打开文件传输
F:\MindSporePetClassification\converter>adb push f:\MindSporePetClassification\converter\pet.ms /sdcard/PetClassification
* daemon not running; starting now at tcp:5037
* daemon started successfully
f:\MindSporePetClassification\converter\pet.ms: 1 file pushed, 0 skipped. 43.4 MB/s (8900552 bytes in 0.196s)
再试试识别效果:

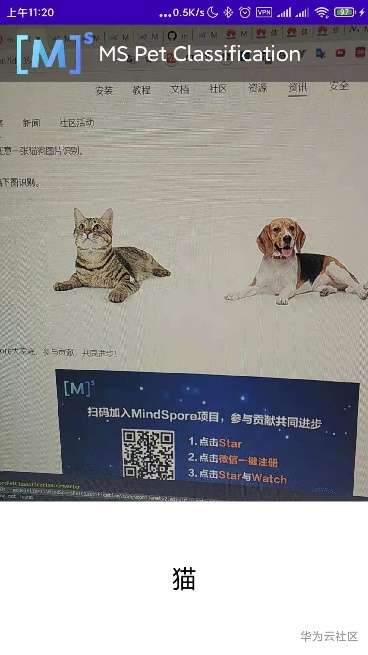
对本次实践 APP 端代码感兴趣的小伙伴可以直接去阅读源码: https://gitee.com/mindspore/mindspore/blob/master/model_zoo/official/lite/pet_classification/app/src/main/java/com/mindspore/classificationforpet/widget/MainActivity.java
本文分享自华为云社区《Copy攻城狮1小时入门AI开发工程师》,原文作者:胡琦。
来源:oschina
链接:https://my.oschina.net/u/4526289/blog/4923209