

文章部分内容 | 圈圈的圈
链接 | juejin.im/post/5c0e6d606fb9a049f66bf246
知乎:新一993
https://zhuanlan.zhihu.com/p/97235795
近期接触到Nginx,然后就学习记录一下。
前言
代理是个啥
既然要聊反向代理, 那首先得知道代理是个啥吧? 嗯.
正向代理
比如, 你买束花, 想要给隔壁工位的测试妹子小丽表白. 但是又怕被人家直面拒绝太没面子. 于是你把鲜花委托给平时和小丽一起的测试小伙伴小红. 让她帮忙把花送给小丽. 这就是一个简单的代理过程, 小红作为代理帮你把花送给了小丽, 当然这种情况在现实中并不推荐使用, 因为难以避免中间商赚差价 😂.
在上面的例子中, 你作为客户端(请求方), 想要向服务方(小丽)发起请求. 但是碍于面子你主动找到了第三方(小红)作为代理向服务方发送请求, 这种情况就是常说的正向代理. 正向代理在互联网中的使用主要是科学上网, 你想访问谷歌但是碍于防火墙你只能通过vpn服务器作为代理才能访问. 这个时候一般也要找值得信赖的vpn厂商, 避免中间商赚差价 😄.

反向代理
关于反向代理的例子, 那就比较多啦. 比如, 孤独的你躺在床上夜不能寐. 于是乎, 拿出手机, 点亮了屏幕, 拨通 10086, 中国移动就会随机分配一个当前处于空闲的客服MM, 你可以和客服MM聊聊天, 问问她家住哪里, 有没有男朋友, 她的微信号, 她的手机号, 星座, 八字.......
在这个例子中, 中国移动就充当了反向代理的角色. 你只需要拨打 10086. 至于会不会分配到 MM 会分配到哪个 MM 在接通之前你都是不知道的. 反向代理在互联网中的使用主要是实现负载均衡. 当你访问某个网站的时候, 反向代理服务器会从当前网站的所有服务器中选择一个空闲的服务器为你响应. 用于均衡每台服务器的负载率.

修改 hosts 完成域名绑定
mac 用户直接执行 vim /private/etc/hosts 在 hosts 文件最后添加一行:
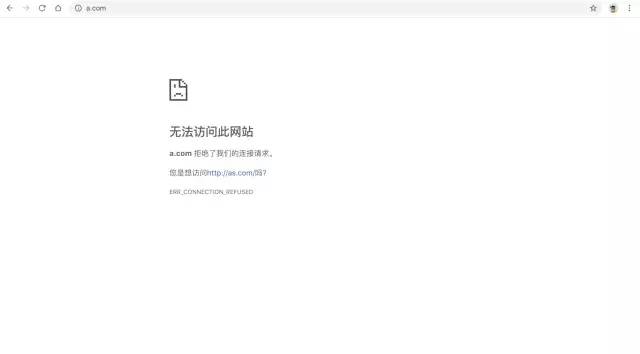
127.0.0.1 a.com这一句是什么意思呢? 就是告诉我们的电脑访问 a.com 的时候, 无需请求 DNS, 直接指向我们本机.
ps: win 环境下, hosts 文件在 C:\Windows\System32\drivers\etc 文件夹下. 如果没有权限修改, 把 hosts 文件先拷贝到别的位置, 通过编辑器打开并添加最后一行内容以后再剪切到原来的位置替换即可.
验证: 打开命令行窗口执行 ping a.com, 如果访问的 ip 为 127.0.0.1 说明我们的域名绑定就完成啦 ^_^
安装 nginx
要做 NGINX 反向代理, 肯定要安装 nginx, 本文安装步骤示例环境为 mac, win 的小伙伴, 可以百度一下嗷, 这个东西大同小异.
-
安装 brew 命令, 执行 ruby -e "$(curl -fsSL https://raw.githubusercontent.com/Homebrew/install/master/install)" -
安装 nginx, 执行 brew install nginx -
启动 nginx nginx, 如果报没有权限, 执行sudo nginx
sudo yum install -y https://dl.fedoraproject.org/pub/epel/epel-release-latest-7.noarch.rpm (RHEL)sudo yum install -y epel-release (CentOS) #添加Nginx存储库sudo yum update -ysudo yum install nginx -y #安装Nginxsudo nginx -v #查看Nginx版本sudo systemctl start nginx (sudo service nginx start) #启动sudo systemctl enable nginx #系统启动开启sudo systemctl status nginx #查看状态http://[你的IP地址]

nginx 配置初探
-
命令行切换到 nginx 配置目录下 cd /usr/local/etc/nginx/servers -
创建并编辑配置文件 vim test.conf, 在配置文件中粘贴以下内容
server {
    # 监听80端口号
    listen 80;

    # 监听访问的域名
    server_name a.com;

    # 根据访问路径配置
    location / {
        # 把请求转发到 https://www.baidu.com
        proxy_pass https://www.baidu.com;
    }
}
保存文件, 并执行
nginx -s reload重启 nginx.
回到浏览器, 打开 a.com 的页签, 强制刷新.
 恭喜你已经完成了第一个 nginx 配置.
创建跨域环境
通过一系列的折腾, 我们已经可以通过 nginx 将 a.com转发到百度. 完成了第一步, 接下来我们创建跨域的 Case 并一步一步通过 nginx 配置实现跨域.
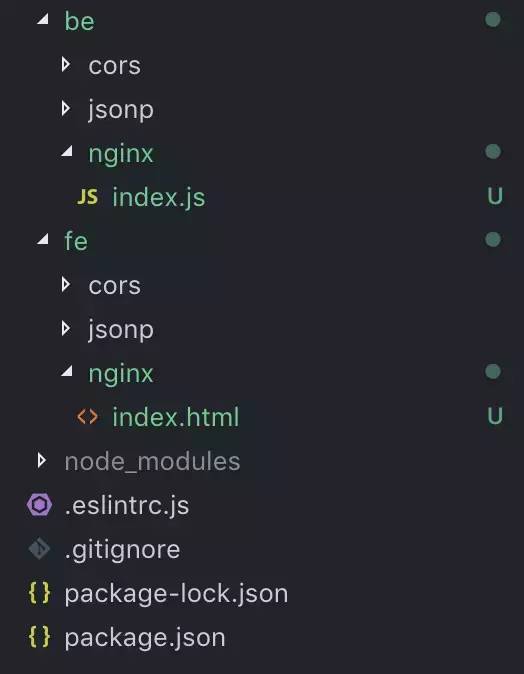
./fe/nginx/index.html
):
<!DOCTYPE html>
<html lang="en">
<head>
    <meta charset="UTF-8">
    <meta name="viewport" content="width=device-width, initial-scale=1.0">
    <meta http-equiv="X-UA-Compatible" content="ie=edge">
    <title>CORS 实现跨域</title>
</head>
<body>
    <h3>CORS 实现跨域</h3>

    <script>
        var xhr = new XMLHttpRequest()
        xhr.open('GET', 'http://localhost:8888/api/getFriend')
        xhr.setRequestHeader('token', 'quanquanbunengshuo')
        xhr.withCredentials = true;
        xhr.onreadystatechange = function() {
            if(xhr.readyState === 4 && xhr.status === 200) {
                console.log(xhr.responseText)
                console.log(xhr.getAllResponseHeaders())
            }
        }
        xhr.send()
    </script>
</body>
</html>live-server ./fe/nginx

live-server ./fe/nginx --port=9999
哈哈, 换一个指令, 依旧是那么顺畅. ^_^
const http = require('http');

const PORT = 8888;


const server = http.createServer((request, response) => {
  console.log(request.headers)
  response.end("{name: 'quanquan', friend: 'guiling'}");
});


server.listen(PORT, () => {
  console.log('服务启动成功, 正在监听: ', PORT);
});node ./be/nginx/index.js
完善 nginx 配置
前后 端代码已经准备完成, 这一步我们就来点干货. 完成最后的配置.
-
首先, 修改 nginx 配置, 把百度地址替换成本地的前端地址
server {
    # 监听80端口号
    listen 80;

    # 监听访问的域名
    server_name a.com;

    # 根据访问路径配置
    location / {
        # 把请求转发到 http://127.0.0.1:9999
        proxy_pass http://127.0.0.1:9999;
    }
}
修改完成 nginx 配置文件以后, 切记执行
nginx -s -reload重启 nginx.
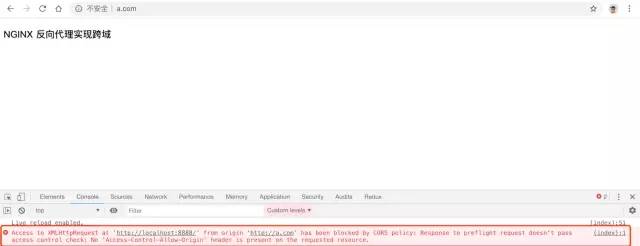
访问a.com
-
修改前端项目中的接口地址: xhr.open('GET', '/api/getFriend') -
修改 nginx 配置文件
  server {
    # 监听80端口号
    listen 80;

    # 监听访问的域名
    server_name a.com;

    # 根据访问路径配置
    location / {
        # 把请求转发到 http://127.0.0.1:9999
        proxy_pass http://127.0.0.1:9999;
    }

    # 监听根目录下的 /api 路径
    location /api/ {
        # 把请求转发到 http://127.0.0.1:8888
        proxy_pass http://127.0.0.1:8888;
    }
}
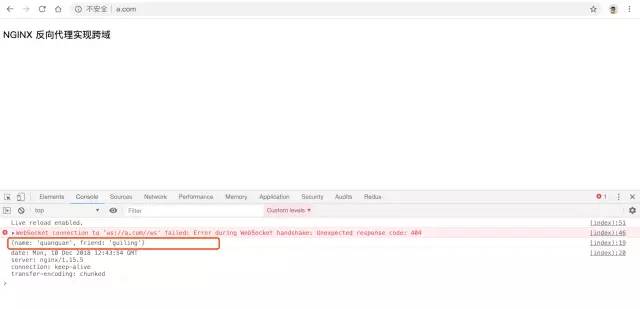
proxy_http_version 1.1;
proxy_set_header Upgrade $http_upgrade;
proxy_set_header Connection "upgrade";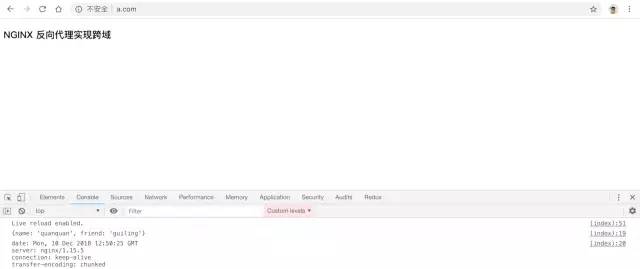
server {
    # 监听80端口号
    listen 80;

    # 监听访问的域名
    server_name a.com;

    # 根据访问路径配置
    location / {
        # 把请求转发到 http://127.0.0.1:9999
        proxy_pass http://127.0.0.1:9999;

        # 兼容websocket
        proxy_http_version 1.1;
        proxy_set_header Upgrade $http_upgrade;
        proxy_set_header Connection "upgrade";
    }

    # 监听根目录下的 /api 路径
    location /api/ {
        # 把请求转发到 http://127.0.0.1:8888
        proxy_pass http://localhost:8888;
    }
}总结
接下来再来学习Nginx更多的内容吧:
什么是反向代理与负载均衡
什么是反向代理
什么是负载均衡
Nginx反向代理与负载均衡的实现
nginx配置
nginx常用命令
-
启动nginx -
nginx -
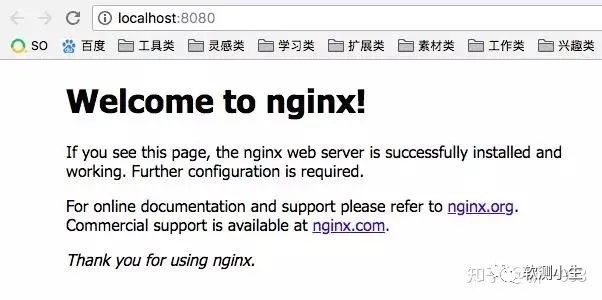
当你敲完nginx这5个键的时候,并没有任何反应,此时你只需访问localhost:8080(默认)即可
-
关闭nginx -
只需nginx -s stop,停止nginx服务 -
然后再次启动nginx即可 -
测试nginx -
nginx -t #如果出现下面ok和successfull就代表正确了,其他的都不对

nginx:the configuration file/usr/local/etc/nginx/nginx.conf syntaxisoknginx:configuration file/usr/local/etc/nginx/nginx.conf testissuccessful
proxy_pass
nginx反向代理主要通过proxy_pass来配置,将你项目的开发机地址填写到proxy_pass后面,正常的格式为proxy_pass URL即可
server {listen 80;location / {proxy_pass http://10.10.10.10:20186;}}
Upstream模块实现负载均衡
-
ip_hash指令 -
server指令 -
upstream指令及相关变量
// 修改nginx.confworker_processes 1;events {worker_connections 1024;}http {upstream firstdemo {server 39.106.145.33;server 47.93.6.93;}server {listen 8080;location / {proxy_pass http://firstdemo;}}}
-
upstream模 #负载均衡就靠它 语法格式:upstream name {} 里面写的两个server分别对应着不同的服务器 -
server模块 实现反向代理 -
listen监听端口号 -
location / {}访问根路径 -
proxy_pass firstdemo,代理到firstdemo里两个服务器上
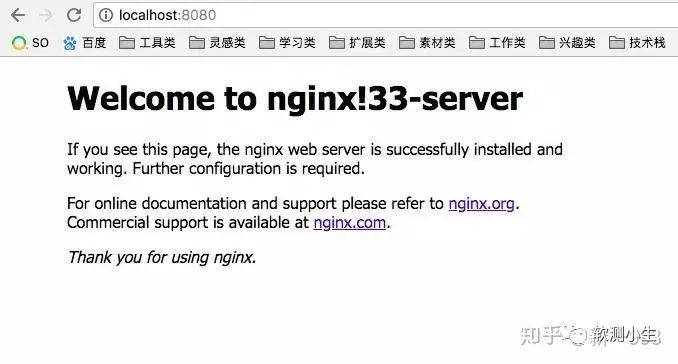
还有另一个页面
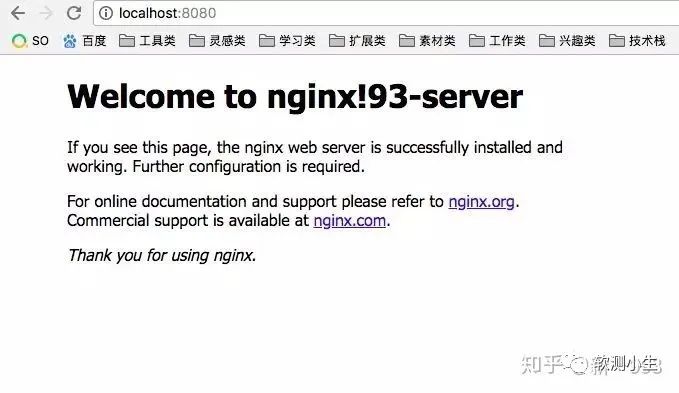
// 省略...upstream firstdemo {ip_hash;server 39.106.145.33;server 47.93.6.93;}
工作中的简单使用
server {listen 80;server_name chd.news.so.m.qss.test.so.com ;auth_basic off;location / {proxy_pass http://10.10.10.10:20186;proxy_set_header Host $host;proxy_redirect off;proxy_set_header X-Real-IP $remote_addr;proxy_set_header X-Forwarded-For $proxy_add_x_forwarded_for;proxy_connect_timeout 60;proxy_read_timeout 600;proxy_send_timeout 600;}}
文章合集
Selenium | Appium | Jenkins | Jmeter
软件测试方法汇总 | Postman接口参数化 | 测试用例设计
视频教程
Selenium | Appium | Jenkins | Jmeter
AWS与Docker
如何使用AWS EC2+Docker+JMeter构建分布式负载测试基础架构
Docker容器数据持久化和容器网桥连接
Docker删除image和container
Docker与VM虚拟机的区别以及Docker的特点

END
觉得不错,可以点“在看”,或者转发、留言
精彩的内容要和朋友分享哦
本文分享自微信公众号 - 软测小生(ruancexiaosheng)。
如有侵权,请联系 support@oschina.cn 删除。
本文参与“OSC源创计划”,欢迎正在阅读的你也加入,一起分享。
来源:oschina
链接:https://my.oschina.net/u/3823827/blog/4368343