一、下载安装小程序开发工具
登录微信公众平台:https://mp.weixin.qq.com/
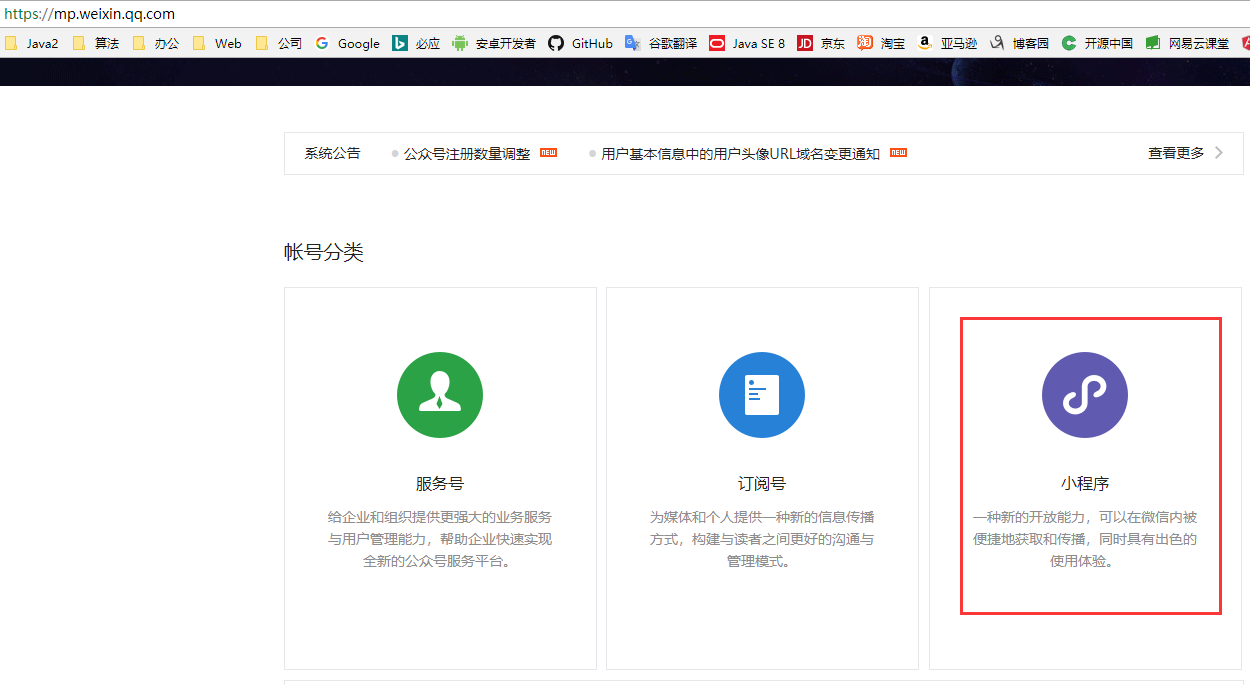
进入小程序开发文档
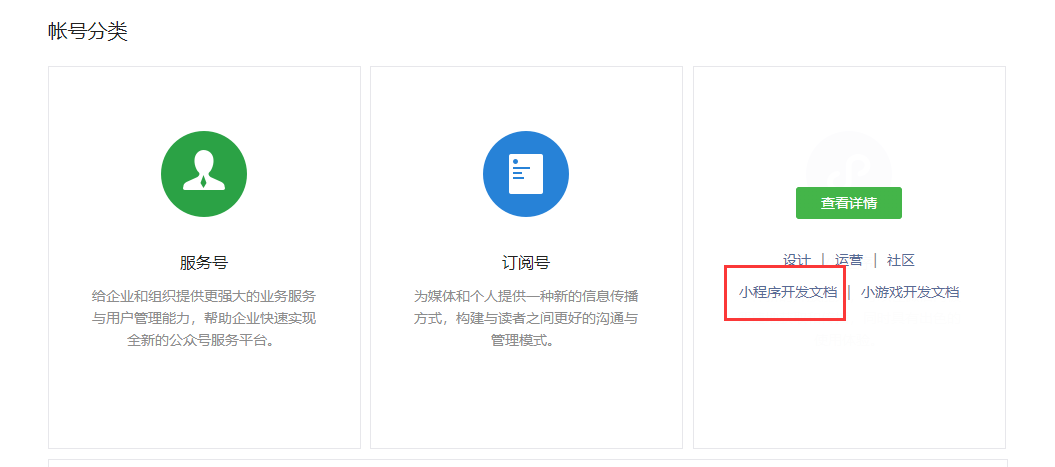
选择工具选项

下载对应平台的开发工具,直接链接:https://mp.weixin.qq.com/debug/wxadoc/dev/devtools/download.html

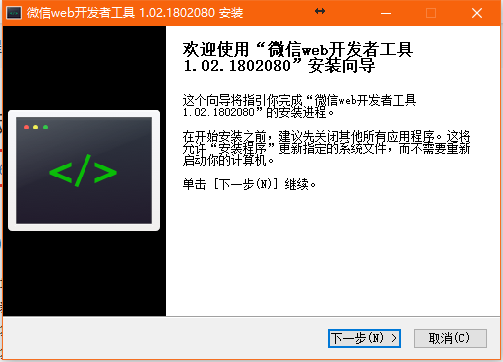
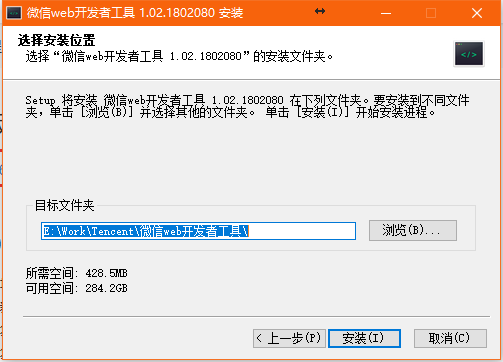
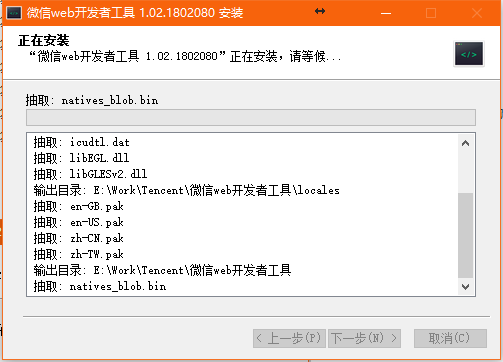
安装小程序开发工具
 |
 |
 |
二、创建项目
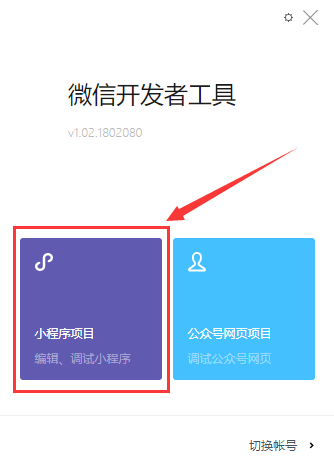
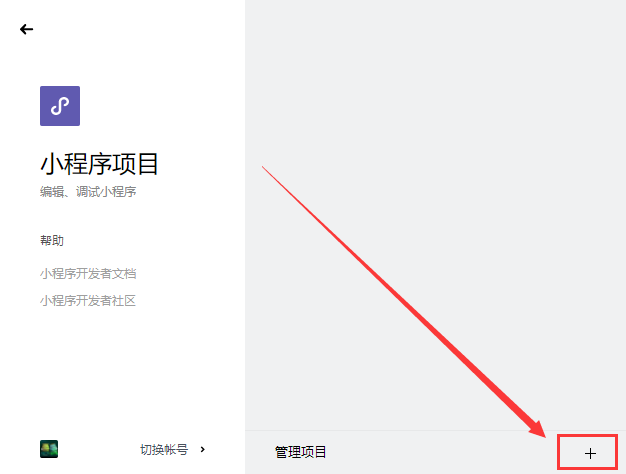
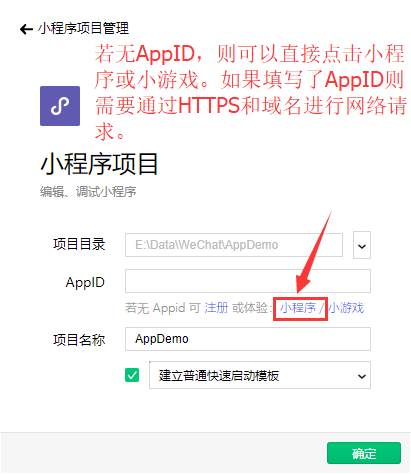
项目创建流程
 |
 |
 |
此时,开发工具将自动帮我们创建一个基础项目,开发工具操作面板结构如下:
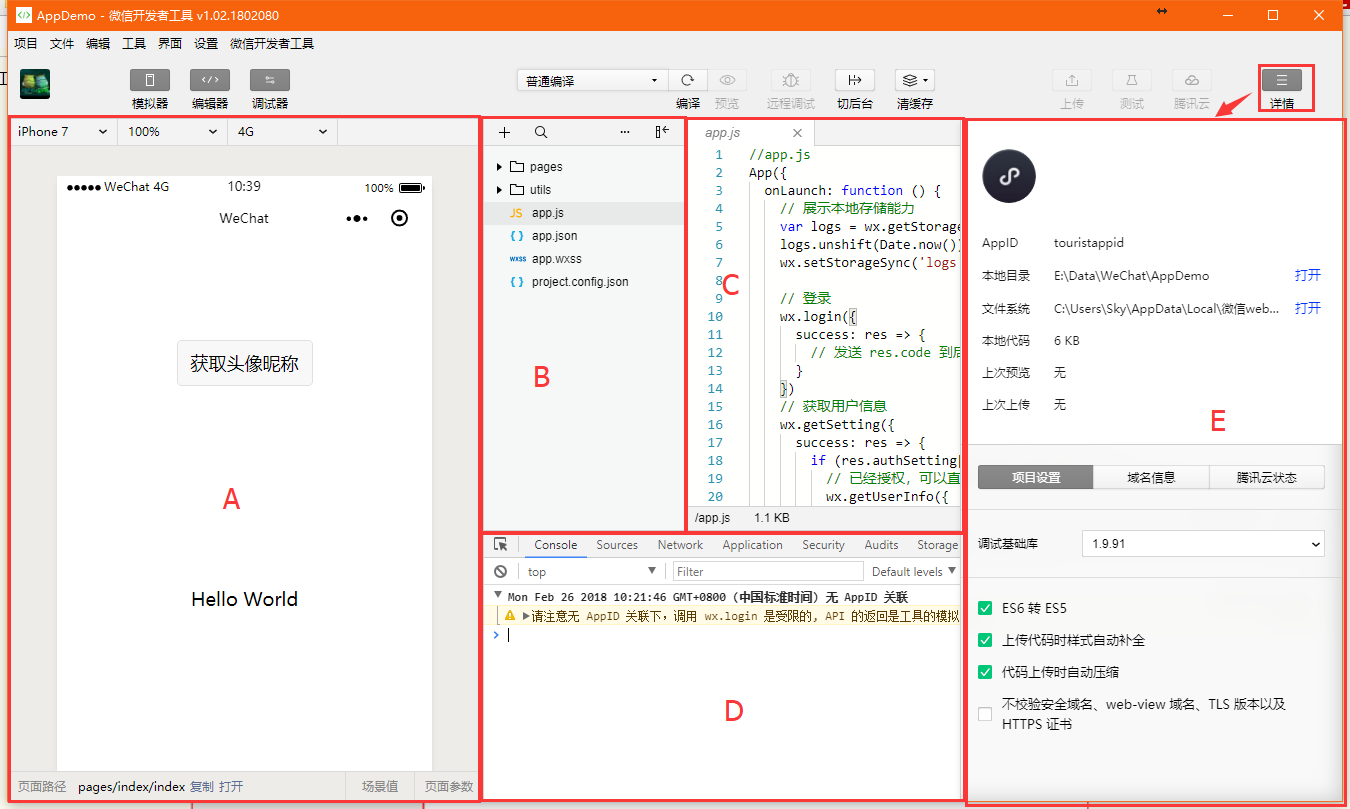
整个界面大致分为A、B、C、D、E四个功能区域
A:模拟器展示
B:项目文件资源管理
C:代码编写区域
D:代码调试面板,与谷歌浏览器的开发者工具很相似。
E:项目配置
三、项目结构
项目中共有四种文件类型,对应功能如下:
- .json 后缀的 JSON 配置文件
- .wxml 后缀的 WXML 模板文件
- .wxss 后缀的 WXSS 样式文件
- .js 后缀的 JS 脚本逻辑文件
项目根路径下的app.js文件为项目启动交互逻辑文件,app.json文件为项目的全局配置文件。
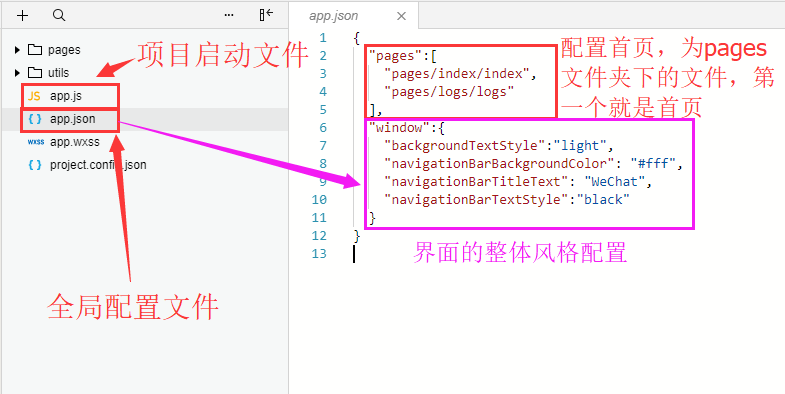
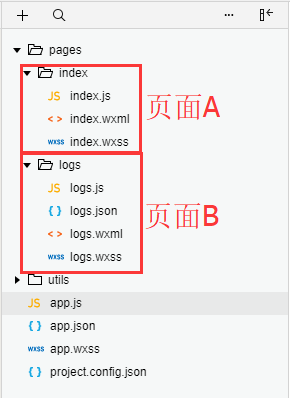
pages目录下的每个子目录对应界面中的一个页面。
每个页面目录下的json文件是各个页面的配置文件。
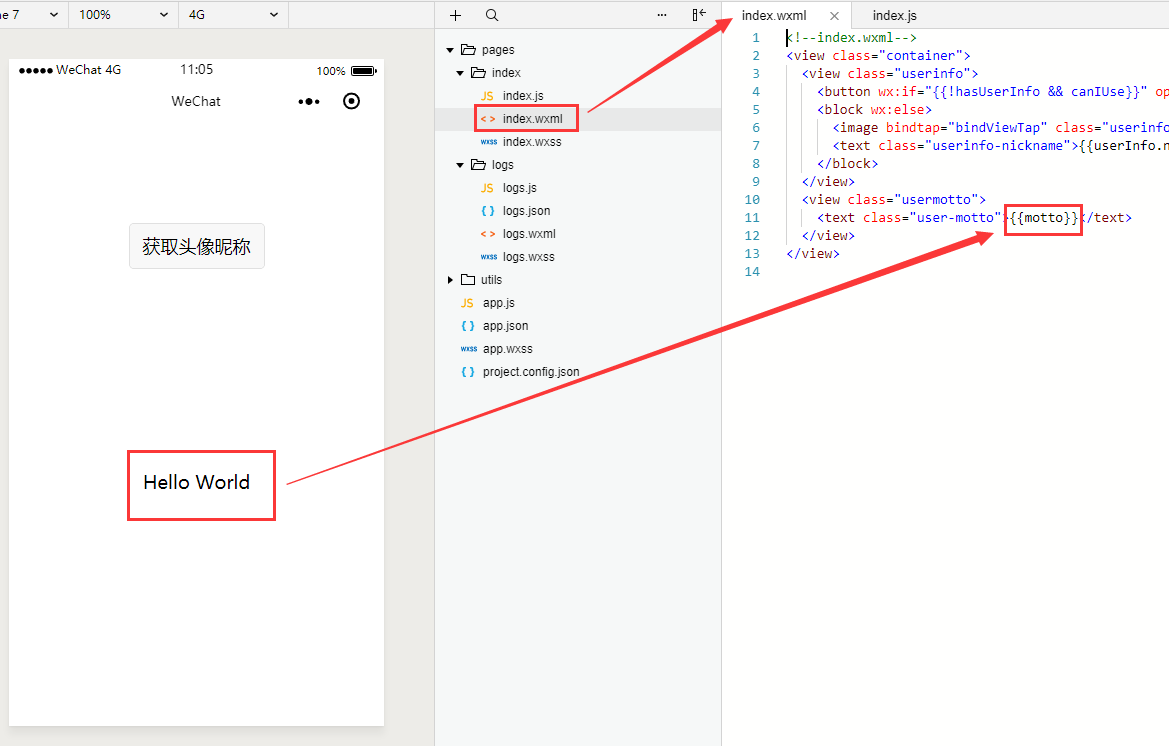
数据传递到页面,使用双大括号{{}}
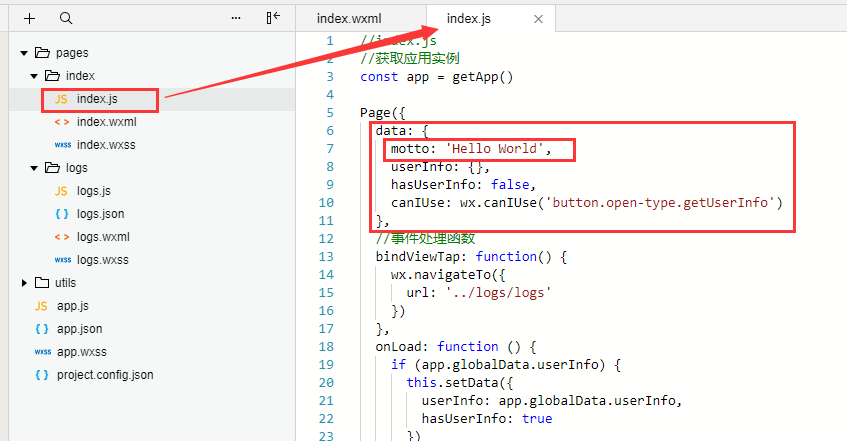
js文件的结构如下
Page({
  data: { // 参与页面渲染的数据
    logs: []
  },
  onLoad: function () {
    // 页面渲染后 执行
  }
})
四、代码编写
分享功能以及网络请求
index.wxml
<!--index.wxml-->
<view class="container">
  <text class="userinfo-nickname">{{templateInfo.code}}</text>
  <view class="userinfo">
    <button wx:if="{{!hasUserInfo && canIUse}}" open-type="getUserInfo" bindgetuserinfo="getUserInfo"> 获取头像昵称 </button>
    <block wx:else>
      <image bindtap="bindViewTap" class="userinfo-avatar" src="{{userInfo.avatarUrl}}" background-size="cover"></image>
      <text class="userinfo-nickname">{{userInfo.nickName}}</text>
    </block>
  </view>
  <view class="usermotto">
    <text class="user-motto">{{motto}}</text>
  </view>
  <view>
  <button id="shareCloseBtn" type='{{shareBtnInfo.type}}' bindtap="onShareCloseBtnClick">{{shareBtnInfo.text}}</button>
  <button id="shareBtn" style='margin-top: 50px;' type='primary' open-type='share'> 分享 </button>
  </view>
</view>
index.js
//index.js
//获取应用实例
const app = getApp()

Page({
  data: {
    motto: 'Hello World',
    shareBtnInfo:{
      text: '关闭分享',
      flag: true,
      type: 'warn'
    },
    templateInfo:{
      code:''
    },
    userInfo: {},
    hasUserInfo: false,
    canIUse: wx.canIUse('button.open-type.getUserInfo')
  },
  //事件处理函数
  bindViewTap: function() {
    wx.navigateTo({
      url: '../logs/logs'
    })
  },
  onLoad: function () {
    if (app.globalData.userInfo) {
      this.setData({
        userInfo: app.globalData.userInfo,
        hasUserInfo: true
      })
    } else if (this.data.canIUse){
      // 由于 getUserInfo 是网络请求,可能会在 Page.onLoad 之后才返回
      // 所以此处加入 callback 以防止这种情况
      app.userInfoReadyCallback = res => {
        this.setData({
          userInfo: res.userInfo,
          hasUserInfo: true
        })
      }
    } else {
      // 在没有 open-type=getUserInfo 版本的兼容处理
      wx.getUserInfo({
        success: res => {
          app.globalData.userInfo = res.userInfo
          this.setData({
            userInfo: res.userInfo,
            hasUserInfo: true
          })
        }
      })
    }
    /**
     * 网络请求
     */
    wx.request({
      url: 'http://60.255.160.15:8070/template/getDetailById', //仅为示例,并非真实的接口地址
      method:'GET',
      data: {
        id: '1'
      },
      success: res => {
        console.log(res.data)
        if(!res.data){
          this.setData({
            templateInfo: { code: '获取到code发生错误' }
          })
        }
        const code = res.data.code ;
        if (code == 20000){
          const data = res.data.data ;
          if(data){
            this.setData({
              templateInfo: {code:data.code}
            })
          }
        }else{
          this.setData({
            templateInfo: { code: '未获取到code' }
          })
        }
      }
    })
  },
  getUserInfo: function(e) {
    console.log(e)
    app.globalData.userInfo = e.detail.userInfo
    this.setData({
      userInfo: e.detail.userInfo,
      hasUserInfo: true
    })
  },
  /**
   * 关闭/打开分享按钮点击事件
   */
  onShareCloseBtnClick : function(){
    if (this.data.shareBtnInfo.flag){
      wx.hideShareMenu()
      this.setData({ shareBtnInfo:{
        text: '打开分享',
        flag : false,
        type:'primary'
      }})
    }else{
      wx.showShareMenu({
        withShareTicket: true
      })
      this.setData({
        shareBtnInfo: {
          text: '关闭分享',
          flag: true,
          type: 'warn'
        }
      })
    }
  },
  /**
   * 分享事件处理
   */
  onShareAppMessage: function (res) {
    if (res.from === 'button') {
      // 来自页面内转发按钮
      console.log(res.target)

    }
    return {
      title: '自定义转发标题',
      path: '/page/user?id=123',
      success: function (res) {
        // 转发成功
      },
      fail: function (res) {
        // 转发失败
      }
    }
  }
})
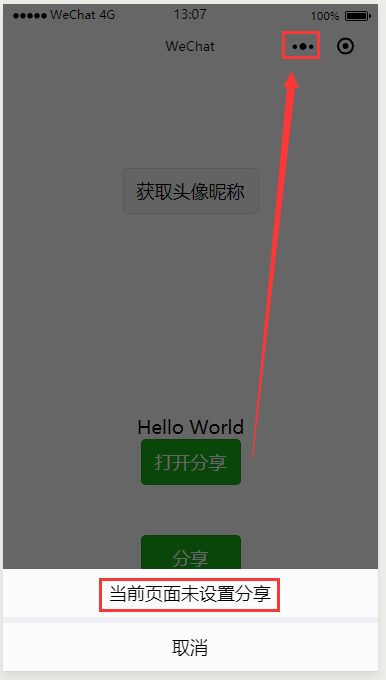
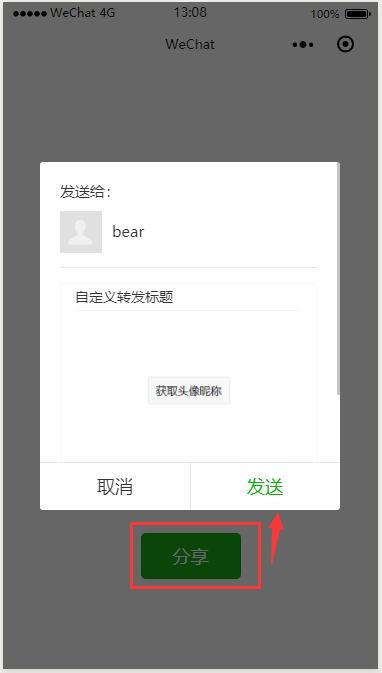
效果如下
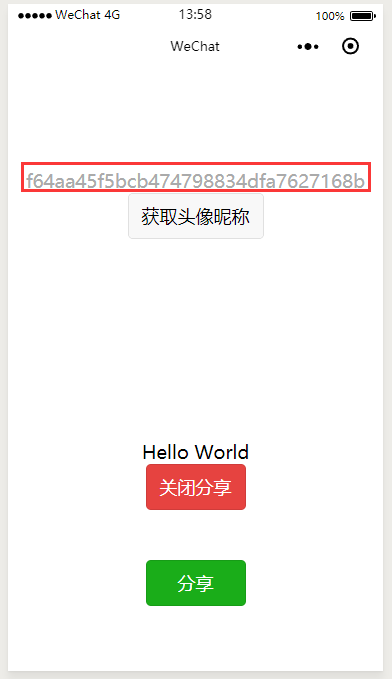 |
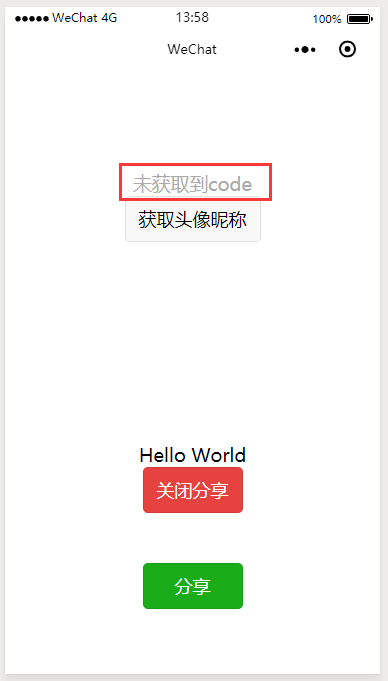 |
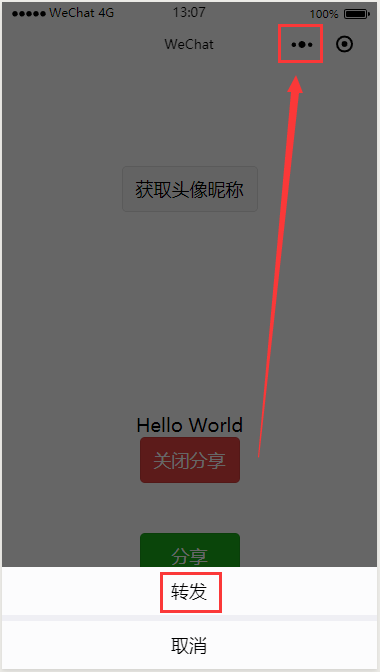 |
 |
 |
来源:oschina
链接:https://my.oschina.net/u/4412369/blog/4242983