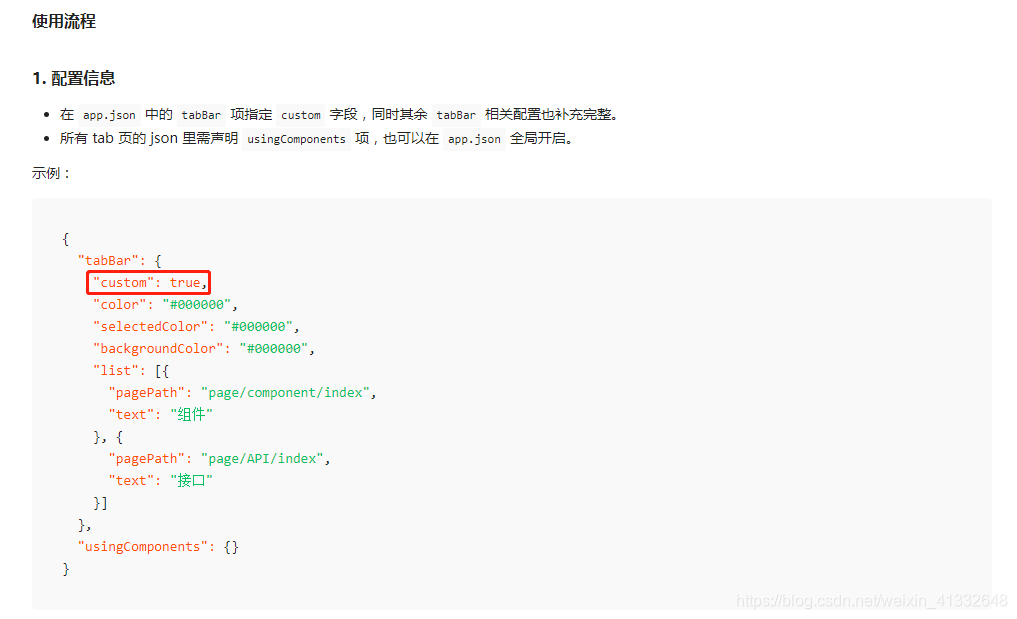
案例一:
https://www.cnblogs.com/liao123/p/11005796.html
很精彩的案例,值得看一下(重点是要知道原理)
案例二:
接合微信小程序开发文档
https://developers.weixin.qq.com/miniprogram/dev/framework/ability/custom-tabbar.html
详见

官网代码见上面圈红的开发者工具预览效果。
使用该方法需要使用到:
if (typeof this.getTabBar === 'function' &&
    this.getTabBar()) {
    this.getTabBar().setData({
      selected: 0
    })
  }
但:个人不建议使用这种方法(案例二),建议使用自定义导航栏组件,隐藏原生的导航栏(在app.js中的onLaunch使用wx.hideTabBar()去隐藏), 方法如案例三
还有如果使用案例二的导航栏的话,需要注意官方文档的这个要求,需要把版本库提高
另外也不使用cover-view + cover-image,因为会因为各种版本库的原因导致各种无法预料的错误。
案例三:个人自定义导航栏简单代码:
效果图:
步骤1:custom-tab-bar(即组件) 文件下:
// index.js
Component({
  data: {
    selected: 0,
    color: "#7A7E83",
    selectedColor: "#3cc51f",
    list: [{
      pagePath: "/pages/home/index",
      iconPath: "/image/icon_component.png",
      selectedIconPath: "/image/icon_component_HL.png",
      text: "组件"
    }, {
      pagePath: "/pages/interface/index",
      iconPath: "/image/icon_API.png",
      selectedIconPath: "/image/icon_API_HL.png",
      text: "接口"
    }]
  },
  properties: {
    selected: {
      type: Number, // 接收父组件传过来的值
      value: ''
    }
  },
  attached() {
  },
  methods: {
    switchTab(e) {
      const data = e.currentTarget.dataset
      const url = data.path
      wx.switchTab({url})
    }
  }
})
// index.json
{
  "component": true
}
<!--miniprogram/custom-tab-bar/index.wxml-->
<view class="tab-bar">
  <view class="tab-bar-border"></view>
  <view wx:for="{{list}}" wx:key="index" class="tab-bar-item" data-path="{{item.pagePath}}" data-index="{{index}}" bindtap="switchTab">
    <image src="{{selected === index ? item.selectedIconPath : item.iconPath}}"></image>
    <view style="color: {{selected === index ? selectedColor : color}}">{{item.text}}</view>
  </view>
</view>
.tab-bar {
  position: fixed;
  bottom: 0;
  left: 0;
  right: 0;
  height: 48px;
  background: white;
  display: flex;
  padding-bottom: env(safe-area-inset-bottom);
}

.tab-bar-border {
  background-color: rgba(0, 0, 0, 0.33);
  position: absolute;
  left: 0;
  top: 0;
  width: 100%;
  height: 1px;
  transform: scaleY(0.5);
}

.tab-bar-item {
  flex: 1;
  text-align: center;
  display: flex;
  justify-content: center;
  align-items: center;
  flex-direction: column;
}

.tab-bar-item image {
  width: 27px;
  height: 27px;
}

.tab-bar-item view {
  font-size: 10px;
}
步骤2:
在使用自定义导航栏的文件中:(/pages/home/index假设是组件页)
// index.json /pages/home/index
{
    "usingComponents": {
      "v-tab-bar": "/custom-tab-bar/index"
    }
}
// index.wxml /pages/home/index
<view class="intro">组件</view>
<!-- 导航栏 -->
<v-tab-bar selected="{{selected}}" ></v-tab-bar>
//index.js /pages/home/index
Page({
  data: {
    selected: 0, // 这里是传给子组件的值
  },
  onLoad: function () {

  },
  /**
 * 生命周期函数--监听页面显示
 */
  onShow: function () {

  },
  //  用户点击右上角分享

  onShareAppMessage: function (res) {

  },

})
// wxss /pages/home/index
.intro {
  margin: 30px;
  text-align: center;
}
步骤三:隐藏原生的导航栏,不然就会出现下图这种情况
//app.js
App({
  onLaunch: function () {
    wx.hideTabBar()  // 隐藏原生的导航栏
  }
})
来源:CSDN
作者:蚊子-daya
链接:https://blog.csdn.net/weixin_41332648/article/details/103668714