【推荐】2019 Java 开发者跳槽指南.pdf(吐血整理) >>> 
【前言】
在工作过程中用到了FastDFS来做分布式文件管理和存储,关于FastDFS的东西百科(详情猛击me)写的很明白,在此不再赘述;接下来主要为大家介绍一下FastDFS搭建过程。
【FastDFS搭建详解】
一、所需基本环境
1、Linux版本:CentOS7
2、FastDFS版本:5.05
3、Xsheel版本:5
二、FastDFS安装
1、安装gcc
yum install gcc-c++
2、安装libevent工具包
yum -y install libevent
3、安装wget
yum -y install wget
4、安装perl
(1)wget http://www.cpan.org/src/5.0/perl-5.24.1.tar.gz
(2)tar -xzf perl-5.24.1.tar.gz
(3)cd perl-5.24.1
(4)./Configure -des -Dprefix=$HOME/localperl
(5)make
(6)make test
(7)make install
5、安装libfastcommon-1.0.7
(1)下载
(2)unzip libfastcommon-1.0.7.zip (若没有unzip插件则用yum install -y unzip zip安装)
(3)cd libfastcommon-1.0.7
(4)./make.sh
(5)./make.sh install
(6)将 /usr/lib64 中的libfastcommon.so 拷贝到/usr/lib下
cp /usr/lib64/libfastcommon.so /usr/lib/
6、安装Tracker服务。
(1)解压缩(FastDFS_v5.05.tar.gz)
(2)./make.sh
(3)./make.sh install
安装后在/usr/bin/目录下有以fdfs开头的文件都是编译出来的。
配置文件都放到/etc/fdfs文件夹
(4)把/root/FastDFS/conf目录下的所有的配置文件都复制到/etc/fdfs下。
(5)配置tracker服务。修改/root/FastDFS/conf/tracker.conf文件。
(6)启动tracker。/usr/bin/fdfs_trackerd /etc/fdfs/tracker.conf
重启使用命令:/usr/bin/fdfs_trackerd /etc/fdfs/tracker.conf restart
7、安装storage服务
(1)如果是在不同的服务器安装,第四步的1~4需要重新执行
(2)配置storage服务。修改/root/FastDFS/conf/storage.conf文件
(3)启动storage服务。
/usr/bin/fdfs_storaged /etc/fdfs/storage.conf restart
8、测试服务
(1)修改配置文件/etc/fdfs/client.conf


(2)测试
/usr/bin/fdfs_test /etc/fdfs/client.conf upload anti-steal.jpg
9、启动tracker和storage的命令改善
(1)每次启动fastdfs启动都需要输入以下这两个命令不容易记
/usr/bin/fdfs_trackerd /etc/fdfs/tracker.conf
/usr/bin/fdfs_storaged /etc/fdfs/storage.conf
(2)进行相关改善
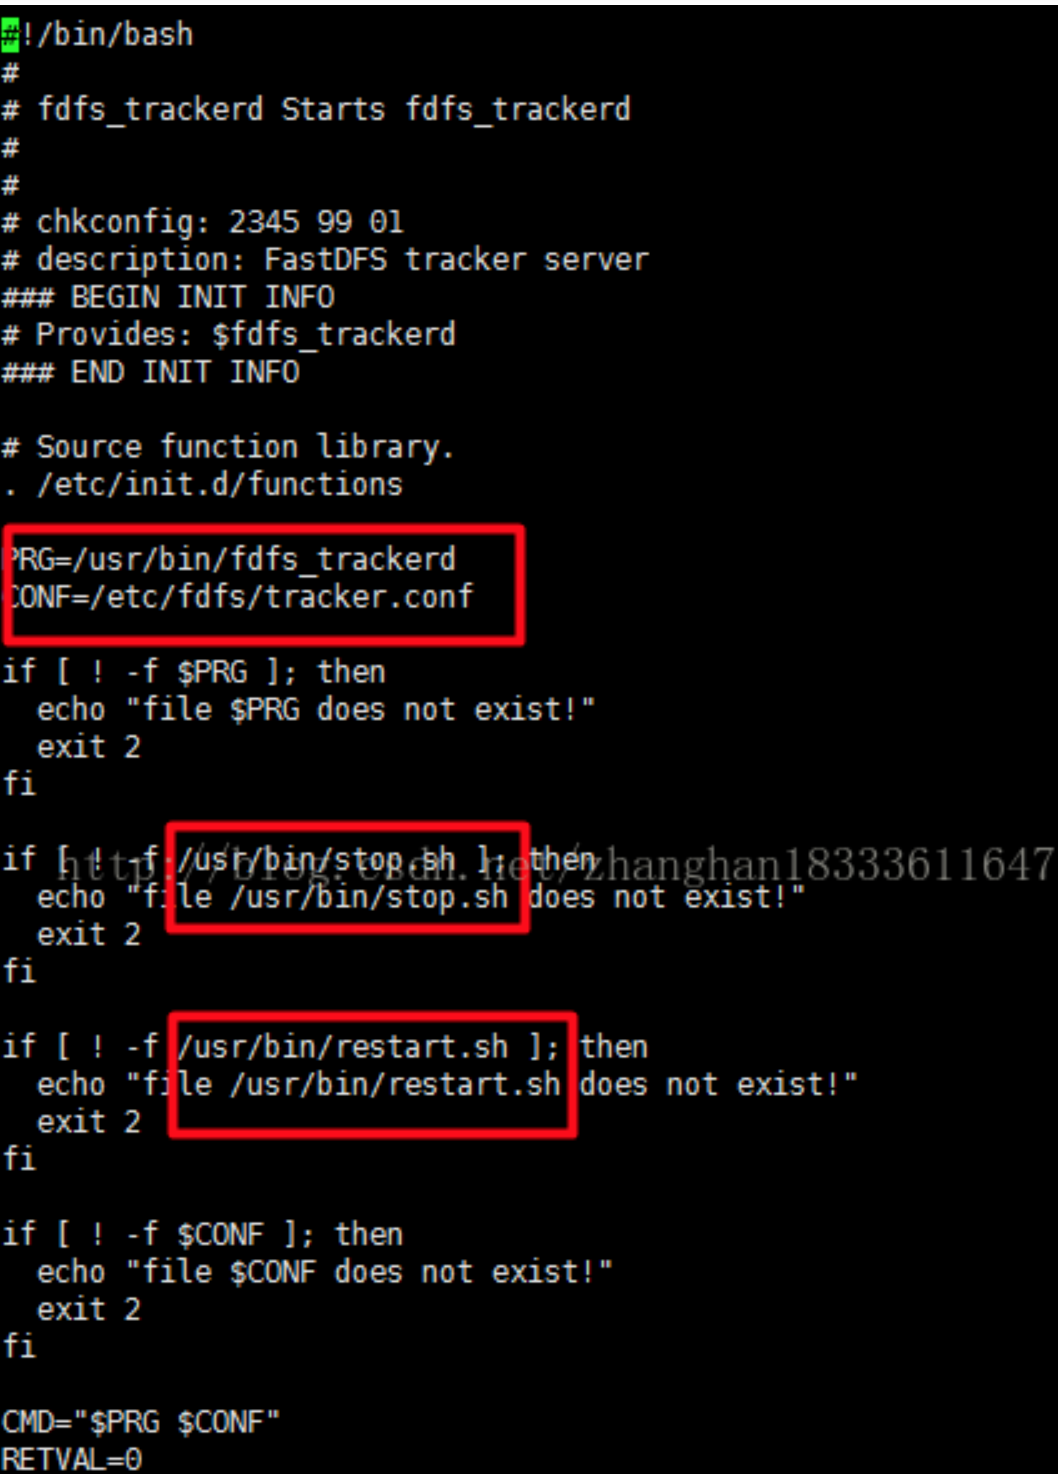
①trackerd相关:
vi /etc/init.d/fdfs_trackerd
修改相应的路径(共5处)
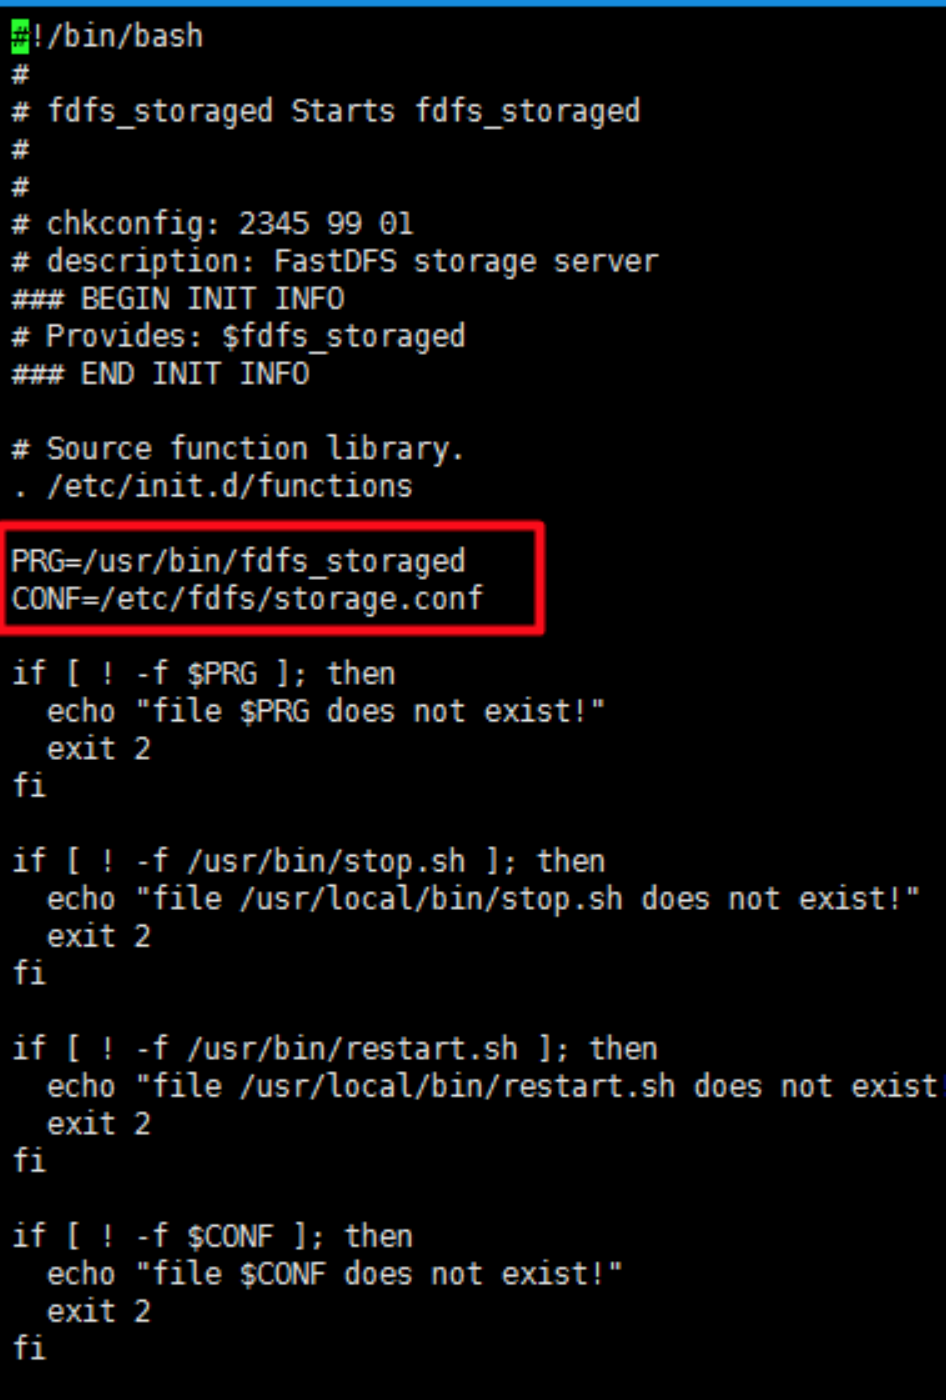
②storaged相关
vi /etc/init.d/fdfs_storaged
修改相应的路径,有五处
③设置环境变量
vi /etc/profile
在最末尾加入

④环境变量生效:
source /etc/profile
(3)启动命令变为
fdfs_trackerd start
fdfs_storaged start
(4)执行完(3)中命令后分别用以下命令进行检查
ps -ef | grep trackerd
ps -ef | grep storage

三、搭建nginx提供http服务
1、说明:
可以使用官方提供的nginx插件。要使用nginx插件需要重新编译。
fastdfs-nginx-module_v1.16.tar03.gz
2、解压插件压缩包
3、修改/root/fastdfs-nginx-module/src/config文件,把其中的local去掉。

4、对nginx重新config
./configure \
--prefix=/usr/local/nginx-1.10.3 \
--add-module=/root/fastdfs-nginx-module/src
5、make
6、make install
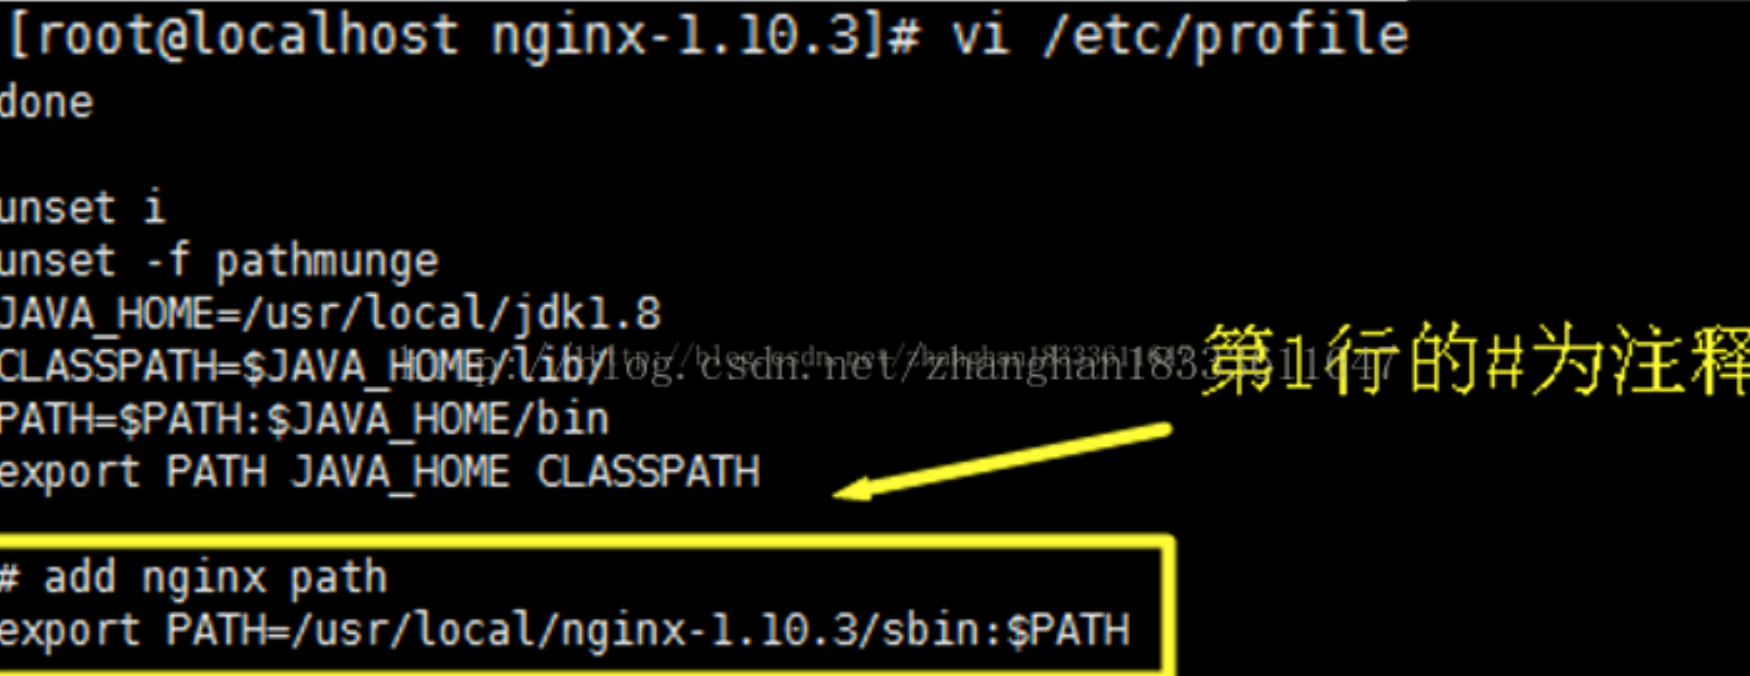
7、修改环境变量
(1)vi /etc/profile 加入以下内容
(2)source /etc/profile
8、将配置文件修改为配置文件在Nginx安装目录下的conf中的nginx.conf
/usr/local/nginx-1.10.3/sbin/nginx -c /usr/local/nginx-1.10.3/conf/nginx.conf
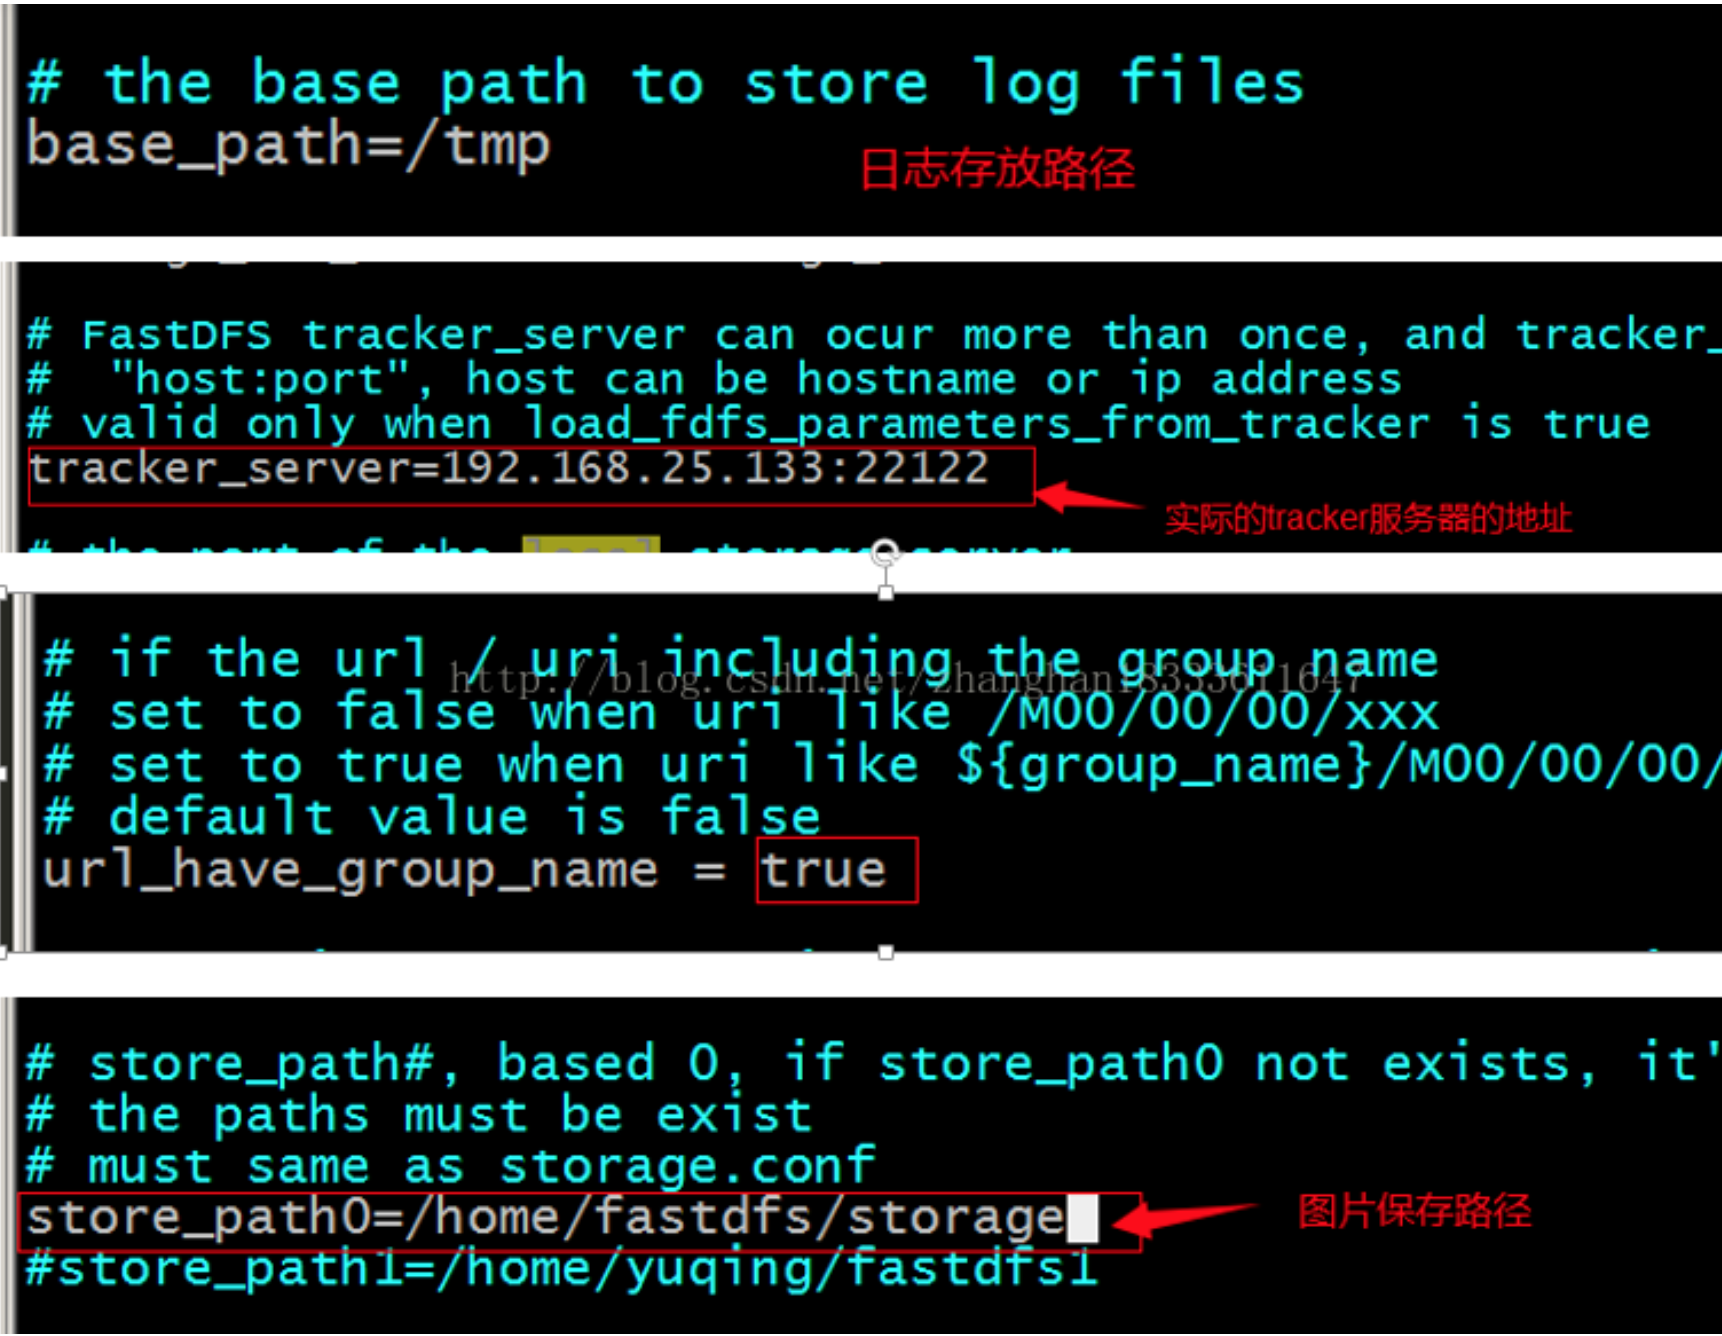
9、把/root/fastdfs-nginx-module/src/mod_fastdfs.conf文件复制到/etc/fdfs目录下。编辑:
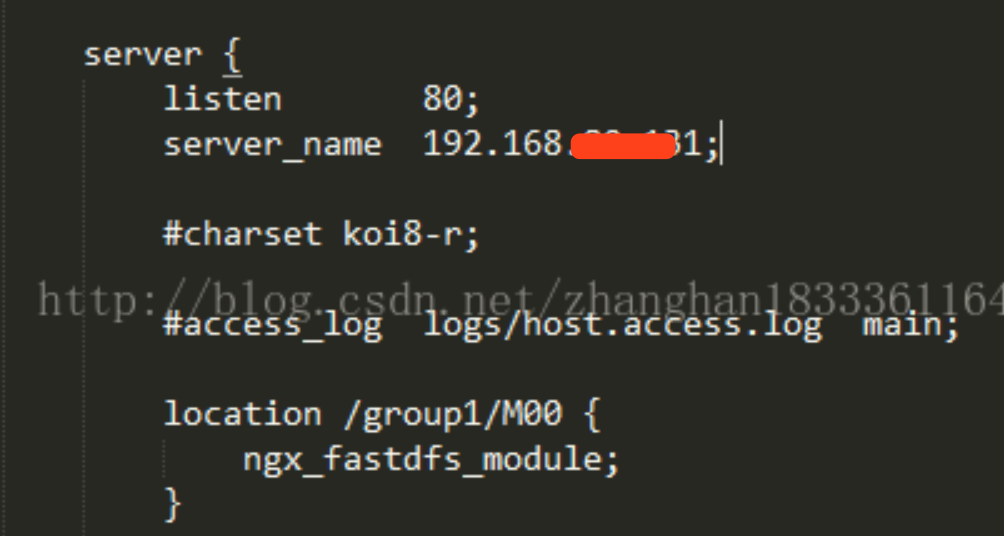
10、nginx的配置
在nginx的配置文件中添加一个Server:
11、将libfdfsclient.so拷贝至/usr/lib下
cp /usr/lib64/libfdfsclient.so /usr/lib/
12、启动nginx
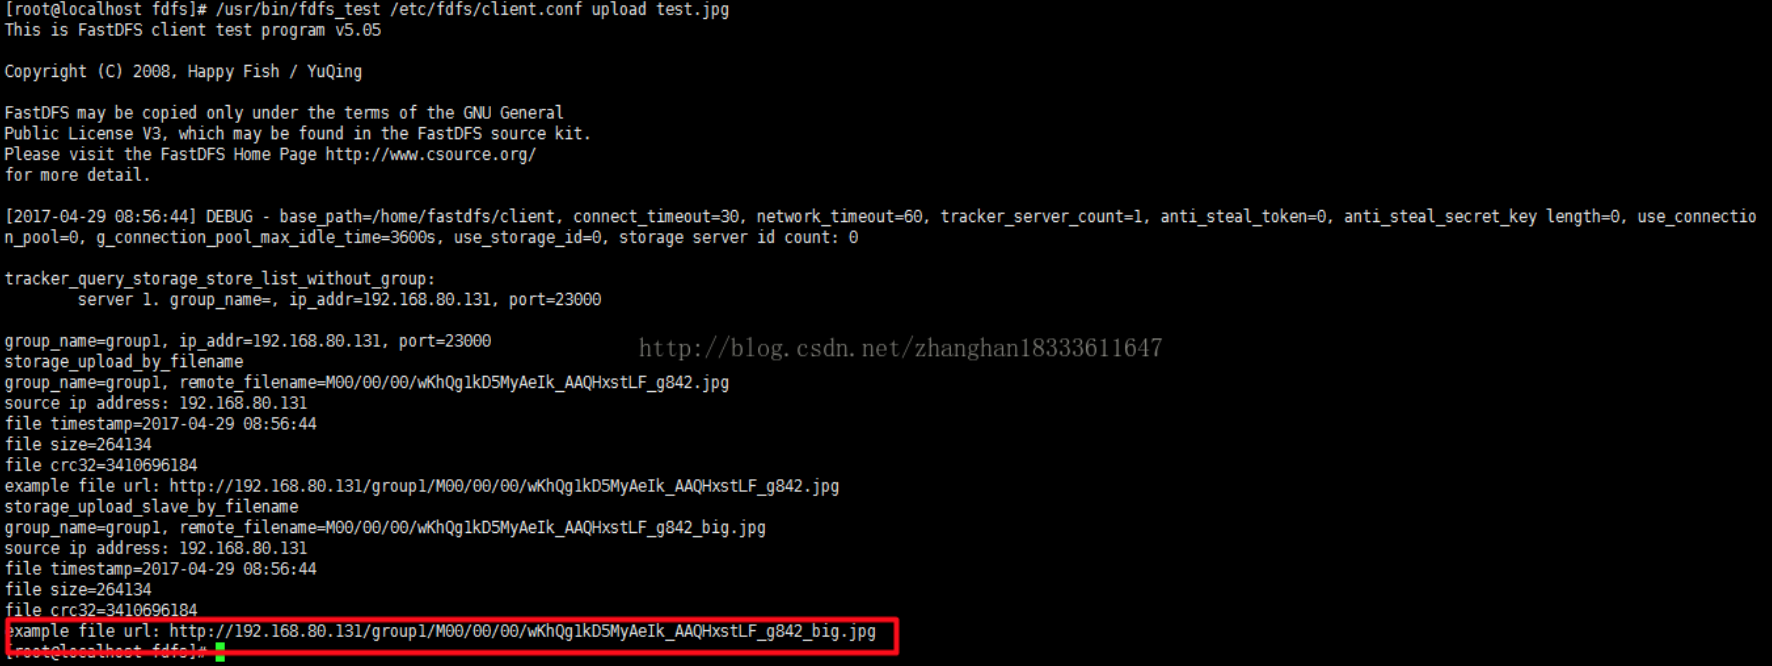
13、进行测试
(1)进入相关目录
cd /etc/fdfs/
(2)上传图片
/usr/bin/fdfs_test /etc/fdfs/client.conf upload anti-steal.jpg
(3)在浏览器中进行访问

【总结】
1、实践出真知;
2、持续不断的去学习;
3、不断去接受新的事物。
来源:oschina
链接:https://my.oschina.net/u/2336787/blog/3146089