苹果在 iOS 5 中新引入了“ 远程虚拟接口(Remote Virtual Interface, RVI )”的特性,可以在 Mac 中建立一个虚拟网络接口来作为 iOS 设备的网络栈,这样所有经过 iOS 设备的流量都会经过此虚拟接口。
此虚拟接口只是监听 iOS 设备本身的协议栈(但并没有将网络流量中转到 Mac 本身的网络连接上),所有网络连接都是 iOS 设备本身的,与 Mac 电脑本身联不联网或者联网类型无关。
iOS设备本身可以为任意网络类型(WiFi/xG),这样在 Mac 电脑上使用任意抓包工具(tcpdump、Wireshark、CPA)抓取 RVI 接口上的数据包就实现了对 iPhone 的抓包。
Mac OS X 对 RVI 的支持是通过终端命令 rvictl 提供的(需要安装Xcode):
➜ ✗  rvictl

rvictl [-h][-l][-s <udid1> ... <udidN>][-x <udid1> ... <udidN>]

Remote Virtual Interface Tool starts and stops a remote packet capture instance
for any set of attached mobile devices. It can also provide feedback on any attached
devices that are currently relaying packets back to this host.

Options:
	-l, -L		List currently active devices
	-s, -S		Start a device or set of devices
	-x, -X		Stop a device or set of devices
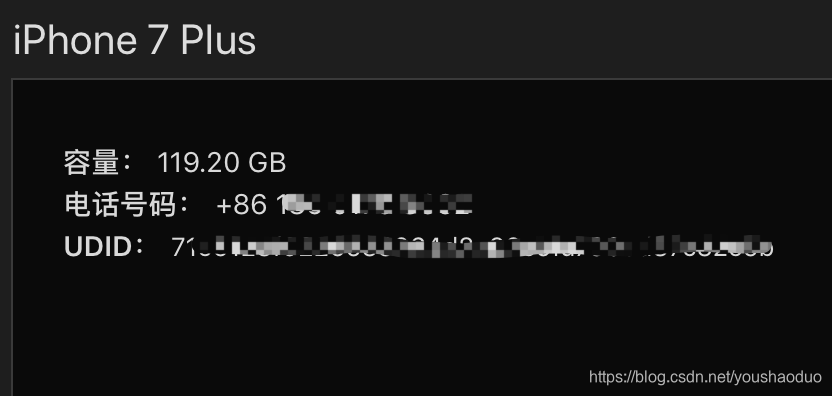
首先将手机连接到Mac上,打开iTunes,查看手机的UDID。
然后打开Mac终端,输入:
➜ ✗  rvictl -s UDID

Starting device xxe6128f0xxxxxxxxxd8e92c9fa790xxxxxxxxxx [SUCCEEDED] with interface rvi0
使用tcpdump监听虚拟接口,可以按Ctrl+C停止监听(如果安装了wireshark,此步骤可以直接使用wireshark来监听虚拟接口):
➜ ✗ sudo tcpdump -i rvi0 -w dump.pcap
tcpdump: WARNING: rvi0: That device doesn't support promiscuous mode
(BIOCPROMISC: Operation not supported on socket)
tcpdump: listening on rvi0, link-type PKTAP (Apple DLT_PKTAP), capture size 262144 bytes

3904 packets captured
3915 packets received by filter
0 packets dropped by kernel
命令行解释:
-i rvi0 选择需要抓取的接口为rvi0(远程虚拟接口)
-w dump.pcap 设置保存的文件名称
结束监听之后别忘了删除虚拟接口:
➜  ✗ rvictl -x UDID

Stopping device xxe6128f0xxxxxxxxxd8e92c9fa790xxxxxxxxxx [SUCCEEDED]
然后将文件dump.pcap拖入wireshark分析即可,此处的dump.pacp包含了WebSockets信息。
或者如果不需要分析WebSockets流量,也可以这样,安装tcpreplay工具:
➜ ✗ brew install tcpreplay
==> Installing dependencies for tcpreplay: libdnet
==> Installing tcpreplay dependency: libdnet
==> Downloading https://homebrew.bintray.com/bottles/libdnet-1.12.mojave.bottle.4.tar.gz
######################################################################## 100.0%
==> Pouring libdnet-1.12.mojave.bottle.4.tar.gz
🍺  /usr/local/Cellar/libdnet/1.12: 28 files, 213.3KB
==> Installing tcpreplay
==> Downloading https://homebrew.bintray.com/bottles/tcpreplay-4.3.2.mojave.bottle.tar.gz
==> Downloading from https://akamai.bintray.com/50/502523def8034da8a129f830457c2d7fb5ac6e3ebde96370c8c2756508c7bdda?__gda__=exp=1575966605~hmac=28bbdf5c3dd5e7db91386e69af18f2454f277e985993b7a69b0f2961aa91b97d&response-content-disposition=
######################################################################## 100.0%
==> Pouring tcpreplay-4.3.2.mojave.bottle.tar.gz
🍺  /usr/local/Cellar/tcpreplay/4.3.2: 14 files, 1.5MB
Tcprewrite可以重写数据包。
Tcprewrite重写第二层以太网层:
➜ ✗ tcprewrite --dlt=enet --enet-dmac=00:11:22:33:44:55 --enet-smac=66:77:88:99:AA:BB --infile=dump.pcap --outfile=data.pcap
也可以重写第四层TCP、UDP层:
➜ ✗ tcprewrite --portmap=80:8080,22:8022 --infile=dump.pcap --outfile=tcp.pcap
但是注意,此方法虽然可以生成让Charles打开的pcap文件,但是并没有我们所需要的WebSockets信息,因此不建议这么做。
来源:CSDN
作者:ParadiseDuo
链接:https://blog.csdn.net/youshaoduo/article/details/103478294