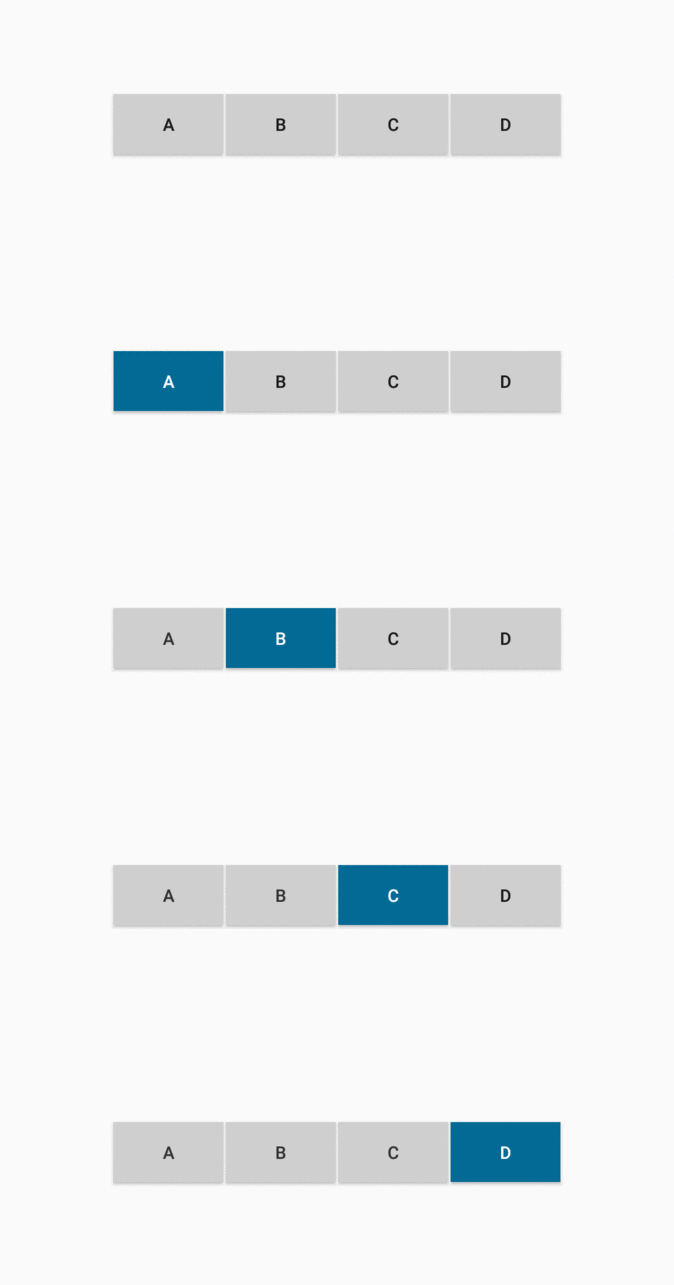
I'm trying to do in android a group of buttons that can be selected and activate only one of them. I need to work with the same logic of a radiogroup and radiobuttons.
I tried many alternatives but I want the most effective way. How can I do it?
You can use this simple way :
1.activity_button_group.xml
<?xml version="1.0" encoding="utf-8"?>
<LinearLayout xmlns:android="http://schemas.android.com/apk/res/android"
    android:layout_width="match_parent"
    android:layout_height="match_parent"
    android:gravity="center_horizontal">

<Button
    android:layout_width="wrap_content"
    android:layout_height="wrap_content"
    android:text="A"
    android:id="@+id/btn0"
    android:layout_gravity="center_vertical" />

<Button
    android:layout_width="wrap_content"
    android:layout_height="wrap_content"
    android:text="B"
    android:id="@+id/btn1"
    android:layout_gravity="center_vertical" />

<Button
    android:layout_width="wrap_content"
    android:layout_height="wrap_content"
    android:text="C"
    android:id="@+id/btn2"
    android:layout_gravity="center_vertical" />

<Button
    android:layout_width="wrap_content"
    android:layout_height="wrap_content"
    android:text="D"
    android:id="@+id/btn3"
    android:layout_gravity="center_vertical" />
</LinearLayout>
2.ButtonGroupActivity.java
public class ButtonGroupActivity extends Activity implements View.OnClickListener{

    private Button[] btn = new Button[4];
    private Button btn_unfocus;
    private int[] btn_id = {R.id.btn0, R.id.btn1, R.id.btn2, R.id.btn3};

    @Override
    protected void onCreate(Bundle savedInstanceState) {
        super.onCreate(savedInstanceState);
        setContentView(R.layout.activity_button_group);

        for(int i = 0; i < btn.length; i++){
            btn[i] = (Button) findViewById(btn_id[i]);
            btn[i].setBackgroundColor(Color.rgb(207, 207, 207));
            btn[i].setOnClickListener(this);
        }

        btn_unfocus = btn[0];
    }

    @Override
    public void onClick(View v) {
        //setForcus(btn_unfocus, (Button) findViewById(v.getId()));
        //Or use switch
        switch (v.getId()){
            case R.id.btn0 :
                setFocus(btn_unfocus, btn[0]);
                break;

            case R.id.btn1 :
                setFocus(btn_unfocus, btn[1]);
                break;

            case R.id.btn2 :
                setFocus(btn_unfocus, btn[2]);
                break;

            case R.id.btn3 :
                setFocus(btn_unfocus, btn[3]);
                break;
        }
    }

    private void setFocus(Button btn_unfocus, Button btn_focus){
        btn_unfocus.setTextColor(Color.rgb(49, 50, 51));
        btn_unfocus.setBackgroundColor(Color.rgb(207, 207, 207));
        btn_focus.setTextColor(Color.rgb(255, 255, 255));
        btn_focus.setBackgroundColor(Color.rgb(3, 106, 150));
        this.btn_unfocus = btn_focus;
    }
}
While you can set this in code as Denny Schuldt suggested, a "cleaner" way is to do it in xml (e.g. drawable/radio.xml):
<?xml version="1.0" encoding="utf-8"?>
<selector xmlns:android="http://schemas.android.com/apk/res/android">
  <item android:drawable="@drawable/button_checked" android:state_checked="true" />
  <item android:drawable="@android:color/transparent" />
</selector>
And set it as button background: android:background="@drawable/radio"
You could still use Radio Buttons inside a Radio Group, and attributes to make each radio button look like a button.
In xml, for each radio button set android:button="@null", so that dots won't be visible. You could add some padding to make it look different.
In code, set a CheckedChangeListener to your radioGroup, then find the reference to the checkedView (RadioButton) with checkedId. In this example I've just changed the background color of the view, but you could add a different background too. If the radioButton is not null, it means it has already been changed, so I'll set its initial state again.
radioGroup.setOnCheckedChangeListener(new RadioGroup.OnCheckedChangeListener() {
  @Override
  public void onCheckedChanged(RadioGroup group, int checkedId) {
    if (radioButton != null) {
      radioButton.setBackgroundColor(Color.TRANSPARENT);
      radioButton.setButtonDrawable(0); // removes the image
    }
    radioButton = (RadioButton) group.findViewById(checkedId);
    radioButton.setBackgroundColor(Color.YELLOW);
    radioButton.setButtonDrawable(R.drawable.icon); //sets the image
  }
});
Hope this helps!
来源:https://stackoverflow.com/questions/32534076/what-is-the-best-way-to-do-a-button-group-that-can-be-selected-and-activate-inde
