【威哥说】如果任何一款产品的推广,不只是运营的主要工作,而是更加注重用户体验,及时网站内容不丰富,只要有一个功能显得小有逼格,就会给人完全不一样的感觉。下面大家就一起看看,如果做一个有逼格的标题栏。
【正文】Toolbar这个控件是在 Android 5.0 推出的一个 Material Design 风格的导航控件 ,Google 推荐大家使用 Toolbar 来作为Android客户端的导航栏,以此来取代之前的 Actionbar 。与 Actionbar 相比,Toolbar 明显要灵活的多。它不像 Actionbar 一样,一定要固定在Activity的顶部,而是可以放到界面的任意位置。除此之外,在设计 Toolbar 的时候,Google也留给了开发者很多可定制修改的余地,这些可定制修改的属性在API文档中都有详细介绍,如:

设置导航栏图标;

设置App的logo;

支持设置标题和子标题;

支持添加一个或多个的自定义控件;

支持Action Menu;

下面我们就开始使用ToolBar这个控件和之前的Fragment一样,由于是后期推出的,为了兼容性(5.0之前),使用 android.support.v7.widget.Toolbar 进行开发。

首先是布局:
<LinearLayout xmlns:android="http://schemas.android.com/apk/res/android"
xmlns:toolbar="http://schemas.android.com/apk/res-auto"

android:layout_width="match_parent"

android:layout_height="match_parent"

android:orientation="vertical">

<android.support.v7.widget.Toolbar

    android:id="@+id/toolbar"

    android:layout_width="match_parent"

    android:layout_height="wrap_content"

    android:background="#0176da"

    toolbar:popupTheme="@style/Theme.ToolBar.Base">

    <!--自定义控件-->

    <TextView

        android:layout_width="wrap_content"

        android:layout_height="wrap_content"

        android:text="磨砺营教育" />

</android.support.v7.widget.Toolbar>
</LinearLayout>
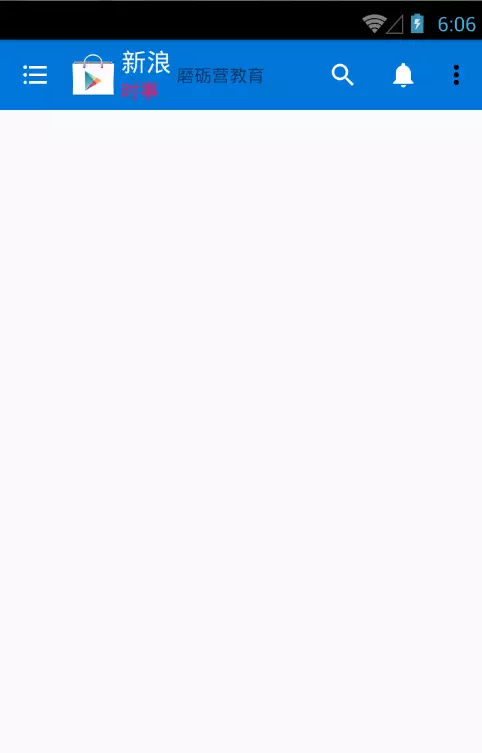
在toolsbar里面放置任意布局,显示位置参照图片

另外这里要注意,如果要用到toolbar的属性,必须导入xmlns:toolbar="http://schemas.android.com/apk/res-auto"命名,不能是android开头,否则无效。
然后是代码的实现:
public class ToolBarActivity extends AppCompatActivity {
@Override

protected void onCreate(Bundle savedInstanceState) {

    super.onCreate(savedInstanceState);
这里设置notitle主题
    supportRequestWindowFeature(Window.FEATURE_NO_TITLE);

    setContentView(R.layout.activity_tool_bar);
这里获取toolbar后,对其进行一系列的设置,颜色,字体等等。
    Toolbar toolbar = (Toolbar) findViewById(R.id.toolbar);

    toolbar.setNavigationIcon(R.mipmap.ic_home);//设置导航栏图标

    toolbar.setLogo(R.mipmap.ic_launcher);//设置app logo

    toolbar.setTitle("新浪");//设置主标题

    toolbar.setTitleTextColor(Color.GREEN);//设置主标题颜色

    toolbar.setTitleTextAppearance(this, R.style.Theme_ToolBar_Base_Title);//修改主标题的外观,包括文字颜色,文字大小等

    toolbar.setSubtitle("时事");//设置子标题

    toolbar.setSubtitleTextColor(getResources().getColor(android.R.color.darker_gray));//设置子标题颜色

    toolbar.setSubtitleTextAppearance(this, R.style.Theme_ToolBar_Base_Subtitle);//设置子标题的外观,包括文字颜色,文字大小等
这里是设置toolbar右侧的菜单按钮
    toolbar.inflateMenu(R.menu.base_toolbar_menu);//设置右上角的填充菜单

    toolbar.setOnMenuItemClickListener(new Toolbar.OnMenuItemClickListener() {

        @Override

        public boolean onMenuItemClick(MenuItem item) {

            int menuItemId = item.getItemId();

            if (menuItemId == R.id.action_search) {

                Toast.makeText(ToolBarActivity.this, “搜索”, Toast.LENGTH_SHORT).show();

            } else if (menuItemId == R.id.action_notification) {

                Toast.makeText(ToolBarActivity.this, “通知”, Toast.LENGTH_SHORT).show();

            } else if (menuItemId == R.id.action_item1) {

                Toast.makeText(ToolBarActivity.this, “选项1”, Toast.LENGTH_SHORT).show();

            } else if (menuItemId == R.id.action_item2) {

                Toast.makeText(ToolBarActivity.this, “选项2”, Toast.LENGTH_SHORT).show();

            }
注意这里要return true
            return true;

        }

    });

}
}
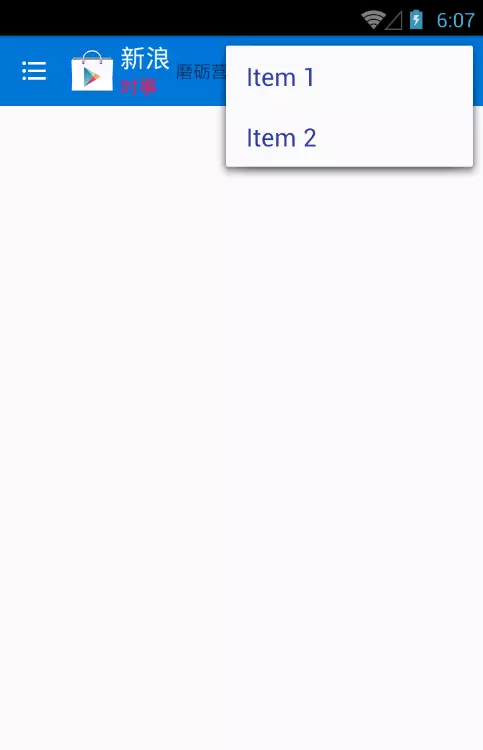
好,下面就可以运行看看效果了,如下:
【图一】
 【图二】
【图二】
 以上仅仅是toolbar简单的使用,toolbar还有很多地方可以学习,更多资料请参考Google文档和API,有兴趣的同学研究下,制作出更好的md效果,也欢迎大家踊跃投稿,感谢大家关注。
更多内容关注微信公众号mjw-java或访问www.moliying.com
来源:oschina
链接:https://my.oschina.net/u/2844951/blog/734402