参考:http://redhacker.iteye.com/blog/1919329
Openfire源码的编译请查看另一篇文章:Ubuntu12.04(64bit)上部署编译运行Openfire+Spark环境
一、基于Openfire源码安装自定义插件
创建自己的插件路径

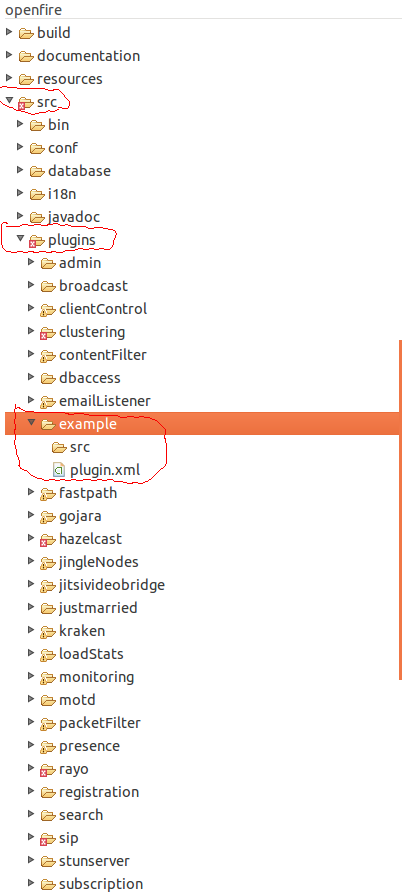
编写plugin.xml,注意路径,是创建在插件的根目录下。否则即使编译出jar包,管控平台也不识别。
这里偷懒直接在其他插件中复制过来的。
<?xml version="1.0" encoding="UTF-8"?>
<plugin>
<!--插件JAVA文件路径-->
<class>org.jivesoftware.example.plugin.ExamplePlugin</class>
<!-- Plugin meta-data -->
<name>Example Plugin</name>
<description>This is an example plugin.</description>
<author>Jive Software</author>
<version>1.0</version>
<date>07/01/2006</date>
<url>http://www.igniterealtime.org/projects/openfire/plugins.jsp</url>
<minServerVersion>3.0.0</minServerVersion>
<licenseType>gpl</licenseType>
<!-- Admin console entries -->
<adminconsole>
<!-- More on this below -->
</adminconsole>
</plugin>
编写java插件
package org.jivesoftware.example.plugin;
import java.io.File;
import org.jivesoftware.openfire.XMPPServer;
import org.jivesoftware.openfire.container.Plugin;
import org.jivesoftware.openfire.container.PluginManager;
public class ExamplePlugin implements Plugin {
private XMPPServer server;
@Override
public void initializePlugin(PluginManager manager, File pluginDirectory) {
server = XMPPServer.getInstance();
System.out.println("初始化…… 安装插件!");
System.out.println(server.getServerInfo());
}
@Override
public void destroyPlugin() {
System.out.println("服务器停止,销毁插件!");
}
}
编译插件
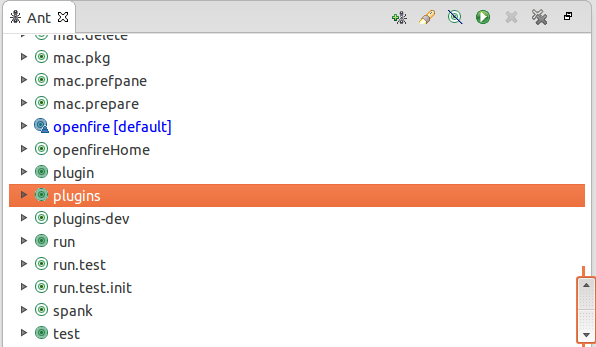

openfire自动停止服务后,重新加载插件,同时在管控平台上也能看到我们开发的插件
下图是之前已经安装了插件。

二、带有JSP和Servlet的插件
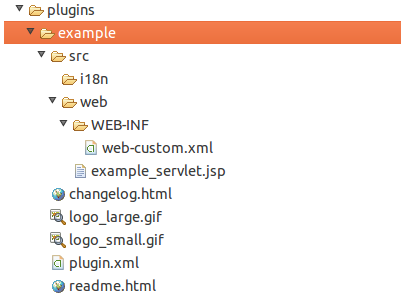
目录结构

添加Servlet文件
package org.jivesoftware.openfire.plugin;
import java.io.IOException;
import java.io.PrintWriter;
import javax.servlet.ServletException;
import javax.servlet.http.HttpServlet;
import javax.servlet.http.HttpServletRequest;
import javax.servlet.http.HttpServletResponse;
public class ExampleServlet extends HttpServlet {
private static final long serialVersionUID = -6093345417438012819L;
@Override
protected void doGet(HttpServletRequest req, HttpServletResponse resp)
throws ServletException, IOException {
// super.doGet(req, resp);
resp.setContentType("text/plain");
PrintWriter out = resp.getWriter();
System.out.println("example servlet doget");
out.print("example servlet doget");
out.flush();
}
@Override
protected void doPost(HttpServletRequest req, HttpServletResponse resp)
throws ServletException, IOException {
// super.doPost(req, resp);
resp.setContentType("text/plain");
PrintWriter out = resp.getWriter();
System.out.println("example servlet dopost");
out.print("example servlet dopost");
out.flush();
}
@Override
public void destroy() {
super.destroy();
}
@Override
public void init() throws ServletException {
super.init();
}
}
配置Servlet,在web/WEB-INF添加xml文件
<?xml version="1.0" encoding="UTF-8"?>
<!DOCTYPE web-app PUBLIC "-//Sun Microsystems, Inc.//DTD Web Application 2.3//EN" "http://java.sun.com/dtd/web-app_2_3.dtd">
<web-app>
<servlet>
<!--Servlet文件路径 -->
<servlet-class>org.jivesoftware.openfire.plugin.ExampleServlet</servlet-class>
<servlet-name>ExampleServlet</servlet-name>
</servlet>
<servlet-mapping>
<servlet-name>ExampleServlet</servlet-name>
<url-pattern>/servlet</url-pattern>
</servlet-mapping>
</web-app>
添加jsp文件在web目录下
<%@ page language="java" import="java.util.*" pageEncoding="UTF-8"%>
<!DOCTYPE HTML PUBLIC "-//W3C//DTD HTML 4.01 Transitional//EN">
<html>
<head>
<title>example plugin</title>
<meta http-equiv="Content-Type" content="text/html; charset=UTF-8">
<meta name="pageID" content="example-servlet"/>
</head>
<body>
<h3>hello world jsp!! <a href="/plugins/example/servlet">SampleServlet</a></h3>
<div class="jive-contentBoxHeader">jive-contentBoxHeader</div>
<div class="jive-contentBox">jive-contentBox</div>
<div class="jive-table">
<table cellpadding="0" cellspacing="0" border="0" width="100%">
<thead>
<tr>
<th> sss</th>
<th nowrap>a</th>
<th nowrap>b</th>
</tr>
</thead>
<tbody>
<tr>
<td>asdf</td>
<td>asdf</td>
<td>asdf</td>
</tr>
<tr class="jive-even">
<td>asdf</td>
<td>asdf</td>
<td>asdf</td>
</tr>
<tr class="jive-odd">
<td>asdf</td>
<td>asdf</td>
<td>asdf</td>
</tr>
</tbody>
</table>
</div>
</body>
</html>
配置Plugin.xml
<adminconsole>
<tab id="tab-server">
<sidebar id="sidebar-server-settings">
<item id="example-servlet" name="Example Servlet" url="example_servlet.jsp"
description="Click is trigger example plugin" />
</sidebar>
</tab>
</adminconsole>
注意:item节点下的id属性值对应jsp中<meta name="pageID" content="example-servlet"/>的content值。
重新编译openfire,在服务器设置中可以看到Servlet插件了。

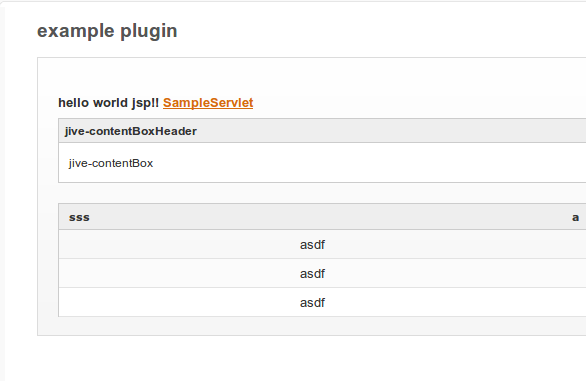
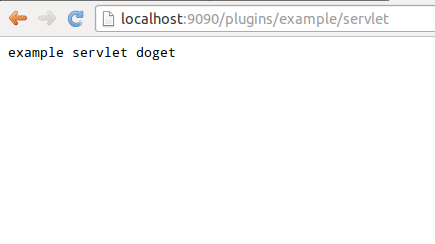
插件编译后生成的路径在:Openfire/openfire_src/target/openfire/plugins
三、编译单个插件
在Ant编译窗口中,找到plugin节点,右键Run AS->2 Ant Build,选择第二个选项,显示配置信息。

在Main标签页中Arguments中输入-Dplugin=插件名
插件名是从src/plugins目录下,你定义的目录名字决定的,这里插件名为example
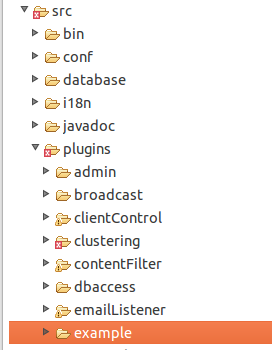
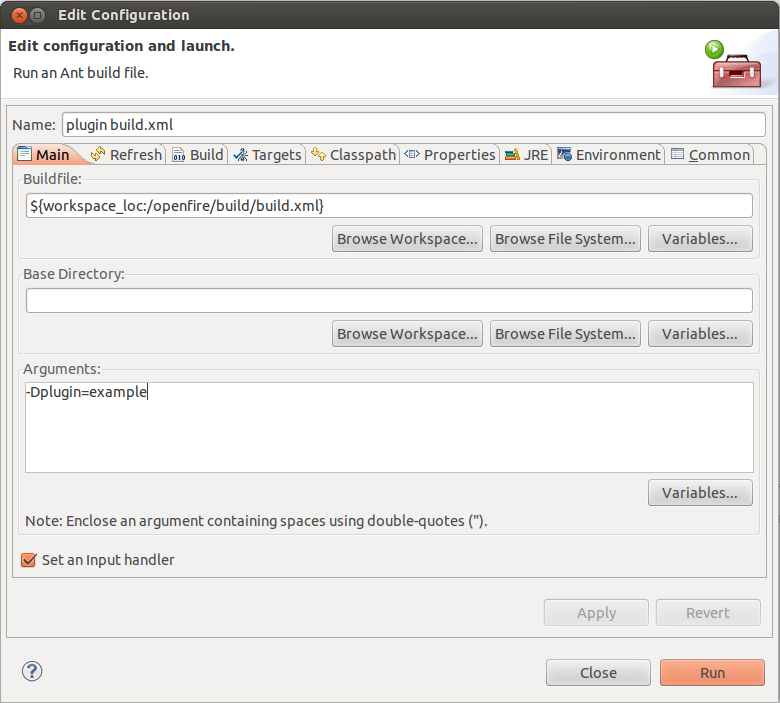
在Targets中只勾选plugin选项。
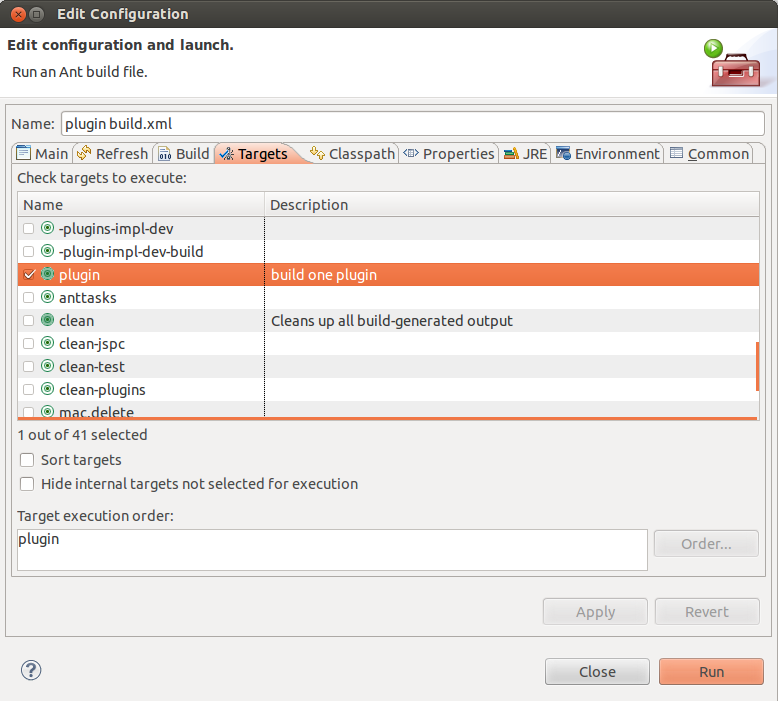
保存后,点击Run进行编译,编译成功后,管控平台重新加载插件。


来源:oschina
链接:https://my.oschina.net/u/437086/blog/207901