一、Spring Security介绍
Spring Security是Spring Resource社区的一个安全组件,Spring Security为JavaEE企业级开发提供了全面的安全防护。Spring Security采用“安全层”的概念,使每一层都尽可能安全,连续的安全层可以达到全面的防护。Spring Security可以在Controller层、Service层、DAO层等以加注解的方式来保护应用程序的安全。Spring Security提供了细粒度的权限控制,可以精细到每一个API接口、每一个业务的方法,或每一个操作数据库的DAO层的方法。Spring Security提供的是应用程序层的安全解决方案,一个系统的安全还需要考虑传输层和系统层的安全,如采用Https协议、服务器部署防火墙等。
使用Spring Security的一个重要原因是它对环境的无依赖性、低代码耦合性。Spring Security提供了数十个安全模块,模块与模块之间的耦合性低,模块之间可以自由组合来实现特定需求的安全功能。
在安全方面,有两个主要的领域,一是“认证”,即你是谁;二是“授权”,即你拥有什么权限,Spring Security的主要目标就是在这两个领域。JavaEE有另一个优秀的安全框架Apache Shiro,Apache Shiro在企业及的项目开发中十分受欢迎,一般使用在单体服务中。但在微服务架构中,目前版本的Apache Shiro是无能为力的。另一个选择Spring Security的原因,是Spring Security易应用于Spring Boot工程,也易于集成到采用Spring Cloud构建的微服务系统中。
Spring Security提供了很多的安全验证模块并支持与很多技术的整合,在Spring Security框架中,主要包含了两个依赖,分别是spring-security-web依赖和spring-security-config依赖。Spring Boot对Spring Security框架做了封闭,仅仅是封闭,并没有改动,并加上了Spring Boot的启动依赖特性。使用时只需要引入spring-boot-starter-security。
二、使用案例
新建一个Spring Boot工程,引入相关依赖
<dependency>
    <groupId>org.springframework.boot</groupId>
    <artifactId>spring-boot-devtools</artifactId>
</dependency>
<dependency>
    <groupId>org.springframework.boot</groupId>
    <artifactId>spring-boot-starter-security</artifactId>
</dependency>
<dependency>
    <groupId>org.springframework.boot</groupId>
    <artifactId>spring-boot-starter-web</artifactId>
</dependency>
<dependency>
    <groupId>org.springframework.boot</groupId>
    <artifactId>spring-boot-starter-thymeleaf</artifactId>
</dependency>
<dependency>
    <groupId>org.thymeleaf.extras</groupId>
    <artifactId>thymeleaf-extras-springsecurity4</artifactId>
</dependency>
配置Spring Security
新建WebSecurityConfig类,作为配置类继承了WebSecurityConfigurerAdapter类,加上@EnableWebSecurity注解,开启WebSecurity功能。
@Configuration
@EnableWebSecurity
public class WebSecurityConfig extends WebSecurityConfigurerAdapter {

    @Autowired
    public void configureGlobal(AuthenticationManagerBuilder auth) throws Exception{
        auth.userDetailsService(userDetailsService()).passwordEncoder(new BCryptPasswordEncoder());
    }
    @Bean
    public UserDetailsService userDetailsService() {
        InMemoryUserDetailsManager manager=new InMemoryUserDetailsManager();
        manager.createUser(User.withUsername("cralor").password(new BCryptPasswordEncoder().encode("123")).roles("USER").build());
        manager.createUser(User.withUsername("admin").password(new BCryptPasswordEncoder().encode("123")).roles("ADMIN").build());
        return manager;
    }
使用Spring Security需要对密码加密,这里使用BCryptPasswordEncoder。
spring security中的BCryptPasswordEncoder方法采用SHA-256 +随机盐+密钥对密码进行加密。SHA系列是Hash算法,不是加密算法,使用加密算法意味着可以解密(这个与编码/解码一样),但是采用Hash处理,其过程是不可逆的。
(1)加密(encode):注册用户时,使用SHA-256+随机盐+密钥把用户输入的密码进行hash处理,得到密码的hash值,然后将其存入数据库中。
(2)密码匹配(matches):用户登录时,密码匹配阶段并没有进行密码解密(因为密码经过Hash处理,是不可逆的),而是使用相同的算法把用户输入的密码进行hash处理,得到密码的hash值,然后将其与从数据库中查询到的密码hash值进行比较。如果两者相同,说明用户输入的密码正确。
这正是为什么处理密码时要用hash算法,而不用加密算法。因为这样处理即使数据库泄漏,黑客也很难破解密码(破解密码只能用彩虹表)。
InMemoryUserDetailsManager 类是将用户信息存放在内存中,上述代码会在内存中创建两个用户,cralor用户具有“USER”角色,admin用户具有“ADMIN”角色。
到目前为止,我们的WebSecurityConfig仅包含有关如何验证用户身份的信息。Spring Security如何知道我们要求所有用户进行身份验证?Spring Security如何知道我们想要支持基于表单的身份验证?原因是WebSecurityConfigurerAdapter在configure(HttpSecurity http)方法中提供了一个默认配置,我们可以自定义自己的配置。
@Configuration
@EnableWebSecurity
@EnableGlobalMethodSecurity(prePostEnabled = true)
public class WebSecurityConfig extends WebSecurityConfigurerAdapter {

    @Autowired
    public void configureGlobal(AuthenticationManagerBuilder auth) throws Exception{
        auth.userDetailsService(userDetailsService()).passwordEncoder(new BCryptPasswordEncoder());
    }
    @Bean
    public UserDetailsService userDetailsService() {
        InMemoryUserDetailsManager manager=new InMemoryUserDetailsManager();
        manager.createUser(User.withUsername("cralor").password(new BCryptPasswordEncoder().encode("123")).roles("USER").build());
        manager.createUser(User.withUsername("admin").password(new BCryptPasswordEncoder().encode("123")).roles("ADMIN").build());
        return manager;
    }

    @Override
    protected void configure(HttpSecurity http) throws Exception {
        http
                .authorizeRequests()
                        //以“/css/**”开头的和“/index”资源不需要验证,可直接访问
                        .antMatchers("/css/**","/index").permitAll()
                        //任何以“/db/”开头的URL都要求用户拥有“ROLE_USER”角色
                        .antMatchers("/user/**").hasRole("USER")
                        //任何以“/db/”开头的URL都要求用户同时拥有“ROLE_ADMIN”和“ROLE_DBA”。由于我们使用的是hasRole表达式,因此我们不需要指定“ROLE_”前缀。
                        .antMatchers("/db/**").access("hasRole('ADMIN') and hasRole('DBA')")
/*                        //确保对我们的应用程序的任何请求都要求用户进行身份验证
                        .anyRequest().authenticated()*/
                        .and()
                //允许用户使用基于表单的登录进行身份验证
                .formLogin()
                        //表单登陆地址“/login”,登录失败地址“/login-error”
                        .loginPage("/login").failureForwardUrl("/login-error")
                        .and()
                .logout()
                        //注销地址
//                        .logoutUrl("/logout")
                        //注销成功,重定向到首页
                        .logoutSuccessUrl("/")
                        //指定一个自定义LogoutSuccessHandler。如果指定了,logoutSuccessUrl()则忽略。
                        //.logoutSuccessHandler(logoutHandler)
                        //指定HttpSession在注销时是否使其无效。默认true
                        .invalidateHttpSession(true)
                        //允许指定在注销成功时删除的cookie的名称。这是CookieClearingLogoutHandler显式添加的快捷方式。
                        .deleteCookies("name","ss","aa")
                        .and()
                //异常处理会重定向到“/401”页面
                .exceptionHandling().accessDeniedPage("/401")

        //      .httpBasic()//允许用户使用HTTP基本身份验证进行身份验证
                ;
    }
}
在上述代码中配置了相关的界面,如首页、登陆页,在Controller中做相关配置
@Controller
public class MainController {

    @RequestMapping("/")
    public String root(){
        return "redirect:/index";
    }

    @RequestMapping("/index")
    public String index(){
        return "index";
    }

    @RequestMapping("user/index")
    public String userIndex(){
        return "user/index";
    }

    @RequestMapping("login")
    public String login(){
        return "login";
    }

    @RequestMapping("login-error")
    public String loginError(Model model){
        model.addAttribute("loginError",true);
        return "login";
    }

    /**
     * 退出登陆两种方式,一种在配置类设置,一种在这里写就不需要配置了
     *
     * 这里 首先我们在使用SecurityContextHolder.getContext().getAuthentication() 之前校验该用户是否已经被验证过。
     * 然后调用SecurityContextLogoutHandler().logout(request, response, auth)  来退出
     *
     * logout 调用流程:
     *
     *  1 将 HTTP Session 作废,解绑其绑定的所有对象。
     *
     *  2 从SecurityContext移除Authentication 防止并发请求的问题。
     *
     *  3 显式地清楚当前线程的上下文里的值。
     *
     * 在应用的其他地方不再需要处理 退出。
     *
     * 注意:你甚至都不需要在你的spring多添加任何配置(不管是基于注解还是基于xml)。
     *
     * @param request
     * @param response
     * @return
     */
/*  @RequestMapping("logout")
    public String logoutPage (HttpServletRequest request, HttpServletResponse response) {

        Authentication auth = SecurityContextHolder.getContext().getAuthentication();
        if (auth != null) {
            new SecurityContextLogoutHandler().logout(request, response, auth);
        }
        return "redirect:/login";
    }*/

        @GetMapping("/401")
    public String accessDenied(){
        return "401";
    }
}
编写相关界面
在application.yml中配置thymeleaf引擎
spring:
  thymeleaf:
    mode: HTML5
    encoding: UTF-8
    cache: false
登陆界面login.html
<!DOCTYPE html>
<html xmlns:th="http://www.thymeleaf.org">
<html lang="en">
<head>
    <meta charset="UTF-8">
    <title>Login page</title>
    <link rel="stylesheet" href="/css/main.css" th:href="@{/css/main.css}"/>
</head>
<body>
    <h1>Login page</h1>
    <p>User角色用户: cralor / 123</p>
    <p>Admin角色用户: admin / 123</p>
    <p th:if="${loginError}" class="error">用户名或密码错误</p>
    <form th:action="@{login}" method="post">
        <label for="username">用户名:</label>
        <input type="text" id="username" name="username" autofocus="autofocus">
        <label for="password">密码:</label>
        <input type="password" id="password" name="password">
        <input type="submit" value="登陆">
    </form>
    <a href="/index" th:href="@{/index}">返回首页</a>
</body>
</html>
首页index.html
<!DOCTYPE html>
<html xmlns="http://www.w3.org/1999/xhtml" xmlns:th="http://www.thymeleaf.org" xmlns:sec="http://www.thymeleaf.org/thymeleaf-extras-springsecurity4">
<head>
    <title>Hello Spring Security</title>
    <meta charset="utf-8" />
    <link rel="stylesheet" href="/css/main.css" th:href="@{/css/main.css}" />
</head>
<body>

<h1>Hello Spring Security</h1>
<p>这个界面没有受保护,你可以进已被保护的界面.</p>

<div th:fragment="logout"  sec:authorize="isAuthenticated()">
    登录用户: <span sec:authentication="name"></span> |
    用户角色: <span sec:authentication="principal.authorities"></span>
    <div>
        <form action="#" th:action="@{/logout}" method="post">
            <input type="submit" value="登出" />
        </form>
    </div>
</div>

<ul>
    <li>点击<a href="/user/index" th:href="@{/user/index}">去/user/index保护的界面</a></li>
</ul>
</body>
</html>
权限不够显示的页面401.html
<!DOCTYPE html>
<html xmlns="http://www.w3.org/1999/xhtml"
    xmlns:sec="http://www.thymeleaf.org/thymeleaf-extras-springsecurity4">

<body>
    <div >
          <div >
            <h2> 权限不够</h2>
        </div>
        <div sec:authorize="isAuthenticated()">
            <p>已有用户登录</p>
            <p>用户: <span sec:authentication="name"></span></p>
             <p>角色: <span sec:authentication="principal.authorities"></span></p>
        </div>
         <div sec:authorize="isAnonymous()">
            <p>未有用户登录</p>
        </div>
        <p>
            拒绝访问!
        </p>
    </div>

</body>
</html>
用户首页/user/index.html,被Spring Security保护,只有拥有“USER”角色的用户才能访问。
<!DOCTYPE html>
<html xmlns="http://www.w3.org/1999/xhtml" xmlns:th="http://www.thymeleaf.org">
    <head>
        <title>Hello Spring Security</title>
        <meta charset="utf-8" />
        <link rel="stylesheet" href="/css/main.css" th:href="@{/css/main.css}" />
    </head>
    <body>
        <div th:substituteby="index::logout"></div>
        <h1>这个界面是被保护的界面</h1>
        <p><a href="/index" th:href="@{/index}">返回首页</a></p>

        <p><a  href="/blogs" th:href="@{/blogs}">管理博客</a></p>

    </body>
</html>
启动工程,在浏览器访问localhost:8080,会被重定向到localhost:8080/index页面。

点击 “去/user/index保护的界面” ,由于“/user/index”界面需要“USER”权限,但还没有登陆,会被重定向到登陆界面“/login.html”。
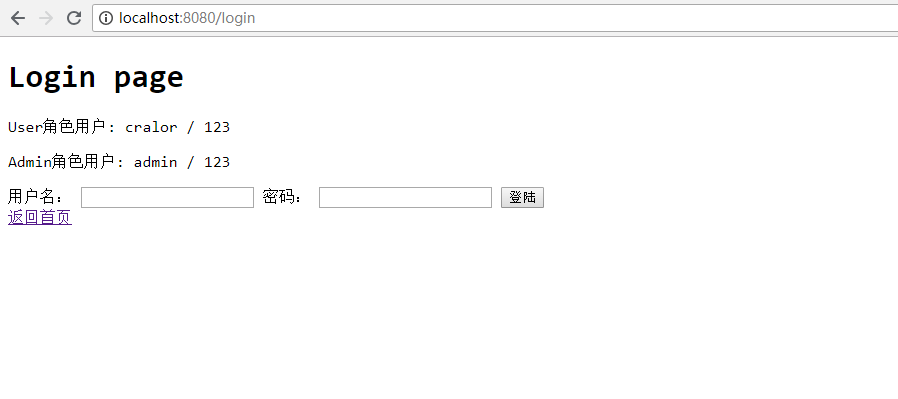
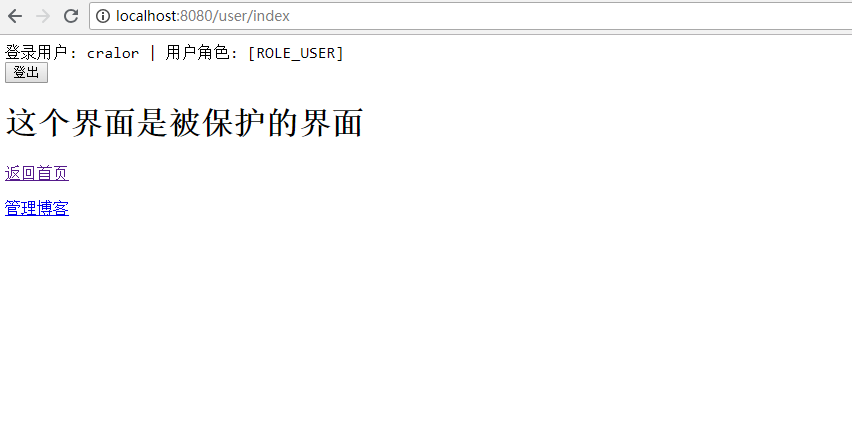
使用具有“USER”权限的cralor用户登陆,登陆成功后会被重定向到“localhost:8080/user/index”界面。
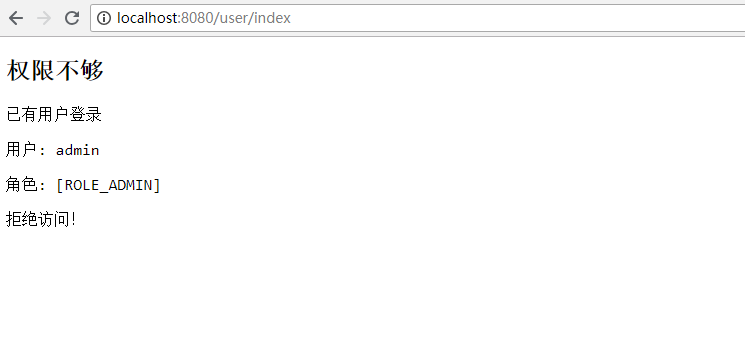
退出登陆,用admin用户登陆,该用户没有“USER”权限,此时会返回权限不足界面。
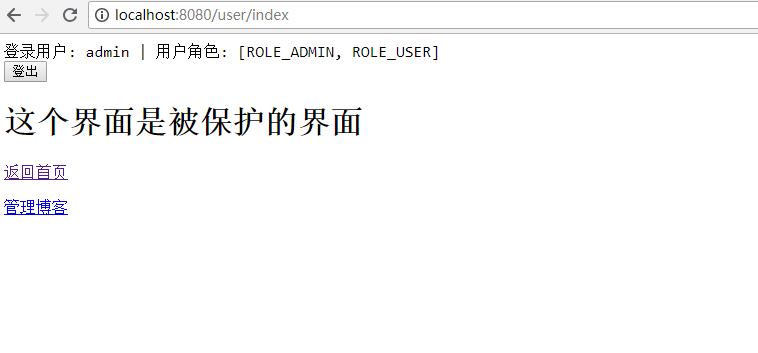
修改WebSecurityConfig,给admin用户加上“USER”角色。
@Bean
    public UserDetailsService userDetailsService() {
        InMemoryUserDetailsManager manager=new InMemoryUserDetailsManager();
        manager.createUser(User.withUsername("cralor").password(new BCryptPasswordEncoder().encode("123")).roles("USER").build());
        manager.createUser(User.withUsername("admin").password(new BCryptPasswordEncoder().encode("123")).roles("ADMIN","USER").build());
        return manager;
    }
并再次访问“localhost:8080/user/index”,可正常显示。
Spring Security方法级保护
在WebSecurityConfig类加上@EnableGlobalMethodSecurity注解,可以开启方法级保护。括号后面的参数可选,可选参数如下:
-
prePostEnabled:Spring Security的Pre和Post注解是否可用,即
@PreAuthorize和@PostAuthorize是否可用; -
secureEnabled:Spring Security的@Secured注解是否可用;
-
jsr250Enabled:Spring Security对JSP-250的注解是否可用。
一般只用到prePostEnabled。因为@PreAuthorize注解和@PostAuthorize注解更适合方法级安全控制,并且支持Spring EL表达式,适合Spring开发者。其中,@PreAuthorize注解会在进入方法前进行权限验证。@PostAuthorize注解在方法执行后再进行权限验证,此注解应用场景很少。如何使用方法级保护注解呢?例如:
-
有权限字符串
ROLE_ADMIN,在方法上可以写@PreAuthorize("harRole('ADMIN')"),此处为权限名,也可以写为@PreAuthorize("harAuthority('ROLE_ADMIN')"),验证权限名和权限字符串二者等价; -
加多个权限,可以写为
@PreAuthorize("harRole('ADMIN','USER')"),也可写为@PreAuthorize("harAuthority('ROLE_ADMIN','ROLE_USER')")。
新添加一个API接口,在该接口上添加权限注解。写一个Blog文章列表的API接口,只有管理员权限的用户才可以删除Blog。
新建实体类Blog
public class Blog {

    private Long id;
    private String name;
    private String content;

    public Blog(){}

    public Blog(Long id, String name, String content) {
        this.id = id;
        this.name = name;
        this.content = content;
    }

    public Long getId() {
        return id;
    }

    public void setId(Long id) {
        this.id = id;
    }

    public String getName() {
        return name;
    }

    public void setName(String name) {
        this.name = name;
    }

    public String getContent() {
        return content;
    }

    public void setContent(String content) {
        this.content = content;
    }
}
新建IBlogService接口类(没有DAO层操作数据库,只是在内存中)。
public interface IBlogService {
    /**
     * 获取所有Blog
     * @return
     */
    List<Blog> getBlogs();
    /**
     * 根据ID获取Blog
     * @param id
     */
    void deleteBlog(long id);
}
实现类BlogServiceImpl,在构造方法添加两个Blog对象。
@Service
public class BlogServiceImpl implements IBlogService {

    private List<Blog> list=new ArrayList<>();

    public BlogServiceImpl(){
        list.add(new Blog(1L, " spring in action", "good!"));
        list.add(new Blog(2L,"spring boot in action", "nice!"));
    }

    @Override
    public List<Blog> getBlogs() {
        return list;
    }

    @Override
    public void deleteBlog(long id) {
        Iterator iter = list.iterator();
        while(iter.hasNext()) {
            Blog blog= (Blog) iter.next();
            if (blog.getId()==id){
                iter.remove();
            }
        }
    }
}
BlogController写两个API接口,一个获取所有Blog列表,第二个根据ID删除Blog,需要有ADMIN权限。
@RestController
@RequestMapping("/blogs")
public class BlogController {

    @Autowired
    IBlogService blogService;

    @GetMapping
    public ModelAndView list(Model model) {

        List<Blog> list =blogService.getBlogs();
        model.addAttribute("blogsList", list);
        return new ModelAndView("blogs/list", "blogModel", model);
    }

    /**
     * 需要拥有“ADMIN”角色权限才可以访问
     * @param id 要删除的Blog的id
     * @param model 返回的视图模型
     * @return 返回页面
     */
    @PreAuthorize("hasAuthority('ROLE_ADMIN')")
    @GetMapping(value = "/{id}/deletion")
    public ModelAndView delete(@PathVariable("id") Long id, Model model) {
        blogService.deleteBlog(id);
        model.addAttribute("blogsList", blogService.getBlogs());
        return new ModelAndView("blogs/list", "blogModel", model);
    }
}
博客列表界面
<!DOCTYPE html>
<html xmlns:th="http://www.thymeleaf.org" xmlns:sec="http://www.thymeleaf.org/thymeleaf-extras-springsecurity4">

<body>

    登录用户: <span sec:authentication="name"></span> |
    用户角色: <span sec:authentication="principal.authorities"></span>
<br>
<br>

<div>
    <table >
        <thead>
        <tr>
            <td>博客编号</td>
            <td>博客名称</td>
            <td>博客描述</td>
        </tr>
        </thead>
        <tbody>
        <tr th:each="blog: ${blogModel.blogsList}">
            <td th:text="${blog.id}"></td>
            <td th:text="${blog.name}"></td>
            <td th:text="${blog.content}"></td>
            <td>
                <div >
                    <a th:href="@{'/blogs/' + ${blog.id}+'/deletion'}">
                        删除
                    </a>
                </div>
            </td>
        </tr>
        </tbody>
    </table>
</div>

</body>
</html>
启动程序,使用admin用户登陆,进入管理博客界面。
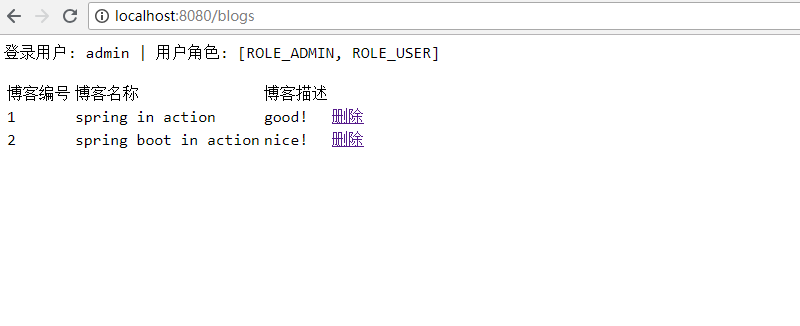
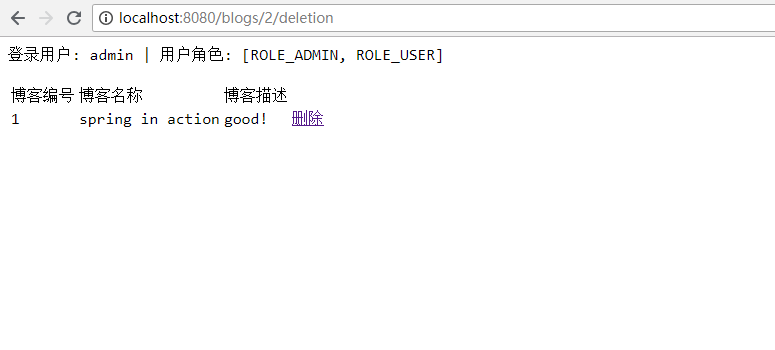
点击删除,删除编号为2的博客,删除成功后如图:
重新用cralor用户登录,点击删除时,会显示权限不足。
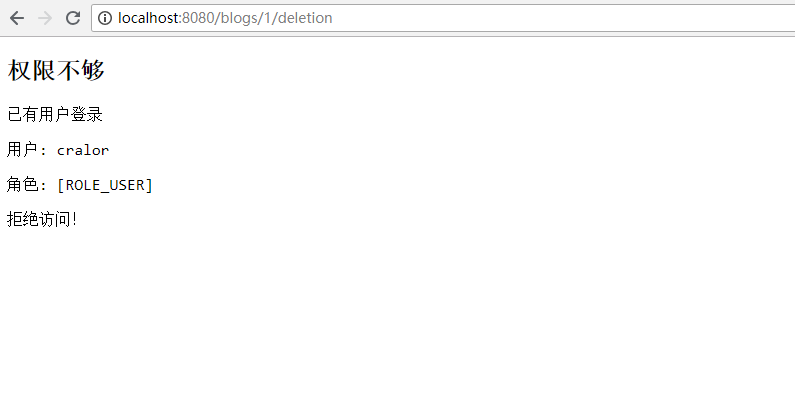
可见,在方法级别上的安全验证时通过相关的注解和配置来实现的。注解写在Controller层还是Service层都生效。
从数据库读取用户的认证信息
数据库MySql,ORM框架JPA。
添加MySql和JPA的依赖
<dependency>
    <groupId>mysql</groupId>
    <artifactId>mysql-connector-java</artifactId>
</dependency>
<dependency>
    <groupId>org.springframework.boot</groupId>
    <artifactId>spring-boot-starter-data-jpa</artifactId>
</dependency>
配置数据库的相关配置
spring:
  thymeleaf:
    mode: HTML5
    encoding: UTF-8
    cache: false
  datasource:
    url: jdbc:mysql://127.0.0.1:3306/spring-security?useUnicode=true&characterEncoding=utf8&characterSetResults=utf8
    username: root
    password: ok
  jpa:
    hibernate:
      ddl-auto: update
    show-sql: true
创建User实体类,使用JPA的@Entity注解,表明该Java对象会被映射到数据库。id采用的生成策为自增加,包含username和password两个字段,其中authorities为权限点的集合。
@Entity
public class User implements UserDetails, Serializable {

    @Id
    @GeneratedValue(strategy = GenerationType.IDENTITY)
    private Long id;

    @Column(nullable = false,  unique = true)
    private String username;

    @Column
    private String password;

    @ManyToMany(cascade = CascadeType.ALL, fetch = FetchType.EAGER)
    @JoinTable(name = "user_role", joinColumns = @JoinColumn(name = "user_id", referencedColumnName = "id"),
            inverseJoinColumns = @JoinColumn(name = "role_id", referencedColumnName = "id"))
    private List<Role> authorities;

    public User() {
    }

    public Long getId() {
        return id;
    }

    public void setId(Long id) {
        this.id = id;
    }

    @Override
    public Collection<? extends GrantedAuthority> getAuthorities() {
        return authorities;
    }

    public void setAuthorities(List<Role> authorities) {
        this.authorities = authorities;
    }

    @Override
    public String getUsername() {
        return username;
    }

    public void setUsername(String username) {
        this.username = username;
    }

    @Override
    public String getPassword() {
        return password;
    }

    public void setPassword(String password) {
        this.password = password;
    }

    @Override
    public boolean isAccountNonExpired() {
        return true;
    }

    @Override
    public boolean isAccountNonLocked() {
        return true;
    }

    @Override
    public boolean isCredentialsNonExpired() {
        return true;
    }

    @Override
    public boolean isEnabled() {
        return true;
    }
}
User类实现了UserDetails接口,该接口是实现Spring Security认证信息的核心接口。其中,getUsername()方法为UserDetails接口的方法,这个方法不一定返回username,也可以返回其他信息,如手机号码,邮箱地址等。getAuthorities()方法返回的是该用户设置的权限信息,在本例中返回的是从数据库读取的该用户的所有角色信息,权限信息也可以是用户的其他信息。另外需要读取密码。最后几个方法一般都返回true,可根据自己的需求进行业务判断。
UserDetails接口源码如下
public interface UserDetails extends Serializable {
    Collection<? extends GrantedAuthority> getAuthorities();

    String getPassword();

    String getUsername();

    boolean isAccountNonExpired();

    boolean isAccountNonLocked();

    boolean isCredentialsNonExpired();

    boolean isEnabled();
}新建Role类,实现GrantedAuthority接口,重写了getAuthority()方法。权限可以为任何字符串,不一定是角色名的字符串,关键是getAuthority()方法如何实现。本例中权限是从数据库中读取Role表的name字段。
@Entity
public class Role implements GrantedAuthority {

    @Id
    @GeneratedValue(strategy = GenerationType.IDENTITY)
    private Long id;

    @Column(nullable = false)
    private String name;

    public Long getId() {
        return id;
    }

    public void setId(Long id) {
        this.id = id;
    }

    @Override
    public String getAuthority() {
        return name;
    }

    public void setName(String name) {
        this.name = name;
    }

    @Override
    public String toString() {
        return name;
    }
}编写DAO层,UserDao继承了JpaRepository默认实现了大多数单表查询的操作。UserDao中自定义一个根据username获取user的方法,由于JPA已经自动实现了根据username字段查找用户的方法,因此不需要额外的工作。
public interface UserDao extends JpaRepository<User, Long> {

    User findByUsername(String username);
}编写Service层,需要实现UserDetailsService接口,该接口根据用户名获取用户的所有信息,包括用户信息和权限。
@Service
public class UserServiceImpl implements UserDetailsService {

    @Autowired
    private UserDao userRepository;

    @Override
    public UserDetails loadUserByUsername(String username) throws UsernameNotFoundException {
        return userRepository.findByUsername(username);
    }
}
最后修改Spring Security配置类WebSecurityConfig ,让Spring Security从数据库中获取用户的认证信息。
@Configuration
@EnableWebSecurity
@EnableGlobalMethodSecurity(prePostEnabled = true)
public class WebSecurityConfig extends WebSecurityConfigurerAdapter {

/*    @Autowired
    public void configureGlobal(AuthenticationManagerBuilder auth) throws Exception{
        auth.userDetailsService(userDetailsService()).passwordEncoder(new BCryptPasswordEncoder());
    }
    @Bean
    public UserDetailsService userDetailsService() {
        InMemoryUserDetailsManager manager=new InMemoryUserDetailsManager();
        manager.createUser(User.withUsername("cralor").password(new BCryptPasswordEncoder().encode("123")).roles("USER").build());
        manager.createUser(User.withUsername("admin").password(new BCryptPasswordEncoder().encode("123")).roles("ADMIN","USER").build());
        return manager;
    }*/

    //1、@Autowired和@Qualifier结合使用
//    @Qualifier("userServiceImpl")
//    @Autowired

    //2、使用@Resource
    @Resource
    UserDetailsService userDetailsService;

    @Autowired
    public void configureGlobal(AuthenticationManagerBuilder auth) throws Exception{

        auth.userDetailsService(userDetailsService).passwordEncoder(new BCryptPasswordEncoder());

    }
因为Spring Boot会自动配置一些Bean,上边用到的UserDetailsService的bean已经在UserDetailsServiceAutoConfiguration类的inMemoryUserDetailsManager()方法自动装配好了。此时单独使用@Autowired注解自动注入UserDetailsService会报错:
Could not autowire. There is more than one bean of 'UserDetailsService' type.
Beans:
inMemoryUserDetailsManager (UserDetailsServiceAutoConfiguration.class) userServiceImpl (UserServiceImpl.java)
可以结合使用 @Qualifier("userServiceImpl")和 @Autowired(需要知道已经自动装配好的Bean的名字),或者使用@Resource,建议使用@Resource。
在启动程序前需要在数据库中建库、建表、初始化数据。建库脚本如下:
CREATE DATABASE `spring-security` CHARACTER SET 'utf8' COLLATE 'utf8_general_ci';建表脚本如下:
/*
 Navicat Premium Data Transfer

 Source Server         : root
 Source Server Type    : MySQL
 Source Server Version : 50721
 Source Host           : localhost:3306
 Source Schema         : spring-security

 Target Server Type    : MySQL
 Target Server Version : 50721
 File Encoding         : 65001

 Date: 31/07/2018 17:36:26
*/

SET NAMES utf8mb4;
SET FOREIGN_KEY_CHECKS = 0;

-- ----------------------------
-- Table structure for role
-- ----------------------------
DROP TABLE IF EXISTS `role`;
CREATE TABLE `role`  (
  `id` bigint(20) NOT NULL AUTO_INCREMENT,
  `name` varchar(255) CHARACTER SET utf8 COLLATE utf8_general_ci NOT NULL,
  PRIMARY KEY (`id`) USING BTREE
) ENGINE = InnoDB AUTO_INCREMENT = 3 CHARACTER SET = utf8 COLLATE = utf8_general_ci ROW_FORMAT = Dynamic;

-- ----------------------------
-- Records of role
-- ----------------------------
INSERT INTO `role` VALUES (1, 'ROLE_USER');
INSERT INTO `role` VALUES (2, 'ROLE_ADMIN');

-- ----------------------------
-- Table structure for user
-- ----------------------------
DROP TABLE IF EXISTS `user`;
CREATE TABLE `user`  (
  `id` bigint(20) NOT NULL AUTO_INCREMENT,
  `username` varchar(255) CHARACTER SET utf8 COLLATE utf8_general_ci NOT NULL,
  `password` varchar(255) CHARACTER SET utf8 COLLATE utf8_general_ci NULL DEFAULT NULL,
  PRIMARY KEY (`id`) USING BTREE
) ENGINE = InnoDB AUTO_INCREMENT = 3 CHARACTER SET = utf8 COLLATE = utf8_general_ci ROW_FORMAT = Dynamic;

-- ----------------------------
-- Records of user
-- ----------------------------
INSERT INTO `user` VALUES (1, 'cralor', '$2a$10$E9Ex7Yp4JZlaslgXCkkl/ugt7hwfoT/tPRHjlYyC8JnsPeLE1Yry2');
INSERT INTO `user` VALUES (2, 'admin', '$2a$10$kcyDOQPHnpFEYYKuRTayYupejdw5HFUF6/zm0yT5jog/waRwc8THi');

-- ----------------------------
-- Table structure for user_role
-- ----------------------------
DROP TABLE IF EXISTS `user_role`;
CREATE TABLE `user_role`  (
  `user_id` bigint(20) NOT NULL,
  `role_id` bigint(20) NOT NULL,
  INDEX `user_id`(`user_id`) USING BTREE,
  INDEX `role_id`(`role_id`) USING BTREE,
  CONSTRAINT `user_role_ibfk_1` FOREIGN KEY (`user_id`) REFERENCES `user` (`id`) ON DELETE RESTRICT ON UPDATE RESTRICT,
  CONSTRAINT `user_role_ibfk_2` FOREIGN KEY (`role_id`) REFERENCES `role` (`id`) ON DELETE RESTRICT ON UPDATE RESTRICT
) ENGINE = InnoDB CHARACTER SET = utf8 COLLATE = utf8_general_ci ROW_FORMAT = Dynamic;

-- ----------------------------
-- Records of user_role
-- ----------------------------
INSERT INTO `user_role` VALUES (1, 1);
INSERT INTO `user_role` VALUES (2, 1);
INSERT INTO `user_role` VALUES (2, 2);

SET FOREIGN_KEY_CHECKS = 1;
因为Spring Security要求密码必需加密,所以我们直接存密码”123“使用 BCryptPasswordEncoder 进行hash运算后的hash值。
新建一个测试类,对”123“进行hash运算。
@RunWith(SpringRunner.class)
@SpringBootTest
public class Springboot3ApplicationTests {

    @Test
    public void contextLoads() {

        BCryptPasswordEncoder util = new BCryptPasswordEncoder();
        for(int i = 0 ; i < 10; i ++){
            System. out.println("经hash后的密码为:"+util.encode("123" ));
        }
    }

}
输出结果如下,随便复制两个存到数据库即可(具体原理请自行百度🙃)。

启动程序,浏览器访问http://localhost:8080,会发现跟之前存放在内存中的用户信息的认证效果是一样的。
本案例代码地址:https://github.com/cralor7/springcloud/tree/master/chap13-security

来源:oschina
链接:https://my.oschina.net/u/4263192/blog/3885564