首先建立工程
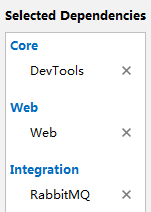
然后
建立一个配置类,用来配置Rabbit相关,主要是交换机和队列以及绑定关系。
package com.example.demo.conf;

import org.springframework.amqp.core.*;
import org.springframework.context.annotation.Bean;
import org.springframework.context.annotation.Configuration;

/**
 * @program: boot-rabbitmq
 * @description:
 * @author: 001977
 * @create: 2018-07-02 17:45
 */
@Configuration
public class RabbitConfiguration {

    /**
     * If not conf the exchange
     * Channel shutdown: channel error; protocol method: #method<channel.close>(reply-code=404, reply-text=NOT_FOUND - no exchange 'hello.direct' in vhost '/', class-id=60, method-id=40)
     *
     */

    private final String direct = "hello.direct";
    private final String fanout = "hello.fanout";
    private final String topic = "hello.topic";

    private final String directRoutingA = "direct.routing.A";
    private final String directRoutingB = "direct.routing.B";

    private final String topicRoutingE = "*.rabbit.*";
    private final String topicRoutingF = "write.#";

    //------------Direct-------------

    @Bean
    public DirectExchange directExchange(){
        return new DirectExchange(direct);
    }

    @Bean
    public Queue queueA(){
        return new Queue("queueA");
    }

    @Bean
    public Queue queueB(){
        return new Queue("queueB");
    }


    @Bean
    public Binding bindingQueueA(Queue queueA, DirectExchange directExchange){
        return BindingBuilder.bind(queueA).to(directExchange).with(directRoutingA);
    }

    @Bean
    public Binding bindingQueueB(Queue queueB, DirectExchange directExchange){
        return BindingBuilder.bind(queueB).to(directExchange).with(directRoutingB);
    }

    //------------Fanout-------------

    @Bean
    public FanoutExchange fanoutExchange(){
        return new FanoutExchange(fanout);
    }

    @Bean
    public Queue queueC(){
        return new Queue("queueC");
    }

    @Bean
    public Queue queueD(){
        return new Queue("queueD");
    }

    @Bean
    public Binding bindingQueueC(Queue queueC, FanoutExchange fanoutExchange){
        return BindingBuilder.bind(queueC).to(fanoutExchange);
    }

    @Bean
    public Binding bindingQueueD(Queue queueD, FanoutExchange fanoutExchange){
        return BindingBuilder.bind(queueD).to(fanoutExchange);
    }

    //------------Topic-------------

    @Bean
    public TopicExchange topicExchange(){
        return new TopicExchange(topic);
    }

    @Bean
    public Queue queueE(){
        return new Queue("queueE");
    }

    @Bean
    public Queue queueF(){
        return new Queue("queueF");
    }

    @Bean
    public Binding bindingQueueE(Queue queueE, TopicExchange topicExchange){
        return BindingBuilder.bind(queueE).to(topicExchange).with(topicRoutingE);
    }

    @Bean
    public Binding bindingQueueF(Queue queueF, TopicExchange topicExchange){
        return BindingBuilder.bind(queueF).to(topicExchange).with(topicRoutingF);
    }

}
然后在测试类里面写
package com.example.demo;

import org.junit.Test;
import org.junit.runner.RunWith;
import org.springframework.amqp.core.AmqpAdmin;
import org.springframework.amqp.core.AmqpTemplate;
import org.springframework.amqp.rabbit.core.RabbitTemplate;
import org.springframework.beans.factory.annotation.Autowired;
import org.springframework.boot.test.context.SpringBootTest;
import org.springframework.test.context.junit4.SpringRunner;

@RunWith(SpringRunner.class)
@SpringBootTest
public class DemoApplicationTests {

    @Autowired
    private AmqpAdmin amqpAdmin;
    @Autowired
    private AmqpTemplate amqpTemplate;
    @Autowired
    private RabbitTemplate rabbitTemplate;


    @Test
    public void contextLoads() {
        amqpTemplate.convertAndSend("hello.direct","direct.routing.A","Hello!Rabbit!!");


    }

}
先不解释相关类的作用,先运行一下测试,让spring建立好相关的交换机、队列、绑定关系。
运行完单元测试,访问 http://localhost:15672/#/exchanges 查看是否建立了Exchange
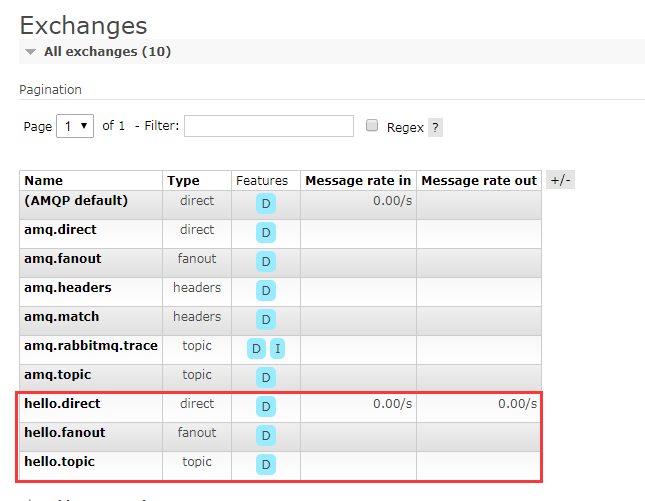
点击进入Exchange详细界面:
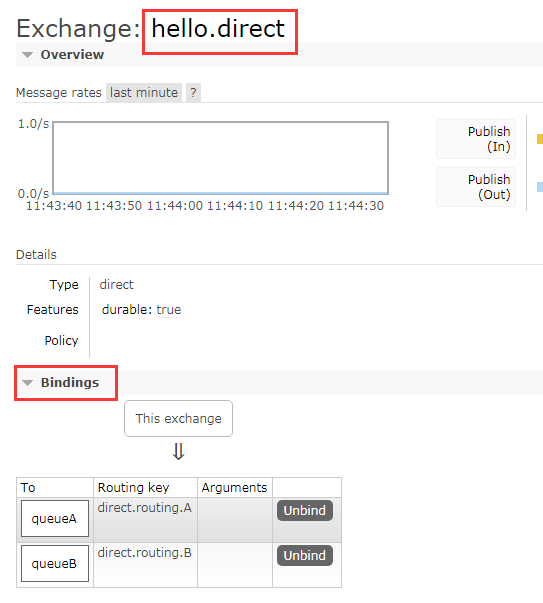
其他两个一样,咱们已经绑定好了。
再看队列: http://localhost:15672/#/queues
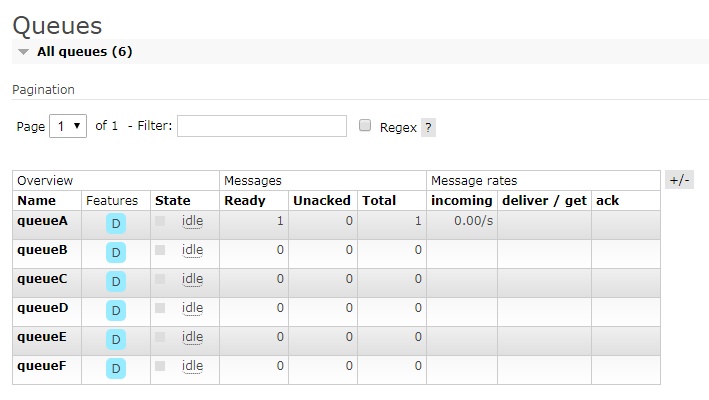
queueA有一条消息,是因为我们给他发了一条。
现在写一条消费信息:
    @Test
    public void contextLoads() {
        //amqpTemplate.convertAndSend("hello.direct","direct.routing.A","Hello!Rabbit!!");
        Object msg = amqpTemplate.receiveAndConvert("queueA");
        System.out.println(msg.toString());

    }
运行,控制台输出:
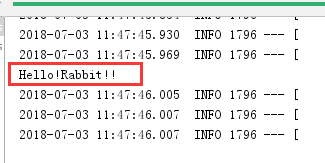
这样,一个最简单的例子就完成了。
关键类
org.springframework.amqp.core.AmqpTemplate

这里面方法很多,但都是重载的哈哈。
发送主要是Send,第一个是交换机,第二个是路由键,第三个是封装的消息
void send(String exchange, String routingKey, Message message) throws AmqpException;
另外一个类似的方法:唯一不同的是,第三个参数类型为Object,这就省去了我们自己序列化的过程
void convertAndSend(String exchange, String routingKey, Object message) throws AmqpException;
实际上呢你调用convertAndSend,底层也是调用的Send。
    @Override
    public void convertAndSend(String exchange, String routingKey, final Object object, CorrelationData correlationData)
            throws AmqpException {
        send(exchange, routingKey, convertMessageIfNecessary(object), correlationData);
    }
org.springframework.amqp.rabbit.core.RabbitTemplate
现在说RabbitTemplate,写代码的时候有人用RabbitTemplate,有人用AmqpTemplate,其实用哪一个都可以,要说他俩的区别:前者是具体实现,后者是接口。

org.springframework.amqp.core.AmqpAdmin
这个类可以理解为管理工具。

当然是管理Exchange、Queue、Binding啦。
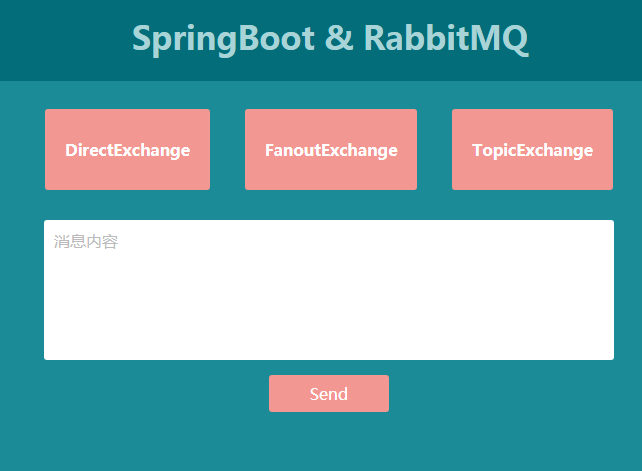
最后,我做了一个瞎玩的东西
来源:oschina
链接:https://my.oschina.net/u/4265488/blog/3918074