现在 机器学习 这么火,小编也忍不住想学习一把。注意,小编是零基础哦。
所以,第一步,推荐买一本机器学习的书,我选的是Peter harrigton 的《机器学习实战》。这本书是基于python 2.7的,但是我安装的是python 3.6.2.
所以很关键的是,你必须得有一定的python基础。这里我推荐runoob的py3教程,通俗易懂。http://www.runoob.com/python3/python3-tutorial.html
注意:python2和python3是不兼容的
python是面向对象的,面向对象是python的精髓。
————————————————————严肃的分割线......——————————————————————————————
言归正传,首先,我们要安装一些包,比如numpy和matplotlib。小编推荐用anaconda,这是一个开源的Python发行版本,其包含了conda、Python等180多个科学包及其依赖项。下载地址https://www.anaconda.com/download/。这就免去安装各种包的烦恼。
界面如下:里面有一个spyder,这是一款很好用的IDE
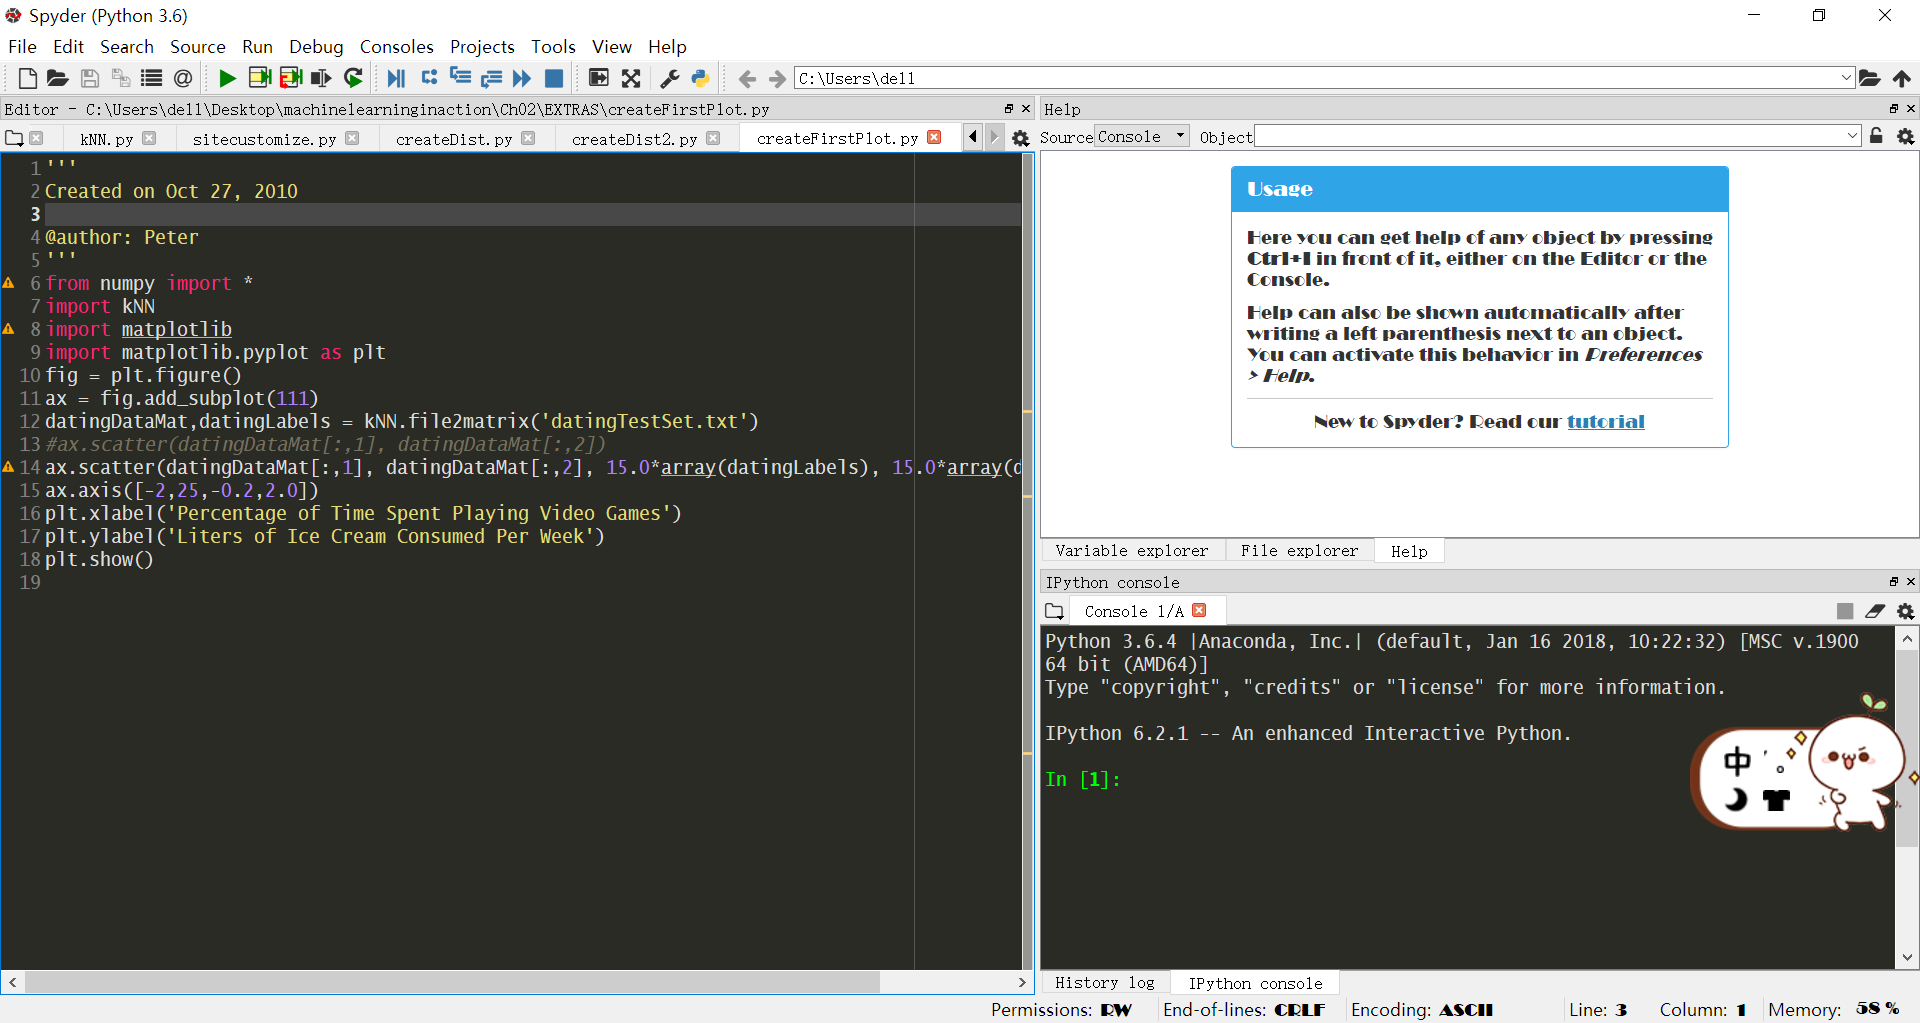
左边是文本编辑区,右下角是命令行。右上角是变量区,很方便啊,有木有!
下面就是KNN算法的讲解了。
————————————————————————分割线————————————————————————————————————————————————————
00000000000001111000000000000000
00000000000011111110000000000000
00000000001111111111000000000000
00000001111111111111100000000000
00000001111111011111100000000000
00000011111110000011110000000000
00000011111110000000111000000000
00000011111110000000111100000000
00000011111110000000011100000000
00000011111110000000011100000000
00000011111100000000011110000000
00000011111100000000001110000000
00000011111100000000001110000000
00000001111110000000000111000000
00000001111110000000000111000000
00000001111110000000000111000000
00000001111110000000000111000000
00000011111110000000001111000000
00000011110110000000001111000000
00000011110000000000011110000000
00000001111000000000001111000000
00000001111000000000011111000000
00000001111000000000111110000000
00000001111000000001111100000000
00000000111000000111111000000000
00000000111100011111110000000000
00000000111111111111110000000000
00000000011111111111110000000000
00000000011111111111100000000000
00000000001111111110000000000000
00000000000111110000000000000000
这就是经过数字图像处理的手写字体了,格式是32x32。
#inX:用于分类的输入向量。即将对其进行分类。
#dataSet:训练样本集
#labels:标签向量
def classify0(inX, dataSet, labels, k):
    dataSetSize = dataSet.shape[0]#得到训练样本集的行数,即有几个训练数据
    diffMat = tile(inX, (dataSetSize,1)) - dataSet #tile:numpy中的函数。tile将原来的一个数组,扩充成了dataSetSize个一样的数组。diffMat得到了目标与训练数值之间的差值。
    sqDiffMat = diffMat**2#差值的平方
    sqDistances = sqDiffMat.sum(axis=1)#对应列相乘,即距离和
    distances = sqDistances**0.5 #开根号 即距离
    sortedDistIndicies = distances.argsort()#升序排列
    classCount={}         #创建一个字典classCount  选择距离最小的k个点,
    for i in range(k):     #k次遍历
        voteIlabel = labels[sortedDistIndicies[i]]
        classCount[voteIlabel] = classCount.get(voteIlabel,0) + 1
    sortedClassCount = sorted(classCount.items(), key=operator.itemgetter(1), reverse=True) #原书是iteritems() py3改为items()
    return sortedClassCount[0][0]
#计算完所有点后,数据按从小到大排序,然后确定前k个距离最小元素所在的主要分类,输入k总是正整数,最后,将classCount字典分解为元组列表,然后此处的排序为逆序,
返回发生频率最高的元素标签。我们要知道的是在python中。classfiy0就是一个函数,而inX, dataSet, labels, k是输入参数,其中k就是KNN算法的K。
shape是numpy库中的函数。.shape用于计算array各维度的长度,在python中都是从0开始的。
tile 也是 numpy中的函数,它可以在行和列上重复一个矩阵。
那 tile(inX, (dataSetSize,1))的意思就是,让inX矩阵,在列重复1次。在行方向上重复dataSetSize次了。diffMat得到了目标与训练数值之间的差值。
而 sum(axis=1) 为什么这样写呢,因为python和c不一样。 小编开始也不懂然后 在命令行输入help(sum) 出来很多有用的帮助。自己亲手敲了几行就懂了。
axis=None, will sum all of the elements of the input array.  If
axis is negative it counts from the last to the first axis.写到这想必大家也懂了。如果想搞机器学习,还需要了解很多python数学函数啊。
下面是get() 它是dictionary(字典)的一个函数。
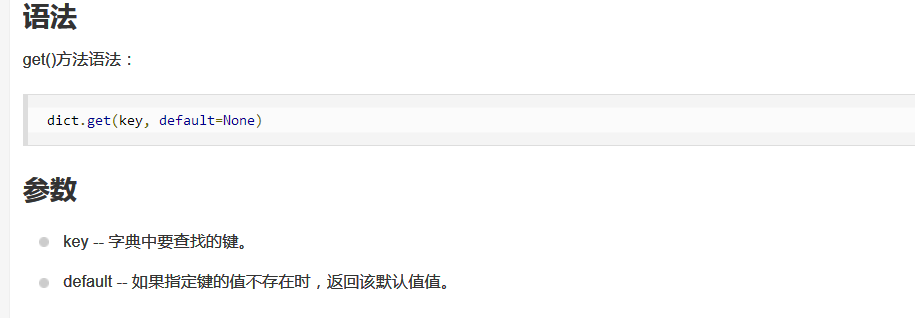
所以classCount[voteIlabel] = classCount.get(voteIlabel,0) + 1 的意思就是查找classcount字典中和voteIlabel相同的元素,默认返回0,因为是从0开始的,所以要加1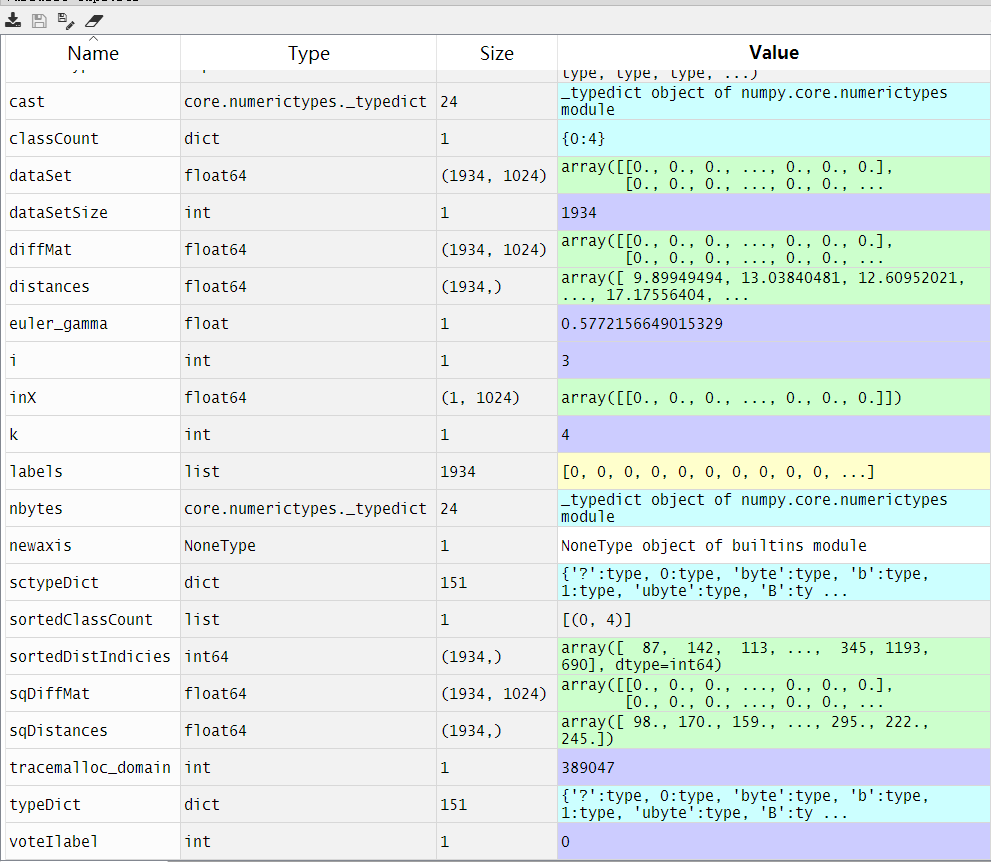
  1 '''
  2 Created on Sep 16, 2010
  3 kNN: k Nearest Neighbors
  4
  5 Input:      inX: vector to compare to existing dataset (1xN)
  6             dataSet: size m data set of known vectors (NxM)
  7             labels: data set labels (1xM vector)
  8             k: number of neighbors to use for comparison (should be an odd number)
  9
 10 Output:     the most popular class label
 11  27 @author: pbharrin
 28 '''
 29 from numpy import *
 30 import operator   #运算符模块
 31 from os import listdir
 32
 33 #inX:用于分类的输入向量。即将对其进行分类。
 34 #dataSet:训练样本集
 35 #labels:标签向量
 36 def classify0(inX, dataSet, labels, k):
 37     dataSetSize = dataSet.shape[0]#得到数组的行数,即有几个训练数据
 38     diffMat = tile(inX, (dataSetSize,1)) - dataSet #tile:numpy中的函数。tile将原来的一个数组,扩充成了4个一样的数组。diffMat得到了目标与训练数值之间的差值。
 39     sqDiffMat = diffMat**2#差值的平方
 40     sqDistances = sqDiffMat.sum(axis=1)#对应列相乘,即距离和
 41     distances = sqDistances**0.5 #开根号
 42     sortedDistIndicies = distances.argsort()#升序排列
 43     classCount={}         #选择距离最小的k个点
 44     for i in range(k):
 45         voteIlabel = labels[sortedDistIndicies[i]]
 46         classCount[voteIlabel] = classCount.get(voteIlabel,0) + 1
 47     sortedClassCount = sorted(classCount.items(), key=operator.itemgetter(1), reverse=True)
 48     return sortedClassCount[0][0]
 49
 50 def createDataSet():
 51     group = array([[1.0,1.1],[1.0,1.0],[0,0],[0,0.1]])
 52     labels = ['A','A','B','B']
 53     return group, labels
 54
 55 def file2matrix(filename):
 56     fr = open(filename)
 57     numberOfLines = len(fr.readlines())         #get the number of lines in the file
 58     returnMat = zeros((numberOfLines,3))        #prepare matrix to return
 59     classLabelVector = []                       #prepare labels return
 60     fr = open(filename)
 61     index = 0
 62     for line in fr.readlines():
 63         line = line.strip()                     #Python strip() 方法用于移除字符串头尾指定的字符(默认为空格)。
 64         listFromLine = line.split('\t')          #将line按'\t'进行分割
 65         returnMat[index,:] = listFromLine[0:3]
 66         classLabelVector.append(int(listFromLine[-1]))  #倒数第一个元素
 67         index += 1
 68     return returnMat,classLabelVector
 69  #归一化特征值
 70  #使得所有参量在0到1之间
 71 def autoNorm(dataSet):
 72     minVals = dataSet.min(0)
 73     maxVals = dataSet.max(0)
 74     ranges = maxVals - minVals
 75     normDataSet = zeros(shape(dataSet))
 76     m = dataSet.shape[0]  #返回矩阵第二维长度(列数)
 77     normDataSet = dataSet - tile(minVals, (m,1))
 78     normDataSet = normDataSet/tile(ranges, (m,1))   #element wise divide
 79     return normDataSet, ranges, minVals
 80
 81 def datingClassTest():
 82     hoRatio = 0.50 #hold out 10%
 83     datingDataMat,datingLabels = file2matrix('datingTestSet2.txt')       #load data setfrom file
 84     normMat, ranges, minVals = autoNorm(datingDataMat)
 85     m = normMat.shape[0]       #m:目录中有多少文件#shape函数是numpy.core.fromnumeric中的函数,它的功能是查看矩阵或者数组的维数。
 86     numTestVecs = int(m*hoRatio)
 87     errorCount = 0.0
 88     for i in range(numTestVecs):
 89         classifierResult = classify0(normMat[i,:],normMat[numTestVecs:m,:],datingLabels[numTestVecs:m],3)
 90 #inX:用于分类的输入向量。即将对其进行分类。normMat[i,:],
 91 #dataSet:训练样本集.normMat[numTestVecs:m,:]
 92 #labels:标签向量.datingLabels[numTestVecs:m]
 93 #k:3
 94         print ("the classifier came back with: %d, the real answer is: %d" % (classifierResult, datingLabels[i]))
 95         if (classifierResult != datingLabels[i]): errorCount += 1.0
 96     print ( "the total error rate is: %f" % (errorCount/float(numTestVecs)))
 97     print (errorCount)
 98 '''
 99 我们将一个32x32二进制图像矩阵转换为1x1024的向量
100 '''
101 def img2vector(filename):   #图片转化为向量
102     returnVect = zeros((1,1024))
103     fr = open(filename)
104     for i in range(32):
105         lineStr = fr.readline()
106         for j in range(32):
107             returnVect[0,32*i+j] = int(lineStr[j])
108     return returnVect
109 #安照先训练再测试的模式
110 def handwritingClassTest():
111     hwLabels = []
112     trainingFileList = listdir('trainingDigits')           #load the training set listdir法用于返回指定的文件夹包含的文件或文件夹的名字的列表
113     m = len(trainingFileList)  #获取文件长度
114     trainingMat = zeros((m,1024))
115     for i in range(m):
116         fileNameStr = trainingFileList[i]      #从文件名解析分类数字
117         fileStr = fileNameStr.split('.')[0]     #take off .txt
118         classNumStr = int(fileStr.split('_')[0])
119         hwLabels.append(classNumStr)
120         trainingMat[i,:] = img2vector('trainingDigits/%s' % fileNameStr)  #将文件名
121     testFileList = listdir('testDigits')        #iterate through the test set
122     errorCount = 0.0
123     mTest = len(testFileList)
124     for i in range(mTest):
125         fileNameStr = testFileList[i]
126         fileStr = fileNameStr.split('.')[0]     #take off .txt
127         classNumStr = int(fileStr.split('_')[0])
128         vectorUnderTest = img2vector('testDigits/%s' % fileNameStr)
129         classifierResult = classify0(vectorUnderTest, trainingMat, hwLabels, 4)
130         print ("the classifier came back with: %d, the real answer is: %d" % (classifierResult, classNumStr))
131         if (classifierResult != classNumStr): errorCount += 1.0
132     print ("\nthe total number of errors is: %d" % errorCount)
133     print ("\nthe total error rate is: %f" % (errorCount/float(mTest)))
134 # main part
135 handwritingClassTest();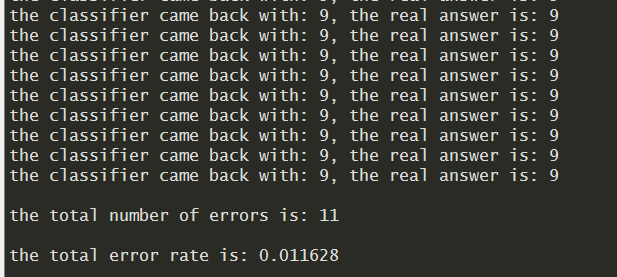
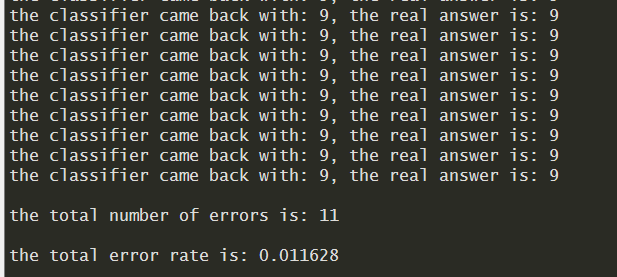
k临近算法手写识别,错误率为1.2%,改变k的值,修改函数handwriting - classTest 随机选取的训练样本,改变训练样本的个数,都会对k临近算法错误率产生影响。
代码下载地址 http://www.ituring.com.cn/book/download/0019ab9d-0fda-4c17-941b-afe639fcccac
来源:oschina
链接:https://my.oschina.net/u/4312035/blog/4246452