本文只描述 windows环境下的使用情况,linux平台基本雷同。
一、配置编译环境.
(1)操作系统 :Windows10 (64bit).
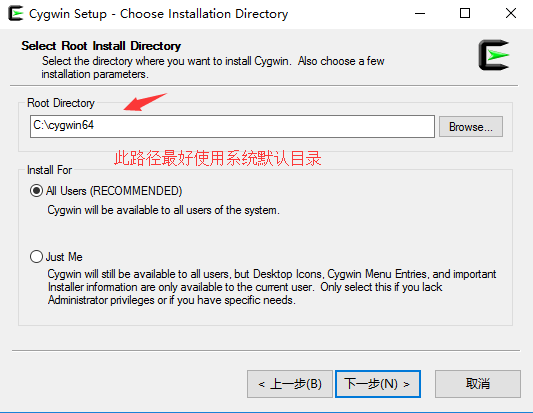
(2)类unix环境:Cygwin(64bit) 下载路径:https://www.cygwin.com/setup-x86_64.exe。
(3)安装Cygwin ,注意:为防止有API Hook的行为导致 Cygwin出现异常,请在干净环境下使用。
流程如下:

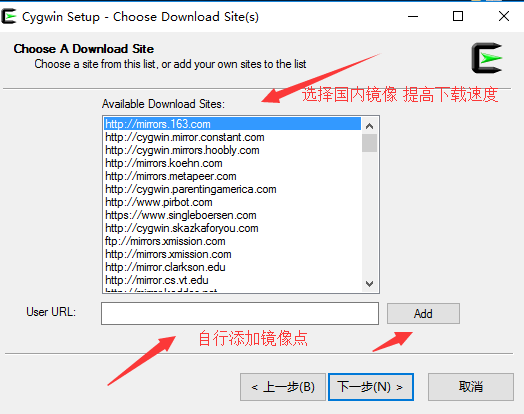
网易开源镜像站 :http://mirrors.163.com/,找到cygwin并添加路径

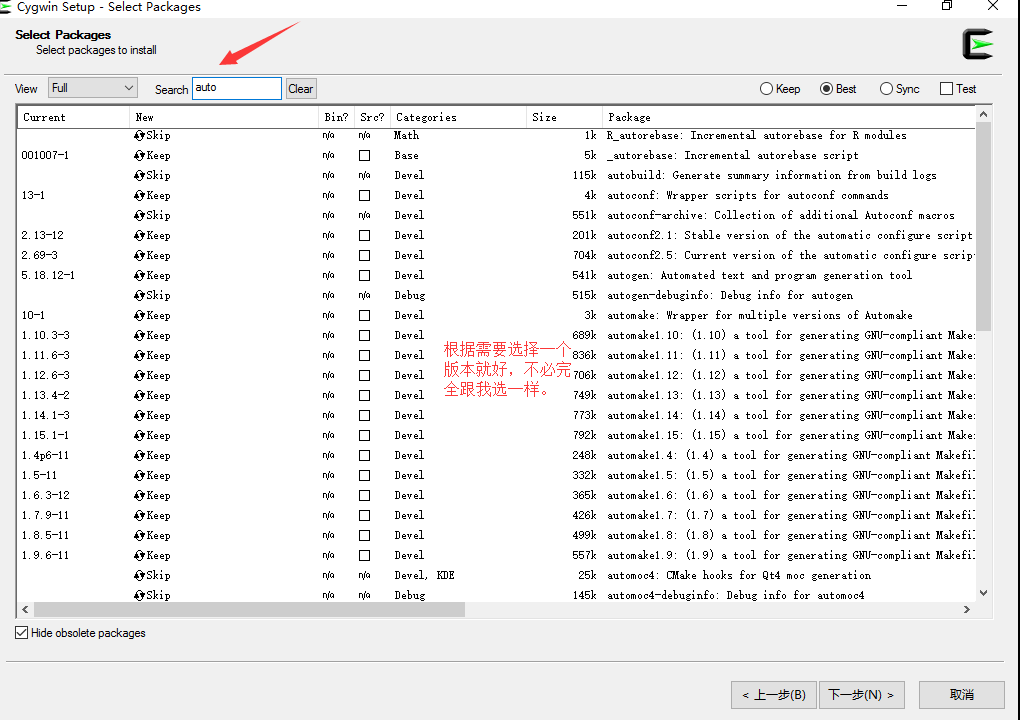
安装 autoconf相关工具

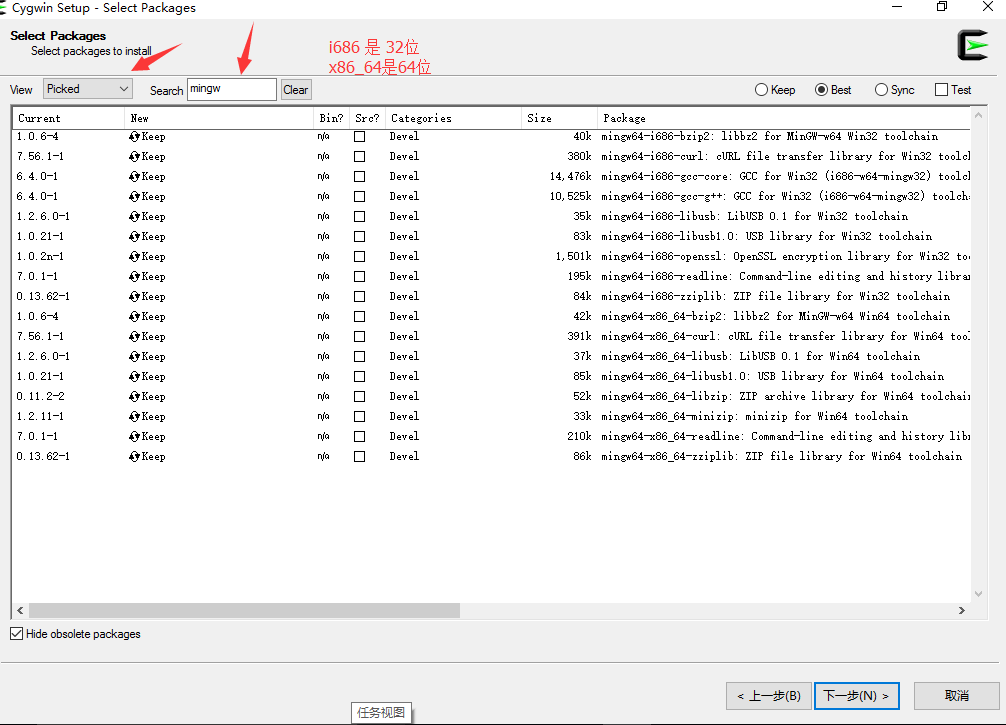
安装mngw32环境

下一步,等待安装完成, 如果要安装cygwin自带的一些bash命令也可以按此方法行事(如:lynx、wget、apt-cyg、cmake等),
二、使用 cygwin自带的 i686-w64-mingw32 编译 libimobiledevice (https://github.com/libimobiledevice)
以下工程的默认安装目录都是在 /usr/local /目录下, 如需改动可以使用 configure的--prefix 自行配置
编译顺序:(由库之间的依赖性决定)
1、 libzip:由于Cygwin当前版本自带的包对于处理大于2G的文件有bug,所以我们要自己编译安装libzip.
(1): 编译安装前先卸载掉libzip. (命令 :apt-cyg remove mingw-i686-libzip)
(2):下载libzip源码 https://libzip.org/download/libzip-1.3.2.tar.gz. 解压.(命令 tar -zxvf libzip-1.3.2.tar.gz)
(3):进入解压目录, 执行配置命令 ./configure --host="i686-w64-mingw32" (关于 配置参数选项,可使用 configure --help查看)
(4):make ,成功后 make install .
2、libplist : git clone https://github.com/libimobiledevice/libplist.git
进入目录: ./autogen.sh --host=i686-w64-mingw32 --without-cython 成功,make 成功,make install
3、libusbmuxd: git clone https://github.com/libimobiledevice/libusbmuxd.git
进入目录: PKG_CONFIG_PATH=/usr/local/lib/pkgconfig ./autogen.sh --host=i686-w64-mingw32 成功,make 成功,make install
4、libimobiledevice : git clone https://github.com/libimobiledevice/libimobiledevice.git ( 需要 Openssl 或者GnuTLS)
进入目录: PKG_CONFIG_PATH=/usr/local/lib/pkgconfig ./autogen.sh --host=i686-w64-mingw32 --without-cython 成功,make 成功,make install
5、libirecovery:git clone https://github.com/libimobiledevice/libirecovery.git
进入目录: ./autogen.sh --host=i686-w64-mingw32 成功,make 成功,make install
6、idevicerestore :git clone https://github.com/libimobiledevice/idevicerestore.git
进入目录: PKG_CONFIG_PATH=/usr/local/lib/pkgconfig ./autogen.sh --host=i686-w64-mingw32 --without-cython 成功,make 成功,make install
上述步骤完毕后,将 /usr/i686-w64-mingw32/sys-root/mingw/bin 目录下的依赖库 dll拷贝到 /usr/local/bin 目录下即可。(运行相关exe 根据报错便可确定少了哪些dll.)
来源:oschina
链接:https://my.oschina.net/u/4387359/blog/4048935