CXF方式

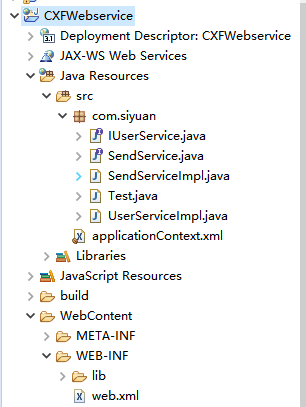
以下是项目的具体结构
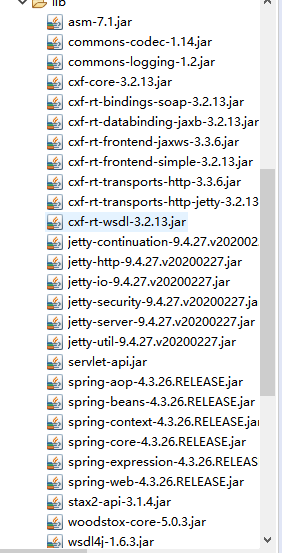
先将jar包放到lib下

然后再去配置web.xml
<?xml version="1.0" encoding="UTF-8"?>
<web-app xmlns:xsi="http://www.w3.org/2001/XMLSchema-instance" xmlns="http://xmlns.jcp.org/xml/ns/javaee" xsi:schemaLocation="http://xmlns.jcp.org/xml/ns/javaee http://xmlns.jcp.org/xml/ns/javaee/web-app_3_1.xsd" id="WebApp_ID" version="3.1">
  <display-name>CXFWebservice</display-name>
  <welcome-file-list>
    <welcome-file>index.html</welcome-file>
    <welcome-file>index.htm</welcome-file>
    <welcome-file>index.jsp</welcome-file>
    <welcome-file>default.html</welcome-file>
    <welcome-file>default.htm</welcome-file>
    <welcome-file>default.jsp</welcome-file>
  </welcome-file-list>

 <context-param>
<param-name>contextConfigLocation</param-name>
<param-value>classpath:/applicationContext.xml</param-value>
</context-param>

<listener>
<listener-class>org.springframework.web.context.ContextLoaderListener</listener-class>
</listener>

<!-- Character Encoding filter -->

<filter>
<filter-name>encodingFilter</filter-name>
<filter-class>org.springframework.web.filter.CharacterEncodingFilter</filter-class>

<init-param>
<param-name>encoding</param-name>
<param-value>UTF-8</param-value>
</init-param>

</filter>

<filter-mapping>
<filter-name>encodingFilter</filter-name>
<url-pattern>/*</url-pattern>
</filter-mapping>

<servlet>
<servlet-name>CXFServlet</servlet-name>
<servlet-class>org.apache.cxf.transport.servlet.CXFServlet</servlet-class>
<load-on-startup>1</load-on-startup>
</servlet>

<servlet-mapping>
<servlet-name>CXFServlet</servlet-name>
<url-pattern>/webservice/*</url-pattern>
</servlet-mapping>

</web-app>
classpath:/applicationContext.xml 是spring 配置文件的路径 /webservice/* 是wsdl的地址内容 编写接口和实现类,注意写注解
//接口类

@WebService
public interface SendService {
		public boolean sendOA(@WebParam(name="param")String param);

}


//接口的实现类

@WebService(endpointInterface="com.siyuan.SendService",serviceName="sendService")
public class SendServiceImpl implements SendService{

	@Override
	public boolean sendOA(String param) {
		System.out.println("-------sendOA---------param:"+param);

		if(param.equals("alice")){

		return true;

		}

		return false;
	}


}
配置spring的文件
<?xml version="1.0" encoding="UTF-8"?>

<beans

xmlns="http://www.springframework.org/schema/beans"

xmlns:xsi="http://www.w3.org/2001/XMLSchema-instance"

xmlns:p="http://www.springframework.org/schema/p"

xmlns:jaxws="http://cxf.apache.org/jaxws"

xsi:schemaLocation="

      http://www.springframework.org/schema/beans

      http://www.springframework.org/schema/beans/spring-beans.xsd

      http://cxf.apache.org/jaxws

      http://cxf.apache.org/schemas/jaxws.xsd">


<jaxws:endpoint id="sendServie" implementor="com.siyuan.SendServiceImpl"

address="/sendServie" />


<!-- <jaxws:client id="sendServiceClient" serviceClass="com.service.SendService"

address="http://10.137.138.11:9080/Wb/webservice/sendServie?wsdl"  />-->


</beans>
“jaxws:client”该标签可以不必写,访问时可以手动拼接该url 发布到tomcat里面 eclipse中启动

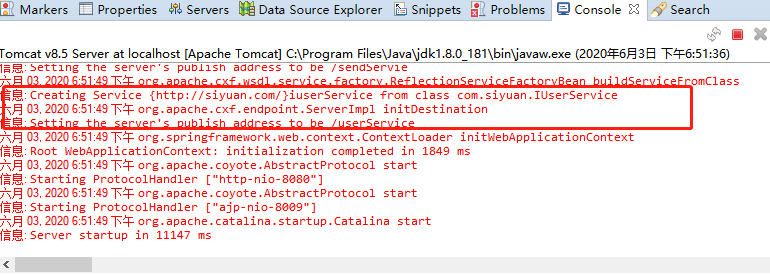
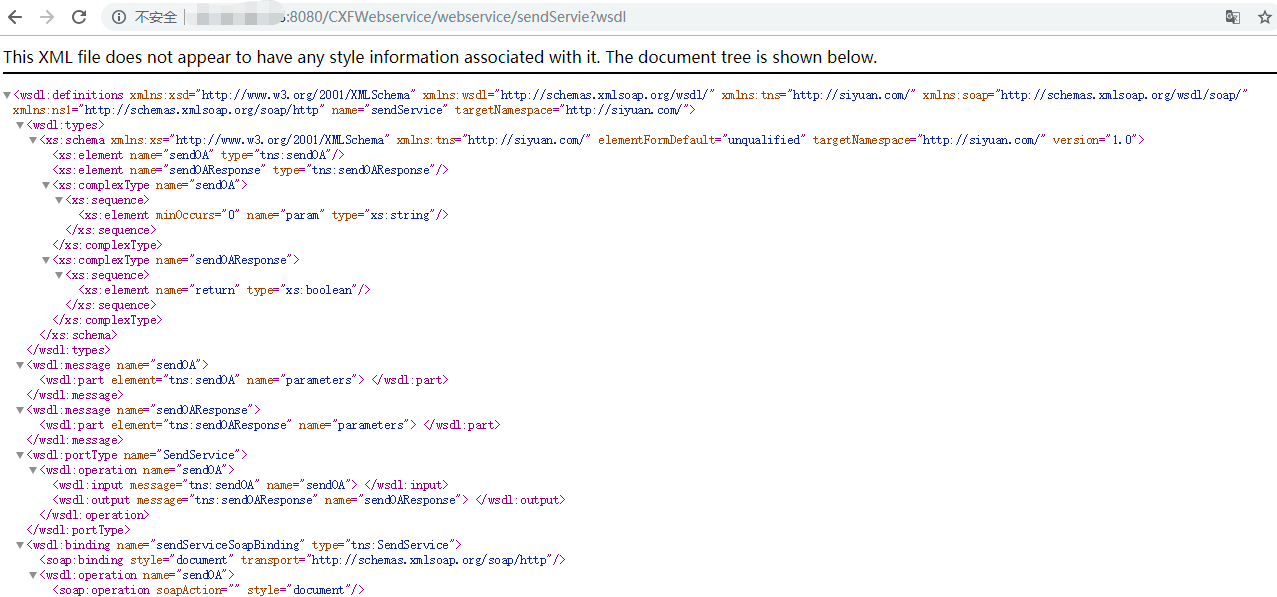
说明服务发布成功,访问该项目http://localhost:8080/CXFWebservice/webservice

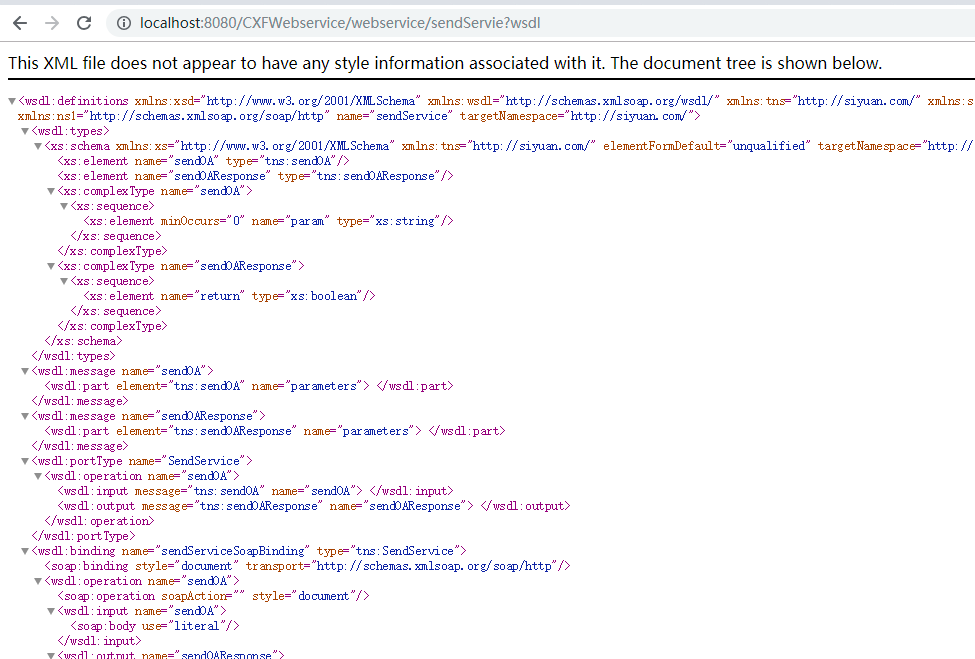
可以看到该工程有两个服务,点击wsdl的连接可以看到下图信息
当然也可以将此项目打成war包放到远程服务器上
再启动tomcat去进行访问远程服务器的ip+tomcat端口号

CXF的webservice的客户端调用方式
	public static void main(String[] args) throws Exception, IllegalAccessException, InvocationTargetException {

		JaxWsDynamicClientFactory dcf = JaxWsDynamicClientFactory.newInstance();

		Client client = dcf.createClient("http://localhost:8080/CXFWebservice/webservice/sendServie?wsdl");

		client.invoke("sendOA", "aa");

		}
来源:oschina
链接:https://my.oschina.net/u/3459265/blog/4299441