1.前提引入
当我们在浏览网页时,有些页面的访问需要我们登陆之后才能够看得到,当我们登陆的身份不一样时,我们看到的东西也会有所差别,那么这个是怎么做到的呢?我们今天要讲的这个springsecurity安全框架就能够做到这样的效果。
2.实战测试
2.1环境搭建
(建议直接新建一个springboot项目)
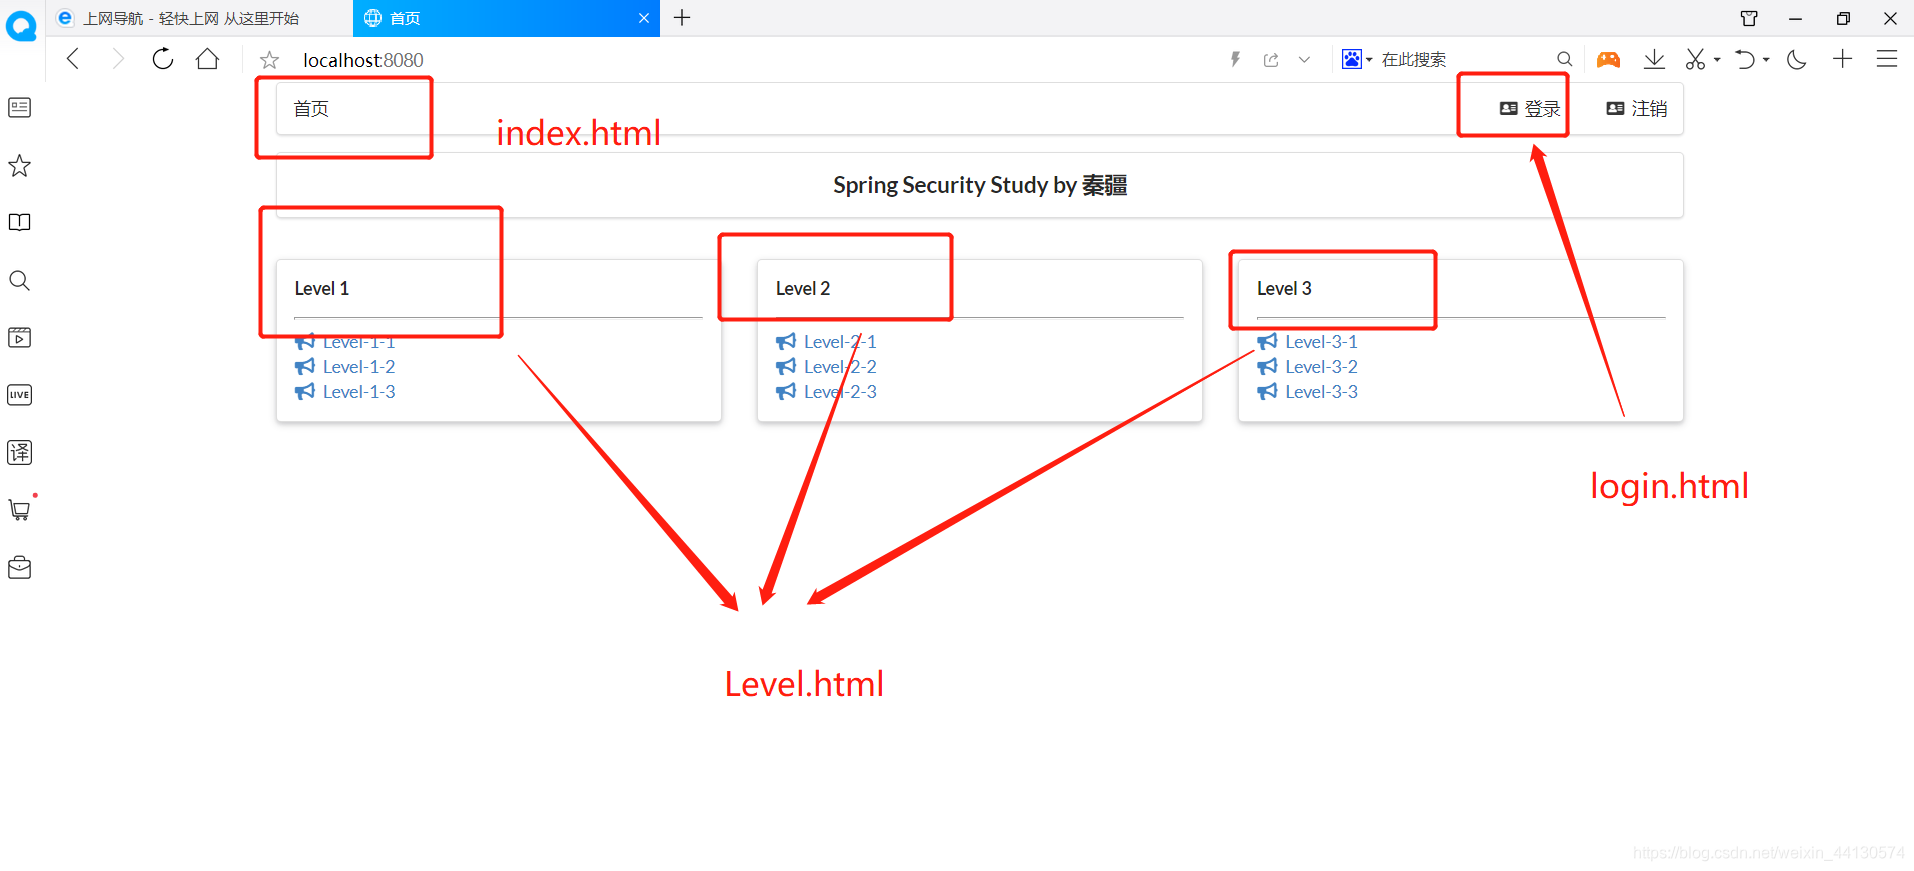
首先我们需要一些静态资源文件来辅助我们完成对springsecurity安全框架的学习。(需要下载静态资源文件的可以直接在最下方链接进行下载)这里就不再做过多的讲解,我们主要学习的是springsecurity安全框架。

application配置文件
编写一个控制器:
(这个暂时看不懂也没关系 就是一些页面之间的跳转)
package com.zc.springbootsecurity01.controller;

import org.springframework.stereotype.Controller;
import org.springframework.web.bind.annotation.PathVariable;
import org.springframework.web.bind.annotation.RequestMapping;

@Controller
public class RouterController {

    @RequestMapping({"/","/index"})
    public String index(){
        return "index";
    }

    @RequestMapping("/toLogin")
    public String toLogin(){
        return "views/login";
    }

    @RequestMapping("/level1/{id}")
    public String level1(@PathVariable("id") int id){
        return "views/level1/"+id;
    }

    @RequestMapping("/level2/{id}")
    public String level2(@PathVariable("id") int id){
        return "views/level2/"+id;
    }

    @RequestMapping("/level3/{id}")
    public String level3(@PathVariable("id") int id){
        return "views/level3/"+id;
    }
}
2.2实例讲解
准备工作做完了,接下来开始讲解代码部分:
emmm…代码看起来虽然多,但是都有注释,相信你们一看就能懂了!
1.首先我们新建一个springsecurityConfig类,继承 WebSecurityConfigurerAdapter,重写方法。
2.下面我们将会创建3个用户 分别是 (在下面代码中新建,看下面代码就都懂了)
cunzhang 123456 所拥有的权限: vip2 vip3
guest 123456 所拥有的权限: vip1 vip2
root 123456 所拥有的权限: vip1 vip2 vip3 vip1
vip1可以访问到Level1 页面 vip2 就可以访问到Level2页面 vip3 就可以访问到Level3 页面
package com.zc.springbootsecurity01.config;
import org.springframework.security.config.annotation.authentication.builders.AuthenticationManagerBuilder;
import org.springframework.security.config.annotation.web.builders.HttpSecurity;
import org.springframework.security.config.annotation.web.configuration.EnableWebSecurity;
import org.springframework.security.config.annotation.web.configuration.WebSecurityConfigurerAdapter;
import org.springframework.security.crypto.bcrypt.BCryptPasswordEncoder;

@EnableWebSecurity // 开启WebSecurity模式
public class SecurityConfig extends WebSecurityConfigurerAdapter {

    @Override
    protected void configure(HttpSecurity http) throws Exception {

            // 定制请求的授权规则
            // 首页(“/” 表示我们的根路径 resource/templates (如果没有指明那个html文件 一般默           认访问  index.html文件  也就是首页))所有人可以访问  自己对着英文单词意思就知道了
            http.authorizeRequests().antMatchers("/").permitAll()
            // 如果你要访问/level1下面的所有资源  那么登陆的用户必须要有 vip1  这个权限才能访问(权限这个在下面的代码会讲到)
                    .antMatchers("/level1/**").hasRole("vip1")
                    .antMatchers("/level2/**").hasRole("vip2")
                    .antMatchers("/level3/**").hasRole("vip3");

        http.formLogin().loginPage("/toLogin");  //,如果你直接访问其他页面,没有登陆,例如level1页面,他会自己去寻找 login登陆页面 ,因为我们上面设置了权限,没登陆肯定就没有权限,当然就访问不了,没登陆默认访问需要权限的页面都会跳转到登陆页面
        http.logout().logoutSuccessUrl("/"); //开启注销功能   返回主页面
        http.cors().disable();
        http.rememberMe();  // 就我们登陆页面的时候,有个记住我的功能,默认保存俩周
    }
    @Override
    protected void configure(AuthenticationManagerBuilder auth) throws Exception {

        //密码必须加密 否则会报错 (这个是什么新版本要求的  不然会报错)
        auth.inMemoryAuthentication().passwordEncoder(new BCryptPasswordEncoder())
        //我们上面所讲到的用户权限就是在下面代码这里设置的   当然  实际开发中我们都是到数据库查询的
                .withUser("cunzhang").password(new BCryptPasswordEncoder().encode("123456")).roles("vip2","vip3")
                .and()
                .withUser("root").password(new BCryptPasswordEncoder().encode("123456")).roles("vip1","vip2","vip3")
                .and()
                .withUser("guest").password(new BCryptPasswordEncoder().encode("123456")).roles("vip1","vip2");
    }
}
3.演示效果
我们先来测试一下没有登陆所看到的页面:没有登陆 就没有任何权限 所以我们只能看到首页!
我们现在来登陆 cunzhang这个用户 他所拥有的权限是 vip2 和vip3 意味着它可以看到 level2 和level3页面

我们现在来登陆root这个用户 他所拥有的权限是vip1 vip2 和vip3 意味着它可以看到 level2 和level3和level1页面

guest也是同样的道理。
讲完了,自己在理解一下就ok!
静态资源来自于B站小狂神,可以上b站搜索!
来源:oschina
链接:https://my.oschina.net/u/4339032/blog/4311135