2013-4-3更新:由于标准GPIO库(gpio-sunxi.ko)已经可用了,不建议再使用sun4i-gpio.ko这个驱动。此文仅作思路上的参考,不用照搬
This driver is not recommended now. For the new gpio driver "gpio-sunxi" is coming. So don't follow this.
1.首先你要编译并加载sun4i-gpio.ko驱动,如何编译:参考 <如何编译单个驱动文件>
2.修改script.bin配置,在末尾加上gpio配置段,如何修改:参考<如何修改script.bin | script.fex>
添加的内容如下:
[gpio_para]
gpio_used = 1
gpio_num = 67
gpio_pin_1 = port:PG03<1><default><default><1>
gpio_pin_2 = port:PB19<1><default><default><1>
gpio_pin_3 = port:PB18<1><default><default><1>
gpio_pin_4 = port:PG06<1><default><default><1>
gpio_pin_5 = port:PG05<1><default><default><1>
gpio_pin_6 = port:PG04<1><default><default><1>
gpio_pin_7 = port:PG01<1><default><default><1>
gpio_pin_8 = port:PG02<1><default><default><1>
gpio_pin_9 = port:PG00<1><default><default><1>
gpio_pin_10 = port:PH14<1><default><default><1>
gpio_pin_11 = port:PH15<1><default><default><1>
gpio_pin_12 = port:PI06<1><default><default><1>
gpio_pin_13 = port:PI05<1><default><default><1>
gpio_pin_14 = port:PI04<1><default><default><1>
gpio_pin_15 = port:PG11<1><default><default><1>
gpio_pin_16 = port:PG10<1><default><default><1>
gpio_pin_17 = port:PG09<1><default><default><1>
gpio_pin_18 = port:PG08<1><default><default><1>
gpio_pin_19 = port:PG07<1><default><default><1>
gpio_pin_20 = port:PE08<1><default><default><1>
gpio_pin_21 = port:PE07<1><default><default><1>
gpio_pin_22 = port:PE06<1><default><default><1>
gpio_pin_23 = port:PE05<1><default><default><1>
gpio_pin_24 = port:PE04<1><default><default><1>
gpio_pin_25 = port:PI09<1><default><default><1>
gpio_pin_26 = port:PI08<1><default><default><1>
gpio_pin_27 = port:PI07<1><default><default><1>
gpio_pin_28 = port:PD04<1><default><default><1>
gpio_pin_29 = port:PD03<1><default><default><1>
gpio_pin_30 = port:PD02<1><default><default><1>
gpio_pin_31 = port:PD01<1><default><default><1>
gpio_pin_32 = port:PD00<1><default><default><1>
gpio_pin_33 = port:PE11<1><default><default><1>
gpio_pin_34 = port:PE10<1><default><default><1>
gpio_pin_35 = port:PE09<1><default><default><1>
gpio_pin_36 = port:PD12<1><default><default><1>
gpio_pin_37 = port:PD11<1><default><default><1>
gpio_pin_38 = port:PD10<1><default><default><1>
gpio_pin_39 = port:PD09<1><default><default><1>
gpio_pin_40 = port:PD08<1><default><default><1>
gpio_pin_41 = port:PD07<1><default><default><1>
gpio_pin_42 = port:PD06<1><default><default><1>
gpio_pin_43 = port:PD05<1><default><default><1>
gpio_pin_44 = port:PD20<1><default><default><1>
gpio_pin_45 = port:PD19<1><default><default><1>
gpio_pin_46 = port:PD18<1><default><default><1>
gpio_pin_47 = port:PD17<1><default><default><1>
gpio_pin_48 = port:PD16<1><default><default><1>
gpio_pin_49 = port:PD15<1><default><default><1>
gpio_pin_50 = port:PD14<1><default><default><1>
gpio_pin_51 = port:PD13<1><default><default><1>
gpio_pin_52 = port:PB02<1><default><default><1>
gpio_pin_53 = port:PD25<1><default><default><1>
gpio_pin_54 = port:PD24<1><default><default><1>
gpio_pin_55 = port:PD26<1><default><default><1>
gpio_pin_56 = port:PD27<1><default><default><1>
gpio_pin_57 = port:PD23<1><default><default><1>
gpio_pin_58 = port:PD22<1><default><default><1>
gpio_pin_59 = port:PD21<1><default><default><1>
gpio_pin_60 = port:PI11<1><default><default><1>
gpio_pin_61 = port:PI13<1><default><default><1>
gpio_pin_62 = port:PI10<1><default><default><1>
gpio_pin_63 = port:PI12<1><default><default><1>
gpio_pin_64 = port:PB13<1><default><default><1>
gpio_pin_65 = port:PB11<1><default><default><1>
gpio_pin_66 = port:PB10<1><default><default><1>
gpio_pin_67 = port:PH07<1><default><default><1>
复制代码
#注意,sun4i-gpio驱动不是一个标准的linux gpio驱动,无法即时转换输入输出模式,而是定义死在script.bin里的。这里我将67个针脚全都配置为输出模式了。比如:gpio_pin_67 = port:PH07<1><default><default><1> 中,红色的1表示将PH07针脚配置为输出模式,改为0则为输入模式,gpio_pin_数字 和 针脚名称 并没有特定的对应要求,只要一个数字对应一个针脚就可以,使用的时候我们是用针脚名,gpio_pin_数字 可以无视。
针脚名具体参考:http://linux-sunxi.org/Cubieboard#Expansion_ports
3.重启系统,查看/sys/devices/virtual/misc/sun4i-gpio/pin/下是否有67个针脚名,如果没有,那你使用命令:dmesg 查看是否有gpio驱动或者script配置的报错信息,再google解决.
如果你有led灯或是其他原件,可以参考<Cubieboard GPIO成功点亮LED>来进行测试
4.先说说控制步进电机的原理,网上已经有一大堆了,如果你完全不了解,可以google搜索"树莓派 步进电机"或"arduino 步进电机"。我这里就简单描述一下:除了步进电机,你还需要一块步进电机的驱动板,买电机的时候就一起买了吧。要让电机转动,只需要在某一时刻对驱动板的4个引脚输出3个低电平一个高电平,下一时刻把高电平往下一个针脚转移。
假设:驱动板a b c d 四条线 连接的 cb上的 1 2 3 4针脚,那么我们需要在t1时间输出电平为:1=>高 2=>低 3=>低 4=>低。
t1+n毫秒时,输出1=>低 2=>高 3=>低 4=>低。以此类推,4为高电平后,为通电一周,下次就再重复1为高电平...
接下来,我写了一些python代码。分为两部分:一是 对针脚电平控制的基础库,这样就能方便的用python对任意针脚进行电平控制;二是 调用基础库对电机进行控制的代码。代码下载见底部附件。
5.下载代码之后,先参考确定你要使用哪几个针脚来控制电机,在上面67个中自己选4个。选好之后,把线接上,把针脚名字记好。除了4根控制线,驱动板还有vcc和gnd两根线供电,也接在板子上对应的针脚。比如我使用的控制针脚为'pg0', 'pb18', 'pb19', 'pg3'。针脚名和在板子上的位置还是参考:http://linux-sunxi.org/Cubieboard#Expansion_ports正负极我接的U15的1号和19号针脚
这里要吐槽一下,CB的GPIO针脚是2mm间距的,我用标准的2.45的杜邦线插上去相当困难,所以买线的时候要注意买2.0的杜邦线哦。
连接控制线的时候,注意顺序,驱动板上的4个接线口假设依次为a b c d,那么你给他通电的顺序一定要是 a b c d或者 d c b a ,所以要看好顺序,然后在下面修改针脚名的时候,依次排列。
解压之后,先修改motor_main.py 的第5行
#modify the tuple to the pins you used
motor_pins = ('pg0', 'pb18', 'pb19', 'pg3') #将这里的引脚名改为你已经连接了的引脚名,注意顺序
保存退出,最后执行
python motor_main.py
电机转了!!有木有!!!!!
下面上图:
虽然你看不出,但它的确在转。。
旁边的 卡王(带天线那位) 是打酱油的,请无视
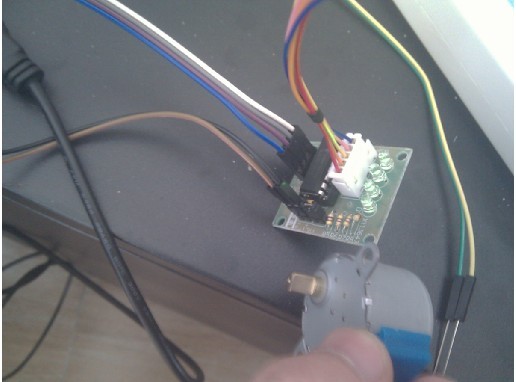
来个特写,驱动板是必须有的
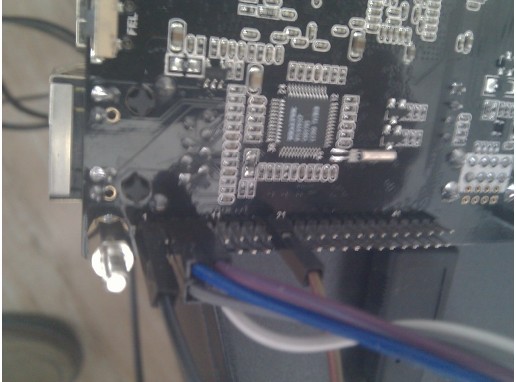
引脚接线
源码下载: motor_gpio.zip (2.18 KB, 下载次数: 263)
原文作者:WindLand
原文链接:http://forum.cubietech.com/forum.php?mod=viewthread&tid=139&highlight=%E6%AD%A5%E8%BF%9B%E7%94%B5%E6%9C%BA
来源:oschina
链接:https://my.oschina.net/u/1982421/blog/305473