macOS使用VM安装CentOS7系统
前面步骤就不截图了百度很多,选择安装系统的iso文件

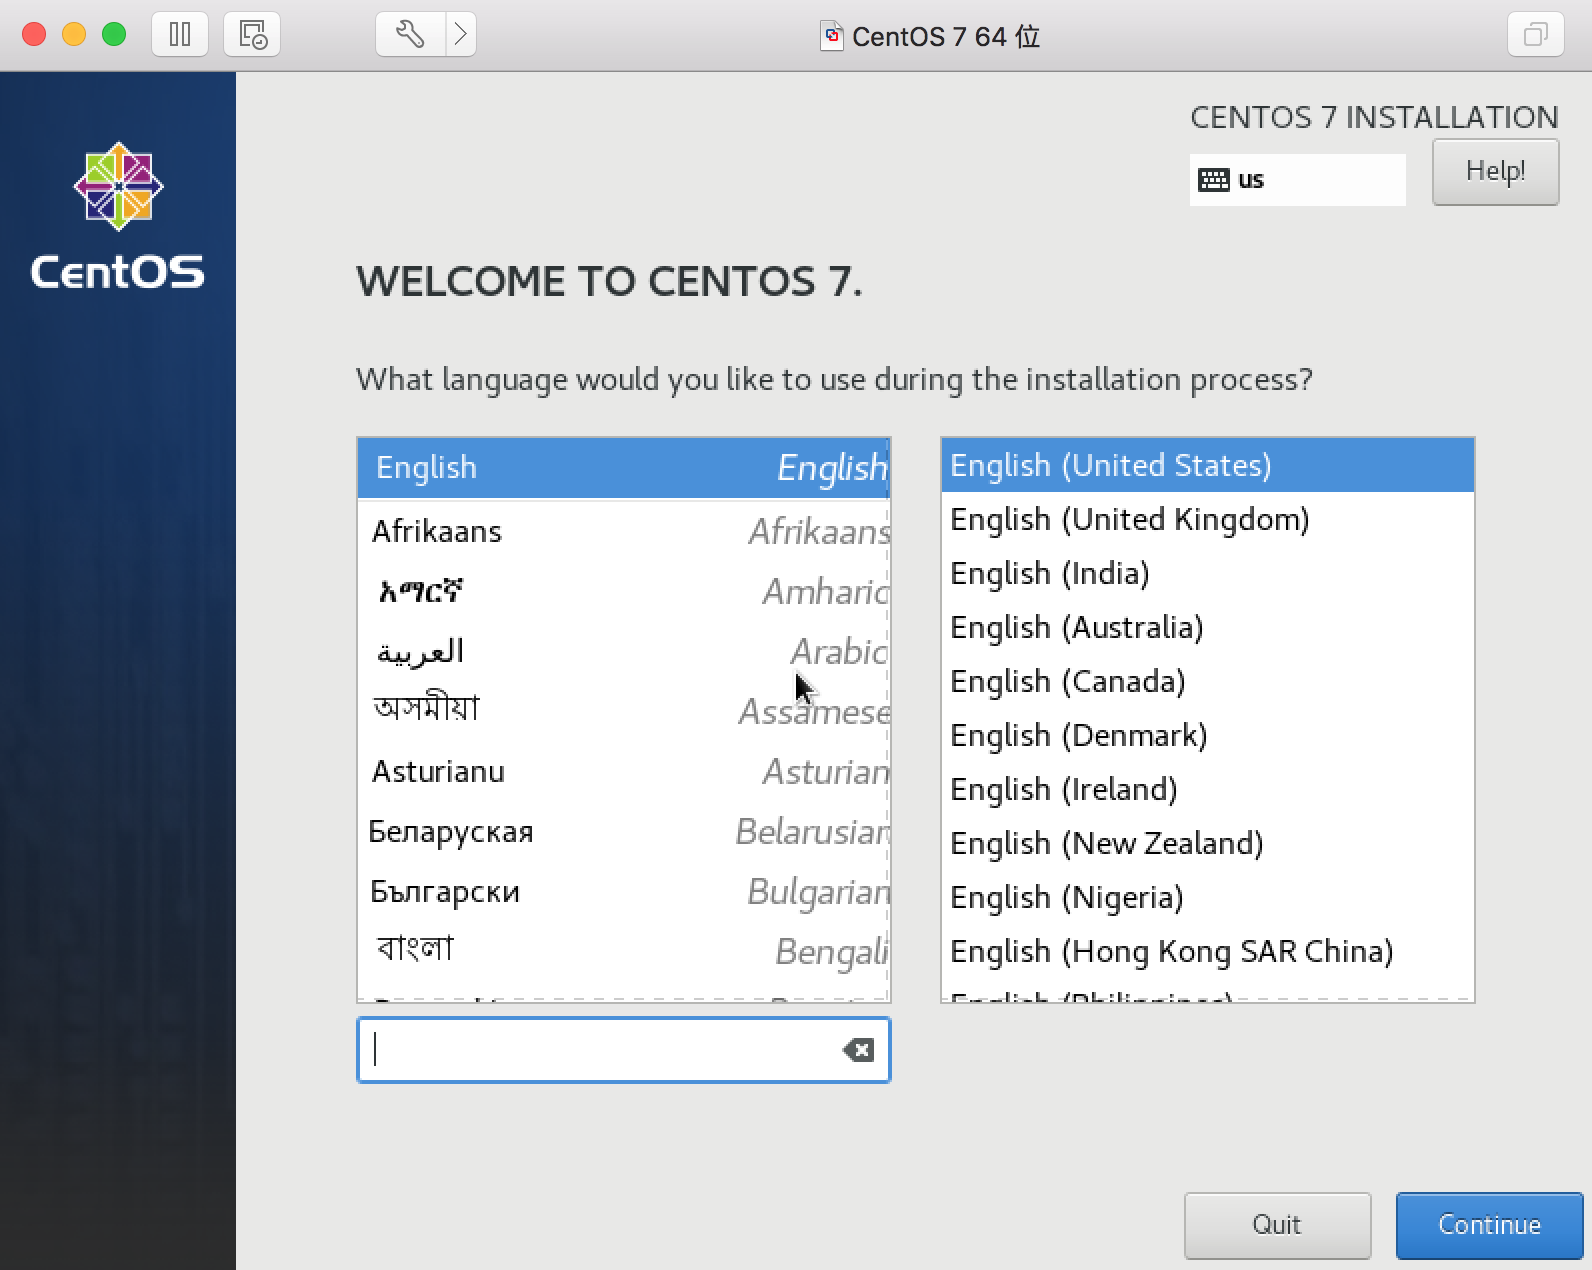
启动虚拟机第一步直接确定等一会到选择语言 默认英语就行
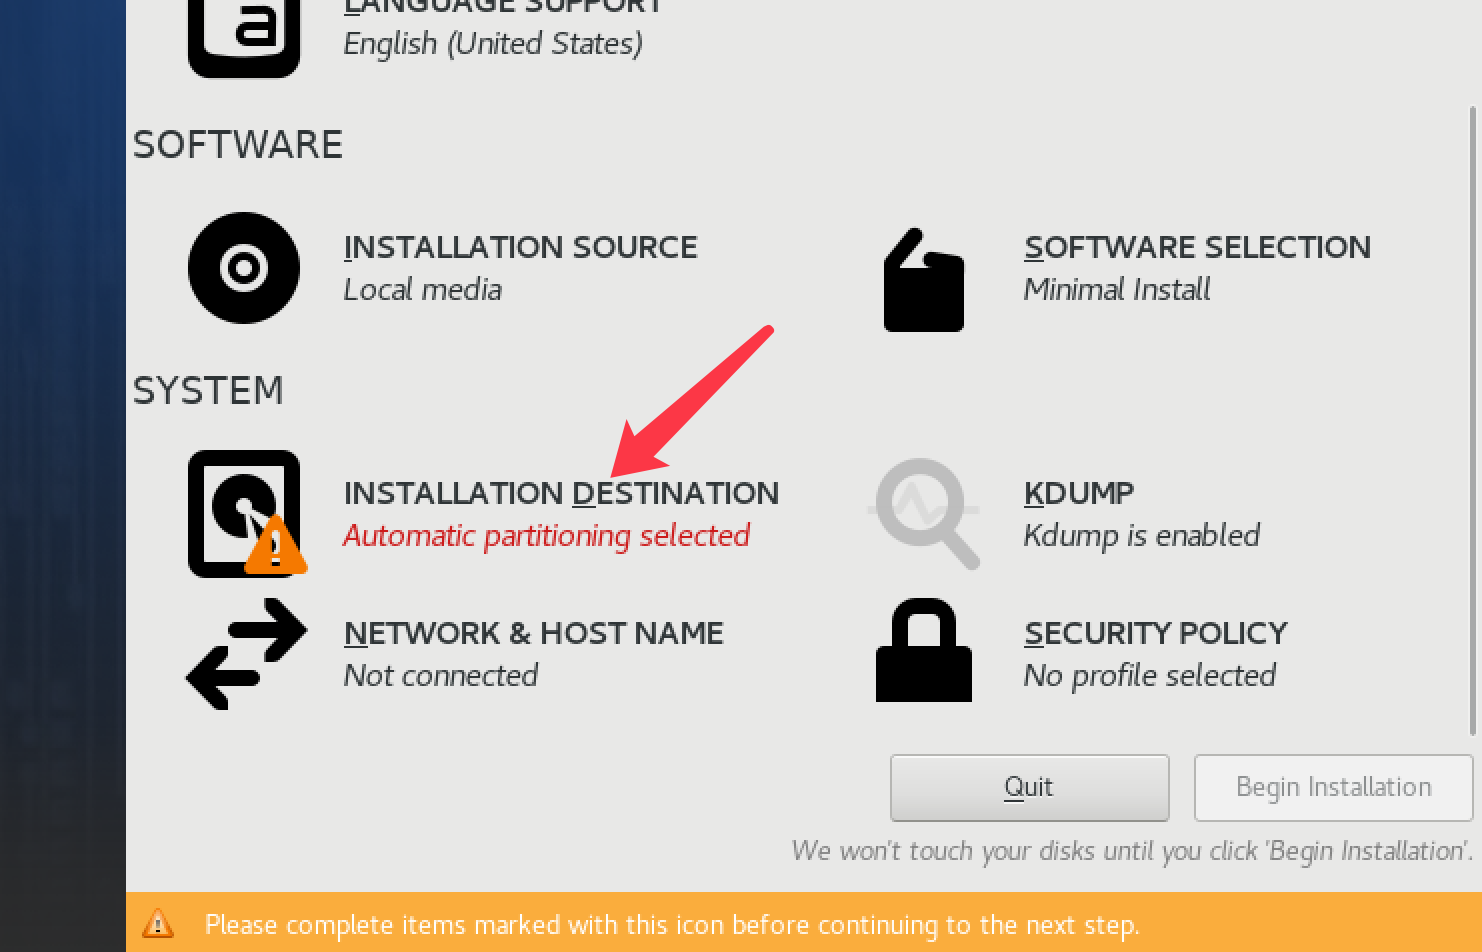

选择完直接点Begin Installation
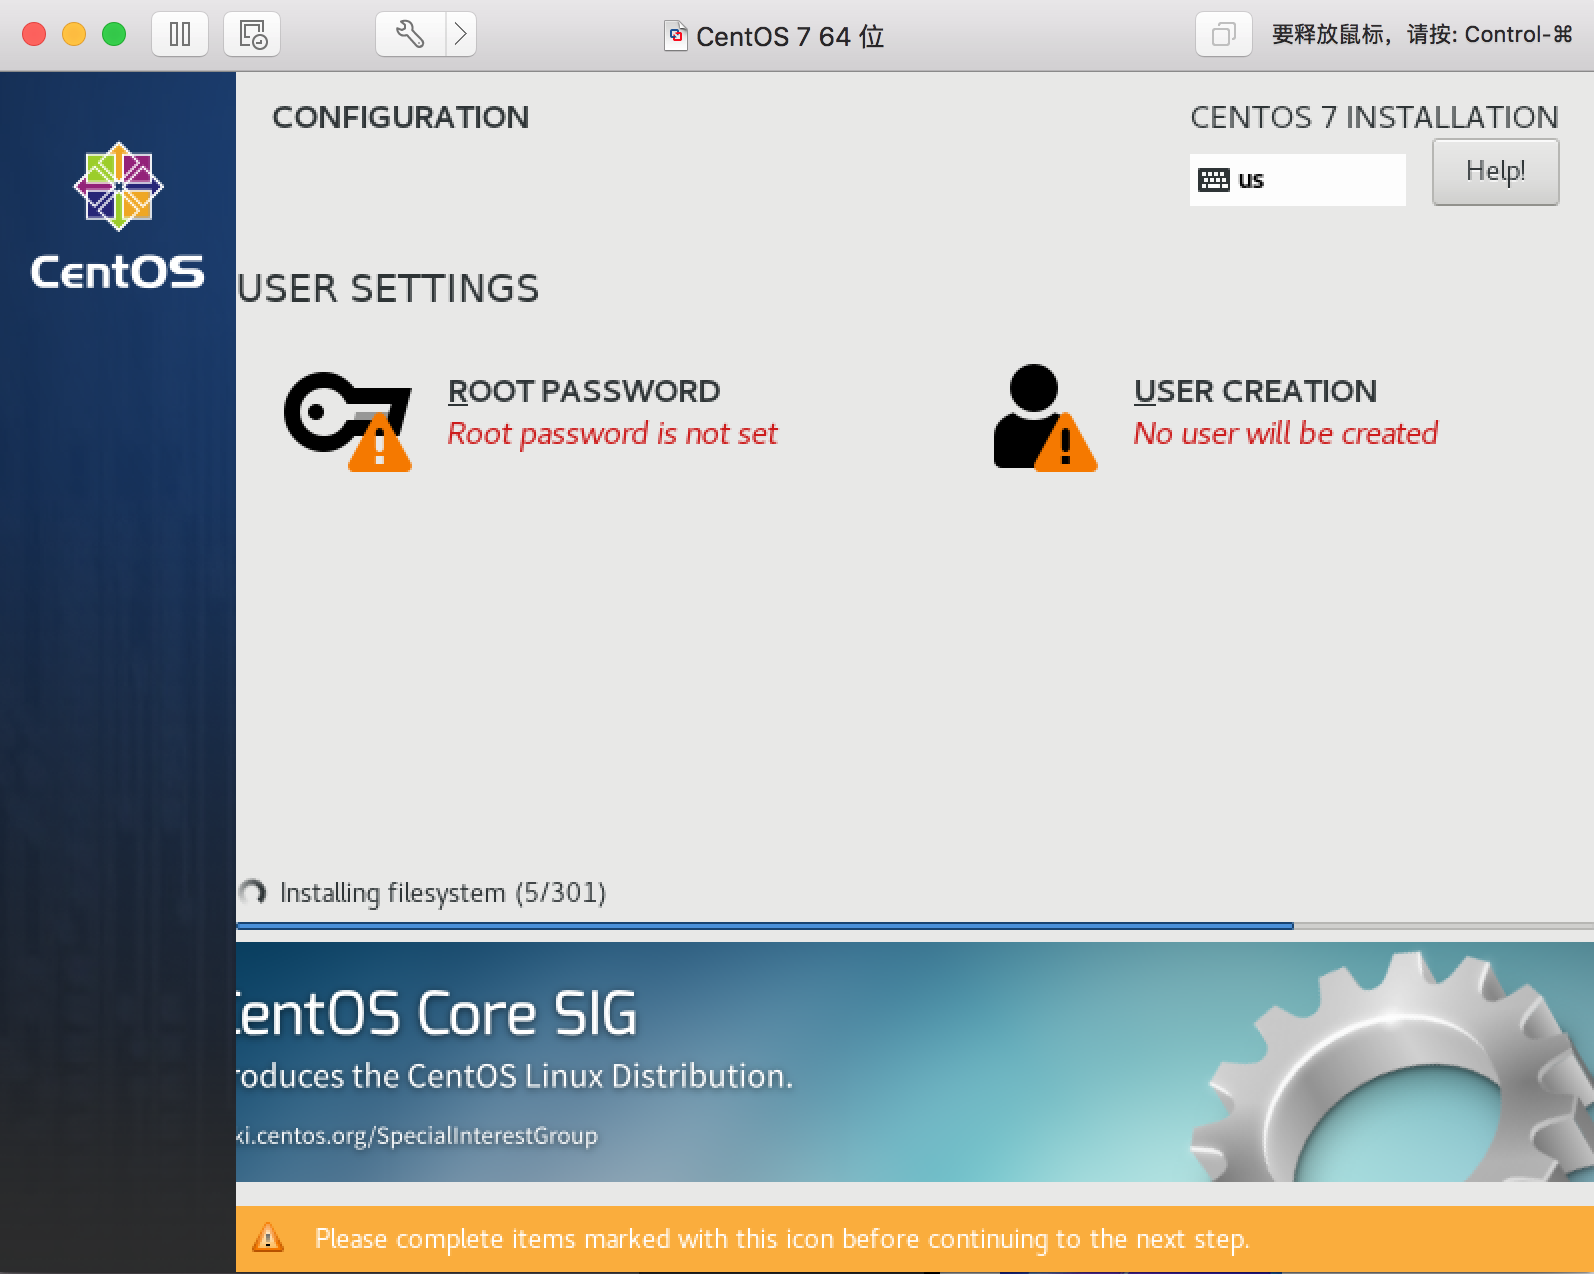
第一项设置root 密码,设置完点Done,等待安装
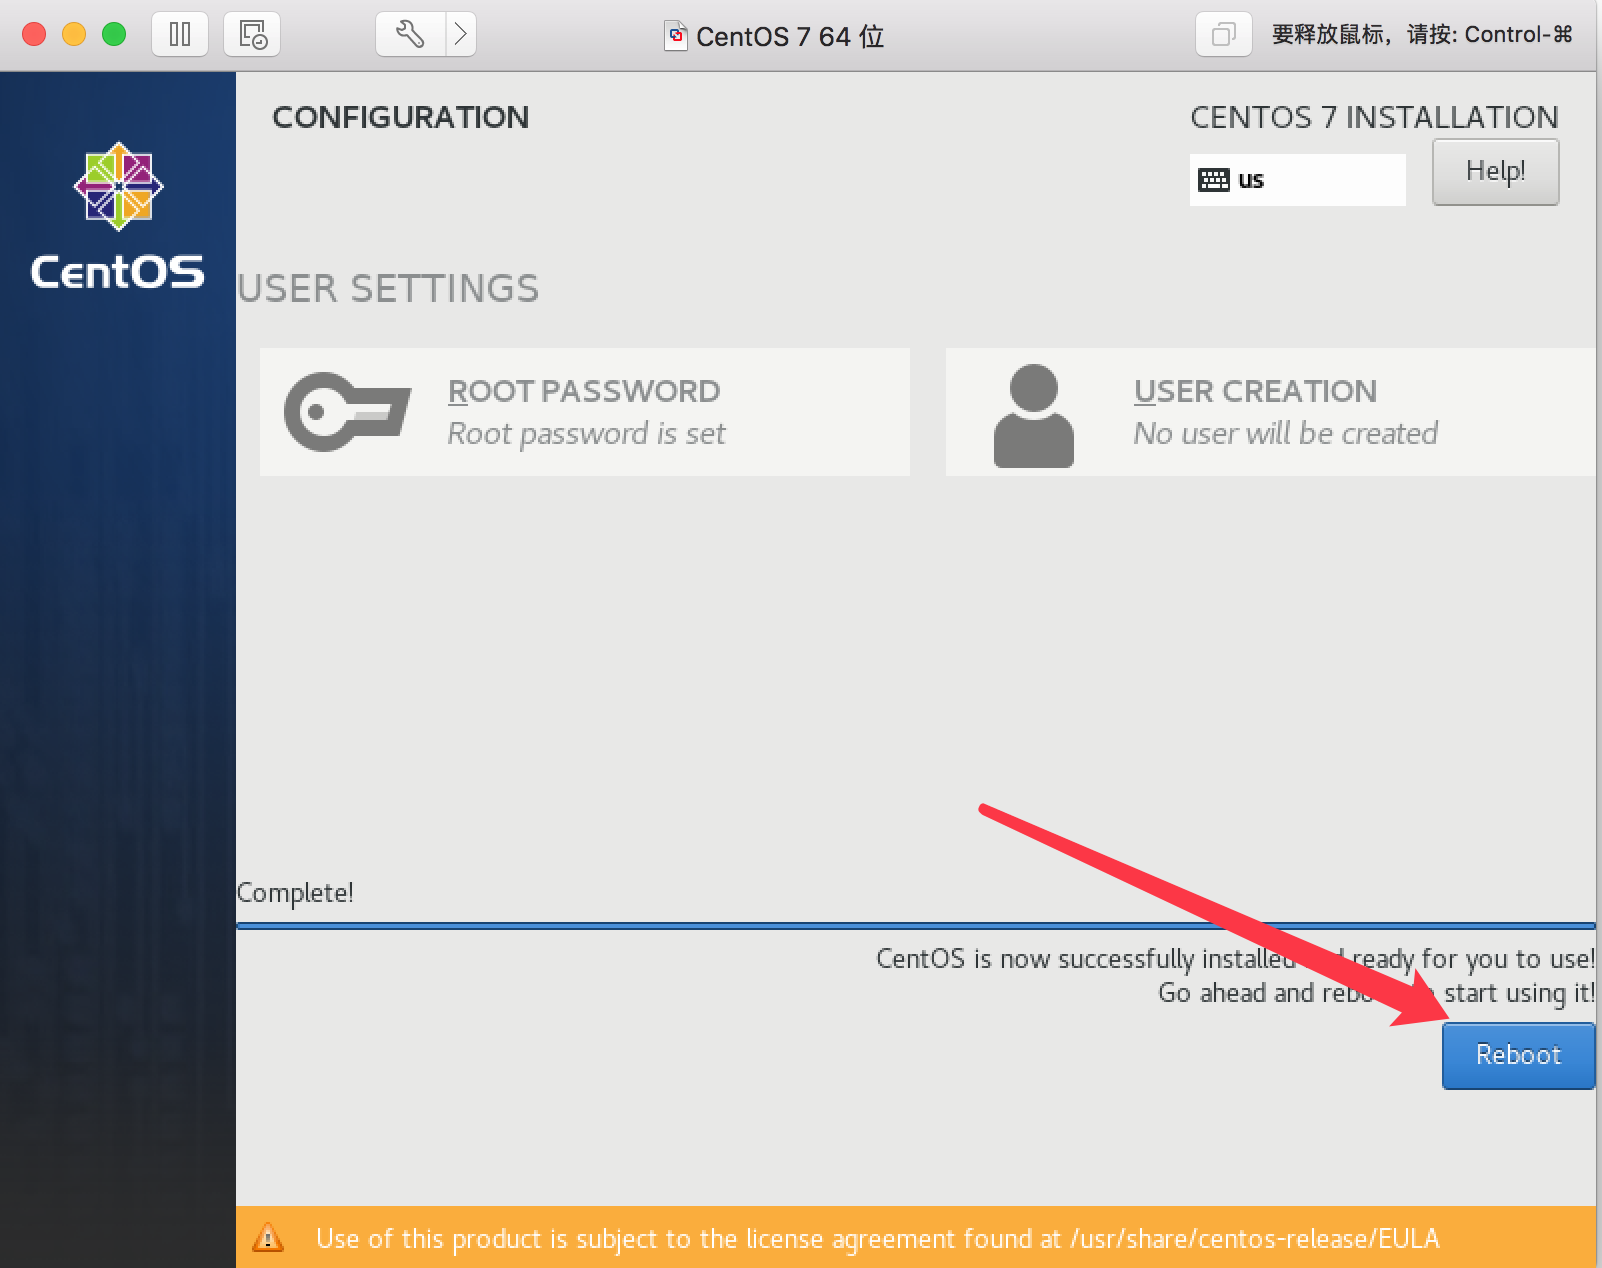
到处安装完成。
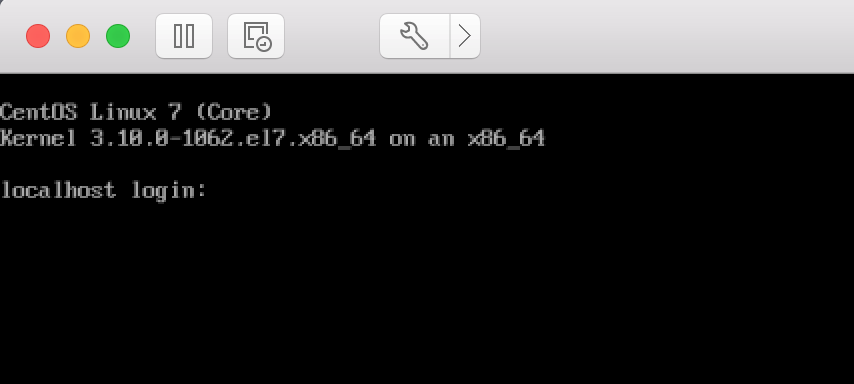
登录系统
网络配置
本机自动分配的IP,记得虚拟机网络一定要选择桥接模式
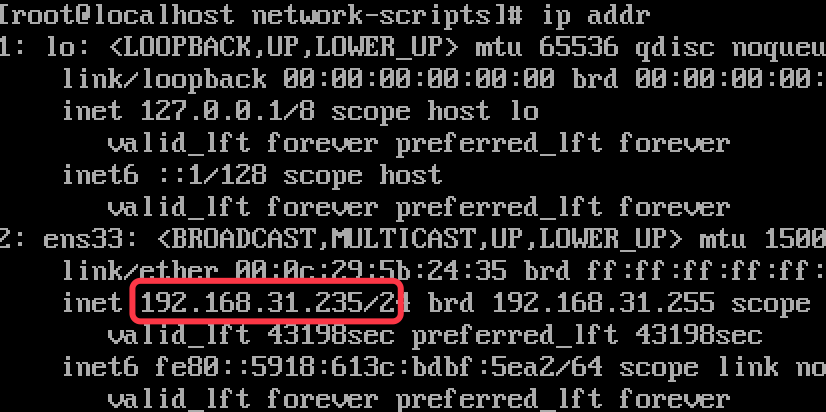
准备修改为固定IP

设置为130固定IP
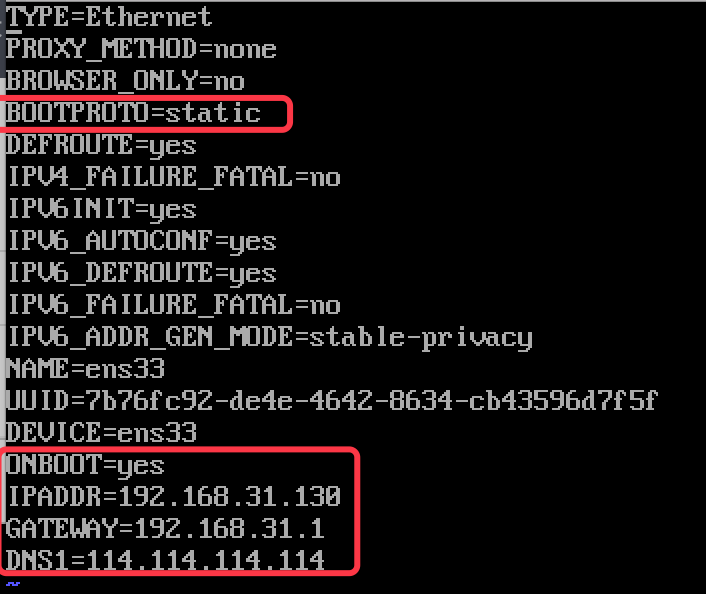
保存,重启网卡
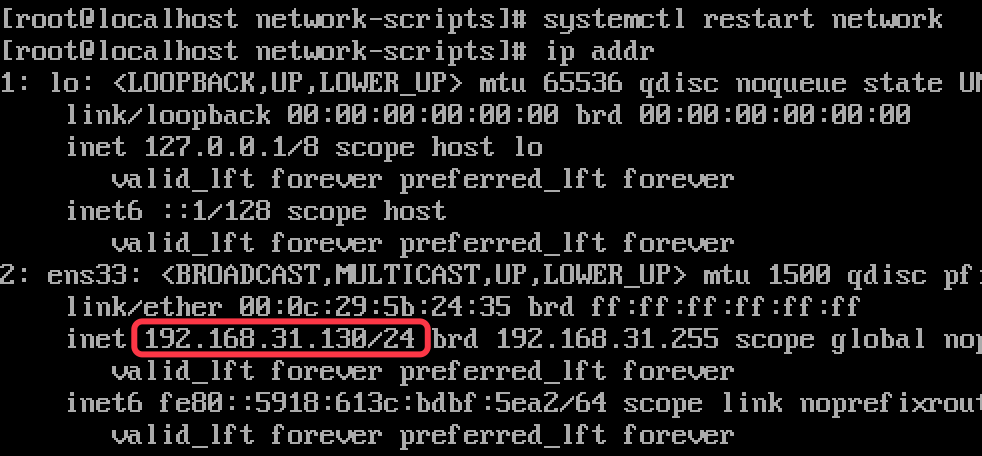
测试网关

主机名配置
YUM源更新
时钟同步
内核参数配置
语言时区
关闭SELINUX,防火墙
SSH参数配置
这里直接用脚本执行:
这个脚本只适合CentOS 7 x86_64系统使用
#!/bin/bash
# init centos7  ./centos7-init.sh 主机名
# 检查是否为root用户,脚本必须在root权限下运行
if [[ "$(whoami)" != "root" ]]; then
    echo "please run this script as root !" >&2
    exit 1
fi
echo -e "\033[31m the script only Support CentOS_7 x86_64 \033[0m"
echo -e "\033[31m system initialization script, Please Seriously. press ctrl+C to cancel \033[0m"
# 检查是否为64位系统,这个脚本只支持64位脚本
platform=`uname -i`
if [ $platform != "x86_64" ];then
    echo "this script is only for 64bit Operating System !"
    exit 1
fi
if [ "$1" == "" ];then
    echo "The host name is empty."
    exit 1
else
        hostnamectl  --static set-hostname  $1
        hostnamectl  set-hostname  $1
fi
cat << EOF
+---------------------------------------+
|   your system is CentOS 7 x86_64      |
|           start optimizing            |
+---------------------------------------+
EOF
sleep 1
# 安装必要支持工具及软件工具
yum_update(){
yum update -y
yum install -y nmap unzip wget vim lsof xz net-tools iptables-services ntpdate ntp-doc psmisc
}
# 设置时间同步 set time
zone_time(){
timedatectl set-timezone Asia/Shanghai
/usr/sbin/ntpdate 0.cn.pool.ntp.org > /dev/null 2>&1
/usr/sbin/hwclock --systohc
/usr/sbin/hwclock -w
cat > /var/spool/cron/root << EOF
10 0 * * * /usr/sbin/ntpdate 0.cn.pool.ntp.org > /dev/null 2>&1
* * * * */1 /usr/sbin/hwclock -w > /dev/null 2>&1
EOF
chmod 600 /var/spool/cron/root
/sbin/service crond restart
sleep 1
}
# 修改文件打开数 set the file limit
limits_config(){
cat > /etc/rc.d/rc.local << EOF
#!/bin/bash
touch /var/lock/subsys/local
ulimit -SHn 1024000
EOF
sed -i "/^ulimit -SHn.*/d" /etc/rc.d/rc.local
echo "ulimit -SHn 1024000" >> /etc/rc.d/rc.local
sed -i "/^ulimit -s.*/d" /etc/profile
sed -i "/^ulimit -c.*/d" /etc/profile
sed -i "/^ulimit -SHn.*/d" /etc/profile
cat >> /etc/profile << EOF
ulimit -c unlimited
ulimit -s unlimited
ulimit -SHn 1024000
EOF
source /etc/profile
ulimit -a
cat /etc/profile | grep ulimit
if [ ! -f "/etc/security/limits.conf.bak" ]; then
    cp /etc/security/limits.conf /etc/security/limits.conf.bak
fi
cat > /etc/security/limits.conf << EOF
* soft nofile 1024000
* hard nofile 1024000
* soft nproc  1024000
* hard nproc  1024000
hive   - nofile 1024000
hive   - nproc  1024000
EOF
if [ ! -f "/etc/security/limits.d/20-nproc.conf.bak" ]; then
    cp /etc/security/limits.d/20-nproc.conf /etc/security/limits.d/20-nproc.conf.bak
fi
cat > /etc/security/limits.d/20-nproc.conf << EOF
*          soft    nproc     409600
root       soft    nproc     unlimited
EOF
sleep 1
}
# 优化内核参数 tune kernel parametres
sysctl_config(){
if [ ! -f "/etc/sysctl.conf.bak" ]; then
    cp /etc/sysctl.conf /etc/sysctl.conf.bak
fi
#add
cat > /etc/sysctl.conf << EOF
net.ipv6.conf.all.disable_ipv6 = 1
net.ipv6.conf.default.disable_ipv6 = 1
net.ipv4.tcp_syn_retries = 1
net.ipv4.tcp_synack_retries = 1
net.ipv4.tcp_keepalive_time = 600
net.ipv4.tcp_keepalive_probes = 3
net.ipv4.tcp_keepalive_intvl =15
net.ipv4.tcp_retries1 = 3
net.ipv4.tcp_retries2 = 5
net.ipv4.tcp_fin_timeout = 10
net.ipv4.tcp_tw_recycle = 1
net.ipv4.tcp_tw_reuse = 1
net.ipv4.tcp_syncookies = 1
net.ipv4.tcp_window_scaling = 1
net.ipv4.tcp_max_tw_buckets = 60000
net.ipv4.tcp_max_orphans = 32768
net.ipv4.tcp_max_syn_backlog = 16384
net.ipv4.tcp_mem = 94500000 915000000 927000000
net.ipv4.tcp_wmem = 4096 16384 13107200
net.ipv4.tcp_rmem = 4096 87380 17476000
net.ipv4.ip_local_port_range = 1024 65000
net.ipv4.route.gc_timeout = 100
net.core.somaxconn = 32768
net.core.netdev_max_backlog = 32768
net.nf_conntrack_max = 6553500
net.netfilter.nf_conntrack_max = 6553500
net.netfilter.nf_conntrack_tcp_timeout_established = 180
vm.overcommit_memory = 1
vm.swappiness = 1
fs.file-max = 1024000
EOF
#reload sysctl
/sbin/sysctl -p
sleep 1
}
# 设置UTF-8   LANG="zh_CN.UTF-8"
LANG_config(){
echo "LANG=\"en_US.UTF-8\"">/etc/locale.conf
source  /etc/locale.conf
}
#关闭SELINUX disable selinux
selinux_config(){
sed -i 's/SELINUX=enforcing/SELINUX=disabled/g' /etc/selinux/config
setenforce 0
sleep 1
}
#日志处理
log_config(){
setenforce 0
systemctl start systemd-journald
systemctl status systemd-journald
}
# 关闭防火墙
firewalld_config(){
/usr/bin/systemctl stop  firewalld.service
/usr/bin/systemctl disable  firewalld.service
}
# SSH配置优化 set sshd_config
sshd_config(){
if [ ! -f "/etc/ssh/sshd_config.bak" ]; then
    cp /etc/ssh/sshd_config /etc/ssh/sshd_config.bak
fi
cat >/etc/ssh/sshd_config<<EOF
Port 22
AddressFamily inet
ListenAddress 0.0.0.0
Protocol 2
HostKey /etc/ssh/ssh_host_rsa_key
HostKey /etc/ssh/ssh_host_ecdsa_key
HostKey /etc/ssh/ssh_host_ed25519_key
SyslogFacility AUTHPRIV
PermitRootLogin yes
MaxAuthTries 6
RSAAuthentication yes
PubkeyAuthentication yes
AuthorizedKeysFile      .ssh/authorized_keys
PasswordAuthentication yes
ChallengeResponseAuthentication no
UsePAM yes
UseDNS no
X11Forwarding yes
UsePrivilegeSeparation sandbox
AcceptEnv LANG LC_CTYPE LC_NUMERIC LC_TIME LC_COLLATE LC_MONETARY LC_MESSAGES
AcceptEnv LC_PAPER LC_NAME LC_ADDRESS LC_TELEPHONE LC_MEASUREMENT
AcceptEnv LC_IDENTIFICATION LC_ALL LANGUAGE
AcceptEnv XMODIFIERS
Subsystem       sftp    /usr/libexec/openssh/sftp-server
EOF
/sbin/service sshd restart
}
# 关闭ipv6  disable the ipv6
ipv6_config(){
echo "NETWORKING_IPV6=no">/etc/sysconfig/network
echo 1 > /proc/sys/net/ipv6/conf/all/disable_ipv6
echo 1 > /proc/sys/net/ipv6/conf/default/disable_ipv6
echo "127.0.0.1   localhost   localhost.localdomain">/etc/hosts
#sed -i 's/IPV6INIT=yes/IPV6INIT=no/g' /etc/sysconfig/network-scripts/ifcfg-enp0s8
for line in $(ls -lh /etc/sysconfig/network-scripts/ifcfg-* | awk -F '[ ]+' '{print $9}')
do
if [ -f  $line ]
        then
        sed -i 's/IPV6INIT=yes/IPV6INIT=no/g' $line
                echo $i
fi
done
}
# 设置历史命令记录格式 history
history_config(){
export HISTFILESIZE=10000000
export HISTSIZE=1000000
export PROMPT_COMMAND="history -a"
export HISTTIMEFORMAT="%Y-%m-%d_%H:%M:%S "
##export HISTTIMEFORMAT="{\"TIME\":\"%F %T\",\"HOSTNAME\":\"\$HOSTNAME\",\"LI\":\"\$(who -u am i 2>/dev/null| awk '{print \$NF}'|sed -e 's/[()]//g')\",\"LU\":\"\$(who am i|awk '{print \$1}')\",\"NU\":\"\${USER}\",\"CMD\":\""
cat >>/etc/bashrc<<EOF
alias vi='vim'
HISTDIR='/var/log/command.log'
if [ ! -f \$HISTDIR ];then
touch \$HISTDIR
chmod 666 \$HISTDIR
fi
export HISTTIMEFORMAT="{\"TIME\":\"%F %T\",\"IP\":\"\$(ip a | grep -E '192.168|172' | head -1 | awk '{print \$2}' | cut -d/ -f1)\",\"LI\":\"\$(who -u am i 2>/dev/null| awk '{print \$NF}'|sed -e 's/[()]//g')\",\"LU\":\"\$(who am i|awk '{print \$1}')\",\"NU\":\"\${USER}\",\"CMD\":\""
export PROMPT_COMMAND='history 1|tail -1|sed "s/^[ ]\+[0-9]\+  //"|sed "s/$/\"}/">> /var/log/command.log'
EOF
source /etc/bashrc
}
# 服务优化设置
service_config(){
/usr/bin/systemctl enable NetworkManager-wait-online.service
/usr/bin/systemctl start NetworkManager-wait-online.service
/usr/bin/systemctl stop postfix.service
/usr/bin/systemctl disable postfix.service
chmod +x /etc/rc.local
chmod +x /etc/rc.d/rc.local
#ls -l /etc/rc.d/rc.local
}
# VIM设置
vim_config(){
cat > /root/.vimrc << EOF
set history=1000
EOF
#autocmd InsertLeave * se cul
#autocmd InsertLeave * se nocul
#set nu
#set bs=2
#syntax on
#set laststatus=2
#set tabstop=4
#set go=
#set ruler
#set showcmd
#set cmdheight=1
#hi CursorLine   cterm=NONE ctermbg=blue ctermfg=white guibg=blue guifg=white
#set hls
#set cursorline
#set ignorecase
#set hlsearch
#set incsearch
#set helplang=cn
}
# done
done_ok(){
cat << EOF
+-------------------------------------------------+
|               optimizer is done                 |
|   it's recommond to restart this server !       |
|             Please Reboot system                |
+-------------------------------------------------+
EOF
}
# main
main(){
    yum_update
    zone_time
    limits_config
    sysctl_config
    LANG_config
    selinux_config
    log_config
    firewalld_config
    sshd_config
    ipv6_config
    history_config
    service_config
    vim_config
    done_ok
}
复制上面的命令到服务器os7init.sh文件
执行脚本
sh os7init.sh 主机名
![]()
安装完成重启服务器

![]()
SSH免密登录
现有两台服务器130,131
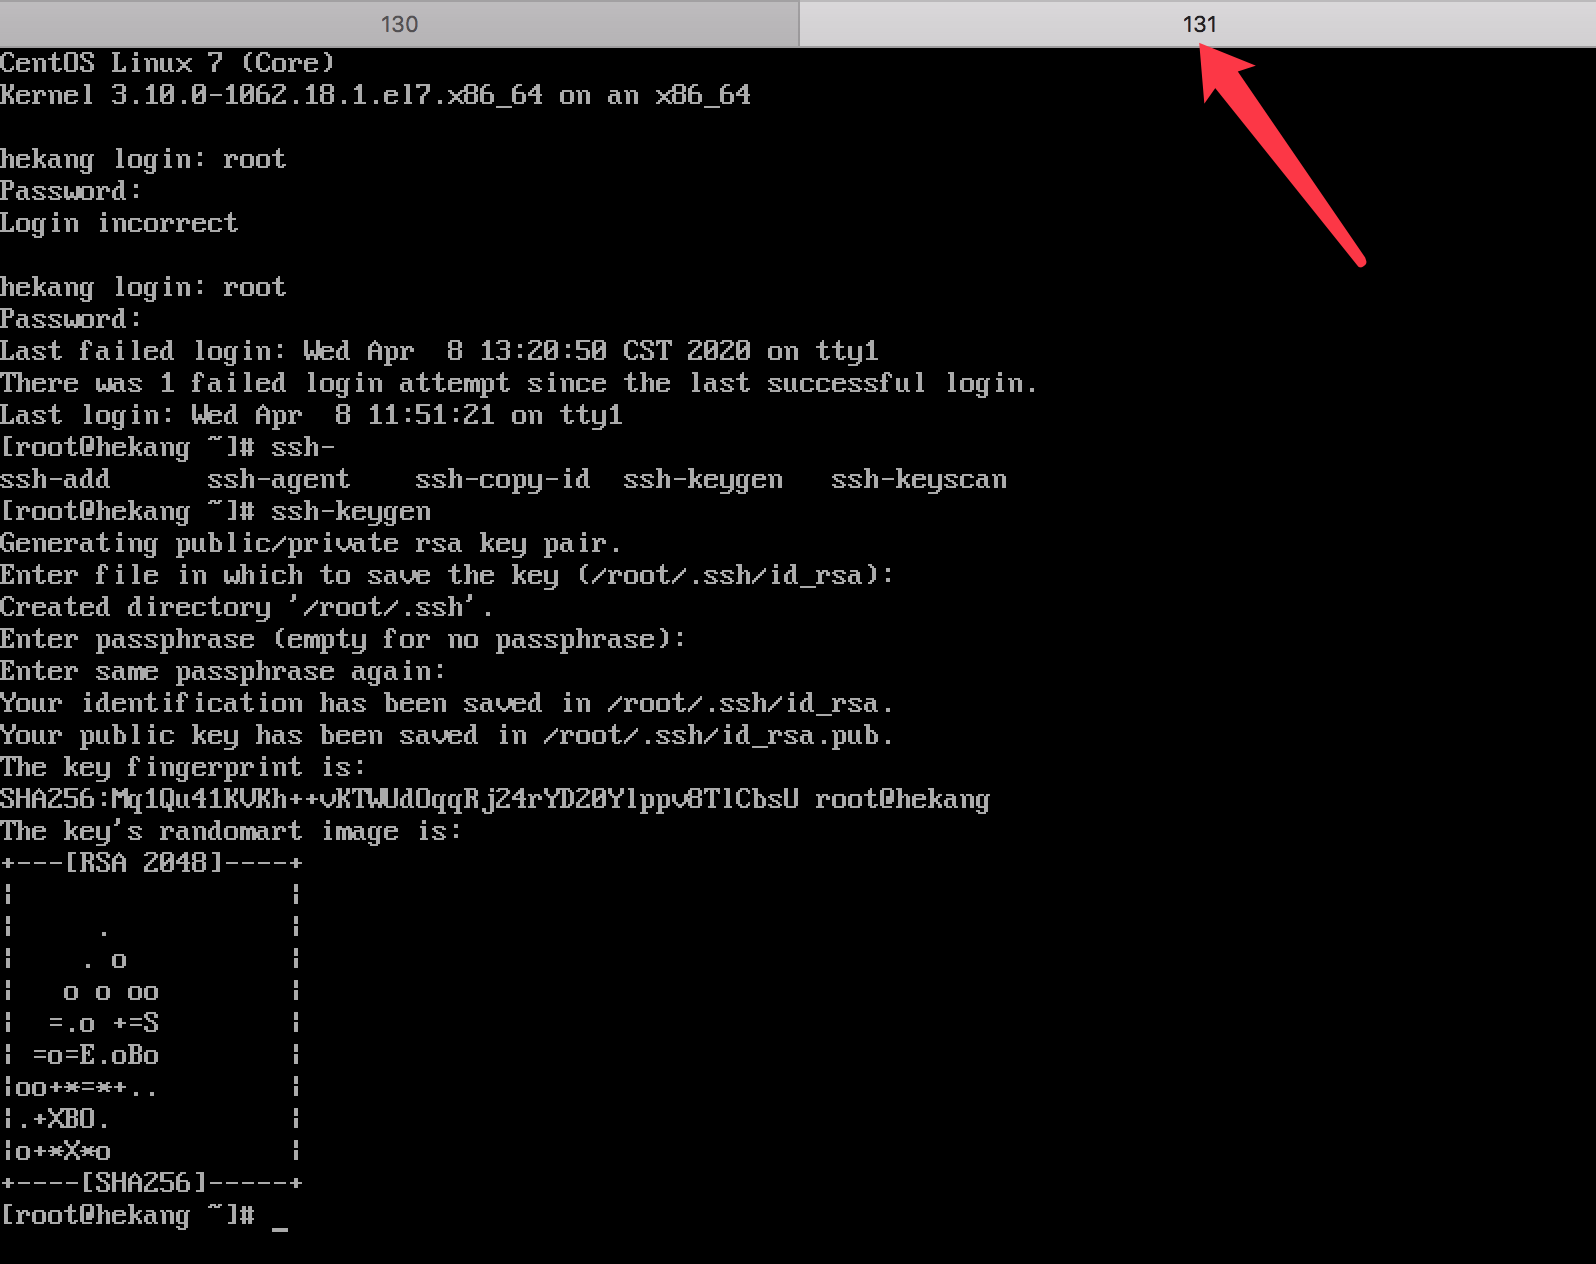
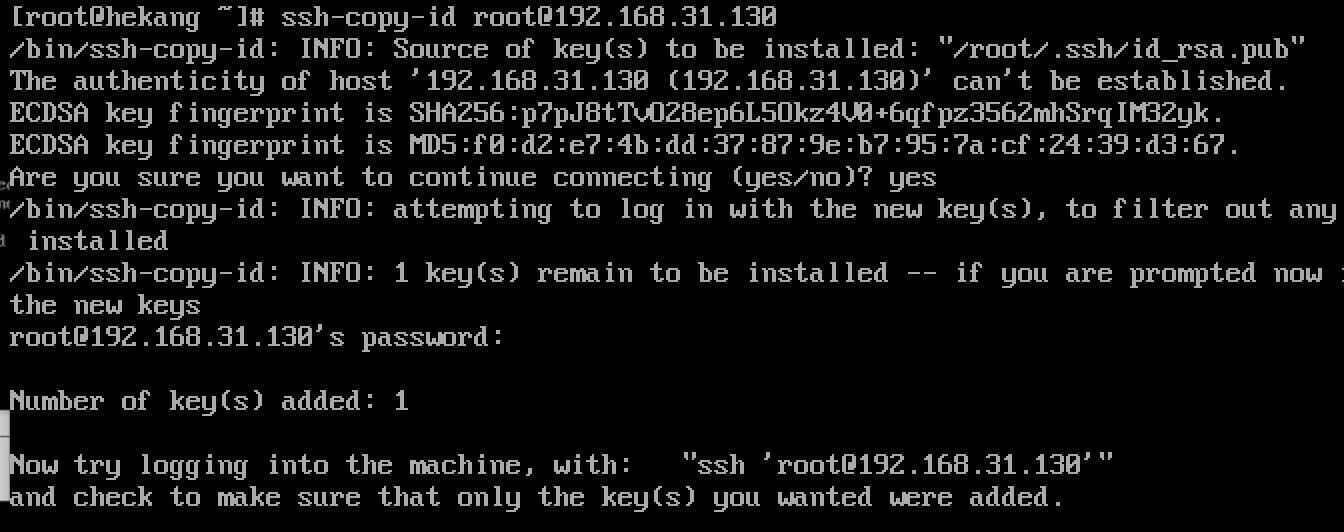

同样道理可以在130服务器生成密钥发到131上,130道理131服务器也不需要密码。
来源:oschina
链接:https://my.oschina.net/u/1046143/blog/3224602