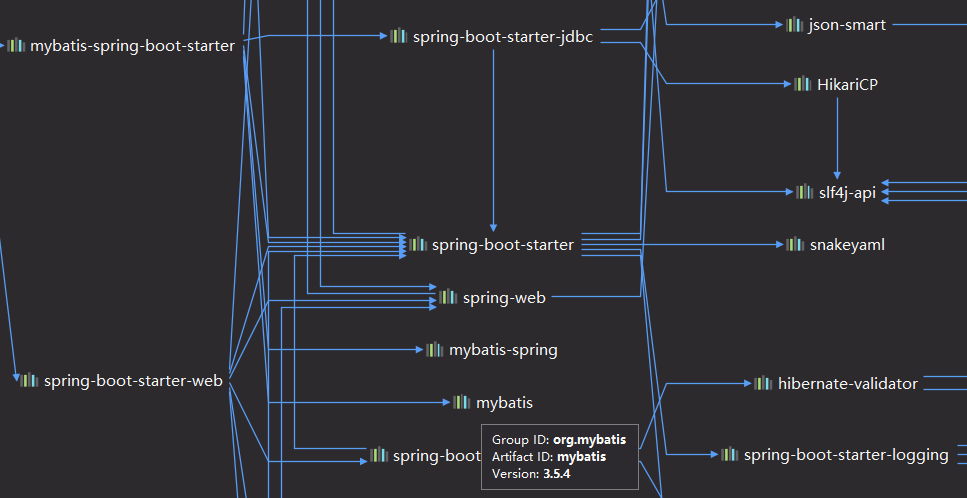
整合Mybatis
<dependency>
    <groupId>org.mybatis.spring.boot</groupId>
    <artifactId>mybatis-spring-boot-starter</artifactId>
    <version>2.1.2</version>
</dependency>

步骤:
1)、配置数据源相关属性(见上一节Druid )
2)、给数据库建表
3)、创建JavaBean
4)、注解版
//指定这是一个操作数据库的mapper
//@Mapper
public interface DepartmentMapper {

    @Select("select * from department where id=#{id}")
    public Department getDeptById(Integer id);

    @Delete("delete from department where id=#{id}")
    public int deleteDeptById(Integer id);

    @Options(useGeneratedKeys = true,keyProperty = "id")
    @Insert("insert into department(department_name) values(#{departmentName})")
    public int insertDept(Department department);

    @Update("update department set department_name=#{departmentName} where id=#{id}")
    public int updateDept(Department department);
}
问题:
自定Mybatis的配置规则;容器中添加一个ConfigurationCustomizer;
@org.springframework.context.annotation.Configuration
public class MyBatisConfig {

    @Bean
    public ConfigurationCustomizer configurationCustomizer(){
        return new ConfigurationCustomizer(){

            @Override
            public void customize(Configuration configuration) {
                configuration.setMapUnderscoreToCamelCase(true);
            }
        };
    }
}
//使用MapperScan批量扫描所有的Mapper接口
@MapperScan(value = "com.eppear.springboot.mapper")
@SpringBootApplication
public class SpringBoot06DataMybatisApplication {

	public static void main(String[] args) {
		SpringApplication.run(SpringBoot06DataMybatisApplication.class, args);
	}
}
5)、配置文件版
mybatis:
  # 指定全局配置文件位置
  config-location: classpath:mybatis/mybatis-config.xml
  # 指定sql映射文件位置
  mapper-locations: classpath:mybatis/mapper/*.xml
更多使用参照
http://mybatis.org/spring-boot-starter/mybatis-spring-boot-autoconfigure/index.html
6.4、整合SpringData JPA
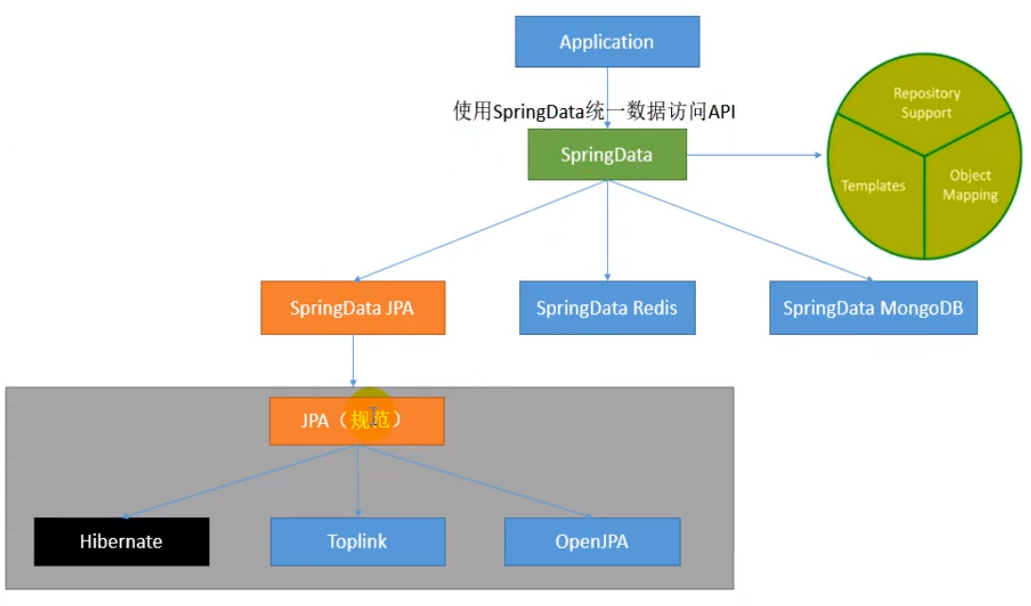
6.4.1、SpringData 简介

6.4.2、整合SpringData JPA
JPA:ORM ( Object Relational Mapping) ; 1)、编写一个实体类( bean )和数据表进行映射,并且配置好映射关系;
//使用JPA注解配置映射关系
@Entity //告诉JPA这是一个实体类(和数据表映射的类)
@Table(name = "tbl_user") //@Table来指定和哪个数据表对应;如果省略默认表名就是user;
public class User {

    @Id //这是一个主键
    @GeneratedValue(strategy = GenerationType.IDENTITY)//自增主键
    private Integer id;

    @Column(name = "last_name",length = 50) //这是和数据表对应的一个列
    private String lastName;
    @Column //省略默认列名就是属性名
    private String email;
2)、编写一个Dao接口来操作实体类对应的数据表( Repository )
//继承JpaRepository来完成对数据库的操作
public interface UserRepository extends JpaRepository<User,Integer> {
}
3)、基本的配置JpaProperties
spring:
  datasource:
    url: jdbc:mysql://192.168.15.22/jpa
    username: root
    password: 123456
    driver-class-name: com.mysql.jdbc.Driver
  jpa:
    hibernate:
#     更新或者创建数据表结构
      ddl-auto: update
#   控制台显示SQL
    show-sql: true
来源:oschina
链接:https://my.oschina.net/6955825/blog/3219119