简介
https://gitee.com/hekang_admin/spring-security
做oauth2之前项目架构给调整了一下,spring-boot更新到最新版本,真是一代版本一代神两天遇到很多问题这里一一解决。
<spring-boot.version>2.2.4.RELEASE</spring-boot.version>
<spring-cloud.version>Hoxton.SR2</spring-cloud.version>
<security.oauth.version>2.3.6.RELEASE</security.oauth.version>
授权码模式
授权码模式是最能体现OAuth2协议,最严格,流程最完整的授权模式,流程如下所示:

A. 客户端将用户导向认证服务器;
B. 用户决定是否给客户端授权;
C. 同意授权后,认证服务器将用户导向客户端提供的URL,并附上授权码;
D. 客户端通过重定向URL和授权码到认证服务器换取令牌;
E. 校验无误后发放令牌。
其中A步骤,客户端申请认证的URI,包含以下参数:
-
response_type:表示授权类型,必选项,此处的值固定为”code”,标识授权码模式
-
client_id:表示客户端的ID,必选项
-
redirect_uri:表示重定向URI,可选项
-
scope:表示申请的权限范围,可选项
-
state:表示客户端的当前状态,可以指定任意值,认证服务器会原封不动地返回这个值。
D步骤中,客户端向认证服务器申请令牌的HTTP请求,包含以下参数:
-
grant_type:表示使用的授权模式,必选项,此处的值固定为”authorization_code”。
-
code:表示上一步获得的授权码,必选项。
-
redirect_uri:表示重定向URI,必选项,且必须与A步骤中的该参数值保持一致。
-
client_id:表示客户端ID,必选项。
认证服务器
app项目根目录创建HkAuthorizationServerConfig类
package com.spring.security;

import org.springframework.context.annotation.Configuration;
import org.springframework.security.oauth2.config.annotation.web.configuration.EnableAuthorizationServer;

/**
 * 认证服务器
 */
@Configuration
@EnableAuthorizationServer
public class HkAuthorizationServerConfig{

}
启动项目控制台输出:

访问:http://127.0.0.1:8080/oauth/authorize?response_type=code&client_id=6edc003b-bf47-4b1b-a4c1-13a63b0df14b&redirect_uri=http://example.com&scope=all
关于参数上面有详细解释
错误一:

错误原因:用户必须通过Spring Security的身份验证才能访问/oauth/authorize
User must be authenticated with Spring Security before authorization can be completed.解决办法配置不需要身份验证:
同目录创建WebSecurityConfigurer认证相关配置类
package com.spring.security;


import org.springframework.context.annotation.Configuration;
import org.springframework.context.annotation.Primary;
import org.springframework.core.annotation.Order;
import org.springframework.security.config.annotation.web.builders.HttpSecurity;
import org.springframework.security.config.annotation.web.configuration.WebSecurityConfigurerAdapter;

/**
 * 认证相关配置
 */
@Primary
@Order(90)
@Configuration
public class WebSecurityConfigurer extends WebSecurityConfigurerAdapter {
    @Override
    public void configure(HttpSecurity http) throws Exception {
        http.csrf().disable();
        http
                .requestMatchers().antMatchers("/oauth/**", "/login/**", "/logout/**", "/token/**", "/actuator/**")
                .and()
                .authorizeRequests()
                .antMatchers("/oauth/**").authenticated()
                .and()
                .formLogin().permitAll(); //新增login form支持用户登录及授权
    }

}
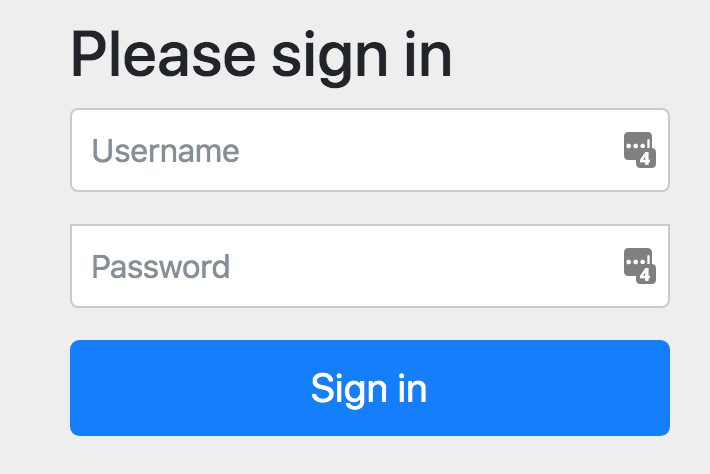
启动项目再次访问,记得修改client_id为本次启动控制台的输出client-id:

输入admin,123456 这个是之前MyUserDetailsService里面配置的:
错误二:

错误原因:意思是说我们没有配置redirect_uri,实际上我们是配置了的为什么还报这错,是因为像QQ互联的回调地址是需要配置的我们这
个也需要配置到白名单
error="invalid_request", error_description="At least one redirect_uri must be registered with the client."解决办法,配置到白名单:
security:
  oauth2:
    client:
      registered-redirect-uri: http://example.com
      client-id: myhk
      client-secret: myhk123
重启项目访问,输入账号密码:

Approve:同意授权
Deny:拒绝
选择Approve点Authoriez:

code已经获取现在去获取token
获取令牌Token
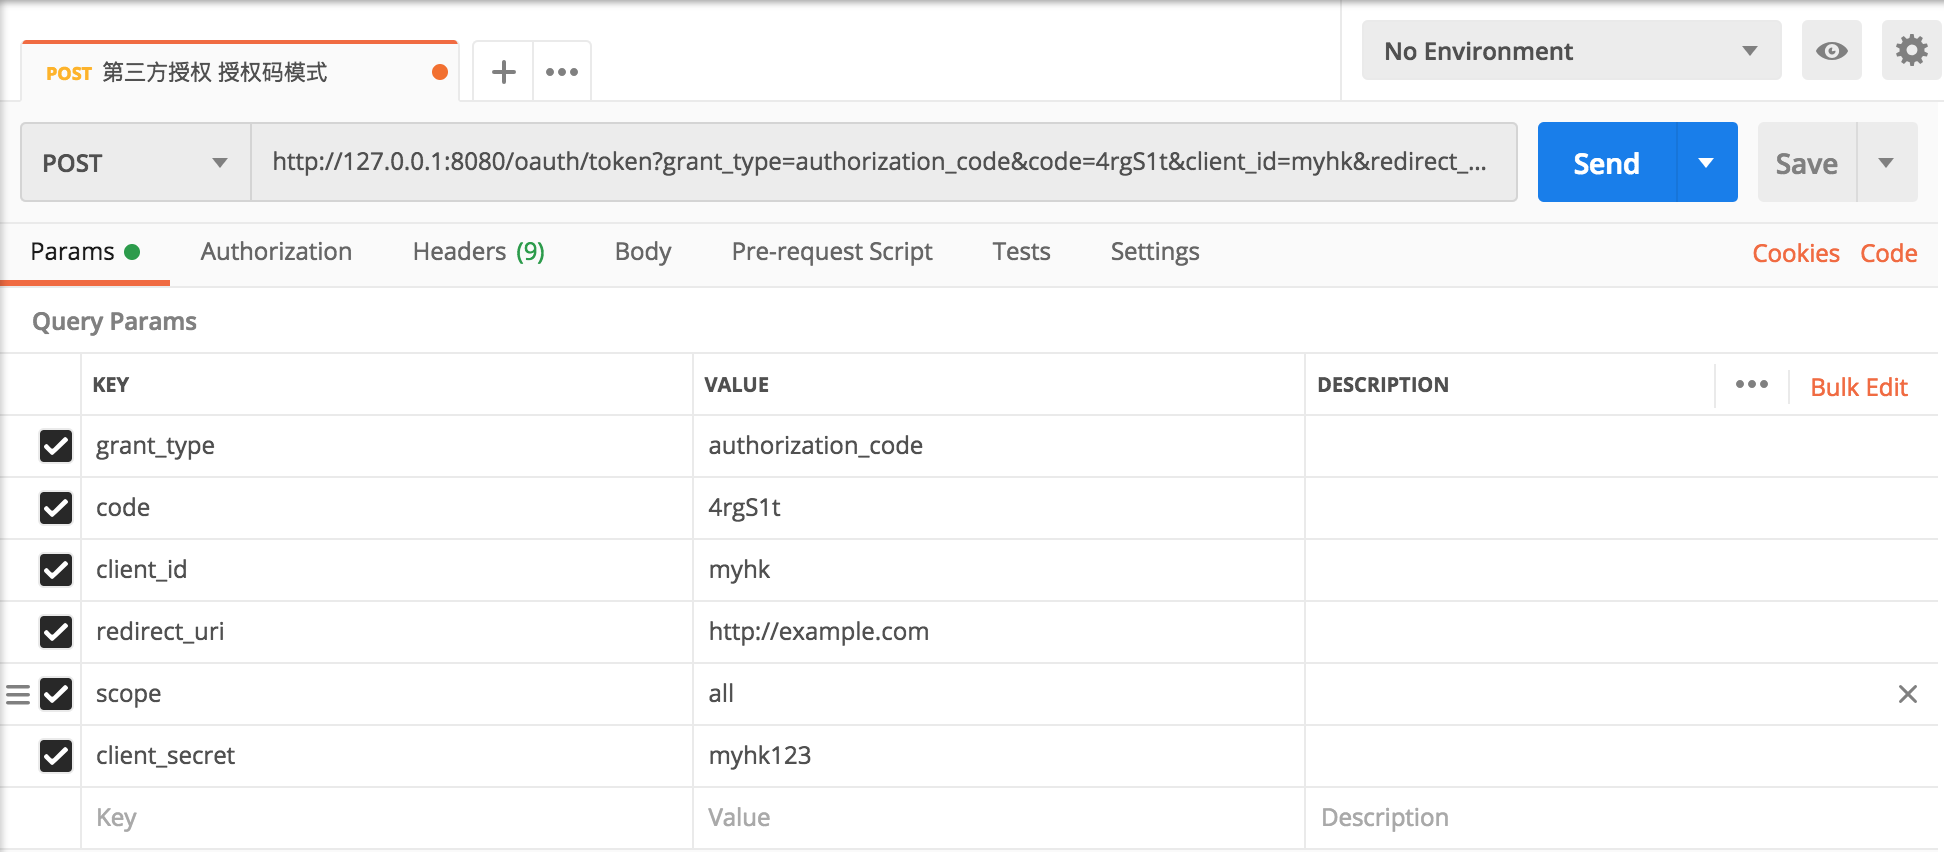
使用postman发送如下请求POST请求http://127.0.0.1:8080/oauth/token:

这里要填的参数和上面介绍的授权码模式D步骤介绍的一致。grant_type固定填authorization_code,code为上一步获取到的授权码,client_id和redirect_uri必须和我们上面定义的一致。
除了这几个参数外,我们还需要在请求头中填写:

key为Authorization,value为Basic加上client_id:client_secret经过base64加密后的值(可以使用http://tool.chinaz.com/Tools/Base64.aspx):

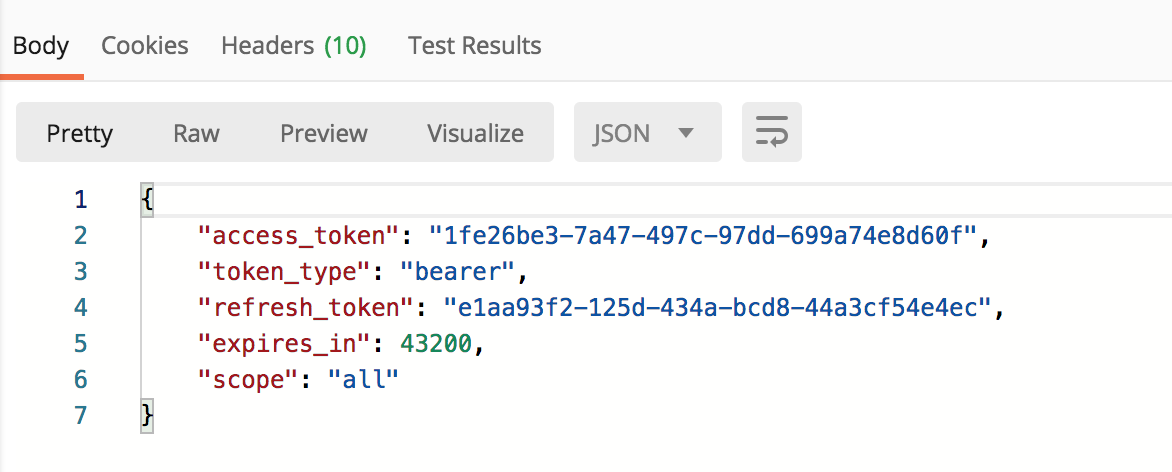
参数填写无误后,点击发送便可以获取到令牌Token:

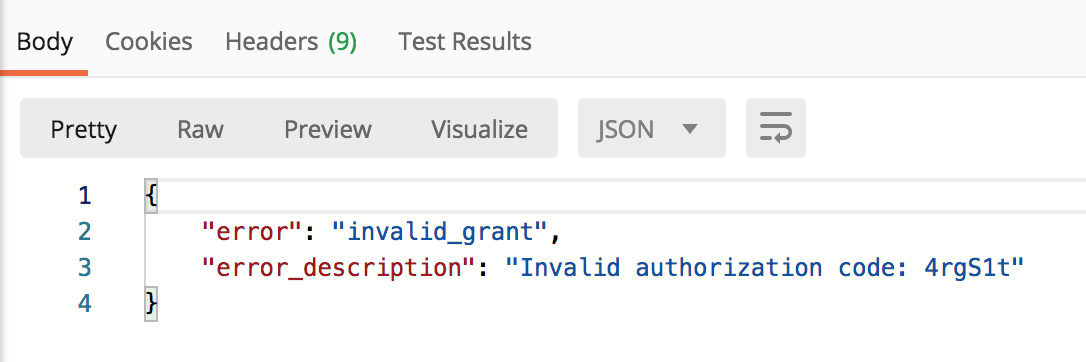
一个授权码只能换一次令牌,如果再次点击postman的发送按钮,将返回:

来源:oschina
链接:https://my.oschina.net/u/1046143/blog/3196612
