python对接钉钉加解密实战
声明:小白,代码比较菜敬请见谅。
需求
通过钉钉的自定义审批流,触发我们自己写的接口(系统or平台)触发后续动作。(特别注意,钉钉接口不支持修改审批状态,故无法实现审批自动化,很好理解,毕竟产品的设计是有它存在的道理,啥都自动了还要审批干啥)
1.我是win10系统,用的python3.7, web框架flask,用的三方sdk,解决加解密问题
2.官方提供了个python sdk,用的python2 但是没有提供注册接口回调的加解密功能。
3.结论,使用三方sdk,不用官方sdk,其余操作通过调用钉钉接口处理,很简单。
参考文档
钉钉官方服务端文档:https://open-doc.dingtalk.com/microapp/serverapi2
三方sdk:https://dingtalk-sdk.readthedocs.io/zh_CN/latest/
回调管理:https://ding-doc.dingtalk.com/doc#/serverapi2/pwz3r5
回调列表:https://ding-doc.dingtalk.com/doc#/serverapi2/skn8ld
开始
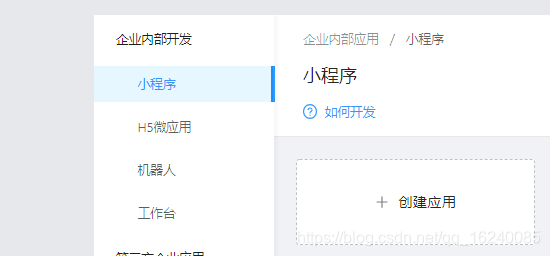
到钉钉开放平台 — 企业内部开发 —创建应用(值得注意的是接口权限这里单独需要开通,根据情况来就行)

代码结构

app.py
# 首页
from devops import app

@app.route('/')
def hello_world():
    return 'Hello World!'


if __name__ == '__main__':
    app.run(host='0.0.0.0', port=5000, debug=True, threaded=True)
devops/init.py
# coding=utf-8
from flask import Flask, render_template, request

# static_url_path 后的配置相当于增加虚拟目录
app = Flask(__name__, static_url_path='/static')
app.config['SQLALCHEMY_TRACK_MODIFICATIONS'] = False
app.config['SQLALCHEMY_COMMIT_ON_TEARDOWN'] = True
app.config['SECRET_KEY'] = 'xxxxxxxxxxxxxxxxxxxxxx'


# 使用flask-restful管理api
from flask_restful import Api

restfulapi = Api(app)

from devops.api.event_callback import EventCallBack

restfulapi.add_resource(EventCallBack, '/api/v1.0/resource_back')
查看:https://open-dev.dingtalk.com/#/index
devops/api/event_callback.py
from dingtalk.crypto import DingTalkCrypto
import time
from flask import make_response
from flask_restful import Resource, request
import demjson

class Crypto(object):
  def __init__(self):
    # 随便填的字符串
    self.token = '123456'
    # 自己生成的43位随机字符串
    self.aes_key = '123456xxlvdhntotr3x9qhlbytb18zyz5zxxxxxxxxx'
    # 钉钉企业ID(注意这个要在首页获取,不是appkey,这块卡了好久,请看上图)
    self.corpid = '你自己的CorpID'
    self.crypto = DingTalkCrypto(
      token=self.token,
      encoding_aes_key=self.aes_key,
      corpid_or_suitekey=self.corpid
    )


class EventCallBack(Resource):
    def __init__(self):
        self.crypto = Crypto().crypto
    def get(self):
        return "event callback!"

    def post(self):
        for k, v in request.values.items():
            print(k, v)
        po = request.json["encrypt"]
        data = request.values

        # 返回加密success
        result = self.crypto.encrypt_message(
            msg="success"
        )
        print(result)

        return make_response(result)

devops/api/test.py
import json
import requests

# 根据 appkey 和 appsecret 获取 access_token
def GetToken():
	# 如何获取看上图
    appkey = "xxx"
    appsecret = "xxxxxxx"
    try:
        request = requests.get(
            "https://oapi.dingtalk.com/gettoken?appkey={appkey}&appsecret={appsecret}".format(appkey=appkey,
                                                                                              appsecret=appsecret))
        return request.json()["access_token"]
    except Exception as e:
        print(e)


# 注册回调
def RegisterCallback(access_token):
    # access_token = GetToken()
	# 这里参数具体含义参考 回调管理:https://ding-doc.dingtalk.com/doc#/serverapi2/pwz3r5
	# 下面的url参数是你本地能访问到的公网地址(或内网穿透地址)
    data = {'call_back_tag': ['bpms_task_change', 'bpms_instance_change'], 'token': '123456',
            'aes_key': '123456xxlvdhntotr3x9qhlbytb18zyz5zxxxxxxxxx',
            'url': "http://zhangzd.vaiwan.com/api/v1.0/resource_back"}
    headers = {"Content-Type": "application/json"}
    data = json.dumps(data)
    url = "https://oapi.dingtalk.com/call_back/register_call_back?access_token={access_token}".format(
        access_token=access_token)
    print(url)
    print(data)
    try:
        req = requests.post(url=url, data=data, headers=headers)
        print(req.text)
    except Exception as e:
        print(e)

# 查看事件回调接口
def GetCallback(access_token):
    try:
        url = "https://oapi.dingtalk.com/call_back/get_call_back?access_token={access_token}".format(access_token=access_token)
        request = requests.get(url)
        print(request.text)
    except Exception as e:
        print(e)


access_token = GetToken()
print(access_token)
RegisterCallback(access_token)
GetCallback(access_token)
注意
- flask项目先启动,准备接受钉钉回调
- 执行test.py注册回调,这时候钉钉会回调flask项目自定义接口
- 执行结果

附内网穿透工具
clone  git仓库执行命令:git clone https://github.com/open-dingtalk/pierced.git
cd windows_64
# 下面命令的参数 subdomain随便修改下,最终访问地址为:zhangzd.vaiwan.com。  5000是映射到flask项目的端口
# 浏览器如果不能访问,就重启试试
./ding -config=ding.cfg -subdomain=zhangzd 5000
来源:CSDN
作者:qq_道可道
链接:https://blog.csdn.net/qq_16240085/article/details/104790129
