前言
GitWeb 和GitLab相比,一个是简单的仓库查看器,一个是复杂的Git管理系统。
之所以不安装GitLab而选择安装GitWeb的原因有以下:
1、GitLab对配置要求很高
GitLab是基于ruby的,此外还使用了Postgresql、redis等,启动的worker process很多,官方推荐至少需要2核4G。
2、不需要特别多人,没有复杂的权限控制要求
基本是一个“私服”,用来与Jenkins配合实现自动集成,未来可能会有别人用,但也不会有多少人。
如果有人可以直接通过ssh添加公钥的方式。
因此如果搭建GitLab是杀鸡用牛刀。不选择gogs、gitea的原因也是如此。
所以选择了GitWeb(其实搭建GitWeb是更麻烦的),如果看官更喜欢gitlab、gogs、gitea可以去github上搜索,对应的配置在网络上可以参考的教程也很多。
Git远程仓库搭建
1、安装git、配置git
sudo apt-get install git
git config --global user.name "github用户名"
git config --global user.email "github邮箱"
配置好之后就可以正常的在该服务器上使用git了。
2、建立git用户
sudo adduser git
3、复制你的ssh公钥
windows默认在C:\Users\你的用户名.ssh\id_rsa.pub,把id_rsa.pub里的内容复制到/home/git/.ssh/authorized_keys文件里。后边你可以通过这种方式添加协同伙伴,同样复制他们的公钥到authorized_keys即可。
4、建立仓库
sudo git init --bare /home/git/test.git
sudo chown -R git:git  /home/git/test.git
https://www.liaoxuefeng.com/wiki/896043488029600/899998870925664
–bare:Git会创建一个裸仓库,裸仓库没有工作区,因为服务器上的Git仓库纯粹是为了共享,所以不让用户直接登录到服务器上去改工作区,并且服务器上的Git仓库通常都以.git结尾。
5、禁止git用户登录shell
出于安全考虑,第二步创建的git用户不允许登录shell,这可以通过编辑/etc/passwd文件完成。找到类似下面的一行:
	git:x:1001:1001:,,,:/home/git:/bin/bash
	改为
	git:x:1001:1001:,,,:/home/git:/usr/bin/git-shell
6、克隆
在你的本地电脑上输入
git clone ssh://git@你的域名:你的SSH端口/home/git/test.git
- 如果出现错误,请检查前面的配置,如authorized_keys是否配置正确git用户是否有文件权限,还有仓库的权限是否设置正确。
- 如果需要密码,那么可能公钥复制出错,可以删除C:\Users\你的用户名.ssh\known_hosts中对应该服务器IP的记录,再次克隆试试。
- 如果你的SSH端口没有修改过,那么默认是22,可以不用显式指定。
GitWeb搭建过程
虽然没有复杂的权限控制要求,但是还是要做登录,因为服务器内其他应用都是通过nginx转发的,所以决定Git web也使用Nginx转发。
1、安装gitweb和用到的配置软件
sudo apt-get -y install gitweb spawn-fcgi autoconf pkg-config libfcgi-dev
2、安装fastcgi-wrapper
git clone https://github.com/gnosek/fcgiwrap.git
cd fcgiwrap/
autoreconf -i
./configure
make CFLAGS='-Wno-implicit-fallthrough'
sudo make install
3、启动
sudo spawn-fcgi -f /usr/local/sbin/fcgiwrap -p 12345
4、配置GitWeb
sudo vim /etc/gitweb.conf

# git仓库存放的目录
# path to git projects (<project>.git)
$projectroot = "/home/git/repositories/";

# directory to use for temp files
$git_temp = "/tmp";

# target of the home link on top of all pages
#$home_link = $my_uri || "/";

# html text to include at home page
#$home_text = "indextext.html";

# file with project list; by default, simply scan the projectroot dir.
# 如果不指定projects.list的话,gitweb会自动在$projectroot定义的目录下递归查找合法的git repo来显示。
$projects_list = "/home/git/projects.list";
# $strict_export参数规定只有显示在首页上的repo才能够被访问。换句话说在有projects.list的情况下,该文件列出的repo才能被访问。
$strict_export = 1;

# stylesheet to use
#@stylesheets = ("static/gitweb.css");

# javascript code for gitweb
$javascript = "static/gitweb.js";

# logo to use
$logo = "static/git-logo.png";

# the 'favicon'
#$favicon = "static/git-favicon.png";

# git-diff-tree(1) options to use for generated patches
#@diff_opts = ("-M");
@diff_opts = ();

# $feature数组启用了一些插件或者说特性。blame可以显示代码来源人,snapshot提供repo的打包下载,highlight提供代码高亮。
$feature {'blame'}{'default'} = [1];
$feature {'blame'}{'override'} = 1;

$feature {'snapshot'}{'default'} = ['zip', 'tgz'];
$feature {'snapshot'}{'override'} = 1;

$feature{'highlight'}{'default'} = [1];
5、配置Nginx
链接gitweb文件
sudo ln -s /usr/share/gitweb/ /var/www/
# GitWeb
server {
        listen 80;

        server_name hostname; # 如xxx.com,建议使用二级域名,如gitweb.xxx.com

        root /var/www/gitweb/;

        rewrite ^/$ http://$host$1/index.cgi permanent;

        location ~ ^.*\.cgi$ {
            root /var/www/gitweb/;
            fastcgi_pass  127.0.0.1:12345;
            fastcgi_index index.cgi;
            include fastcgi.conf;
        }

        # access log file 访问日志
        access_log logs/gitweb.access.log;
}
6、浏览器访问你的hostname,如http://gitweb.xxx.com/
7、将一个之前建好的仓库添加到projects.list
未添加的仓库是显示不出来的(通过这个可以控制你想公开的仓库)
echo "test.git" >> projects.list
8、样式不好看,修改一下:
git clone https://github.com/kogakure/gitweb-theme.git
cd gitweb-theme
sudo ./setup -vi --insstall
sudo service nginx restart

9、设置登录认证
sudo htpasswd -c /etc/nginx/gitweb.passwd name

在nginx配置中添加
auth_basic "请先登录";
auth_basic_user_file /etc/nginx/gitweb.passwd;
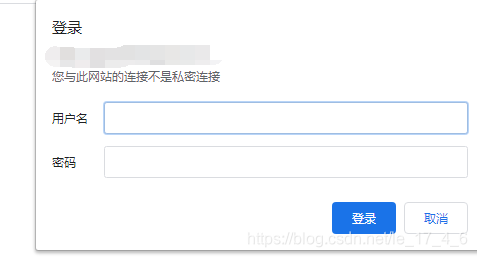
进入网站提示:
到这里就都搭建完成了~
附:GitWeb仓库配置(在具体的仓库中)
1、description 中可以设置仓库的描述
2、cloneurl 显示该仓库的克隆路径
3、README.html来创建你的仓库内容描述
4、config中可以设置owner = Your Name
http://sourceforge.net/apps/trac/sourceforge/wiki/GitWeb%20repository%20browser
Create a “description” file in your git repository root, with a brief, one-line description of your repository. This file is treated as plain text, > > any HTML will be escaped. This will appear in the top section of the gitweb repository landing page.
Create a “cloneurl” file in your git repository root, containing one url per line. Use this to display the clone url for your repository. This will > appear in the same section as the description line, one url per line.
Create a “README.html” file in your git repository root, with arbitrary descriptive content. HTML is allowed, and will be displayed inside a > div tag on the gitweb page, in a section below the one with description.
Set the owner, by setting a gitweb.owner configuration variable in the “config” file, located in your git repository root. If the “gitweb” section does not exist, create it. The owner setting in the config should look like the sample below (you can use any arbitrary string for owner):
[gitweb]
owner = Your Name
来源:CSDN
作者:衡与墨
链接:https://blog.csdn.net/le_17_4_6/article/details/104672299