前言
shiro内置了几个注解,比如最常用之一的 @RequiresPermissions,这个注解可以规定哪些用户可以访问哪些接口。
但是好多小伙伴在controller层里使用shiro注解的时候,发现这些注解并没有生效,关于这个问题在这篇博客中会有所讲述。
正文
在上一篇博客中所配置的项目中,使用qiu这个用户登录,如下图可以得知,qiu这个用户他有三个权限功能。
在controller层接口上添加一个@RequiresPermissions,它的值就填一个qiu所不拥有的权限
    @RequiresPermissions("user:export")
    @RequestMapping("export")
    @ResponseBody
    public String export(){
        return "i have export permission";
    }
那么运行项目后发现照样还是可以访问到路径为export的接口,如下图所示
对于上述这个问题并不是shiro出现了bug,而是需要配置一些东西。
1、扫描shiro的注解
的确,没看错,它不具备自动生效,需要手动去配置扫描注解 ,该配置不配置在applicationContext.xml中,具体原因已经在注释中说明,请耐心看下去
<!--启动shiro注解功能,因为shiro的注解都在controller层中,并且springmvc文件加载优先级低于applicationContext,所以只有springmc文件加载了之后,才能加载shiro-->
<!--所以,shiro注解功能扫描的配置要配置在springmvc.xml中-->
    <bean id="lifecycleBeanPostProcessor" class="org.apache.shiro.spring.LifecycleBeanPostProcessor"></bean>
    <bean class="org.springframework.aop.framework.autoproxy.DefaultAdvisorAutoProxyCreator" depends-on="lifecycleBeanPostProcessor"></bean>
    <bean class="org.apache.shiro.spring.security.interceptor.AuthorizationAttributeSourceAdvisor">
        <property name="securityManager" ref="securityManager"></property>
    </bean>
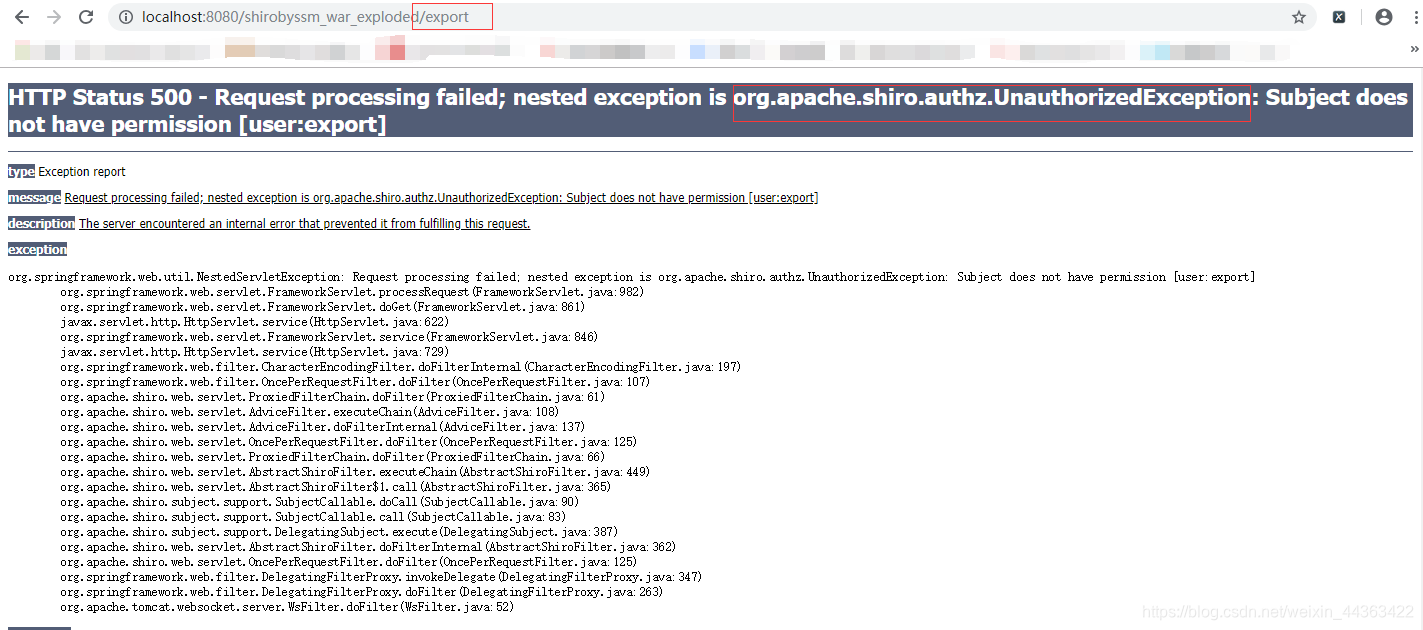
以上配置完毕之后重启项目,如果一个不具有某权限功能的用户访问了这个权限将会报错。如下图所示。
可以得知访问没权限的接口会抛出抛出了UnauthorizedException异常,所以为了项目的健全性我们可以使用全局监控的方式处理这个异常。
package com.qiu.shirobyssm.ExceptionHandle;

import org.apache.shiro.authz.UnauthorizedException;
import org.springframework.web.bind.annotation.ControllerAdvice;
import org.springframework.web.bind.annotation.ExceptionHandler;
import org.springframework.web.bind.annotation.ResponseBody;
import org.springframework.web.bind.annotation.RestControllerAdvice;

/**
 * @Author VULCAN
 * @create 2020/1/22 15:27
 */

//全局异常监控,出现的异常就跑到这里来,但是需要在springmvc.xml中配置扫描到该注解
@ControllerAdvice
public class MyExceptionHandle {

    @ResponseBody
    @ExceptionHandler(value={UnauthorizedException.class})
    public String dealUnauthorized() {
        return "noPower";
    }
 }
上述代码类似controller,所以在springmvc.xml中还需要配置扫描注解。
<!--    扫描异常处理控制层的注解@ControllerAdvice,让它生效-->
    <context:component-scan base-package="com.qiu.shirobyssm.ExceptionHandle"></context:component-scan>
以上全部配置完了,重新启动项目看看效果
来源:CSDN
作者:我fuze很6
链接:https://blog.csdn.net/weixin_44363422/article/details/104070517