实现nginx+ffmpeg推本地MP4视频功能。
环境:Ubuntu12.04LTS
插件安装:
安装包放置位置:/home/nicholas/Desktop/FFmpeg/
1、Nginx安装
下载安装包:http://nginx.org/en/download.html
下载第三方扩展模块:https://github.com/arut/nginx-rtmp-module
安装包解压:
tar zxvf nginx-1.12.2.tar.gz
unzip nginx-rtmp-module-master.zip
编译安装nginx:

#cd nginx-1.12.2
#./configure --prefix=/usr/local/nginx --add-module=/home/nicholas/Desktop/FFmpeg/nginx-rtmp-module-master --with-http_ssl_module
#make
#make install
编译成功后修改nginx的配置文件nginx.conf,添加rtmp配置。完整代码如下
#user  nobody;
worker_processes  2;

#error_log  logs/error.log;
#error_log  logs/error.log  notice;
#error_log  logs/error.log  info;

#pid        logs/nginx.pid;


events {
    use epoll;
    worker_connections  1024;
}

rtmp_auto_push on;
rtmp_auto_push_reconnect 1s;

rtmp {
    server {
	listen 1935;
	application myapp {
	    live on;
	}

	application hls {
	    live on;
	    hls on;
	    hls_path /tmp/hls;
	}

	application qiniu {
	    live on;
	}

	application pull {
	    live on;
	}

	access_log logs/rtmp_access.log;
    }
}

http {
    include       mime.types;
    default_type  application/octet-stream;

    log_format  main  '$remote_addr - $remote_user [$time_local] "$request" '
                      '$status $body_bytes_sent "$http_referer" '
                      '"$http_user_agent" "$http_x_forwarded_for"';

    access_log  logs/access.log  main;

    sendfile        on;
    #tcp_nopush     on;

    #keepalive_timeout  0;
    keepalive_timeout  65;

    gzip  on;

    server {
        listen       80;
        server_name  localhost;

        charset utf-8;

        #access_log  logs/host.access.log  main;

        location / {
            root   html;
            index  index.html index.htm;
        }

	location /stat {
	    rtmp_stat all;
	    rtmp_stat_stylesheet stat.xsl;
	}

	location /stat/xsl {
	    root /home/nicholas/Desktop/FFmpeg/nginx-rtmp-module-master/;
	}

	location /hls {
	    types {
		application/vnd.apple.mpegurl m3u8;
		video/mp2t ts;
	    }
	    root /tmp/hls;
	    add_header Cache-Control no-cache;
	}

        #error_page  404              /404.html;

        # redirect server error pages to the static page /50x.html
        #
        error_page   500 502 503 504  /50x.html;
        location = /50x.html {
            root   html;
        }

        # proxy the PHP scripts to Apache listening on 127.0.0.1:80
        #
        #location ~ \.php$ {
        #    proxy_pass   http://127.0.0.1;
        #}

        # pass the PHP scripts to FastCGI server listening on 127.0.0.1:9000
        #
        #location ~ \.php$ {
        #    root           html;
        #    fastcgi_pass   127.0.0.1:9000;
        #    fastcgi_index  index.php;
        #    fastcgi_param  SCRIPT_FILENAME  /scripts$fastcgi_script_name;
        #    include        fastcgi_params;
        #}

        # deny access to .htaccess files, if Apache's document root
        # concurs with nginx's one
        #
        #location ~ /\.ht {
        #    deny  all;
        #}
    }


    # another virtual host using mix of IP-, name-, and port-based configuration
    #
    #server {
    #    listen       8000;
    #    listen       somename:8080;
    #    server_name  somename  alias  another.alias;

    #    location / {
    #        root   html;
    #        index  index.html index.htm;
    #    }
    #}


    # HTTPS server
    #
    #server {
    #    listen       443 ssl;
    #    server_name  localhost;

    #    ssl_certificate      cert.pem;
    #    ssl_certificate_key  cert.key;

    #    ssl_session_cache    shared:SSL:1m;
    #    ssl_session_timeout  5m;

    #    ssl_ciphers  HIGH:!aNULL:!MD5;
    #    ssl_prefer_server_ciphers  on;

    #    location / {
    #        root   html;
    #        index  index.html index.htm;
    #    }
    #}

}
- 这是一个最简单,最基础的配置, rtmp监听1935端口,如果是hls的话用hls on开启hls,并且为hls设置一个临时文件目录hls_path /tmp/hls; 其它更高级的配置可以参看nginx-rtmp-module的readme,里面有比较详细的介绍其它的配置,并且它还提供了一个通过JWPlayer在网页上播放的例子.
修改/etc/profile文件添加nginx路径:
export NGINX_PATH=/usr/local/nginx/sbin
export PATH=$PATH:$NGINX_PATH
source /etc/profile
启动nginx:nginx -c /usr/local/nginx/conf/nginx.conf
重启nginx:nginx -t; nginx -s reload
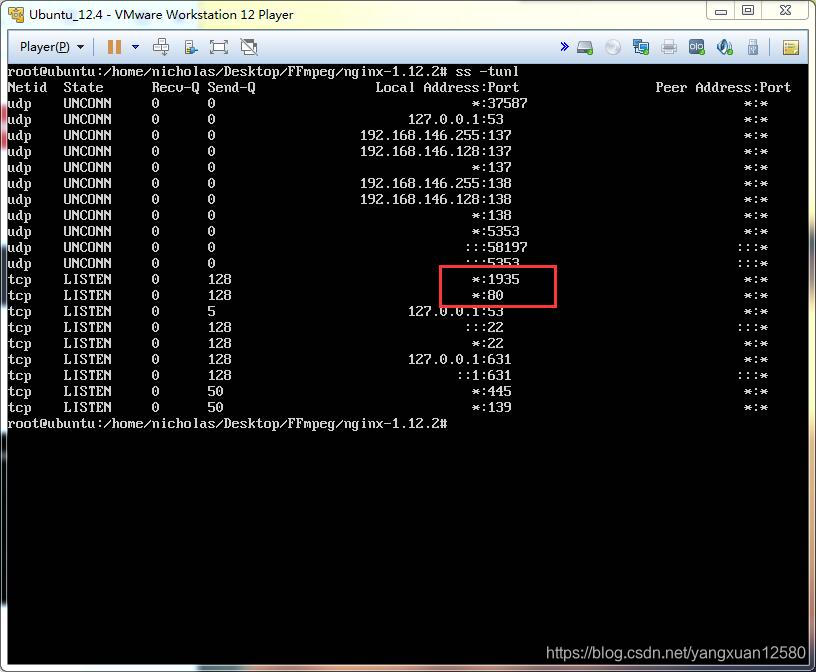
查看nginx是否正常启动:

2、FFmpeg安装
下载安装包:https://download.csdn.net/download/yangxuan12580/12115541
tar jxvf ffmpeg-3.2.14.tar.bz2

编译安装ffmpeg:
cd ffmpeh-3.2.14
./configure --prefix=/usr/local/ffmpeg --enable-static --disable-shared --disable-yasm --enable-memalign-hack --enable-gpl --disable-libx264 --disable-librtmp --extra-cflags=-I/usr/local/include --extra-ldflags=-L/usr/local/lib
make
make install
编译成功后修改/etc/profile文件添加ffmpeg路径
export FFMPEG_PATH=/usr/local/ffmpeg
export PATH=$PATH:$FFMPEG_PATH/bin
source /etc/profile
执行如下命令查看ffmpeg是否正常安装

使用FFmpeg推流到Nginx
推一个本地的MP4到上面配置的myapp上
ffmpeg -re -i /hmoe/nicholas/Desktop/123.mp4 -vcodec copy -acodec copy -f flv "rtmp://127.0.0.1:1935/myapp/test1"
流播放地址为:rtmp://192.168.146.128:1935/myapp/test1。目录名为myapp,上传节点为test1。
推一个本地的MP4到hls上
ffmpeg -re -i /hmoe/nicholas/Desktop/123.mp4 -vcodec copy -acodec copy -f flv "rtmp://127.0.0.1:1935/hls/test2"
七牛:https://portal.qiniu.com/create
流媒体播放器地址及测试效果
WOWZA播放器地址:https://www.wowza.com/testplayers

流媒体播放器地址:http://www.cutv.com/demo/live_test.swf

来源:CSDN
作者:Nicholas_yang0411
链接:https://blog.csdn.net/yangxuan12580/article/details/104049811