【推荐】2019 Java 开发者跳槽指南.pdf(吐血整理) >>> 
1、增加录音和读写外部存储的权限
修改AndroidManifest.xml:<?xml version="1.0" encoding="utf-8"?>
<manifest xmlns:android="http://schemas.android.com/apk/res/android"
package="com.example.HelloWorld"
android:versionCode="1"
android:versionName="1.0">
<uses-sdk android:minSdkVersion="14"/>
<uses-permission android:name="android.permission.RECORD_AUDIO" />
<uses-permission android:name="android.permission.WRITE_EXTERNAL_STORAGE" />
<application android:label="@string/app_name" android:icon="@drawable/ic_launcher">
<activity android:name="MyActivity"
android:label="@string/app_name">
<intent-filter>
<action android:name="android.intent.action.MAIN"/>
<category android:name="android.intent.category.LAUNCHER"/>
</intent-filter>
</activity>
</application>
</manifest>
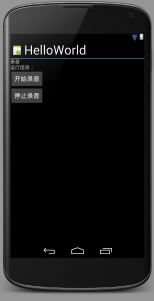
2、设计界面,修改layout/main.xml
<?xml version="1.0" encoding="utf-8"?>
<LinearLayout xmlns:android="http://schemas.android.com/apk/res/android"
              android:orientation="vertical"
              android:layout_width="fill_parent"
              android:layout_height="fill_parent"
        >
    <TextView
            android:layout_width="fill_parent"
            android:layout_height="wrap_content"
            android:text="录音"
            />

    <TextView
            android:id="@+id/info"
            android:layout_width="fill_parent"
            android:layout_height="wrap_content"
            android:text="运行信息:"
            />

    <Button
        android:id="@+id/start_record"
        android:layout_width="wrap_content"
        android:layout_height="wrap_content"
        android:text="开始录音"
        />
    <Button
            android:id="@+id/stop_record"
            android:layout_width="wrap_content"
            android:layout_height="wrap_content"
            android:text="停止录音"
            />


</LinearLayout>

3、修改java代码
package com.example.HelloWorld;

import android.app.Activity;
import android.media.MediaRecorder;
import android.os.Bundle;
import android.os.Environment;
import android.view.View;
import android.widget.TextView;
import android.widget.Button;

import android.widget.Toast;
import android.util.Log;
import java.io.File;
import java.io.IOException;


public class MyActivity extends Activity{

    Button startRecordButton;
    Button stopRecordButton;
    TextView infoText;
    MediaRecorder recorder = new MediaRecorder();
    boolean isRecording = false;

    @Override
    public void onCreate(Bundle savedInstanceState) {
        super.onCreate(savedInstanceState);
        setContentView(R.layout.main);

        startRecordButton = (Button) findViewById(R.id.start_record);
        stopRecordButton = (Button) findViewById(R.id.stop_record);

        stopRecordButton.setEnabled(false);

        infoText = (TextView)findViewById(R.id.info);

        final String filePath = Environment.getExternalStorageDirectory() + "/aaaaa.amr";

        infoText.setText("保存到"+filePath);

        startRecordButton.setOnClickListener(new View.OnClickListener() {
             @Override
             public void onClick(View v) {
                 isRecording = true;
                 try {
                     recorder.setAudioSource(MediaRecorder.AudioSource.MIC); // 输入源
                     recorder.setOutputFormat(MediaRecorder.OutputFormat.DEFAULT); //设置输出格式
                     recorder.setAudioEncoder(MediaRecorder.AudioEncoder.DEFAULT); //设置编码
                     recorder.setOutputFile(filePath); //输出文件
                     recorder.prepare();  //预备!
                     recorder.start();    //开始!
                     startRecordButton.setEnabled(false);
                     stopRecordButton.setEnabled(true);
                 } catch (Exception e) {
                     e.printStackTrace();
                     infoText.setText(e.getMessage());
                 }
             }
         });
        stopRecordButton.setOnClickListener(new View.OnClickListener() {
            @Override
            public void onClick(View v) {
                recorder.stop();
                isRecording = false;
                startRecordButton.setEnabled(true);
                stopRecordButton.setEnabled(false);
            }
        });

    }


    @Override
    protected void onDestroy() {
        if (isRecording) {
            recorder.stop();
        }
        recorder.release();
        super.onDestroy();
    }
}
在startRecordButton被点击后,开始录音。recorder是实例化的MediaRecorder,先依次设置其输入源、输出格式、编码、输出文件,然后prepare()和start()录音就开始了。这时候禁用了startRecordButton以防用户误点。与此同时,默认被禁用的stopRecordButton被启用。
在stopRecordButton被点击后,停止录音,调用stop()函数即可。同时禁用stopRecordButton,激活startRecordButton。
在重写的onDestroy()方法中,会根据布尔变量isRecording判断是否正在录音,若在录音在stop it,然后释放。
初始界面:

开始录音:

生成的音频文件:

来源:oschina
链接:https://my.oschina.net/u/940565/blog/263507