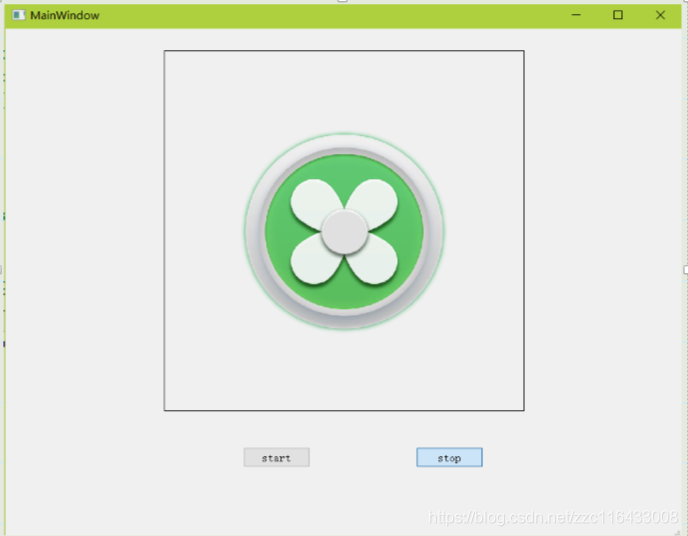
旋转图片控件:
用途,用于设置一个繁忙的图片,告知用户正在进行中
方法1.旋转图片本身
使用图片的旋转算法:
对象:
#ifndef BUSYLABELIMG_H
#define BUSYLABELIMG_H
#include <QLabel>
#include <QTimer>
class BusyLabelImg : public QLabel {
public:
BusyLabelImg(QWidget* parent = nullptr);
void setPixmap(const QString& imgPath);
void setTick(int msSeconds = 500);
void start();
void stop()
{
mTimer.stop();
}
private:
void next();
private:
QTimer mTimer;
QPixmap mPix;
int mTick;
};
#endif // BUSYLABELIMG_H
#include "BusyLabelImg.h"
#include <QApplication>
#include <QDebug>
#include <QFile>
#include <QPixmap>
#include <QTransform>
BusyLabelImg::BusyLabelImg(QWidget* parent)
: QLabel(parent)
, mTick(500)
{
this->setWordWrap(true);
//this->setScaledContents(true); 此处代码只是测试,设置此选项图片会固定大小到label大小
//不适合此处目的使用,使用此选项意味着不同旋转之后的图像大小缩放到label大小,边界不同的差异
connect(&mTimer, &QTimer::timeout, this, &BusyLabelImg::next);
}
//读取图片并且缩放到固定大小
void BusyLabelImg::setPixmap(const QString& imgPath)
{
if (QFile::exists(imgPath)) {
mPix.load(imgPath);
mPix = mPix.scaled(300, 300);
}
}
//旋转时间间隔
void BusyLabelImg::setTick(int msSeconds)
{
mTick = msSeconds;
}
void BusyLabelImg::start()
{
mTimer.start(mTick);
}
//旋转图片到下一个角度
void BusyLabelImg::next()
{
static int angle = 0;
angle += 60;
angle %= 360;
QMatrix matrix;
matrix.rotate(angle);
auto tmp = mPix.transformed(matrix);
this->QLabel::setPixmap(tmp);
QApplication::processEvents();
qDebug() << " pix size " << tmp.size();
}
任意位置使用该对象:
我的是在主窗口通过提示实现
使用的代码:
void MainWindow::on_start1_clicked()
{
auto filePath = QFileDialog::getOpenFileName(this, tr("Image"), this->windowFilePath());
if (filePath.isEmpty()) {
return;
}
ui->label->setPixmap(filePath);
ui->label->setTick(100);
ui->label->start();
this->setWindowFilePath(filePath);
}
输出:
pix size QSize(410, 410)
pix size QSize(410, 410)
pix size QSize(300, 300)
pix size QSize(411, 410)
pix size QSize(410, 410)
pix size QSize(300, 300)
可以看出来,旋转后的图像打下发生变化,因此label的最小大小必须能够容纳411,410,
也就是可以简单的认为是对角线长度
效果:

因为图像中心有偏转,所以转动稍微偏移

方法2:旋转绘制坐标
#ifndef BUSYLABELPAINTER_H
#define BUSYLABELPAINTER_H
#include <QLabel>
#include <QPixmap>
#include <QTimer>
class BusyLabelPainter : public QLabel {
public:
BusyLabelPainter(QWidget* parent = nullptr);
void setPixmap(const QString& imgPath);
void setTick(int msSeconds = 500);
void start();
void stop()
{
mTimer.stop();
}
private:
void next();
private:
QPixmap mPix;
QTimer mTimer;
int mTick;
};
#endif // BUSYLABELPAINTER_H
#include "BusyLabelPainter.h"
#include <QDebug>
#include <QFile>
#include <QPainter>
BusyLabelPainter::BusyLabelPainter(QWidget* parent)
: QLabel(parent)
{
this->setWordWrap(true);
//this->setScaledContents(true);
connect(&mTimer, &QTimer::timeout, this, &BusyLabelPainter::next);
}
void BusyLabelPainter::setPixmap(const QString& imgPath)
{
if (QFile::exists(imgPath)) {
mPix.load(imgPath);
mPix = mPix.scaled(300, 300);
}
}
void BusyLabelPainter::setTick(int msSeconds)
{
mTick = msSeconds;
}
void BusyLabelPainter::start()
{
mTimer.start(mTick);
}
void BusyLabelPainter::next()
{
static int angle = 0;
angle += 60;
angle %= 360;
QMatrix matrix;
matrix.rotate(angle);
QPixmap tmp(mPix.size());
tmp.fill(Qt::transparent);
QPainter painter(&tmp);
painter.translate(mPix.rect().center());
painter.rotate(angle);
painter.translate(-mPix.rect().center());
painter.drawPixmap(mPix.rect(), mPix);
this->QLabel::setPixmap(tmp);
qDebug() << " pix painter size " << tmp.size();
}
绘制逻辑图

使用方法和方法1相同
两者对比:

对比两种玩法,第二种相对来说不需要设置更多的参数,label大小很容易控制
第一种label的大小需要可以发生一定的变化;
没有直接使用painter去绘制的原因是因为,图像的变化速度会比控件绘制要快,后期可以在线程里面调用图像的绘制,然后切到主线程刷新图片
这个例子比较简单,但是也是很多地方会用到特殊控件
来源:CSDN
作者:冰宁秋叶四飘
链接:https://blog.csdn.net/zzc116433008/article/details/103653073