【推荐】2019 Java 开发者跳槽指南.pdf(吐血整理) >>> 
入门咯
新建项目
beego 的项目基本都是通过 bee 命令来创建的,那我们就先拉取代码吧。
bee框架
go get -u github.com/astaxie/beego

bee命令行工具
go get -u github.com/beego/bee
创建一个api
首先我们看命令行,一般是 -h 或者help
bee help
果不其然
Bee is a Fast and Flexible tool for managing your Beego Web Application.

USAGE
    bee command [arguments]

AVAILABLE COMMANDS

    version     Prints the current Bee version
    migrate     Runs database migrations
    api         Creates a Beego API application
    bale        Transforms non-Go files to Go source files
    fix         Fixes your application by making it compatible with newer versions of Beego
    dlv         Start a debugging session using Delve
    dockerize   Generates a Dockerfile for your Beego application
    generate    Source code generator
    hprose      Creates an RPC application based on Hprose and Beego frameworks
    new         Creates a Beego application
    pack        Compresses a Beego application into a single file
    rs          Run customized scripts
    run         Run the application by starting a local development server
    server      serving static content over HTTP on port

Use bee help [command] for more information about a command.
可以看到,api命令是用于创建一个bee api application。继续查看命令如何使用:
bee help api
USAGE
  bee api [appname]

OPTIONS
  -conn
      Connection string used by the driver to connect to a database instance.

  -driver
      Database driver. Either mysql, postgres or sqlite.

  -tables
      List of table names separated by a comma.

DESCRIPTION
  The command 'api' creates a Beego API application.

  Example:
      $ bee api [appname] [-tables=""] [-driver=mysql] [-conn="root:@tcp(127.0.0.1:3306)/test"]

  If 'conn' argument is empty, the command will generate an example API application. Otherwise the command
  will connect to your database and generate models based on the existing tables.

  The command 'api' creates a folder named [appname] with the following structure:

            ├── main.go
            ├── conf
            │     └── app.conf
            ├── controllers
            │     └── object.go
            │     └── user.go
            ├── routers
            │     └── router.go
            ├── tests
            │     └── default_test.go
            └── models
                  └── object.go
                  └── user.go
那我们就创建一个包含表结构的项目吧。
创建一个为blog的项目
bee api blog -conn="root:sa@tcp(127.0.0.1:3306)/blog"
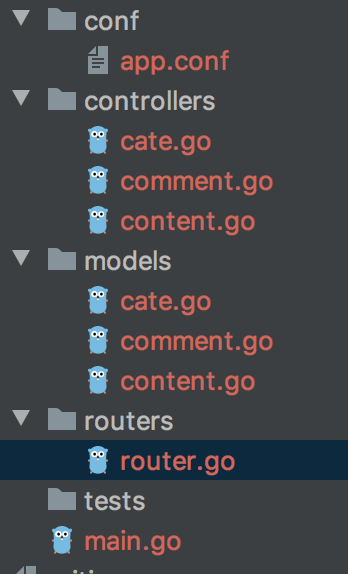
生成项目目录如下:

进去看代码,可以看到,基础的增删改查已经全部完成了。

运行项目
开始我们看到Bee help,有个run命令。
bee run blog
运行成功
______
| ___ \
| |_/ /  ___   ___
| ___ \ / _ \ / _ \
| |_/ /|  __/|  __/
\____/  \___| \___| v1.10.0
2019/12/20 09:20:12 INFO     ▶ 0001 Using 'blog' as 'appname'
2019/12/20 09:20:12 INFO     ▶ 0002 Initializing watcher...
2019/12/20 09:20:13 SUCCESS  ▶ 0003 Built Successfully!
2019/12/20 09:20:13 INFO     ▶ 0004 Restarting 'blog'...
2019/12/20 09:20:13 SUCCESS  ▶ 0005 './blog' is running...
这时候应该就可以请求了吧,但是,神奇了,无论你请求那个路由,都会404。 curl http://localhost:8080/v1/content/1
为什么呢?
查看文档得到新的东西
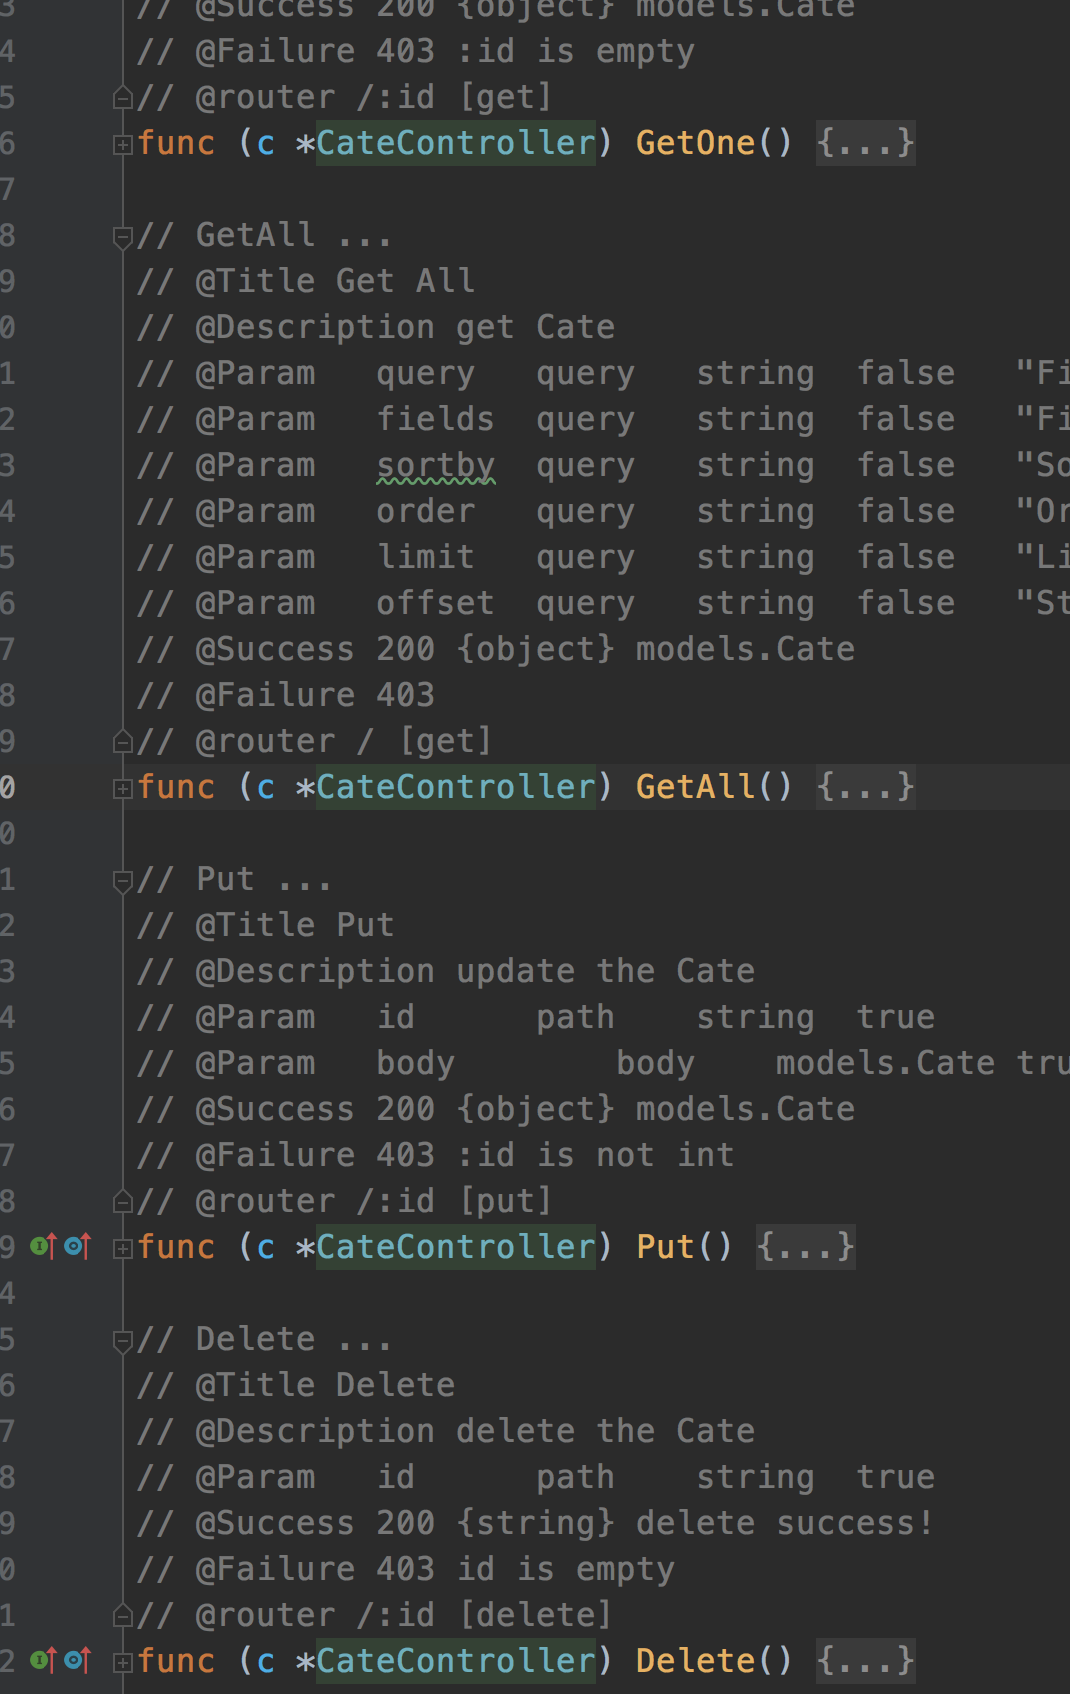
beego 自动会进行源码分析,注意只会在 dev 模式下进行生成,生成的路由放在 “/routers/commentsRouter.go” 文件中。
然后我看,runmod是dev模式的。
后面我发现,项目一定要在gopath中,才会生成。
于是乎,项目运行前,手动导出gopath加上当前工作目录
workdir=$(cd $(dirname $0); pwd)
echo "exec path:"$workdir
gosrc_path=$workdir/../../

export GOPATH=$GOPATH:$gosrc_path
echo $GOPATH
cd $workdir && go run main.go
神奇动物出现了
{
        "id": 1,
        "cate_id": 0,
        "title": "1231",
        "description": "2222",
        "content": "",
        "keyword": "",
        "create_time": "2019-12-19 10:36:14",
        "update_time": "2019-12-19 10:36:14",
        "status": 1,
        "is_original": 1,
        "ext": ""
}
真乃神坑(如果项目是在gopath里,则不用这一步)。
会生成如下文件

来源:oschina
链接:https://my.oschina.net/lwl1989/blog/3145207