原则 : 对谁做过渡,过渡效果就加在谁身上.
一、2D变形—移动
translate : 在2D范围内移动
可以单独设置X、Y轴,也可以结合使用
transition : 结合translate使用,过渡效果的属性、时间以及何种效果
<!DOCTYPE html>
<html lang="en">
<head>
    <meta charset="UTF-8">
    <title></title>
    <style>
        div{
            width: 100px;
            height: 100px;
            background-color: green;
            /*设置过渡效果*/
            transition: all 0.5s linear;
        }

        div:hover{
            /*transform: translateX(100px);*/
            /*transform: translateY(100px);*/
            transform: translate(100px, 200px);
        }
    </style>
</head>
<body>
   <div>我要移动</div>
</body>
</html>
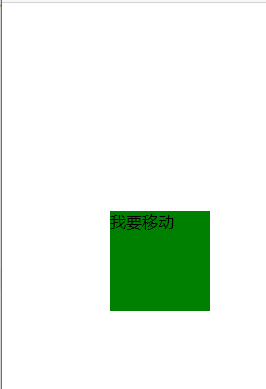
运行效果:
在0.5秒内,匀速移动,X轴移动100px,Y轴移动200px
二、2D变形—缩放
scale : 设置缩放倍数
可以单独设置X、Y轴,也可以结合使用
transition : 结合scale 使用,过渡效果的属性、时间以及何种效果
<!DOCTYPE html>
<html lang="en">
<head>
    <meta charset="UTF-8">
    <title></title>
    <style>
        div{
            width: 100px;
            height: 100px;
            background-color: green;
            margin: 100px auto;
            transition: all 0.5s linear;
        }

        div:hover{
            transform: scale(0.1);
            /*transform: scaleY(6);*/
        }

        section{
            width: 480px;
            height: 300px;
            margin: 100px auto;
            border: 10px solid #e00b00;
            overflow: hidden;
            text-align: center;
        }

        section img{
            width: 80%;
            /*过渡效果*/
            transition: all 0.2s linear;
        }

        section:hover img{
            transform: scale(0.6);
        }
    </style>
</head>
<body>
   <div></div>

   <section>
       <img src="images/mac.png" alt="">
   </section>
</body>
</html>
运行效果:
在0.2秒内,匀速缩小至原图0.6倍

三、2D变形—旋转
rotate: 设置旋转角度
transition : 结合rotate使用,过渡效果的属性、时间以及何种效果
<!DOCTYPE html>
<html lang="en">
<head>
    <meta charset="UTF-8">
    <title></title>
    <style>
        img{
            margin: 100px;
            border: 10px solid red;
            border-radius: 50%;

            transition: all 1s linear;
        }

        img:active{
            /*transform: rotateX(-180deg);*/
            /*transform: rotateY(-180deg);*/
            /*transform: rotate(-180deg);*/
            transform: rotate(2000deg);
        }
    </style>
</head>
<body>
    <img src="images/mac.png" alt="" width="60%">
</body>
</html>
运行效果:
无法展示…
在1秒内,X、Y轴都旋转2000°
四、2D变形—改变变形中心点
transform-origin属性可以改变元素的中心点
语法:transform-origin: x-axis y-axis z-axis;
x-axis 定义视图被置于 X轴的何处。可能的值:left、center、right、length、%
y-axis 定义视图被置于 Y 轴的何处。可能的值:top、center、bottom、length、%
z-axis 定义视图被置于 Z 轴的何处。可能的值:length
五、案例 : 一手好牌
<!DOCTYPE html>
<html lang="en">
<head>
    <meta charset="UTF-8">
    <title></title>
    <style>
        section{
            width: 120px;
            height: 163px;
            margin: 200px auto;
            /*background-color: #e00b00;*/
            position: relative;
        }

        section div{
            width: 100%;
            height: 100%;
            background:#fff url("images/pk.png") no-repeat -17px -17px;
            position: absolute;
            left: 0;
            top: 0;
            transform-origin: left bottom;
            transition: all 1s linear;
        }

        section:hover div:nth-child(1){
            transform: rotate(15deg);
        }

        section:hover div:nth-child(2){
            transform: rotate(30deg);
        }

        section:hover div:nth-child(3){
            transform: rotate(45deg);
        }

        section:hover div:nth-child(4){
            transform: rotate(60deg);
        }

        section:hover div:nth-child(5){
            transform: rotate(75deg);
        }

        section:hover div:nth-child(6){
            transform: rotate(90deg);
        }
    </style>
</head>
<body>
   <section>
       <div></div>
       <div></div>
       <div></div>
       <div></div>
       <div></div>
       <div></div>
   </section>
</body>
</html>
运行效果:
在1秒内所有扑克牌匀速旋转
六、2D变形—倾斜
skew: 设置倾斜角度
<!DOCTYPE html>
<html lang="en">
<head>
    <meta charset="UTF-8">
    <title></title>
    <style>
        img{
            transition: all 1s linear;
        }

        img:hover{
            /*transform: skewX(-60deg);*/
            /*transform: skewY(-60deg);*/
            transform: skew(-60deg, -30deg);
        }
    </style>
</head>
<body>
    <img src="images/mac.png" alt="" width="60%">
</body>
</html>
运行结果:
在1秒时间内匀速倾斜
七、2D变形→3D变形—透视
perspective 属性定义 3D 元素距视图的距离,以像素计。
视距 距离 眼睛到屏幕的距离
视距越大,效果越不明显3D效果越不明显
视距越小,透视效果越明显 3D效果越明显
<!DOCTYPE html>
<html lang="en">
<head>
    <meta charset="UTF-8">
    <title>09-透视</title>
    <style>
        body{
            /*透视*/
            perspective: 300px;
        }

        img{
            margin: 100px;
            transition: all 5s linear;
        }

        img:active{
            /*transform: rotateX(360deg);*/
            transform: rotate3d(100, 110, 200, 270deg);
        }
    </style>
</head>
<body>
    <img src="images/mac.png" alt="" width="60%">
</body>
</html>
运行效果:

八、3D变形—移动
perspective 结合 2D变化属性造成3D效果
<!DOCTYPE html>
<html lang="en">
<head>
    <meta charset="UTF-8">
    <title>09-透视</title>
    <style>
        body{
            /*透视*/
            perspective: 300px;
        }

        img{
            margin: 100px;
            transition: all 5s linear;
        }

        img:active{
           /*transform: translateY(300px);*/
           transform: translateZ(300px);
        }
    </style>
</head>
<body>
<img src="images/mac.png" alt="" width="60%">
</body>
</html>
运行效果:


九、3D变形—背靠背图片翻转
<!DOCTYPE html>
<html lang="en">
<head>
    <meta charset="UTF-8">
    <title></title>
    <style>
        body{
            perspective: 600px;
        }

        div{
            width: 300px;
            height: 200px;
            margin: 100px auto;
            position: relative;

            transform-style: preserve-3d;
        }

        div img{
            width: 100%;
            height: 450px;

            position: absolute;
            top: 0;
            left: 0;

            /*过渡效果*/
            transition: all 5s;
        }

        div img:first-child{
            z-index: 1;
            /*不是正面对向屏幕, 就隐藏*/
            backface-visibility: hidden;
        }

        div:hover img{
            transform: rotateY(180deg);
        }
    </style>
</head>
<body>
    <div>
        <img src="images/f08.png" alt="">
        <img src="images/f02.png" alt="">
    </div>
</body>
</html>
运行效果:
在这里用到一个属性**backface-visibility: hidden;**如果背对屏幕就隐藏

十、自定义动画 — 无缝滚动
1.定义和用法
通过 @keyframes 规则,您能够创建动画。
创建动画的原理是,将一套 CSS 样式逐渐变化为另一套样式。
在动画过程中,您能够多次改变这套 CSS 样式。
以百分比来规定改变发生的时间,或者通过关键词 “from” 和 “to”,等价于 0% 和 100%。
0% 是动画的开始时间,100% 动画的结束时间。
为了获得最佳的浏览器支持,您应该始终定义 0% 和 100% 选择器。
注释:请使用动画属性来控制动画的外观,同时将动画与选择器绑定。
通过animation,调用自定义的动画
2.语法 :
① @keyframes animationname {keyframes-selector {css-styles;}}
| 值 | 描述 |
|---|---|
| animationname | 定义动画的名称。 |
| keyframes-selector | 必需。动画时长的百分比。 合法的值:0-100% from(与 0% 相同) to(与 100% 相同) |
| css-styles | 必需。一个或多个合法的 CSS 样式属性。 |
② animation: name duration timing-function delay iteration-count direction;
| 值 | 描述 |
|---|---|
| animation-name | 规定需要绑定到选择器的 keyframe 名称。 |
| animation-duration | 规定完成动画所花费的时间,以秒或毫秒计。 |
| animation-timing-function | 规定动画的速度曲线。 |
| animation-delay | 规定在动画开始之前的延迟。 |
| animation-iteration-count | 规定动画应该播放的 |
| animation-direction | 规定是否应该轮流反向播放动画。 |
3.案例
<!DOCTYPE html>
<html lang="en">
<head>
<meta charset="UTF-8">
<title>13-C3实现无缝滚动</title>
<style>
*{
margin: 0;
padding: 0;
}
ul{
list-style: none;
}
nav{
width: 900px;
height: 100px;
border: 1px solid orangered;
margin: 100px auto;
overflow: hidden;
}
nav li{
float: left;
width: 100px;
height: 100px;
}
nav li img{
width: 100%;
height: 100%;
}
nav ul{
width: 200%;
animation: moving 5s linear infinite;
}
/*自定义动画*/
@keyframes moving {
from {transform: translateX(0)}
to {transform: translateX(-900px)}
}
nav:hover ul{
animation-play-state: paused;
}
</style>
</head>
<body>
<nav>
<ul>
<li><img src="images/f01.png" alt=""></li>
<li><img src="images/f02.png" alt=""></li>
<li><img src="images/f03.png" alt=""></li>
<li><img src="images/f04.png" alt=""></li>
<li><img src="images/f05.png" alt=""></li>
<li><img src="images/f06.png" alt=""></li>
<li><img src="images/f07.png" alt=""></li>
<li><img src="images/f08.png" alt=""></li>
<li><img src="images/f09.png" alt=""></li>
</ul>
</nav>
</body>
</html>
运行效果:
不停滚动,鼠标放入停止
animation-play-state 属性规定动画正在运行还是暂停。
来源:CSDN
作者:KaiSarH
链接:https://blog.csdn.net/KaiSarH/article/details/103577874