Lnmp 环境搭建
LNMP是指一组通常一起使用来运行动态网站或者服务器的自由软件名称首字母缩写。L指Linux,N指 Nginx,M一般指MySQL,也可以指MariaDB,P一般指PHP,也可以指Perl或Python。
源码安装 nginx
首先在根目录递归创建/data/server
mkdir -p /data/server
下载依赖包
yum -y install openssl openssl-devel zlib zlib-devel pcre pcre-devel
下载gcc编译器
yum -y install gcc gcc-c++
下载nginx包
wget http://nginx.org/download/nginx-1.16.0.tar.gz
解压nginx
tar -zxvf nginx-1.16.0.tar.gz
cd nginx-1.16.0
探测目标环境生成makefile
./configure --prefix=/data/server/nginx
编译
make && make install
开启nginx
cd /data/server/nginx/sbin
./nginx
1.nginx环境下如何配置支持php5.6,主要分3个步骤:配置安装php5.6.25,配置php-fpm组件,配置nginx支持php
2.下载php源码包:wget http://cn2.php.net/distributions/php-5.6.0.tar.xz
xz -d php-5.6.0.tar.xz解压(解压在家目录)
tar xf php-5.6.0.tar -C /usr/local/src/(把家目录里的php包移到usr/local/src)
3.下载依赖包:yum install zlib-devel libxml2-devel libjpeg-devel libjpeg-turbo-devel libiconv-devel
yum install freetype-devel libpng-devel gd-devel libcurl-devel libxslt-devel bz2-devel
wget -O /etc/yum.repos.d/epel.repo http://mirrors.aliyun.com/repo/epel-6.repo
yum -y install libmcrypt-devel mhash mcrypt
4.创建www用户
groupadd www
useradd -g www -s /sbin/nologin -M www
5.编译安装
cd /usr/local/src/php-5.6.0/
./configure \
--prefix=/usr/local/php56 \
--with-config-file-path=/usr/local/php56/etc \
--enable-inline-optimization \
--disable-debug \
--disable-rpath \
--enable-shared \
--enable-opcache \
“”FPM“”
--enable-fpm \
--with-fpm-user=www \
--with-fpm-group=www \
"MYSQL"
--with-mysql=mysqlnd \
--with-mysqli=mysqlnd \
--with-pdo-mysql=mysqlnd \
--with-gettext \
--enable-mbstring \
--with-iconv \
--with-mcrypt \
--with-mhash \
--with-openssl \
--enable-bcmath \
--enable-soap \
--with-libxml-dir \
--enable-pcntl \
--enable-shmop \
--enable-sysvmsg \
--enable-sysvsem \
--enable-sysvshm \
--enable-sockets \
--with-curl \
--with-zlib \
--enable-zip \
--with-bz2 \
--with-readline\
--with-gd
(如果缺少那个文件就下载那个文件在文件的后面+devel
比如:yum install bzip2-devel)
make && make install
配置php
cp php.ini-development /usr/local/php56/etc/php.ini
php-fpm 服务
cp /usr/local/php56/etc/php-fpm.conf.default /usr/local/php56/etc/php-fpm.conf
cp sapi/fpm/init.d.php-fpm /etc/init.d/php-fpm56
chmod +x /etc/init.d/php-fpm56
启动 php-fpm
service php-fpm56 start Starting php-fpm done
添加 PHP 命令到环境变量
编辑 vim /etc/profile
PATH=$PATH:$HOME/bin
改为:
PATH=$PATH:$HOME/bin:/usr/local/php56/bin
使 PHP 环境变量生效:
source /etc/profile
查看看 PHP 版本
php -v
执行 vim /usr/local/nginx/nginx.conf 编辑nginx配置文件
user  www www
worfer_processes  1;

   Location/{
       root html;
       Index index.html index.htm index.php
}
然后配置.php请求被传送到后端的php-fpm模块,默认情况下php配置块是被注释的,此时去掉注释
并修改为以下内容:
location ~*\.php${
   root           html;
   fastcgi_pass   127.0.0.1:9000;
   fastcgi_index   index.php;
   fastcgi_param   SCRIPT_FILENAME  $document_root$fastcgi_script_name
   Include        fastcgi_params;
}
这里面很多都是默认的,root是配置php程序放置的根目录,主要修改的就是fastcgi_param中
的/scripts为$document_root
修改完上面的,回到nginx.conf第一行,默认是#user nobody; 这里要去掉注释改为user wwwdata;或者user
www www;表示nginx服务器的权限为www
修改完这些保存并退出,然后重启nginx
wordpress的搭建
WordPress是一款个人博客系统,并逐步演化成一款内容管理系统软件,它是使用PHP语言和MySQL数据库 开发的,用户可以在支持 PHP 和 MySQL数据库的服务器上使用自己的博客。
WordPress有许多第三方开发的免费模板,安装方式简单易用。不过要做一个自己的模板,则需要你有一定 的专业知识。比如你至少要懂的标准通用标记语言下的一个应用HTML代码、CSS、PHP等相关知识。
包下载到/usr/local/src
cd /usr/local/src
wget https://wordpress.org/wordpress-4.9.7.tar.gz
解压wordpress指定目录/data/server
mkdir -p /data/server
tar -zxvf wordpress-4.9.7.tar.gz -C /data/server/nginx/html/
cd /data/server/nginx/html/
chown -R www.www wordpress
查看一下wordpress权限是多少如果不是755那么改成755
现在修改配置
cd /data/server/nginx/conf
vim nginx.conf
·
 user      www www;
     worker_process 1;

   server {
     listen        80;
     Server_name  www.dragon.org;

     Location /{
          Root  html;
          Index  index.html  index.htm index.php;
     }

 location  ~/.php$ {
         fastcgi_pass   127.0.0.1:9000;
         fastcgi_index   index.php;
         fastcgi_param   SCRIPT_FILENAME  $document_root$fastcgi_script_name
         Include        fastcgi_params;
         Include        fastcgi.conf;
   }
vim /data/server/nginx/html/wordpress/wp-config.php
·
define{‘DB_NAME’, ‘wordpress’};
  define{‘DB_USER’, ‘wordpress’};
  define{‘DB_PASSWORD’, ‘123456’};
  define{‘DB_HOST’, ‘127.0.0.1’};
  define{‘DB_CHARSET’, ‘utf8’};
  define{‘DB_COLLATE’, ‘’};
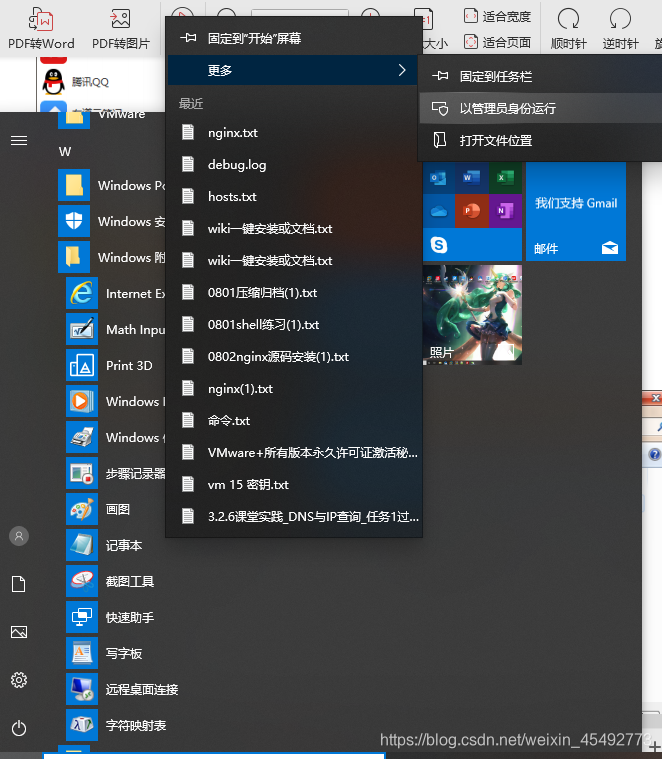
编辑windows的hosts配置文件右键以管理员方式运行 ctrl+o打开
打开C盘windows/system32/drivers/etc hosts

添加 192.168.124.123 www.dragon.org

开启mysql服务
cd /data/server/mysql/support-files
./mysql.server start
然后cd /data/server/mysql/bin
./mysql -u root -p
创建数据库
create database wordpress;
回车
使用数据库 : use wordpress
设置用户名密码 :
退出: exit
关闭防火墙
systemctl stop firewalld
setenforce 0
网页访问ip/wordpress
配置完成
来源:https://blog.csdn.net/weixin_45492773/article/details/99072312