安装GitLab
官网安装步骤:
https://about.gitlab.com/install/#centos-7
- 安装前配置,防火墙之类的
- 邮件配置
- 登陆gitlab
安装Gitlab
- 打开防火墙的http和ssh访问
sudo yum install -y curl policycoreutils-python openssh-server
sudo systemctl enable sshd
sudo systemctl start sshd
sudo firewall-cmd --permanent --add-service=http
sudo systemctl reload firewalld
- 安装Postfix邮件通知
sudo yum install postfix
sudo systemctl enable postfix
sudo systemctl start postfix
如果希望其他的方式,参考链接
[root@iZm5e1zao4uxbr8etk59y5Z /]# sudo systemctl start postfix

Job for postfix.service failed because the control process exited with error code. See "systemctl status postfix.service" and "journalctl -xe" for details.
出现报错,解决方式:
修改 /etc/postfix/main.cf的设置

inet_protocols = ipv4
inet_interfaces = all
vim 操作 http://www.cnblogs.com/z-x-y/p/9198481.html
- 执行安装gitlab,EXTERNAL_URL为服务器的IP,也可设置为域名。端口默认为80
curl https://packages.gitlab.com/install/repositories/gitlab/gitlab-ee/script.rpm.sh | sudo bash

sudo EXTERNAL_URL="http:115.29.67.31" yum install -y gitlab-ee
出现下图所示,则表示安装成功。
       *.                  *.
      ***                 ***
     *****               *****
    .******             *******
    ********            ********
   ,,,,,,,,,***********,,,,,,,,,
  ,,,,,,,,,,,*********,,,,,,,,,,,
  .,,,,,,,,,,,*******,,,,,,,,,,,,
      ,,,,,,,,,*****,,,,,,,,,.
         ,,,,,,,****,,,,,,
            .,,,***,,,,
                ,*,.


     _______ __  __          __
    / ____(_) /_/ /   ____ _/ /_
   / / __/ / __/ /   / __ `/ __ \
  / /_/ / / /_/ /___/ /_/ / /_/ /
  \____/_/\__/_____/\__,_/_.___/


Thank you for installing GitLab!
GitLab was unable to detect a valid hostname for your instance.
Please configure a URL for your GitLab instance by setting `external_url`
configuration in /etc/gitlab/gitlab.rb file.
Then, you can start your GitLab instance by running the following command:
  sudo gitlab-ctl reconfigure

For a comprehensive list of configuration options please see the Omnibus GitLab readme
https://gitlab.com/gitlab-org/omnibus-gitlab/blob/master/README.md

  Verifying  : gitlab-ee-11.10.4-ee.0.el7.x86_64                                                                                                                                                             1/1

Installed:
  gitlab-ee.x86_64 0:11.10.4-ee.0.el7

Complete!
You have mail in /var/spool/mail/root
/etc/gitlab/gitlab.rb 修改external_url,
external_url 'http://XX.XX.XX.XX'
然后,刷新配置 sudo gitlab-ctl reconfigure
配置邮件
配置发件人
### Email Settings
 gitlab_rails['gitlab_email_enabled'] = true
 gitlab_rails['gitlab_email_from'] = 'chenglitao@wangxiaobao.com'
 gitlab_rails['gitlab_email_display_name'] = 'Gitlab'
配置服务器
 gitlab_rails['smtp_enable'] = true
 gitlab_rails['smtp_address'] = "smtp.XXX.com"
 gitlab_rails['smtp_port'] = 465
 gitlab_rails['smtp_user_name'] = "XXX@XXX.com"
 gitlab_rails['smtp_password'] = "XX"
 gitlab_rails['smtp_domain'] = "XX.com"
 gitlab_rails['smtp_authentication'] = "login"
 gitlab_rails['smtp_enable_starttls_auto'] = true
 gitlab_rails['smtp_tls'] = true
sudo gitlab-ctl reconfigure
测试发送邮件
gitlab-rails console


#进入控制台,然后发送邮件
Notify.test_email('593482670@qq.com', '邮件标题', '邮件正文').deliver_now
出现如下报错:
OpenSSL::SSL::SSLError (hostname "smtp.wangxiaobao.com" does not match the server certificate)
解决办法:修改/etc/gitlab/gitlab.rb文件
gitlab_rails['smtp_openssl_verify_mode'] = 'none'
sudo gitlab-ctl reconfigure,重新测试。
邮件发送成功!
登陆gitlab
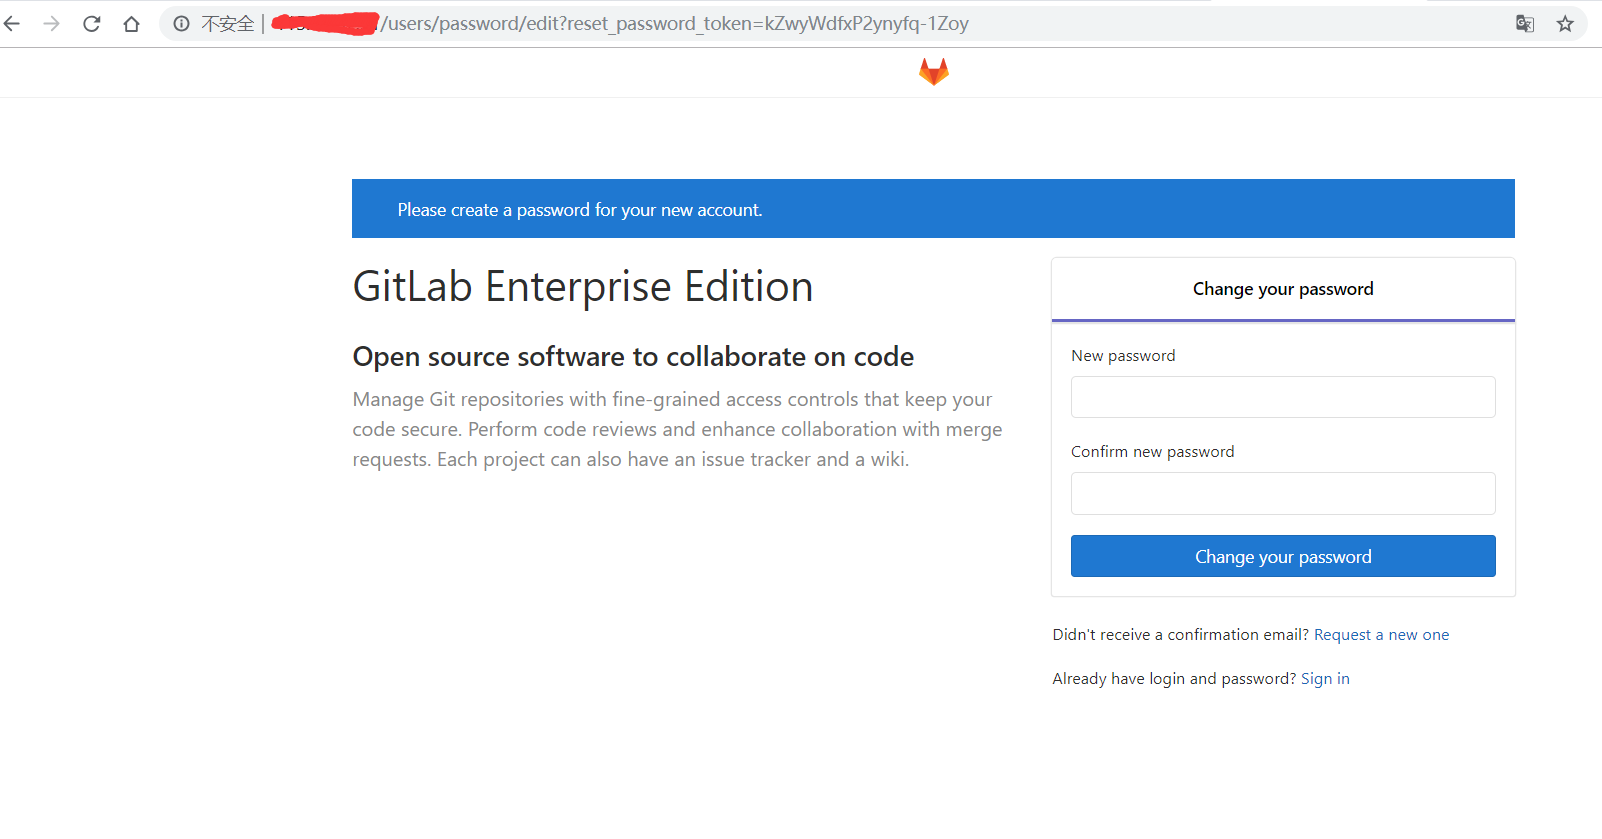
登陆external_url配置的地址,第一次打开需要设置密码:

默认用户root,密码即为刚才设置的密码。
修改配置
修改ip
gitlab 本身采用 80 端口,如安装前服务器有占用 80,安装完访问会报错。需更改gitlab 的默认端口,比如我们将 Gitlab 的默认端口改为 8088 。
第一步
打开阿里云服务器防火墙的 `8088 端口
//打开防火墙服务
systemctl start firewalld

//开启防火墙 8082 端口
firewall-cmd --zone=public --add-port=8082/tcp --permanent

//重启防火墙服务,让配置生效
systemctl restart firewalld
第二步
修改 Gitlab 默认端口配置
打开 /etc/gitlab/gitlab.rb 文件,找到 external_url 字段,如下所示:
把 http://47.94.230.26 改为 http://47.94.230.26:8082
然后执行 gitlab-ctl reconfigure 让配置立即生效。
在浏览器中访问 http://47.94.230.26:8082 , 就可以看到 Gitlab 的页面了。
访问不通
- 检查是否开启防火墙,端口是否开放
- 阿里云安全组允许端口开放
常用命令
//启动
sudo gitlab-ctl star

//停止
sudo gitlab-ctl stop

//重启
sudo gitlab-ctl restart

//使更改配置生效
sudo gitlab-ctl reconfigure
来源:oschina
链接:https://my.oschina.net/u/2470977/blog/3049187